12
Styling Tables
WHAT YOU WILL LEARN IN THIS CHAPTER:
- The optional table elements that can make it easier to style a table and that make the structure more intuitive
- Controlling placement of the table caption
- Controlling the layout of the table
- Controlling the spacing between table cells
Tables are primarily a method to show the relationship between data, much as a spreadsheet application does. Tables can be complex creatures in HTML, but if used properly, they allow information to be presented in a neat, organized, and consistent manner.
OPTIONAL TABLE ELEMENTS
The <table> element has several optional elements that can be used to enhance the presentation and semantic value of a table, including captions, columns, headings, and footers. Take a look at a <table> element that makes use of all these optional elements. When I get into the discussion of styling tables, beginning with the section “Table Captions,” you'll need to understand what is possible in a table. The following markup shows a table complete with all the required and optional elements.

<!DOCTYPE html PUBLIC “-//W3C//DTD HTML 4.01//EN”
    “http://www.w3.org/TR/html4/strict.dtd”>
<html lang=“en”>
<head>
    <meta http-equiv=“Content-Type” content=“text/html; charset=utf-8”>
    <title>FIGURE 12-1</title>
</head>
<body>

<table>
    <caption>Ingredients</caption>
    <colgroup>
        <col class=“ingredient”>
        <col class=“quantity”>
    </colgroup>
    <thead>
        <tr>
            <th>Ingredient</th>
            <th>Quantity of Ingredient</th>
        </tr>
    </thead>
    <tfoot>
        <tr>
            <th>Ingredient</th>
            <th>Quantity of Ingredient</th>
        </tr>
    </tfoot>
    <tbody>
        <tr>
            <td>Bread</td>
            <td>2 medium thickness slices</td>
        </tr>
        <tr>
            <td>Butter</td>
            <td>Enough for 2 slices of bread</td>
        </tr>
        <tr>
            <td>Grated Cheddar</td>
            <td>1.5 handfuls</td>
        </tr>
        <tr>
            <td>Beer</td>
            <td>One splash</td>
        </tr>
        <tr>
            <td>Wholegrain mustard</td>
            <td>One dollop</td>
        </tr>
        <tr>
            <td>Pepper</td>
            <td>To taste</td>
        </tr>
    </tbody>
</table>

</body>
</html>
code snippet /chapter12/figure_12-1.html
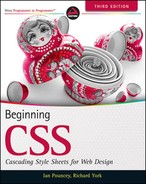
Figure 12-1 shows what this table looks like with no additional styling.
In the preceding markup, you can see that HTML tables support many additional, optional elements.
- The <caption> element is used to provide the table with a caption or the name of the table.
- The <colgroup> element is used to enclose each of the table <col> elements. <colgroup> elements are not displayed.
- <col> elements are used to control certain properties of each table column, the most common being the column width. <col> elements are not displayed and contain no content.
- The <thead> element encloses information about column headers. If you print a table that spans more than one page, the information in the <thead> element is repeated at the top of each page.
- The <tbody> element contains the main table data.
- The <tfoot> element is similar to the <thead> element, and is sometimes used to repeat column headers in long tables but may contain summary or footnote content. When you print a table that spans more than one page, the information in the <tfoot> element is repeated at the bottom of each page.
In the coming sections, you learn more about what properties CSS offers for tweaking the visual presentation of HTML tables.
TABLE CAPTIONS
Captions are presented in the <caption> element. By default, they are rendered above the table in the document. You use the caption-side property to control the placement of the table caption.
The following table shows the caption-side property and its values.
| PROPERTY | VALUE |
| caption-side | top | bottom Initial value: top |
![]() NOTE Although IE 6 and IE 7 support the <caption> element for tables, neither IE 6 nor IE 7 supports the CSS caption-side property. The <caption> element is displayed but is always positioned above the table.
NOTE Although IE 6 and IE 7 support the <caption> element for tables, neither IE 6 nor IE 7 supports the CSS caption-side property. The <caption> element is displayed but is always positioned above the table.
All other browsers (including IE 8 and 9) have full support.
Using the caption-side property, you can control whether the caption appears above or below the table. The following is a demonstration of the caption-side property positioning the caption at the bottom of the table.
<!DOCTYPE html PUBLIC “-//W3C//DTD HTML 4.01//EN”
    “http://www.w3.org/TR/html4/strict.dtd”>
<html lang=“en”>
<head>
    <meta http-equiv=“Content-Type” content=“text/html; charset=utf-8”>
    <title>FIGURE 12-2</title>
    <style type=“text/css”>
        table {
            caption-side: bottom;
        }
    </style>
</head>
<body>

<table>
    <caption>Ingredients</caption>
    <colgroup>
        <col class=“ingredient”>
        <col class=“quantity”>
    </colgroup>
    <thead>
        <tr>
            <th>Ingredient</th>
            <th>Quantity of Ingredient</th>
        </tr>
    </thead>
    <tfoot>
        <tr>
            <th>Ingredient</th>
            <th>Quantity of Ingredient</th>
        </tr>
    </tfoot>
    <tbody>
        <tr>
            <td>Bread</td>
            <td>2 medium thickness slices</td>
        </tr>
        <tr>
            <td>Butter</td>
            <td>Enough for 2 slices of bread</td>
        </tr>
        <tr>
            <td>Grated Cheddar</td>
            <td>1.5 handfuls</td>
        </tr>
        <tr>
            <td>Beer</td>
            <td>One splash</td>
        </tr>
        <tr>
            <td>Wholegrain mustard</td>
            <td>One dollop</td>
        </tr>
        <tr>
            <td>Pepper</td>
            <td>To taste</td>
        </tr>
    </tbody>
</table>

</body>
</html>
code snippet /chapter12/figure_12-2.html
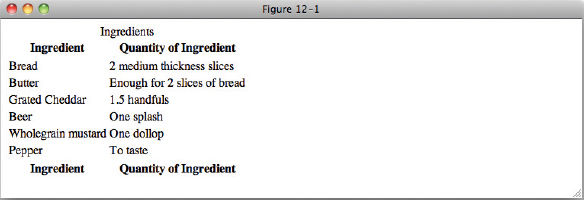
In Figure 12-2, you see how the caption-side property works; the table caption appears beneath the table.
In the next section, I continue the discussion of tables with the styles allowed in table columns.
TABLE COLUMNS
In HTML, the <colgroup> and <col> elements allow the vertical columns of a table to be controlled. This is useful for controlling the width of a column of data, background color, or text color.
![]() NOTE IE is the only browser that supports the setting of text color on <col> elements. This is non-standard behavior, so don't expect to see it in other browsers in the future.
NOTE IE is the only browser that supports the setting of text color on <col> elements. This is non-standard behavior, so don't expect to see it in other browsers in the future.
All browsers have support for width and background color properties.
I have already shown how to use the width and background-color properties in previous chapters, and they work in exactly the same way on <col> elements. Even though the <col> elements themselves are not visible, the styles applied to them carry over to the cells that appear in those columns in the table. In the following Try It Out, I show how width and background-color can be applied to <col> elements.
TRY IT OUT Styling Columns
To apply styles to <col> elements, follow these steps.
- Enter the following markup:
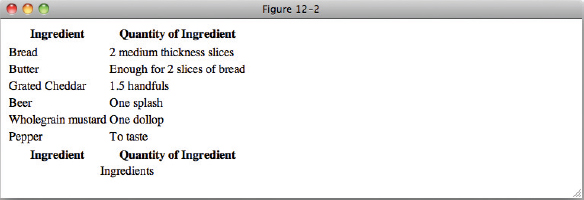
<!DOCTYPE html PUBLIC “-//W3C//DTD HTML 4.01//EN” “http://www.w3.org/TR/html4/strict.dtd”> <html lang=“en”> <head> <meta http-equiv=“Content-Type” content=“text/html; charset=utf-8”> <title>Example 12-1</title> <style type=“text/css”> .ingredient { width: 200px; background-color: #CC5; color: red; } .quantity { width: 400px; background-color: #CCF; } </style> </head> <body> <table> <caption>Ingredients</caption> <colgroup> <col class=“ingredient”> <col class=“quantity”> </colgroup> <thead> <tr> <th>Ingredient</th> <th>Quantity of Ingredient</th> </tr> </thead> <tfoot> <tr> <th>Ingredient</th> <th>Quantity of Ingredient</th> </tr> </tfoot> <tbody> <tr> <td>Bread</td> <td>2 medium thickness slices</td> </tr> <tr> <td>Butter</td> <td>Enough for 2 slices of bread</td> </tr> <tr> <td>Grated Cheddar</td> <td>1.5 handfuls</td> </tr> <tr> <td>Beer</td> <td>One splash</td> </tr> <tr> <td>Wholegrain mustard</td> <td>One dollop</td> </tr> <tr> <td>Pepper</td> <td>To taste</td> </tr> </tbody> </table> </body> </html> - Save the preceding CSS and markup as example_12-1.html. This example results in the output in Figure 12-3.
In Example 12-1, we gave each <col> element a class and used this class to apply styles that affected the column they were associated with. The <col> element with class ingredient is given a width of 200px and a light green background-color. The <col> element with class quantity is given a width of 400px and a light blue background-color.
These styles are applied to each cell within the <thead>, <tbody>, and <tfoot> elements.
Now that you have seen the various elements available for use in a <table> element, the following section explores how you control table width with the table-layout property.
CONTROLLING TABLE LAYOUT
The following table outlines the table-layout property and its values.
| PROPERTY | VALUE |
| table-layout | auto | fixed Initial value: auto |
As you learned in Chapter 8, by default, a table expands and contracts to accommodate the data contained inside. As data fills the table, it continues to expand as long as there is space. When you look at them this way, tables are inherently fluid.
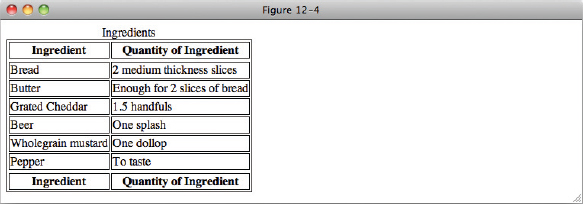
By adding borders, you can see in Figure 12-4 that, by default, table cells and the table itself expands to the width of the content.
Sometimes, however, it is necessary to force a table into a fixed width for both the table and the cells. The following is a demonstration of what happens when you specify a fixed width for the table.
<!DOCTYPE html PUBLIC “-//W3C//DTD HTML 4.01//EN”
    “http://www.w3.org/TR/html4/strict.dtd”>
<html lang=“en”>
<head>
    <meta http-equiv=“Content-Type” content=“text/html; charset=utf-8”>
    <title>FIGURE 12-5</title>
    <style type=“text/css”>
        table,
        .control {
            width: 100px;
        }

        table,
        th,
        td,
        .control {
            border: 1px solid #000;
        }
    </style>
</head>
<body>

<div class=“control”>
    <p>100px wide</p>
</div>

<table>
    <caption>Ingredients</caption>
    <colgroup>
        <col class=“ingredient”>
        <col class=“quantity”>
    </colgroup>
    <thead>
        <tr>
            <th>Ingredient</th>
            <th>Quantity of Ingredient</th>
        </tr>
    </thead>
    <tfoot>
        <tr>
            <th>Ingredient</th>
            <th>Quantity of Ingredient</th>
        </tr>
    </tfoot>
    <tbody>
        <tr>
            <td>Bread</td>
            <td>2 medium thickness slices</td>
        </tr>
        <tr>
            <td>Butter</td>
            <td>Enough for 2 slices of bread</td>
        </tr>
        <tr>
            <td>Grated Cheddar</td>
            <td>1.5 handfuls</td>
        </tr>
        <tr>
            <td>Beer</td>
            <td>One splash</td>
        </tr>
        <tr>
            <td>Wholegrain mustard</td>
            <td>One dollop</td>
        </tr>
        <tr>
            <td>Pepper</td>
            <td>To taste</td>
        </tr>
    </tbody>
</table>

</body>
</html>
code snippet /chapter12/figure_12-5.html
I've given the table a width of 100px and added a snippet of markup to show what a 100px width should look like, as you can see in Figure 12-5
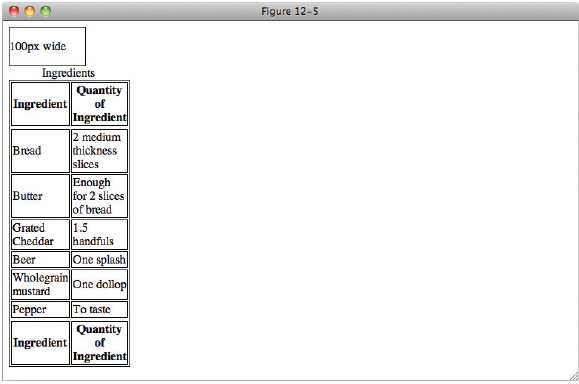
As you can see in Figure 12-5, the table is wider than 100px because the text contained in the cells is too wide.
Should it be a requirement that a table does not expand to fit its contents, you can use the table-layout: fixed; declaration to force the width as follows:
<!DOCTYPE html PUBLIC “-//W3C//DTD HTML 4.01//EN”
    “http://www.w3.org/TR/html4/strict.dtd”>
<html lang=“en”>
<head>
    <meta http-equiv=“Content-Type” content=“text/html; charset=utf-8”>
    <title>FIGURE 12-6</title>
    <style type=“text/css”>
        table {
            table-layout: fixed;
        }

        table,
        .control {
            width: 100px;
        }

        table,
        th,
        td,
        .control {
            border: 1px solid #000;
        }
    </style>
</head>
<body>

<div class=“control”>
    <p>100px wide</p>
</div>

<table>
    <caption>Ingredients</caption>
    <colgroup>
        <col class=“ingredient”>
        <col class=“quantity”>
    </colgroup>
    <thead>
        <tr>
            <th>Ingredient</th>
            <th>Quantity of Ingredient</th>
        </tr>
    </thead>
    <tfoot>
        <tr>
            <th>Ingredient</th>
            <th>Quantity of Ingredient</th>
        </tr>
    </tfoot>
    <tbody>
        <tr>
            <td>Bread</td>
            <td>2 medium thickness slices</td>
        </tr>
        <tr>
            <td>Butter</td>
            <td>Enough for 2 slices of bread</td>
        </tr>
        <tr>
            <td>Grated Cheddar</td>
            <td>1.5 handfuls</td>
        </tr>
        <tr>
            <td>Beer</td>
            <td>One splash</td>
        </tr>
        <tr>
            <td>Wholegrain mustard</td>
            <td>One dollop</td>
        </tr>
        <tr>
            <td>Pepper</td>
            <td>To taste</td>
        </tr>
    </tbody>
</table>

</body>
</html>
code snippet /chapter12/figure_12-6.html
This results in the output in Figure 12-6.
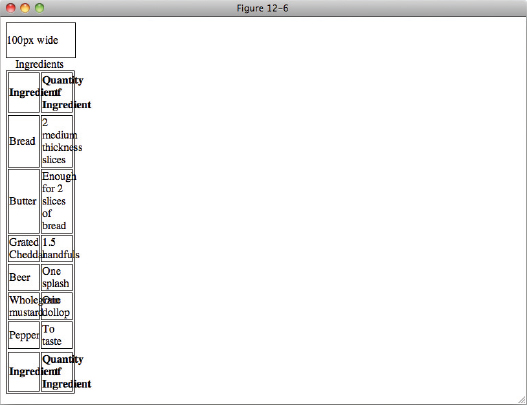
The table is forced to maintain its width of 100 pixels, regardless of how much data is contained in its table cells. If the content inside the cells results in a width larger than 100 pixels, the content overflows.
![]() NOTE When content overflows in all versions of IE the content is clipped, as if a overflow: hidden; declaration has been applied to each th and td.
NOTE When content overflows in all versions of IE the content is clipped, as if a overflow: hidden; declaration has been applied to each th and td.
All other browsers display the content as per Figure 12-6. By applying the overflow property, which I covered in Chapter 8, whenever you use table-layout: fixed; you can avoid inconsistencies across browsers.
Now that I've explored the table-layout property, in the following sections I examine the other CSS properties that exist for controlling table layout.
COLLAPSING BORDERS
Tables, by default, include some spacing between each of the cells appearing in the table. As you have seen in the previous examples, each cell has its own border with a space between the borders of its neighboring cells. The border-collapse property allows you to remove this space completely, and for finer control, the border-spacing property allows you to specify the spacing.
The following table outlines the border-collapse property and its values.
| PROPERTY | VALUE |
| border-collapse | collapse | separate Initial value: separate |
By default, the border-collapse property has a value of separate. If you set the value to collapse, you remove the spacing between each cell. The following demonstrates the border-collapse property in action:
<!DOCTYPE html PUBLIC “-//W3C//DTD HTML 4.01//EN”
    “http://www.w3.org/TR/html4/strict.dtd”>
<html lang=“en”>
<head>
    <meta http-equiv=“Content-Type” content=“text/html; charset=utf-8”>
    <title>FIGURE 12-7</title>
    <style type=“text/css”>
        table {
            border-collapse: collapse;
        }

        table,
        th,
        td {
            border: 1px solid #000;
        }
    </style>
</head>
<body>

<table>
    <caption>Ingredients</caption>
    <colgroup>
        <col class=“ingredient”>
        <col class=“quantity”>
    </colgroup>
    <thead>
        <tr>
            <th>Ingredient</th>
            <th>Quantity of Ingredient</th>
        </tr>
    </thead>
    <tfoot>
        <tr>
            <th>Ingredient</th>
            <th>Quantity of Ingredient</th>
        </tr>
    </tfoot>
    <tbody>
        <tr>
            <td>Bread</td>
            <td>2 medium thickness slices</td>
        </tr>
        <tr>
            <td>Butter</td>
            <td>Enough for 2 slices of bread</td>
        </tr>
        <tr>
            <td>Grated Cheddar</td>
            <td>1.5 handfuls</td>
        </tr>
        <tr>
            <td>Beer</td>
            <td>One splash</td>
        </tr>
        <tr>
            <td>Wholegrain mustard</td>
            <td>One dollop</td>
        </tr>
        <tr>
            <td>Pepper</td>
            <td>To taste</td>
        </tr>
    </tbody>
</table>

</body>
</html>
code snippet /chapter12/figure_12-7.html
If you apply the collapse value, all the cells are squeezed together, and the borders between cells are combined. Figure 12-7 shows what happens.
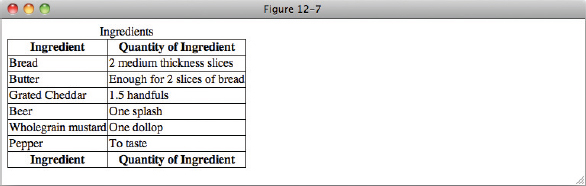
Notice that the border on the <table> element is also collapsed.
The next section talks about how you can control spacing between table cells with greater precision with the border-spacing property.
CONTROLLING BORDER SPACING
The following table outlines the border-spacing property and its values.
| PROPERTY | VALUE |
| border-spacing | <length> <length>? Initial value: 0 |
![]() NOTE IE 6 and IE 7 do not support the border-spacing property. Instead, if you must support these browsers, a common workaround is to remove borders from the table cells completely, and instead wrap the contents of each cell in a <div> element, to which you apply the borders and padding you need.
NOTE IE 6 and IE 7 do not support the border-spacing property. Instead, if you must support these browsers, a common workaround is to remove borders from the table cells completely, and instead wrap the contents of each cell in a <div> element, to which you apply the borders and padding you need.
The border-spacing property allows more control over cell spacing than border-collapse because it allows the length to be specified.
If, as in the following example, you provide a single length value of 15px, 15 pixels of space are added between each cell, both vertically and horizontally:
<!DOCTYPE html PUBLIC “-//W3C//DTD HTML 4.01//EN”
    “http://www.w3.org/TR/html4/strict.dtd”>
<html lang=“en”>
<head>
    <meta http-equiv=“Content-Type” content=“text/html; charset=utf-8”>
    <title>FIGURE 12-8</title>
    <style type=“text/css”>
        table {
            border-spacing: 15px;
        }

        table,
        th,
        td {
            border: 1px solid #000;
        }
    </style>
</head>
<body>

<table>
    <caption>Ingredients</caption>
    <colgroup>
        <col class=“ingredient”>
        <col class=“quantity”>
    </colgroup>
    <thead>
        <tr>
            <th>Ingredient</th>
            <th>Quantity of Ingredient</th>
        </tr>
    </thead>
    <tfoot>
        <tr>
            <th>Ingredient</th>
            <th>Quantity of Ingredient</th>
        </tr>
    </tfoot>
    <tbody>
        <tr>
            <td>Bread</td>
            <td>2 medium thickness slices</td>
        </tr>
        <tr>
            <td>Butter</td>
            <td>Enough for 2 slices of bread</td>
        </tr>
        <tr>
            <td>Grated Cheddar</td>
            <td>1.5 handfuls</td>
        </tr>
        <tr>
            <td>Beer</td>
            <td>One splash</td>
        </tr>
        <tr>
            <td>Wholegrain mustard</td>
            <td>One dollop</td>
        </tr>
        <tr>
            <td>Pepper</td>
            <td>To taste</td>
        </tr>
    </tbody>
</table>

</body>
</html>
code snippet /chapter12/figure_12-8.html
The result is shown in Figure 12-8.
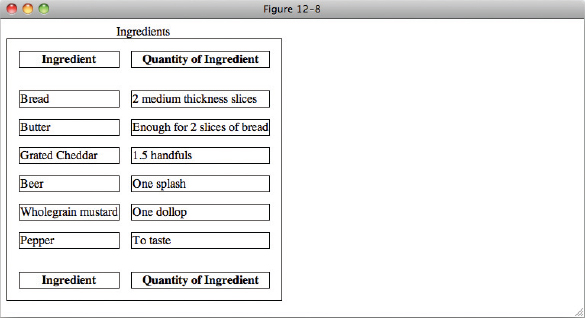
You can see that the space between cells in <thead> and <tbody>, and between cells in <tfoot> and <tbody>, is doubled as their containing element (<thead>, <tfoot> or <tbody>) sets a new context for cell boundaries.
The border-spacing property has the following syntax:
border-spacing: <horizontal spacing length> <vertical spacing length>;
If the optional second value is present, this property allows the vertical and horizontal spacing to be specified. For our final example of this chapter, let's Try It Out.
TRY IT OUT Style Borders for Separating Rows and Columns
To see the border-spacing property in action, follow these steps.
- Enter the following markup:
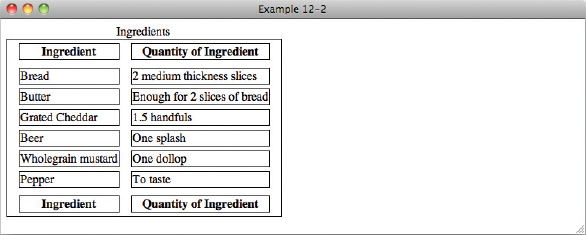
<!DOCTYPE html PUBLIC “-//W3C//DTD HTML 4.01//EN” “http://www.w3.org/TR/html4/strict.dtd”> <html lang=“en”> <head> <meta http-equiv=“Content-Type” content=“text/html; charset=utf-8”> <title>Example 12-2</title> <style type=“text/css”> table { border-spacing: 15px 5px; } table, th, td { border: 1px solid #000; } </style> </head> <body> <table> <caption>Ingredients</caption> <colgroup> <col class=“ingredient”> <col class=“quantity”> </colgroup> <thead> <tr> <th>Ingredient</th> <th>Quantity of Ingredient</th> </tr> </thead> <tfoot> <tr> <th>Ingredient</th> <th>Quantity of Ingredient</th> </tr> </tfoot> <tbody> <tr> <td>Bread</td> <td>2 medium thickness slices</td> </tr> <tr> <td>Butter</td> <td>Enough for 2 slices of bread</td> </tr> <tr> <td>Grated Cheddar</td> <td>1.5 handfuls</td> </tr> <tr> <td>Beer</td> <td>One splash</td> </tr> <tr> <td>Wholegrain mustard</td> <td>One dollop</td> </tr> <tr> <td>Pepper</td> <td>To taste</td> </tr> </tbody> </table> </body> </html> - Save the preceding CSS and markup as example_12-2.html. This example results in the output in Figure 12-9.
How It Works
In Example 12-2, we applied a border-spacing: 15px 5px; declaration to the <table> element, which added 15px of horizontal spacing and 5px vertical spacing between each cell.
- Describe what the table-layout: fixed; declaration does.
- When sizing using the table-layout: fixed; declaration, how does the browser determine the width of table columns?
- What purpose does the optional <thead> element serve?
- In what containing element does the main table data appear?
![]() WHAT YOU LEARNED IN THIS CHAPTER
WHAT YOU LEARNED IN THIS CHAPTER
In this chapter, I showed you what is possible with HTML tables and CSS. You learned the following:
| TOPIC | KEY CONCEPTS |
| Table structure and optional elements | Tables have a lot of optional elements that make the structure easier to style. These include columns, heading groupings, body groupings, and footer groupings. |
| Positioning of table caption elements | You control the placement of a table's caption by using the caption-side property. |
| Table layout | You control a table's layout by using the table-layout property. With this property, it is possible to force a table into a certain width. |
| Controlling border spacing | You can remove the spacing between table cells by using the border-collapse property. You can also adjust the spacing between table cells by using the border-spacing property. |