C H A P T E R 4
Security and Compliance
Security is important—more so, in fact, than design, creation, and performance. If your database had no security measures in place, absolutely anyone could come along and steal or corrupt the data, causing havoc to you and your company—and not in just one database but in every database in every server.
Security can be enforced in many ways on SQL Server: by Windows itself through Windows authentication; by restricting users' access to sensitive data through views; by specifically creating users, logins, and roles that have explicit levels of access; or by encrypting your database, logs, and files.
This chapter covers some parts of security, although it is impossible to talk about every area of security, mainly because you haven't seen much of SQL Server's feature set yet! In Chapter 1, you looked at the difference between Windows authentication and SQL Server authentication, so already you know your options with regard to the type of security you might want to use. In this chapter, you'll go deeper. You will see security mentioned at some other points in the book where relevant to give you a good level of knowledge about securing your database solution. You will also see a section in Chapter 12 of the book once many of SQL Server's features have been covered.
You will also learn about Declarative Management Framework (DMF), which was new in SQL Server 2008 and improved in SQL Server 2012. In the past, a database administrator had to write tools and monitor systems to ensure that any new database created in production was created with the right options. The database administrator also had to monitor to ensure that items were not being created when they should not be. Now it is possible to create rules on databases, tables, views, and so on to check whether an object in question is compliant with standards defined by those rules. If an object isn't, then you will be notified, and a simple click will allow changes to be made to bring the object back into alignment with the policy.
By the end of this chapter, you will have dealt with the following:
- Logins for individuals and groups
- Roles at the server, database, and application level
- Schemas
- Applying policies to your database to ensure compliance
So the first area of security and compliance you need to understand is what roles and logins are.
Logins
The only way anyone can connect to SQL Server is via a login. As discussed in Chapter 1, this doesn't necessarily mean that every user has to have a specific login within SQL Server itself. With Windows authentication, if a Windows user belongs to a specific Windows group, just by belonging to that group, provided that group is contained within SQL Server, the Windows account will have access to SQL Server.
![]() Note All groups discussed within the book are created on the local computer. In organizations you will find that groups will be created on the network domain and Windows users added to the necessary groups. Users can be added to multiple groups.
Note All groups discussed within the book are created on the local computer. In organizations you will find that groups will be created on the network domain and Windows users added to the necessary groups. Users can be added to multiple groups.
When a database is created, initially only the database owner has any rights to complete any task on that database, whether that be to add a table, insert any data, or view any data. This was the case when you first created your ApressFinancial database in Chapter 3. It is only when the database owner grants permissions to other users that they gain extra access to complete tasks.
It is common practice to create a Windows group and place Windows user accounts into that group. In a networked organization, you would create a domain group and place the specific user into that domain group. However, I am demonstrating on a local non-domain setup. In a network domain, the steps will be similar, although the main difference is that you will have to complete the steps using utilities like Microsoft Active Directory. Using Windows groups is not mandatory, though, and it is possible to add a login for individual Windows users. You can also have a mix of groups and individuals. However, as you proceed through the chapter, you will see the benefit of groups and the large amount of overhead you may have to complete when using individual logins.
Using Windows groups is how I wish to work with the ApressFinancial system, and so I will create some Windows groups for it. I will group logins depending on which department the login relates to and what I want to allow each group to do. I will allow some groups to add new financial products and other groups to add customers, and, finally, I'll set up a group for batch processes to add interest and financial transactions. I will create a few of these groups so that later in the book you can see security in action.
On some versions of Windows, such as Vista Home and Windows 7 Home, creating groups is not possible. By not having the ability to create groups, each user who is required to access the database needs to be defined individually. I tend to find that developers who are building databases at home with SQL Server Express Edition fit this category.
![]() Note The process you are about to go through would be the same if you were adding a single user.
Note The process you are about to go through would be the same if you were adding a single user.
TRY IT OUT: GROUPS, LOGINS, AND SQL SERVER ACCESS
- Navigate to your Control Panel, and then select Administrative Tools
 Computer Management.
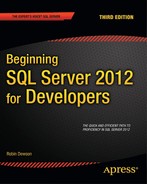
 - This brings up a screen that shows different aspects of your computer management. I am interested in selecting Local Users and Groups. When you do so, you will see that there are already several groups within your computer, as shown in Figure 4-1, as well as a large number of groups already defined for the use of SQL Server. These groups differ from groups that we will be defining for accessing the data.
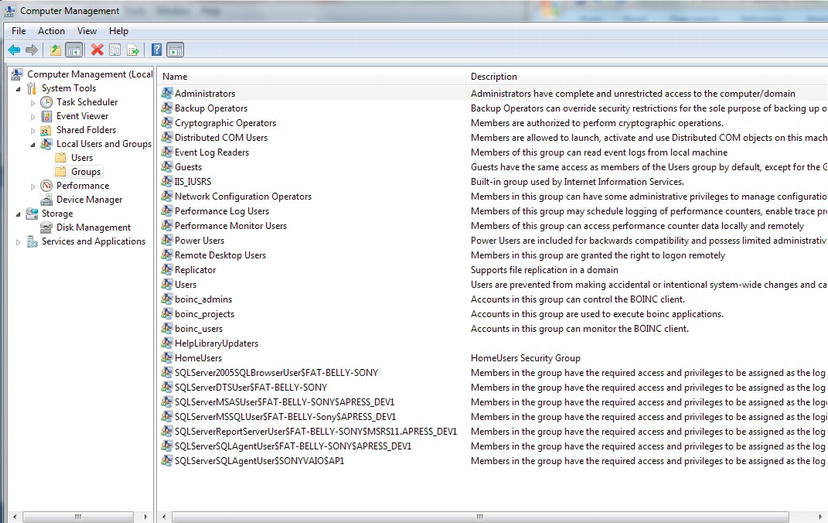
Figure 4-1. List of groups on the computer
- MSmith is a product controller in the fictitious corporation and can add new corporate financial products. Right-click Groups and select New Group. This brings up the New Group screen, as shown in Figure 4-2, where you can add your grouping for the product controllers.
Apress_Product_Controllersis the group you will use in this chapter.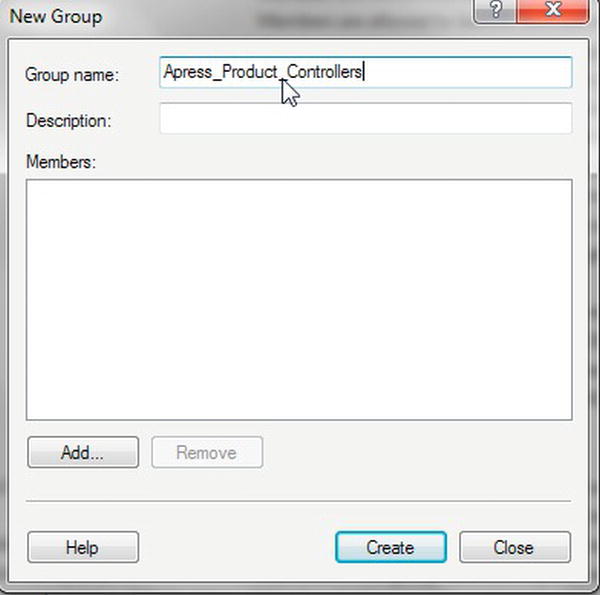
- By clicking Add, you can then add all the Windows user accounts that you need to be part of this group. You can either type MSmith or click Advanced, which brings up a selection dialog box. If you click Find Now, as I assume that there will be only a few accounts on your computer if you are working locally, you should find MSmith. Clicking the Check Names button adds the object names text box, as shown in Figure 4-3.
If MSmith were on your company network, you may have to prefix the name with the domain name, and you definitely would if the account were on a different domain. For example, if you had a network domain called
Apressand MSmith were on that domain (as opposed to your local computer and therefore your local domain, as is the case for this example), then you would type ApressMSmith. Figure 4-3 shows MSmith is on theFAT-BELLY-Sonylocal domain.
- Click OK and then click the Create button on the New Group screen. Once you have created the group, you should close the New Group dialog box, as you don't want to create any more groups at the moment. This brings you back to the Computer Management dialog box, where you see your new group added, as shown in Figure 4-4.
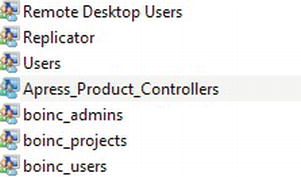
Figure 4-4. New group added
- You now need to add this group to SQL Server as a login. Open SQL Server Management Studio, and navigate to Security Logins within Object Explorer. Once there, right-click Logins, and then click New Login, which brings up the dialog box shown in Figure 4-5.

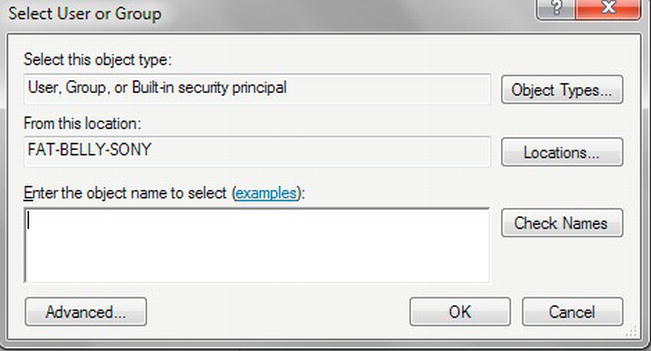
- Click Search to display the Select User or Group dialog box, where you will begin your search for the group. This is very similar to the previous search box you saw but has been defined to search for a user or built-in security principal. However, by default, the search will not search for groups. You need to click Object Types and ensure the Groups option is checked on the screen that comes up. You will then see Group added to the list of objects in the top text box, as shown in Figure 4-6.
- By clicking Advanced, you can refine the search for the group that is to be added rather than typing it in. After clicking Advanced, you can click Find Now, which is a button about halfway down on the right, which will then list all of the group, user, and principal objects on your computer, and the selected domain. Highlight the following group—
Apress_Product_Controllers, in this case—as shown in Figure 4-7, and click OK.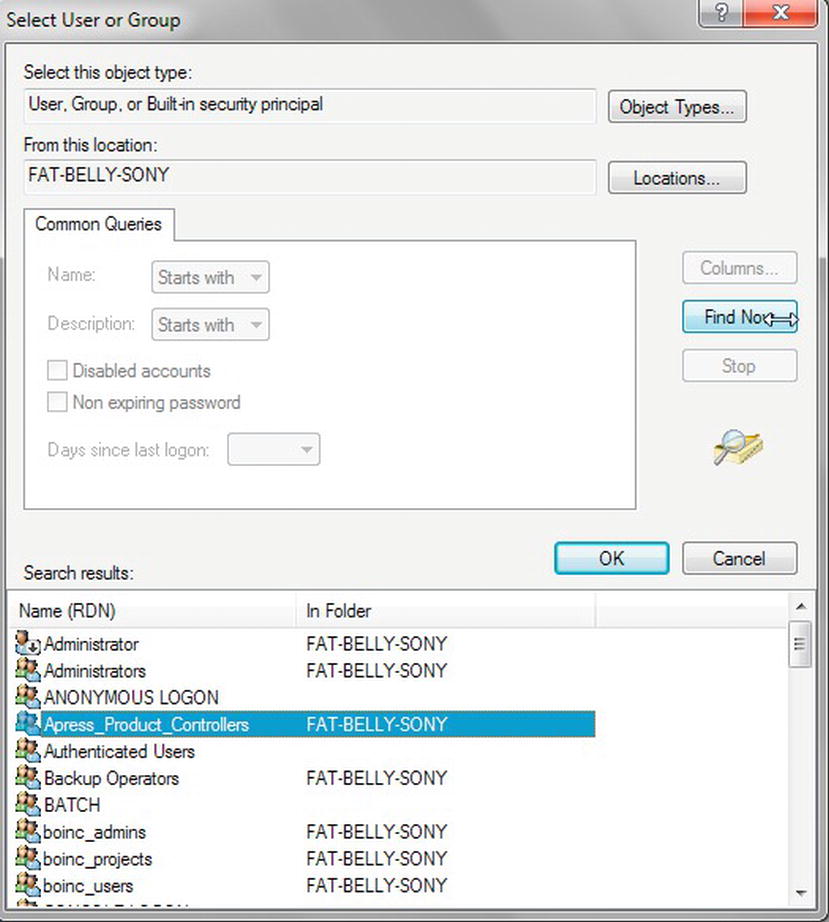
- This brings you back to the Select User or Group dialog box, where you will see your group has been added, as shown in Figure 4-8. You can then click OK.
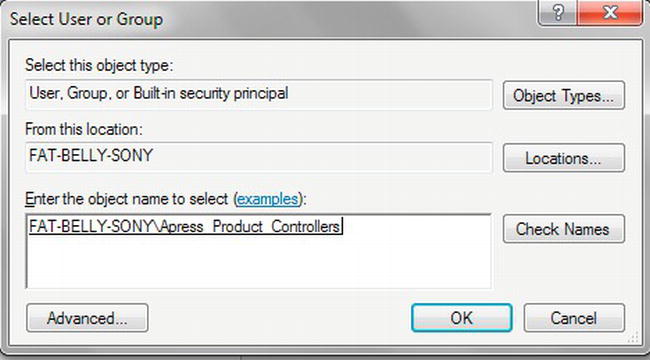
Figure 4-8. Group found, ready for adding
 Note You are now back at the new login screen where the group will be populated. If you clicked OK at this point, this would allow the group to connect only to SQL Server and nothing else. Members of this group would therefore not be able to do anything. While creating this login, I will not be demonstrating the Credentials section. This is used when a login has to access external SQL Server resources.
 - You need to give this group access to the databases you wish to allow them to use. It is vital that you allow users or groups of users login access only to the resources they need and don't use the “allow everything, it's easier” approach that I have seen on my travels. You want your users to see only the
ApressFinancialdatabase. Click User Mapping in the left-hand list of items, and then, within the Users Mapped to This Login section of the screen shown in Figure 4-9, select ApressFinancial.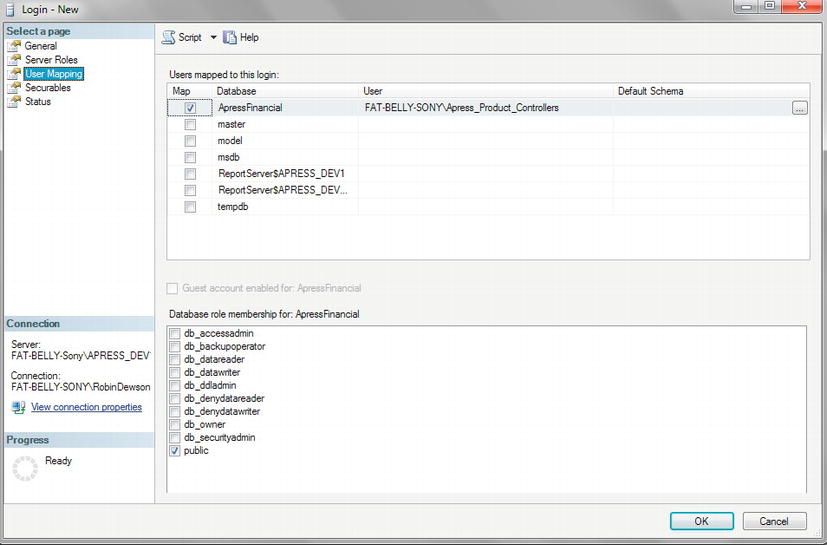
- Before you click OK, click the Script button at the top of the screen and choose to place the script into a new query window. The SQL generated from Figure 4-9 follows. You will look at it in more detail in a moment when you more closely examine adding a login, but you can use this in the next section, as a basis of adding the next login. The code will be explained in that section.
USE [master]

GO

CREATE LOGIN [FAT-BELLY-SONYApress_Product_Controllers] FROM WINDOWS

WITH DEFAULT_DATABASE=[master]

GO

USE [ApressFinancial]

GO

CREATE USER [FAT-BELLY-SONYApress_Product_Controllers]

FOR LOGIN [FAT-BELLY-SONYApress_Product_Controllers]

GO - Returning to SQL Server Management Studio, you can see in Figure 4-10 that I have moved to the Status page. Here you can grant or deny access to SQL Server for a Windows account, SQL Server login, or, in your case, Windows group. The second set of options is for enabling or disabling SQL Server logins, which is ideal for when someone leaves the firm. The final set of options, specific to SQL Server authentication, allows an account to be unlocked after it has been locked out either by too many incorrect passwords or by someone with the authority to lock it.
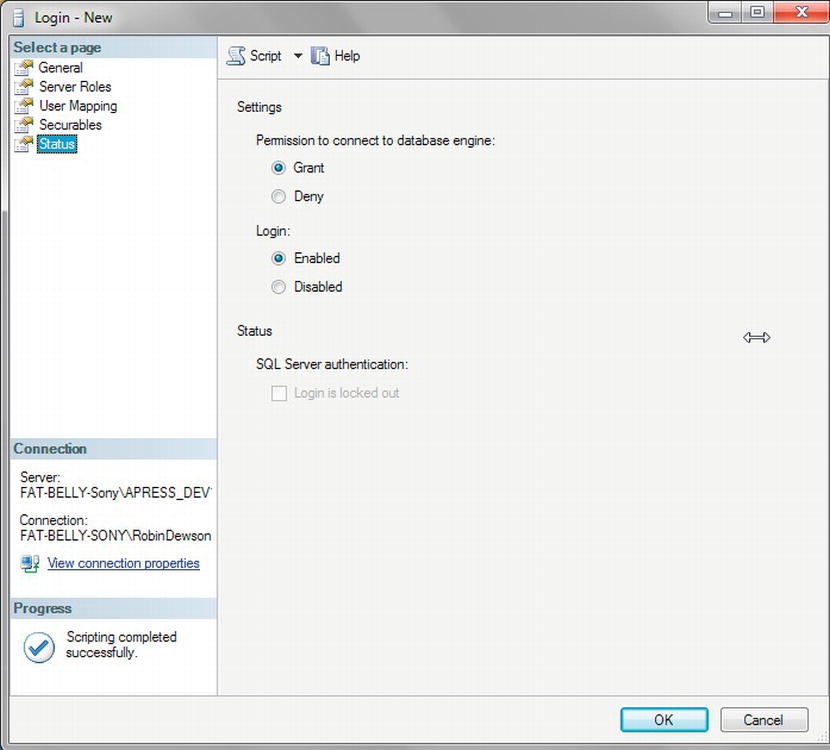
Figure 4-10. Login status
- You can now click OK to add the login. This will complete the addition to SQL Server.
Now that you have created the new server login and placed it within SQL Server, you could within Windows now switch the user account to MSmith and successfully connect. However, as MSmith, you would be able to explore only the ApressFinancial database created in Chapter 3. As this is the ideal secure scenario, the task has succeeded in its objective.
![]() Note As I mentioned at the start of this discussion, the process of creating a login would be the same if you wished to add a single user.
Note As I mentioned at the start of this discussion, the process of creating a login would be the same if you wished to add a single user.
What has been described in the preceding exercise is Windows authentication. For SQL Server authentication, each Windows user needs to be added separately. The process is very similar to that for adding users with Windows authentication, but you must specify a password expiration and enforce password complexity. This forces the Windows password policies for expiration and complexity that exist on the local computer or domain to apply to this login's password.
So now that you have added a server login graphically, the same can be achieved via a query pane using T-SQL code. You saw the code generated from my computer when I took this from the scripting option, and you will use it as the basis of your next login creation to demonstrate using T-SQL this time. This is a very straightforward process, so let's take a look at it next.
TRY IT OUT: PROGRAMMATICALLY WORKING WITH A LOGIN
- From SQL Server Management Studio, select New Query. This should bring up an empty query pane similar to the one you saw in Chapter 2.
- It is necessary to add a second login group for the book example. You have available two different methods to create the login via T-SQL, and which one you use depends on whether you are going to use Windows authentication or SQL Server authentication. The first example takes a look at the Windows authentication method. Locate the code from Steps 10 and 11 in the previous “Try It Out: Groups, Logins, and SQL Server Access” exercise (it is repeated here for ease of reference).
USE [master]

GO

CREATE LOGIN [FAT-BELLY-SONYApress_Product_Controllers] FROM WINDOWS

WITH DEFAULT_DATABASE=[master]

GO

USE [ApressFinancial]

GO

CREATE USER [FAT-BELLY-SONYApress_Product_Controllers]

FOR LOGIN [FAT-BELLY-SONYApress_Product_Controllers]

GO - You can now alter this code to create a group that will be defined for users wishing to view customers and their information that could be used in call centers, for example. Just to remind you that a group is being created so that you do not need to create a login for each person in that call center. Also, this time you are going to set the database that will be connected to by default by this login to the
ApressFinancialdatabase. This is so that user groups do not connect to a system database as they should have no reason for any user to connect to a system database. For developer groups, you can and in some companies you will make the login connect to a system database, such as the master database, by default. Then, if the default login user database is dropped or is offline, the accounts can still log in without a problem. Developer accounts quite often are defined to connect to a system database, such as the master database, but user and system logins are not and are defined to log in to the user database. Before entering the following code, you will of course need to add the new group,Apress_Client_Information, within your Computer Management icon found in the Administrative tools of the Control Panel first (see the “Try It Out: GROUPS, LOGINS, AND SQL SERVER ACCESS” exercise earlier for more on this specifically—steps 1–5). Once you've done this, enter the following code in a new Query Editor window (don't execute it yet):CREATE LOGIN [FAT-BELLY-SONYApress_Client_Information]
FROM WINDOWS
WITH DEFAULT_DATABASE=[ApressFinancial],
DEFAULT_LANGUAGE=[us_english]
GOThe format of this syntax is straightforward. In this case,
CREATE LOGINinstructs SQL Server that you want to create a new login calledFAT-BELLYApress_Client_Information, whereFAT-BELLY-SONYis the name of the network domain in which theApress_Client_Informationgroup can be found. You should change the prefix to match your own setup. Here the definition appears surrounded with optional square brackets in case of spaces in the name.Next, the keywords
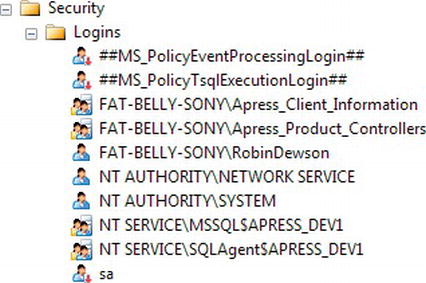
FROM WINDOWSinform SQL Server that you are creating a login with Windows authentication. After that, you define the name of the database that the login will connect to when a connection is made usingWITH DEFAULT_DATABASE. Finally, the second option specifies the default language the connection will use, although it is possible at any time to alter the language using the Set Language option. This allows this group to connect to SQL Server. - Once you have placed the code in your query pane, you can execute it by pressing F5 or by clicking the Execute button on the toolbar. Once it finishes executing, you should see the new login in the Security node within Object Explorer on the left, as shown in Figure 4-11. If you right-click the new login and select Properties, you will see the same screen and details as you saw when you created the login graphically.
- You can then enable the login's ability to access SQL Server or disable it by using the
ALTER LOGINcommand. It is also possible to alter the login's default database. In the graphical example, if you check back to Figure 4-5, you will see that the default database found near the foot of the graphic was called master. It would be better for the login to connect to the correct database as this is a user-based login. The following code informs SQL Server that it should connect your login to theApressFinancialdatabase by default, rather than the master database as defined previously. Remember to change the prefix as appropriate:ALTER LOGIN [FAT-BELLY-SONYApress_Product_Controllers]
WITH DEFAULT_DATABASE=ApressFinancial - The final piece in the jigsaw is to grant the Windows account access to the database, which will then allow the login to use the
ApressFinancialdatabase. To do this, you need to switch from the master database to theApressFinancialdatabase with theUSEkeyword followed by the name of the database.Using
CREATE USER, you can then specify the name of the user you want in your database. The standard procedure is to use the same name as the login, which makes life so much easier when maintaining the system in general. You then useFOR LOGINto define which server login you want to map to this database user:USE ApressFinancial
GO
CREATE USER [FAT-BELLY-SONYApress_Client_Information]
FOR LOGIN [FAT-BELLY-SONYApress_Client_Information]
GO
Server Logins and Database Users
As you now know, there are two steps to complete, whether you want to create a login based upon SQL Server authentication or Windows authentication. The first step is to create a server login, which was the first part of creating a login that you went through. A login is also quite different from a user, and the two may look the same, but this is not the case. With a login, you can connect to SQL Server, but a user is an account that is database-specific. The two may have exactly the same name, and this can cause confusion, but a login cannot connect to a database or perform database actions without an association with a valid user account. A server login is one that, when used, can connect only to the server itself. It cannot use any of the user databases within SQL Server. The second step is creating the database user; in the graphical section that you looked at first, this is when you selected the databases you wanted to use.
Within SQL Server, permissions can be granted at multiple levels, including the server and database levels. Examples of server-level permissions include creating new logins or managing server properties. Examples of database permissions include being able to read data from a table or being able to create new tables. One server login can be associated with multiple users in different databases. Generally, when using Windows authentication, a database username is the same as the login name, but this does not have to be the case. It does, however, simplify administration. In this book, I will mostly be dealing with database-level permissions, but I will briefly examine server roles in the following section.
Roles
Three different types of roles exist within SQL Server: fixed server roles, database roles (which are the general roles included during installation of SQL Server, component-specific roles such as those for Reporting Services that are added when the component is installed, and user-defined roles), and application roles.
Fixed Server Roles
Within SQL Server, specific predefined roles are set up to allow certain tasks and to restrict other tasks. Someone with the right permissions, such as a system administrator, can assign these roles to any login ID within SQL Server.
![]() Note These are server roles and therefore are assigned to logins.
Note These are server roles and therefore are assigned to logins.
If you look at the Server Roles node in Object Explorer, you will see a list of roles as shown in Figure 4-12. But what do they mean? You get a little hint if you move to the Server Roles node within SQL Server Management Studio.
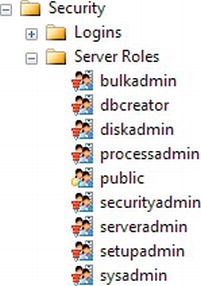
Figure 4-12. Fixed server roles
![]() Note It is not possible to create your own server role.
Note It is not possible to create your own server role.
These roles, available for anyone to use across the server, can perform the following tasks:
bulkadmin: RunBULK INSERTstatementsdbcreator: Create, alter, or drop databases as well as restore themdiskadmin: Administer disk filesprocessadmin: Kill a process running T-SQL codepublic: View any database permission but without the ability alter anysecurityadmin: Manage logins including passwords for SQL logins and login permissionsserveradmin: Administrate the server and carry out tasks such as changing options and even starting and shutting down the serversetupadmin: Work with more than one server with which anyone in this role can add, remove, and manage linked serverssysadmin: Perform any activity.BUILTINAdministratorsis not added to this role automatically; however, if you want an administrator of the server to be able to connect to your SQL Server, then addingBUILTINAdministratorsis possible and is suggested by Microsoft. I personally would not add theBUILTINAdministratorsgroup, as I believe that it is a security risk that can be reduced by having a specific group.
Server roles are static objects. They contain groups of actions that operate at the server level rather than at the database level. When creating a new login, you could assign these server roles to it if you wanted the login to carry out server actions as well as any database-related actions, if required.
Database Roles
Database roles deal with actions that are performed at the database level. Actions within SQL Server can be grouped into different types.
The following bullet points list the existing database roles installed with SQL Server and what they can or cannot do:
dbo/db_owner: Specifies the owner of the databasedb_accessadmin: Can manage access to a database for loginsdb_backupoperator: Can back up the databasedb_datareader: Can read data from all user-defined tablesdb_datawriter: Can perform any write actions to user tablesdb_ddladmin: Can perform Data Definition Language (DDL) actions like creating tablesdb_denydatareader: Cannot read data from user tablesdb_denydatawriter: Cannot write data from user tablesdb_securityadmin: Can modify database role membership and manage permissionspublic: Can see any database objects that are created with public, or full rights, access (every user that you create will belong to the public database role)
Although you will put the existing database roles to use, you'll find it helpful to create new database roles—a common task in SQL Server—when you want to be very specific about permissions particular users have. You do this by creating a specific database role, and then adding the database user IDs to your role. If you wanted to group several user IDs together, then you might create a new role.
Application Roles
Databases are written for applications. However, not all databases exist for just one application. Application roles allow you to define one role for accessing a database based on the application that is connecting, rather than having security via database roles for different groups of users or single users. Let's look at an example.
Consider a central database that holds client data. This database is in turn accessed from the sales order department, which has its own separate database. The client database is also accessed from the debt recovery department, which also has its own database.
As a database administrator, you may set up database roles for each application. Say you have a Debt Recovery database role and a Sales Order Processing database role. Debt Recovery would want to see information that was hidden from the Sales Order role, such as how in debt a customer is. But what if a user, such as MSmith, worked in both the debt recovery and sales order departments, in two different part-time jobs, for instance? While working as part of the Sales Order group of users, MSmith could see information that was not pertinent to that group.
You can set up an application role for the Sales Order application and another for the Debt Recovery application, thus removing the conflict of having two different sets of security settings for the one user login. Also, when users move departments, you are not wasting time revoking one set of database roles to give them a new set of database roles for their new department. The security is controlled via the application as it would log on to the database via an application role.
An application role overrides any user security settings and is created for giving an application access to SQL Server. Therefore, the Sales Order Processing application would define the access for anybody using it.
An application role has no users; it is used when you wish to define what an application can access within your database and what it cannot. You need to create an application role for examples shown later in this book, so let's do this now.
TRY IT OUT: CREATING A NEW APPLICATION ROLE
- Navigate to the
ApressFinancialdatabase, expand the Security node, right-click Roles, select New, and then New Application Role. In the dialog box that appears, enter a useful role name and a password, as shown in Figure 4-13. This role will be for the banking application through which users will want to look at checks, cash withdrawals, etc.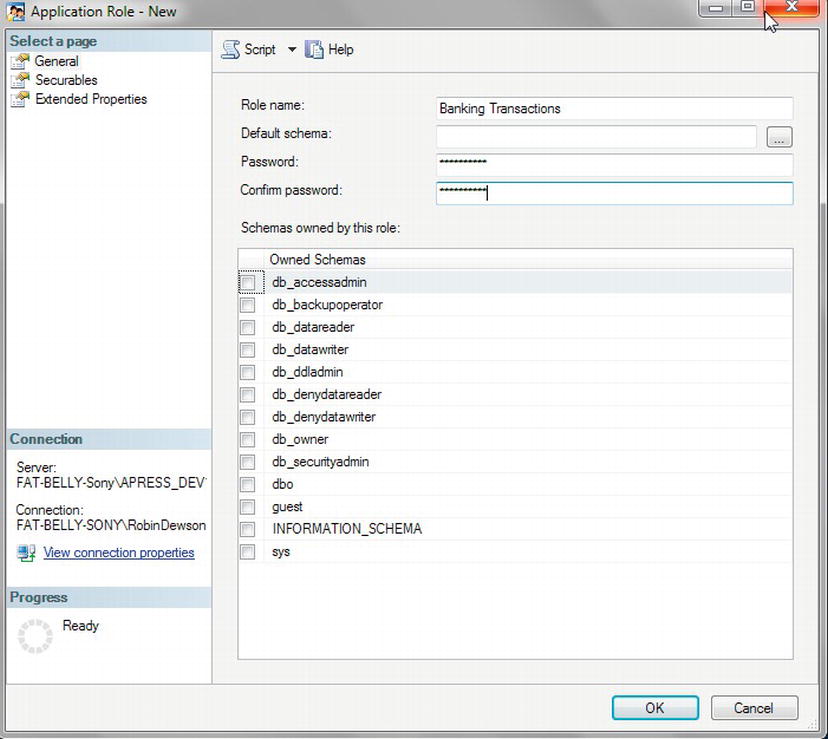
- Click Securables in Object Explorer on the left-hand side, and then click Search. This is how you begin to define what objects you want to assign to this role.
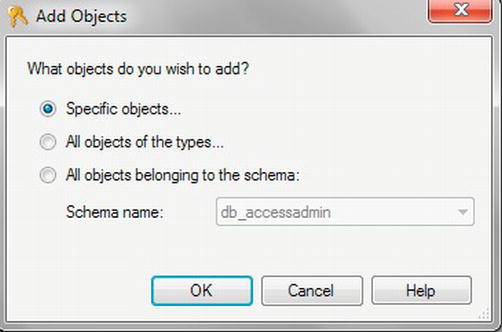
- In the Add Objects dialog box that appears, leave the options as they are shown in Figure 4-14 and click OK.
- Click Object Types, which will bring up a list of objects that you can select from. As you don't have much within your database that you can apply permissions to at this point in the book, select Databases, as shown in Figure 4-15, and click OK. You are going to give this application authority to access your database, but not the ability to do anything (mainly because you don't have anything it can do yet).
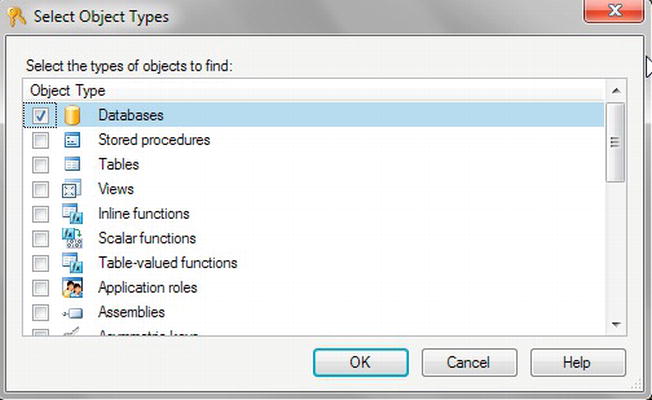
Figure 4-15. Selecting the database
- Click Browse. You now see a list of all the databases within the server. As shown in Figure 4-16, select
ApressFinancial, as this is the only database this role will access.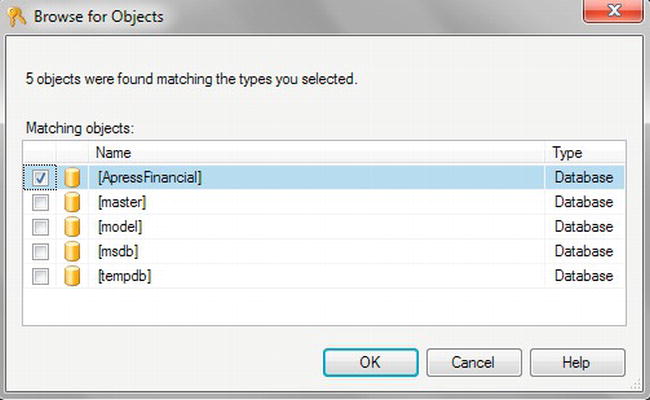
Figure 4-16.
ApressFinancialdatabase selected - Clicking OK brings you back to the Select Objects screen, and clicking OK again gets you back to the Securables page, where you can allow or deny specific actions, as you see in Figure 4-17. Leave everything unchecked for the moment; you will come back to this later in the book when you look at stored procedures in Chapter 12.
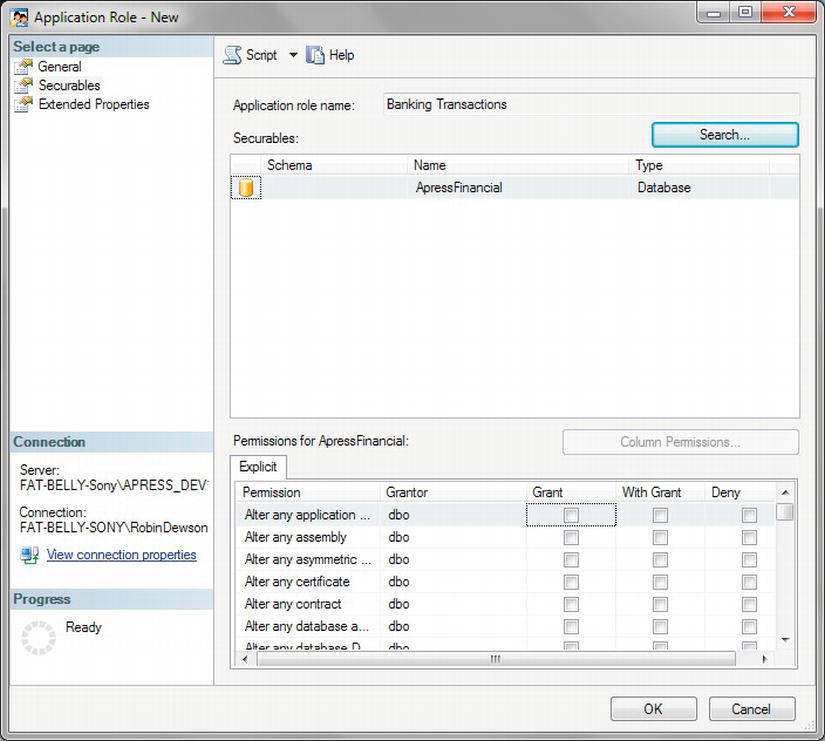
Figure 4-17. Application roles' explicit permission settings
- Click OK to finish creating your application role.
Schemas
In the following chapters, you will be creating SQL Server objects to hold and work with your data. You could create these objects so that each could be seen as its own small part of the overall solution. It would make for better organization, though, if objects that could be seen as subsets of the whole solution were grouped together. For instance, in your example, you could group share details and share prices together as share information, or group the financial transactions the customer makes using the transactions and transaction types tables together. These groupings could then be used as the basis of security to the underlying data for when a SQL Server connection tries to access the data. These groupings I have just talked about, called schemas, exist at the database level within SQL Server. Therefore, a schema is a method of creating a group and placing objects within that group, which can then be used to grant or revoke permissions as a group to SQL Server connections.
Prior to SQL Server 2005, each object was owned by a user account. Whenever a user left, quite often it would mean moving the ownership of objects for that user's account to a new account. As you can imagine, in a very large system this could take hours or even days to complete. Now objects are owned by schemas, and the many objects that exist will be contained within one schema in a very large system. Although a schema will still be owned by a SQL Server account, as you will see when you take a look at the syntax in a moment, the number of schemas should be a fraction of the number of objects, even in very large systems, and therefore moving ownership will be easier and faster.
So by having a schema within your solution and assigning objects to that schema, not only are you improving security, but also you are grouping logical units of the database together, making your solution easier to understand and use.
Creating a schema is very simple, and the syntax is defined as follows:
CREATE SCHEMA schema_name AUTHORIZATION owner_name
You can now put this in action.
TRY IT OUT: CREATING SCHEMAS AND ADDING OBJECTS
- Open up a Query Editor window so you can create your first schema. This schema will be used to keep all your transaction details together. Enter the following code:
USE ApressFinancial

GO

CREATE SCHEMA TransactionDetails AUTHORIZATION dbo - When you execute this by pressing F5 or by clicking the Execute button, you should see it successfully complete. This will have created a new schema where the owner of the schema is the dbo user. This means that any login with sysadmin privileges will automatically have access to this schema because it maps to the dbo user in all databases. If you execute the code successfully, you'll see the following message:
Command(s) completed successfully. - You can then create further schemas for other groupings, such as one for share details or customer details including products. Enter the following code:
CREATE SCHEMA ShareDetails AUTHORIZATION dbo

GO

CREATE SCHEMA CustomerDetails AUTHORIZATION dbo - Execute this code, which adds the schemas to the database. If you execute the code successfully, you'll see the following message:
Command(s) completed successfully. - If you move to Object Explorer, you can see your schemas in place, as shown in Figure 4-18.
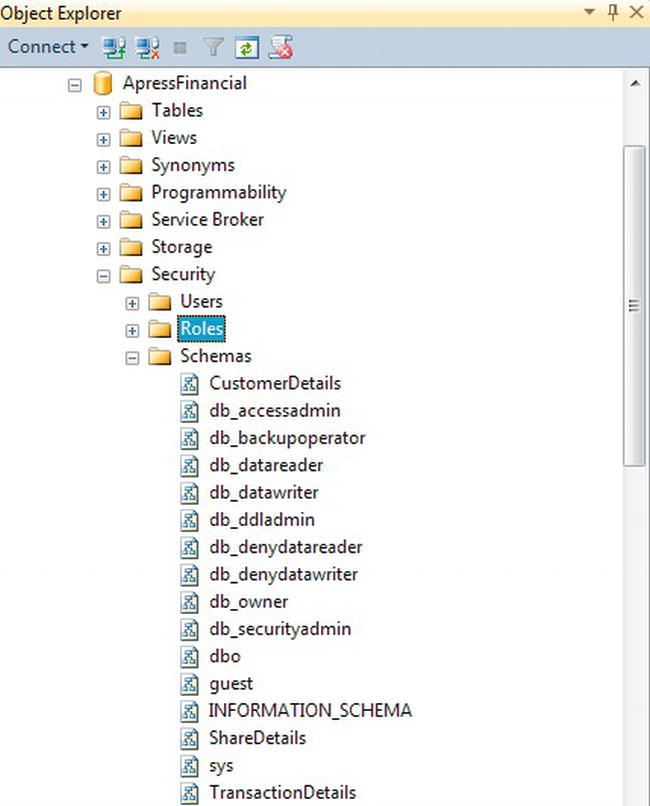
Figure 4-18. Schemas applied
Before You Can Proceed with Your Solution
You have now created a database and gained an understanding of the different roles in SQL Server at both the server and database level. Before you can proceed and create objects such as tables, you need to clear a couple of obstacles. After the database, the next objects you will create are tables, which you will learn about in the next chapter. So what security considerations do you need to check before you can do this?
First of all, you must be using a database user account that has the authority to add tables to the specific database you are required to—in this case, ApressFinancial. This is the next security issue you will tackle, and you should keep in mind what you have learned about accounts and roles in this and the previous chapter. You also need to have access to that specific database. Let's look at the issue of access to the database if you are using a user ID that did not create the database.
The database was re-created at the very end of the previous chapter under user ID FAT-BELLY-SonyRobinDewson. The user who created the database is the database owner, also known as dbo. So how can you check who created the database if you did not? At the end of the previous chapter, I asked you to create the database under your own user ID, which, if you followed the instructions so far and you are a local administrator of the machine SQL Server is installed on, you should have the right privileges within SQL Server to do the check.
The following exercise will demonstrate how you check the identity of the database owner.
TRY IT OUT: CHECKING THE DATABASE OWNER
- Ensure that SQL Server Management Studio is open.
- Navigate to the database that you wish to check on—in this case,
ApressFinancial. - Click the
ApressFinancialdatabase node in Object Explorer on the left-hand side of the screen once, and then right-click. - Select Properties to bring up the Database Properties dialog box shown in Figure 4-19. On the General tab, you will see an item named Owner. This is the fully qualified account preceded by the domain or local machine name.
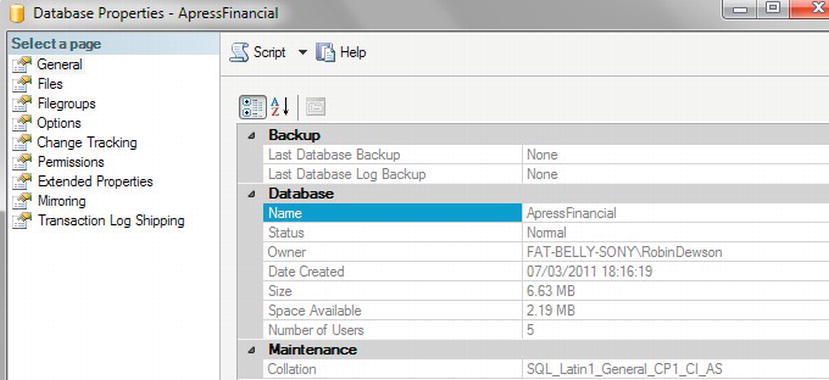
Figure 4-19. Database Properties window
- Click Cancel to close this dialog box.
Ownership of tables and other database objects is just as important. If you create a table using the same user ID as that which you created the database with, or use a user ID that is a member of the sysadmin role that is also implicitly mapped to the dbo user in the database, the table will have a default schema of dbo. However, if you logged in with a different user ID that was not a dbo user, the table would have that user's default schema as the prefix to the table name, replacing the dbo prefix.
Now that you know who the database owner is, it is up to that user, or another user who has system administration rights (in other words, a login that has the sysadmin server role or a user ID that has the db_owner database role), to allow any other specified user the ability to create tables within the database. You have a user called MSmith who is not a system administrator, but a developer. Recall you created this user in Chapter 1, and that this user could not log in to SQL Server.
The next section will go through a scenario where, as a developer, MSmith has no rights to create any new items. However, you will rectify this situation in the next exercise, where you will alter MSmith's user privileges so that he can connect to SQL Server and create a table.
TRY IT OUT: ALLOWING A USER TO CREATE A TABLE
- Log on to SQL Server as a sysadmin if required. (However, you are probably already logged in as a sysadmin if you are following the book.) Create a new login by right-clicking the Logins node on the Server Security node and selecting New Login. This brings up the new login screen, which you can populate with the login name of the account by typing in the details of the login, as shown in Figure 4-20, or by searching for the object using the button to the right. You are also going to allow this user to connect to
ApressFinancialby default when he or she logs in.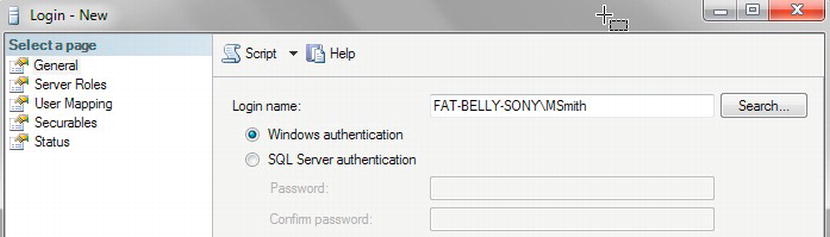
Figure 4-20. New login
- You are not going to assign this user any server roles, but you are going to assign this login to the
db_ownerdatabase role, as you see in Figure 4-21. This will allow the user to create tables as well as create and work with other objects and data. You could have selecteddb_ddladmin, but this would have allowed the user to create only objects and not data.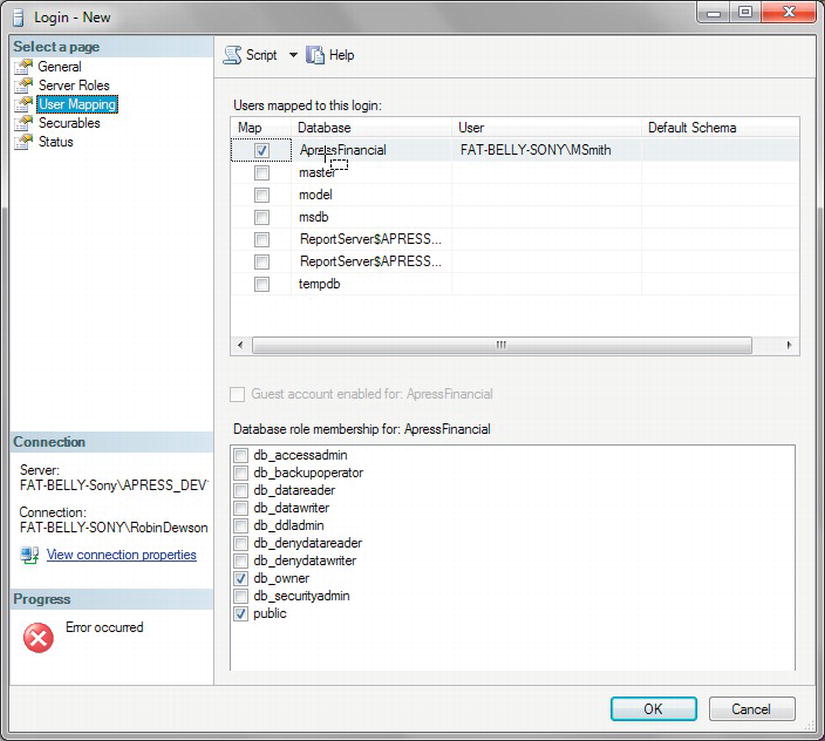
- Click OK, which will create not only a server login, but also a database user in
ApressFinancialfor MSmith, as shown in Figure 4-22.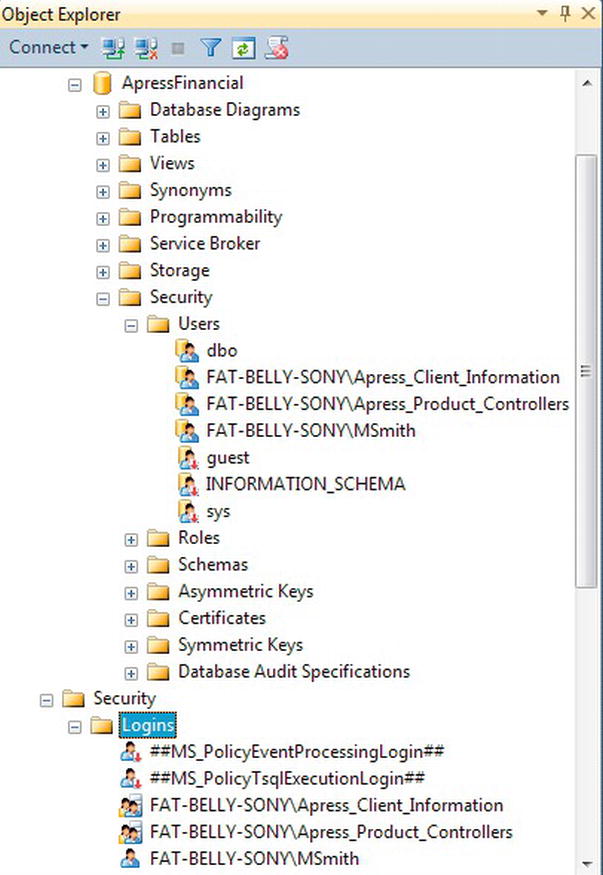
MSmith is now in a position to log in to SQL Server and create tables in the ApressFinancial database.
Declarative Management Framework
The security of a database does not just involve ensuring that only the correct people can log in to the system and see only the data that they are authorized to see. Security also involves knowing that the basis of the data has met certain defined compliance criteria. This comes under the header of Declarative Management Framework (DMF). SQL Server 2012's DMF allows policies to be defined to ensure that SQL Server objects follow a defined set of rules. These rules are not compulsory, but rather generate warnings showing that you are not in compliance. DMF also includes tools to rectify such problem situations. The logic behind DMF is for administrators to determine how an installation should be defined as part of its setup and to then have the ability to enforce the rules of their definition should they be violated.
There are three aspects to DMF, and you must understand all three before you can make DMF work for you:
Facets: A facet is a grouping that exists to place conditions into. Facets are prebuilt within SQL Server and expose conditions that can be tested within a policy. Each facet group will contain logically combined conditions. One example is the Login facet, which contains conditions to test whether a login is locked, the default database, the last time the password was altered, whether password expiration is enabled, and so on.
Policies: A policy defines one or more conditions to be applied to a server. Policies will be defined by database administrators or even auditors to ensure that specified conditions are met. Historically, one of the largest areas of contention with installations of SQL Server has been that it required the database administrators to write their own stored procedures and schedule them to ensure that every database complied with company policy. Now it is a simple method of defining a condition and letting Service Broker execute and report on the condition. The result is a greater degree of standardization, as well as ease of programming.
Conditions: A condition within DMF is similar to any other condition and is a test on an attribute to make sure that it meets a certain criteria. A number of conditions for your installations will be built up over time, and it is even good practice to set up conditions to test the value of attributes that should be set by default. Such conditions could surround the checking of the
ANSI NULLdefault, for example. Such a condition would then trap for any database where, even by accident, the tested value was altered as part of the setup. Conditions need to be part of a policy.
TRY IT OUT: BUILDING A CONDITION AND A POLICY
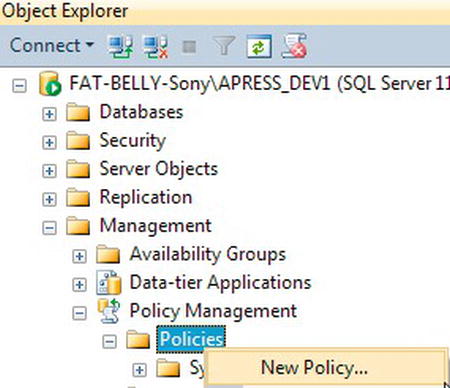
- Ensure that SQL Server Management Studio is open. There are two ways to progress with this example. It is possible to create a condition and then the policy, or you can create the condition while building the policy. There is no right or wrong way. For this example, you will be building a condition while building the policy. From within Object Explorer, expand the Management node, followed by the Policy Management node, and then the Policies node. Right-click Policies and select New Policy, as demonstrated in Figure 4-23.
- You are now presented with an empty Create New Policy screen. Enter a description of Database ANSI NULL Default in the name. Below this, you will see the Check Condition combo box, which holds the condition the policy is testing. When you click the down arrow, select New Condition and you should see a screen as shown in Figure 4-24.
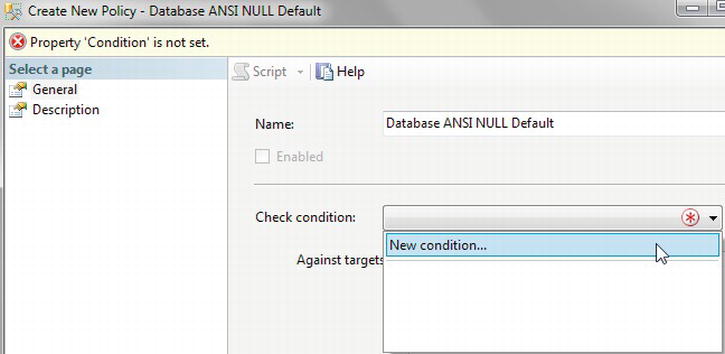
Figure 4-24. Creating a new condition
- Selecting New Condition takes you to the Create New Condition screen. It is then necessary to enter a name and select the type of facet you wish to create. As you are creating a database condition, select Database Options under the Facet option. You will be testing that the database has been set up with
AnsiNullDefaultset to False, so in the Expression section, which has been filtered to show only the Database Options, select @AnsiNullDefault from the list of expressions (see Figure 4-25). Then in the Value column, select False from the list of available options. Once complete, click OK.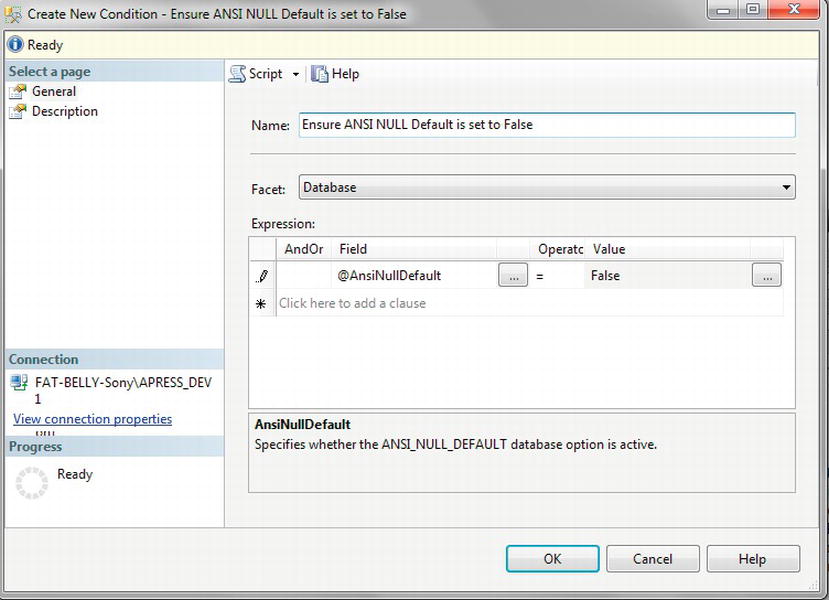
Figure 4-25. The New Condition screen with the description and test expression
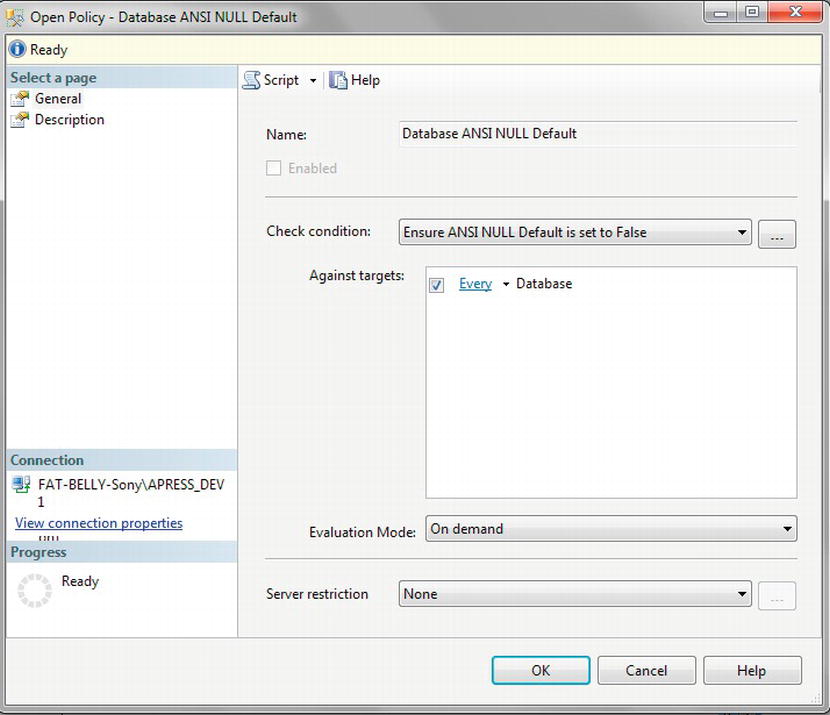
- Clicking OK returns you to the New Policy screen, which is now labeled as Open Policy, which should be like the one shown in Figure 4-26. The Enabled box is protected because the policy is to run On Demand. If you wanted to run the policy at set periods, then you would select a schedule option from the Evaluation Mode found toward the bottom of the dialog. The Check Condition combo box should be populated, and in the Against Targets list, the condition should check Every Database as the database server. You could also refine this condition to only databases that are over a certain size or to online databases.
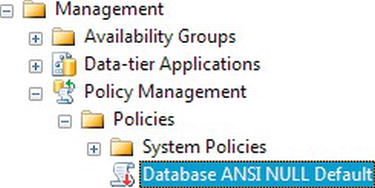
- Once you click OK, you should notice both the policy and the condition listed, as shown in Figure 4-27. At this point, nothing has been tested and no policy or condition has been checked against any database.
- Find the
ApressFinancialdatabase, and select Properties, as shown in Figure 4-28. You are going to alter theAnsiNullDefaultoption on the database to break the policy. Select Options from the page list on the left.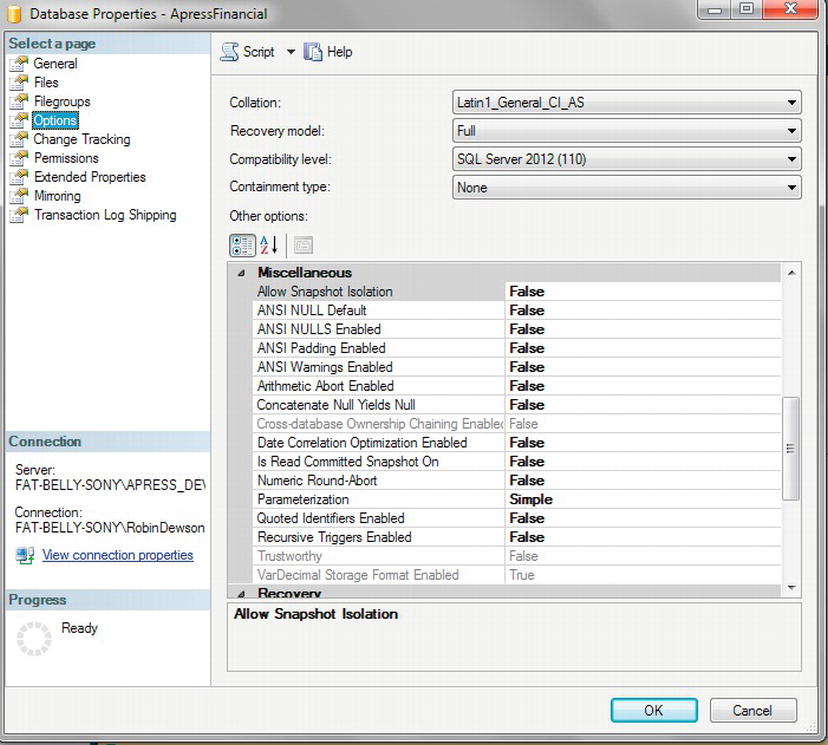
Figure 4-28. Opening the database properties
- In the Options page, scroll down to the Miscellaneous section and switch ANSI NULL Default to True, as shown in Figure 4-29. Click OK.
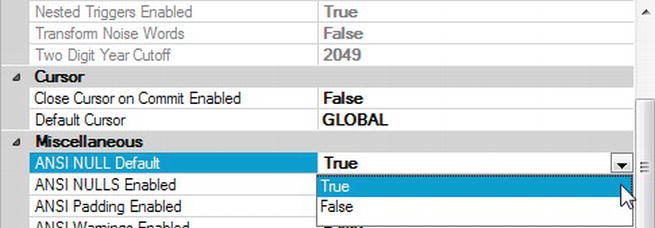
Figure 4-29. Altering the database property to break the condition
- Now that the database is no longer compliant, you need to run the policy and test it. Running the policy normally would be a task scheduled at periodic times, with the results sent to the relevant person. You can schedule the running of a policy by using a job to build the script. You will learn about the use of jobs in Chapter 8, when you see how to back up and restore a database. For the moment, as demonstrated in Figure 4-30, highlight the policy, right-click, and select Evaluate from the pop-up menu.
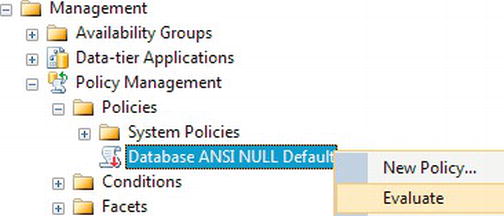
Figure 4-30. Finding the policy and testing it
- You are now presented with the results of the evaluation, and you should see something similar to the results shown in Figure 4-31, which demonstrate that your database is out of policy.
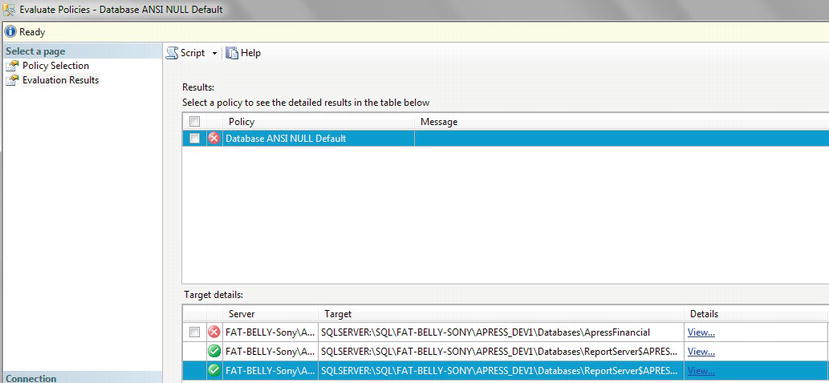
Figure 4-31. The results of the test in the evaluation window
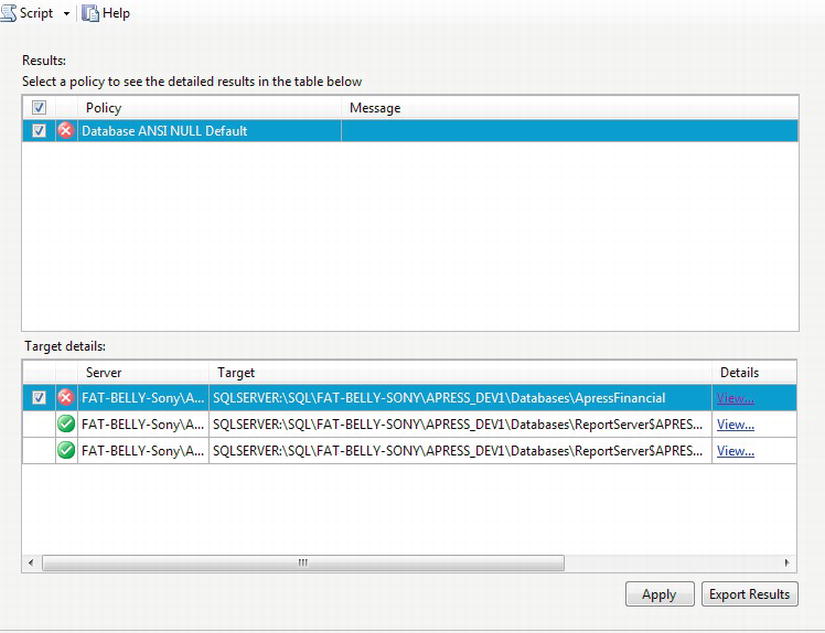
- It is not necessary to close this dialog and to correct every failure manually one by one. To clean up your database of all policies that you have set up that have failed, even if there is just one, as you have built in this example, ensure the check box for each failure is selected and click the Apply button, as shown toward the right in Figure 4-32. You are then presented with a confirmation dialog, and clicking Yes will apply the correction required to the database so that it conforms.
Summary
There is a great deal to cover concerning security and its different aspects. I would like to recap everything that we have seen just for one last time to ensure that you understand how everything fits together.
Before you can connect to SQL Server, an administrator of the SQL Server installation must give you permission to connect. In a Windows authentication setup, the administrator would either allow your Windows account or a group that contains your Windows account to connect to SQL Server. He or she can do this by either using the GUI and creating a login via the Security node or using the CREATE LOGIN … FROM WINDOWS T-SQL statement. If you are in a SQL Server authentication setup, then a user ID and password would be created within SQL Server, again either via the Security/Logins node or by using the CREATE LOGIN … PASSWORD = 'password' syntax.
Once a connection has been made, you can create a user login within the database using the CREATE USER … syntax. This allows either the Windows account or the SQL Server login access to the database.
It is then possible to place the user into a role: either a predefined role or, more likely, a custom role that you create. This role can be used to determine what can and cannot be accessed within SQL Server tables, views, stored procedures, and any other object. Therefore, a role allows groups of users in one statement to be granted or revoked access to objects within SQL Server. Without roles, as new people join and as others leave, or as people move between departments, you would need to grant or revoke privileges as required—quite an onerous task.
Finally, when creating objects, as you will see in the next few chapters, these objects are owned by schemas. This allows for groups of objects to belong to a specific schema rather than a specific user login. This also reduces the overhead of granting privileges and allows the grouping of objects that belong together, making your application easier to understand.
This chapter continued your coverage of security within SQL Server. At this point in the book, you now know about SQL Server authentication and Windows authentication, and you have discovered how to control access to databases. The discussions on security are by no means finished because there are still several areas that we need to explore together, which we will do as we go through the book.
Security is the most important part of ensuring that your organization continues to have the ability to work. A security breach could result in lost income and will certainly mean that many people will be unable to do their work. It can also lead to unfulfilled orders, backlogs, or even fraudulent transactions. Regardless of whether you have the most well-designed database or the most poorly performing application ever, if you allow the wrong person into the wrong database, the result will be catastrophic.
Finally, the security of the database becomes a whole lot easier with the use of Declarative Management Framework. By setting up policies using DMF, it is possible to instantly see which databases meet the necessary criteria and which fail. It is then just a simple select-and-click to bring the database into alignment. Setting up correct policies in the development and staging environments is just as crucial as in production because this will allow the correct testing to take place before the database reaches production. Changing a setting in production on a failed condition within a policy could have serious ramifications.