C H A P T E R 9
Data Insertion, Deletion, and Transactions
The database is now defined, has a backup and recovery plan in place, logins to the server and users to the database defined, but you have not yet had to work with any data at this point. Within this chapter, you will learn about data insertion and deletion. In Chapter 10, this will progress to retrieving and removing data.
Inserting data can be straightforward when data are simply placed into each column of a table, but in some columns you may not want to add data, such as IDENTITY-based columns and those columns with a default value. This chapter will cover these areas, as well as show how to work with IDENTITY values and some of the situations that can occur.
You will then move on to see how to surround any data modifications with a transaction. A transaction will allow you to complete one or more data modification actions so that they are either all applied or all rejected if there has been a problem. Transactions have a danger element to them in that you can lock some data, which then stops other code from executing. You will see this in action and the dangers associated with it. You will also read about best practices with transactions.
The final section in the chapter covers removing data by deleting one or more rows, all the rows in the table, or even the whole table itself. Transactions will also be covered within this section and how a transaction works when you remove all the rows in a table via a truncation. You will also see how to drop a table.
In this chapter, you will therefore see the following:
- How to insert data
- When a default value for a column is useful
- What happens when you try to insert invalid data
- Looking at when a value is not required in a column
IDENTITYcolumns and the data generated- Transaction basics
- Different methods of removing data
The first area you will look at is how to insert data into your tables.
Inserting Data
You have now built your tables, set up the relationships, and backed up your solution, so you are ready to start inserting your data. Not all the tables will be populated with data at this point. You will insert data in other tables later on in the book when different functionality of SQL Server is being demonstrated. Although data are being inserted, the database is still at the stage of being set up, as you are inserting static information at this point in the examples you are building together. To clarify, static data are data that will not change once set up, although there may be further additions to this data at periodic intervals, such as when a new share is created.
Not everyone who is allowed to access your database may, or should, be allowed to insert data directly into all of the tables. Therefore, you need to know how to set up the security to grant permission to specific user logins for inserting the data. The only people who really ought to be adding data directly to tables rather than using controlled methods such as stored procedures in production, for example, are special accounts like dbo accounts. In development, any developer should be able to insert data, but any login that would be testing out the application should not have that authority. You will see the reasons for this when you look at the security of adding data later in this chapter, and you will learn about alternative and more secure methods when you look at stored procedures and views.
Once you have set up users correctly, it is time to demonstrate inserting data into SQL Server. It is possible to insert data using SQL commands using T-SQL or through SQL Server Management Studio. Although both of these tools will have the same final effect on the database, each works in its own unique way.
When inserting data, you don't necessarily have to populate every column. You take a look at when it is mandatory and when it is not. There are many different ways to avoid inserting data into every column. This chapter will demonstrate the various different methods you can use to avoid having to use NULL values and default values. By using these methods, you are reducing the amount of information it is necessary to include with a record insertion. This method of inserting data uses special commands within SQL Server called constraints. You will see how to build a column constraint through T-SQL in Query Editor as well as in SQL Server Management Studio.
The T-SQL INSERT Statement Syntax
Before it is possible to insert data using T-SQL code, you need to be familiar with the INSERT statement and its structure. The INSERT statement is very simple and straightforward in its most minimal form, which is all that is required to insert a record.
INSERT [INTO]

   {table_name|view_name}

   [{(column_name,column_name,...)}]

   {VALUES (expression, expression, ...)}
You are required to start all data-based statements with the type of action you are trying to perform, which for the moment is the statement INSERT. The next part of the statement, INTO, is optional. It serves no purpose, but you will find some developers do use it to ensure their statement is more readable. The next part of the statement deals with naming the table or the view that the insertion has to place the data into. If the name of the table or view is the same as that of a reserved word or contains spaces, you have to surround that name with square brackets or double quotation marks, although, as mentioned earlier in the book, it is best to try to avoid names with spaces. However, if you do need to, it is better to use square brackets, because there will be times you wish to set a value such as Acme's Rockets to column data, which can be added easily by surrounding it with double quotation marks, as covered in the discussion of SET QUOTED_IDENTIFIER OFF in Chapter 2.
I cannot stress enough that, really, there is nothing to be gained by using reserved words for table, view, or column names. Deciding on easy-to-use and unambiguous object names is part of a good design.
Column names are optional, but it is best practice to list them to help to have reliable code, as this ensures that data are inserted only into the columns into which you want it to be inserted. Therefore, it will be necessary to place the column names in a comma-delimited list. The list of column names must be surrounded by parentheses: (). The only time that column names are not required is when the INSERT statement is inserting data into every column that is within the table in the same order as the column names are laid out in the table. However, this is a potentially dangerous scenario. If you build an INSERT statement that you then save and use later, you expect the columns to be in a specific order because that is the way they have always been. If someone then comes along and adds a new column, or perhaps alters the order, your query or stored procedure will either not work or give erroneous results, as values will be added to the wrong columns. Therefore, I recommend that you always name every column in anything but a query, which is built, run once, and thrown away.
The VALUES keyword, which precedes the actual values to be entered, is mandatory when you are inserting values. SQL Server needs to know that the following list is a list of values, not a list of columns. Therefore, you have to use the VALUES keyword, especially if you omit the list of columns as explained previously. Later in the chapter, I demonstrate when the VALUES keyword is not mandatory, and that is when you are building a query to define the values you are going to insert into your table. For the moment, though, I will be demonstrating only when you are inserting data with values.
You will have a comma-separated list surrounded by parentheses covering the values of data to insert. There has to be a column name for every value to be entered. To clarify, if there are ten columns listed for data to be entered, then there must be ten values to enter.
Finally, it is possible to insert multiple rows of data from the one INSERT statement. You can do this by surrounding each row you want to add with its own separate parentheses: (). You will see this in action later in the chapter. As with a single-row addition, it is necessary to have the same number of columns either as the table you are inserting into, if you are not defining the columns in the INSERT statement, or as the INSERT statement if you are defining the list. Now that the INSERT statement is clear, it's time to move on and use it.
INSERT SQL Statement
The first method of inserting data is to use the INSERT SQL statement as described previously. This example will insert one record into the ShareDetails.Shares table using Query Editor. When inserting the data, the record will be inserted immediately without any opportunity to roll back changes, as this statement does not use any transaction processing. You will also see with this example how Query Editor can aid you as a developer in building the SQL statement for inserting a row. Let's dive straight in and create the row.
TRY IT OUT: INSERTING DATA USING T-SQL
As you have just seen in your first example, you specified every column in the table within the INSERT statement. You are now probably wondering whether you have to specify every column every time a record is inserted into a table. The answer is not necessarily, and it depends on how your table columns are defined. The following sections look at two methods for inserting rows of data without specifying a value for each column: using default values and allowing a NULL value.
Default Values
One way to avoid entering a value for each column is to set a column or a set of columns with a default value. You set up the CustomerDetails.Customers table to have a default value when creating the tables in Chapter 5. Default values are used when a large number of INSERTs for a column would have the same value entered each time. Why have the overhead of passing this information, which would be the column name plus the value, through to SQL Server, when SQL Server can perform the task quickly and simply for you? Network traffic would be reduced and accuracy ensured as the column information would be completed directly by SQL Server. Do note, though, that a default value is not a mandatory value that will always be stored in a column. It is just a value that you think is the best value to use in the event that no other value is supplied. If you do pass a value, then the default value will be overridden, as you would expect.
Although it has been indicated that default values are best for a large number of INSERTs, it can also be argued that this need not be the case. Some people feel that all that is required is a significant number of rows to be altered from a default value setting for the use of default values to be a disadvantage. It does come down to personal preference as to when you think setting a default value will be of benefit. However, if there are times when you wish a column to have an initial value when a row is inserted with a specific value, then it is best to use a default value.
In the next section's example, where you'll build up your next set of INSERT statements, I will demonstrate how a default value will populate specific columns. When creating the CustomerDetails.Customers table, you created a column that is set up to be populated with a default value: the DateOpened column. In this column, you call a SQL Server reserved function, GETDATE(). This function gets the date and time from the operating system and returns it to SQL Server. By having this within a column default value, it is then inserted into a record when a row is added.
Using NULL Values
Another way to avoid filling in data for every column is to allow NULL values in the columns. You did this for some columns when defining the tables. Ensuring that each column's Allow Nulls option is checked can ensure this is true for all your columns. If you take a look at Figure 9-1, you'll see that one of the columns in the ShareDetails.Shares table, StockExchangeTicker, does allow a NULL value to be entered into the column.
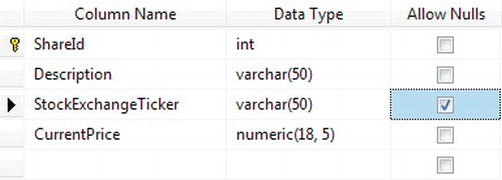
Figure 9-1. NULLs selected on a column
Therefore, the previous example could have placed data only in the Description and CurrentPrice fields if you had wanted, as ShareId is an IDENTITY column and is auto-filled. If the ShareDetails.Shares record had been inserted only with those two columns, the statement would have looked like the following T-SQL:
SET QUOTED_IDENTIFIER OFF

INSERT INTO [ApressFinancial].[ShareDetails].[Shares]

           ([Description]

           ,[CurrentPrice])

     VALUES

           ("ACME'S HOMEBAKE COOKIES INC",

            2.34125)
Figure 9-2 shows what the data would have looked like had you used the preceding T-SQL instead of the code in the previous example.

Figure 9-2. Insert with NULL shown in SQL Server Management Studio
As you can see in Figure 9-2, the column that had no data entered has a setting of allowing a NULL. A NULL setting is a special setting for a column. The value of NULL requires special handling within SQL Server or applications that will be viewing this data. What this value actually means is that the information within the column is unknown; it is not a numeric or an alphanumeric value. Therefore, because you don't know if it is numeric or alphanumeric, you cannot compare the value of a column that has a setting of NULL to the value of any other column, and this includes if that other also had a NULL value.
![]() Note One major rule involving
Note One major rule involving NULL values: A primary key cannot contain any NULL values.
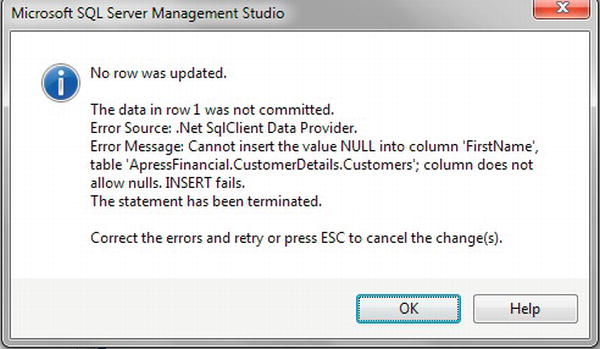
In the following exercise, you will use SQL Server Management Studio to see the effects of not populating a field defined as NOT NULL. The exercise also demonstrates how to edit rows of data using SSMS and how there can be dangers in this approach. You will see what happens to the IDENTITY values when an insertion has a problem and is not inserted. It is important to see these effects, and so you need to see errors being generated.
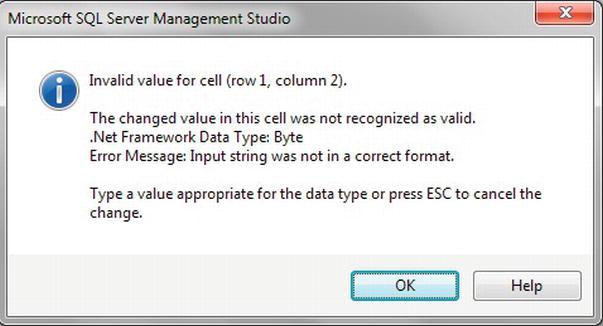
When using SQL Server Management Studio, it is not always immediately apparent what data are valid in each column or if a column is NULL or NOT NULL. If you enter invalid data or leave a column empty, when in fact it should have data (i.e., isn't set to accept NULL values), you will receive an error message. An IDENTITY column is protected.
Editing data within SSMS can be quick and easy and has the potential of some trouble when entering data. SQL Server provides the ability to edit data by displaying an editable grid, not dissimilar to basic Excel. A new toolbar will be displayed, providing you with the options to let you work with the data. You will see this in the following exercise and how you can use this toolbar to access the underlying T-SQL that is used to provide the data for the grid. Once the toolbar is visible, by individually clicking the first four buttons, you can see your Management Studio display alter to show more and different information. You will be able to toggle the visibility of a pane diagramming the tables and relationships, the selection criteria, the SQL, and finally the results. This toolbar comes into its own when working with data, as you are seeing, but also when building views; you will see the toolbar again in Chapter 11. When you use the grid for working with data, as you will do when developing a system, then you may find these buttons useful, especially the SQL button.
TRY IT OUT: NULL VALUES AND SQL SERVER MANAGEMENT STUDIO
![]() Note By having an
Note By having an IDENTITY column, every time a record is entered or an attempt is made to enter a record and all the data entered are of valid data types—whether this is through SQL Server Management Studio or an INSERT statement—the column value within the table will be incremented by the Identity Increment amount that you defined when the table was created.
Now that you have seen how SSMS deals with NULL values and invalid data and how it is possible to modify the data in a table, the next exercise will demonstrate how the same set of problems works using T-SQL in Query Editor.
TRY IT OUT: NULL VALUES AND T-SQL
DBCC CHECKIDENT
The DBCC commands can be used for many different operations, from checking the integrity of the database, as you saw in Chapter 8 when building a database maintenance plan, to working with data and tables, such as working with IDENTITY columns.
If you find that when testing out IDENTITY columns, you receive a number of errors, and the identity number has jumped up further than you wished, it is possible to reset the seed of the IDENTITY column so that Query Editor starts again from a known point. The syntax for this command is very simple:
DBCC CHECKIDENT ('table_name'[,{NORESEED |{RESEED[,new_reseed_value]}}])
The following elaborates on the three areas of the syntax that may need explanation:
- The name of the table that you wish to reset the identity value for is placed in single quotation marks.
- You can then use
NORESEEDto display what SQL Server believes the current identity value should be—in other words, what the current maximum identity value is within theIDENTITYcolumn. Although rare, SQL Server can jump and skip a very large range of values with the potential of generating a gap. A smaller jump as you have just seen is more common when you have an issue. It is unusual for this to be a problem for you, but if it is, then don't useIDENTITYand generate the value yourself. - The final option is the one you are interested in. You can reseed a table automatically by simply specifying the
RESEEDoption with no value. This will look at the table defined and will reset the value to the current maximum value within the table. Or optionally, you can set the column of the table to a specific value by separating the value and the optionRESEEDby a comma.
Resetting the seed for an IDENTITY column, though, does have a danger, which you need to be aware of. If you reset the point to start inserting values for the IDENTITY column prior to the greatest number on the given table, you will find that there is the potential of an error being produced. To clarify this point, when a value that already exists is generated from an INSERT after resetting the IDENTITY column value, then you will receive an error message informing you that the value already exists. To give an example, you have a table with the values 1, 2, 5, 6, 7, and 8, and you reset the IDENTITY value back to 2. You insert the next record, which will correctly get the value 3, and the insertion will work. This will still work the same with the next insertion, which will receive the value 4. However, come to the next record, and there will be an attempt to insert the value 5, but that value already exists; therefore, an error will be produced. However, if you had reset the value to 8—the last value successfully entered—then everything would have been okay.
As you do not have the value 1 for the first row in the CustomerDetails.Customers table, it would be nice to correct this. It also gives a good excuse to demonstrate CHECKIDENT in action. The code that follows will remove the erroneous record entry and reset the seed of the IDENTITY column back to 0, to a value indicating that no records have been entered. You will then reenter the customer information via T-SQL. Enter the following code into Query Editor, and execute it. The first line removes the record from CustomerDetails.Customers, and the second line resets the identity. For now, don't worry about the record deletion part, as deleting records is covered in detail later in the chapter in the “Deleting Data” section. When inserting the first customer, Anthony Jawad, I have demonstrated how through the use of the keyword NULL it is possible to place a NULL value into a field via T-SQL. In this example, it is superfluous as the two columns defined with a value of NULL did not need to be mentioned in the columns listed, and therefore a value would remain undefined such as the DateClosed column. SQL Server has inserted a NULL value for DateClosed.
DELETE FROM CustomerDetails.Customers

DBCC CHECKIDENT('CustomerDetails.Customers',RESEED,0)

INSERT INTO CustomerDetails.Customers

(Title,LastName,FirstName,

OtherInitials,AddressLine1,TownOrCity,USState,

AccountType,ClearedBalance,UnclearedBalance)

VALUES (1,'Jawad','Anthony',NULL,'80 Firbank Bvd',987897,52,1,NULL,NULL)

INSERT INTO CustomerDetails.Customers

(Title,LastName,FirstName,

OtherInitials,AddressLine1,TownOrCity,USState,

AccountType,ClearedBalance,UnclearedBalance)

VALUES (3,'Lomas','Aubrey',NULL,'11c Clerkenwell',2654,0,2,437.97,-10.56)
When the code is run, you should see the following information output to the Query Results pane:
(2 row(s) affected)

Checking identity information: current identity value '5', current column value '0'.

DBCC execution completed. If DBCC printed error messages, contact your system administrator.


(1 row(s) affected)


(1 row(s) affected)
Column Constraints
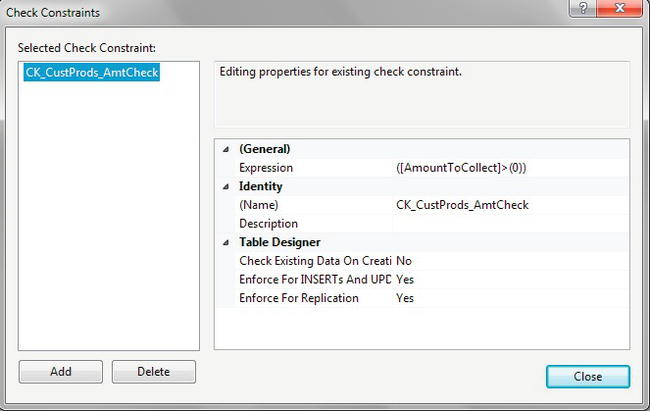
A constraint is essentially a check that SQL Server places on a column to ensure that the data to be entered in the column meet specific conditions. You first saw a constraint when creating a primary key in Chapter 6. This can keep out data that are erroneous, and therefore avoid data inconsistencies. Constraints are used to keep database integrity by ensuring that a column receives data only within certain parameters.
You have already built a non-key-based constraint on the CustomerDetails.Customers table for the default value for the column DateAdded. If you go to Object Explorer, right-click, select Script Table As Create To, and put the output in a new query window, you will see the following line from that output. So a constraint is used for setting a default value.
ADD  CONSTRAINT [DF_Customers_DateOpened]

DEFAULT (getdate()) FOR [DateOpened]
Constraints are used to not only insert default values, but also validate data as well as primary keys. However, when using constraints within SQL Server, you do have to look at the whole picture, which is the user graphical system with the SQL Server database in the background. If you are using a constraint for data validation, some people will argue that perhaps it is better to check the values inserted within the user front-end application rather than in SQL Server. This has some merit, but what also has to be kept in mind is that you may have several points of entry to your database. This could be from the user application, a web-based solution, or other applications if you are building a central database. Many people will say that all validation, no matter what the overall picture is, should always be placed in one central place, which is the SQL Server database. Then there is only one set of code to alter if anything changes. It is a difficult choice and one that you need to look at carefully.
You have two ways to add a constraint to a table. You saw the first when creating a default value as you built a table via SQL Server Management Studio in Chapter 5.
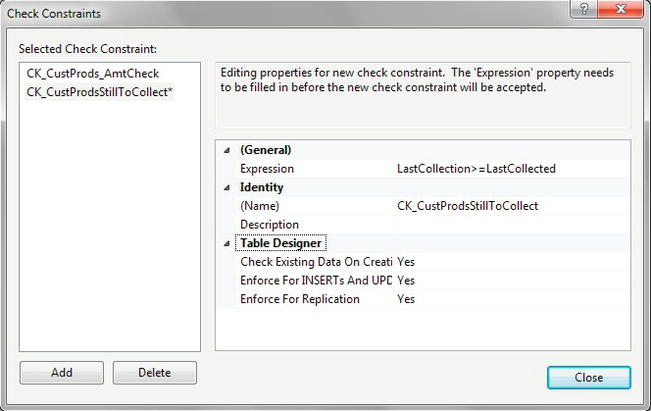
To build a constraint via code, you need to use the ALTER TABLE command, no matter what type of constraint this is. The ALTER TABLE command can cover many different alterations to a table, but in this instance, the example concentrates on just adding a constraint. This makes the ALTER TABLE statement easy, as the only real meat to the clause comes with the ADD CONSTRAINT syntax. The next example will work with the CustomerDetails.CustomerProducts table, and you will see three different types of constraints added, all of which will affect insertion of records. It is worth reiterating the adding of a default value constraint again, as this will differ from the DateAdded column on the CustomerDetails.Customers table. Once the constraints have been added, you will see them all in action, and how errors are generated from erroneous data input.
TRY IT OUT: ALTERING A TABLE FOR A DEFAULT VALUE IN QUERY EDITOR
Inserting Several Records at Once
It is now necessary to enter a few more customers so that a reasonable amount of data is contained within the CustomerDetails.Customers table to work with later in the book. You need to do the same with several other tables as well, such as TransactionDetails.TransactionTypes, CustomerDetails.CustomerTransactions, and so on. This section will prove that no extra or specialized processing is required when inserting several records. When working with data, there may be many times that several records of data are inserted at the same time. This could be when initially populating a table or when testing. In this sort of situation, where you are repopulating a table, it is possible to save your query to a text file, which can then be reopened in Query Editor and executed without having to reenter the code. This is demonstrated at the end of the upcoming example.
In the next example, you will learn how to insert several rows. The work will be completed in batches. There is no transaction processing surrounding these INSERTs, and therefore each insertion will be treated as a single unit of work, which either completes or fails.
Finally, for the moment, in Chapter 10 you will see further INSERT statements on how to insert data using the SELECT statement.
![]() Note A transaction allows a number of
Note A transaction allows a number of INSERTs or modifications to be treated as one unit, and if any insertion fails within the transaction, all the units will be returned to their original value, and no insertions will take place. Transactions will be discussed in more detail in the upcoming “Transactions” section in Chapter 10.
TRY IT OUT: INSERT SEVERAL RECORDS AT ONCE
Inserting data using named-value pairs of the column in the table with a corresponding value in the VALUES expression is straightforward and the simplest method of data insertion. Excluding columns where a value is not mandatory has benefits of reducing the columns required but also creating the ability to insert a NULL value, which denotes a special condition that is useful when interrogating the data at a later stage. You will use the methods shown in this section of the book on many occasions, but also take time to see the section on inserting data in Chapter 10, where you will see how to use data in one or more tables to insert into the required table.
It is also possible to attempt to insert data and, if there is a problem, for the insertion not to occur and the attempt to be rolled back. This can be achieved via a transaction.
Transactions
A transaction is a method through which developers can define a unit of work logically or physically that, when it completes, leaves the database in a consistent state. A transaction forms a single unit of work, which must pass the ACID test before it can be classified as a transaction. The ACID test is an acronym for atomicity, consistency, isolation, and durability:
- Atomicity: In its simplest form, all data modifications within the transaction must be both accepted and inserted successfully into the database, or none of the modifications will be performed.
- Consistency: Once the data has been successfully applied, or rolled back to the original state, all the data must remain in a consistent state, and the data must still maintain its integrity.
- Isolation: Any modification in one transaction must be isolated from any modifications in any other transaction. Any transaction should see data from any other transaction either in its original state or once the second transaction has completed. It is impossible to see the data in an intermediate state.
- Durability: Once a transaction has finished, all data modifications are in place and can be modified only by another transaction or unit of work. Any system failure (hardware or software) will not remove any changes applied.
Transactions within a database are a very important topic, but also one that requires a great deal of understanding. This chapter covers the basics of transactions only. To really do justice to this area, you would have to deal with some very complex and in-depth scenarios, covering all manner of areas such as triggers, nesting transactions, and transaction logging, which are beyond the scope of this book. However, you will see more on transactions in Chapter 10.
Transaction Basics
A transaction can be placed around any data manipulation, whether it is an update, insertion, or deletion, and can cater to one row or many rows, and also many different commands. A transaction is required only when data manipulation occurs such that changes will be either committed to the table or discarded. A transaction could cover several UPDATE, DELETE, or INSERT commands, or indeed a mixture of all three. However, there is one very large warning that goes with using transactions (see the “Caution” note).
![]() Caution Be aware that when creating a transaction, you will be keeping a hold on the whole table, pages of data, or specific rows of information in question, and depending upon how your SQL Server database solution is set up to lock data during updates, you could be stopping others from updating any information, and you could even cause a deadlock, also known as a deadly embrace. If a deadlock occurs, SQL Server will choose one of the deadlocks and kill the process; there is no way of knowing which process SQL Server will select. Keep your transactions short, and, when dealing with multiple tables within a transaction, keep the same order of table access as you would find in other transactions.
Caution Be aware that when creating a transaction, you will be keeping a hold on the whole table, pages of data, or specific rows of information in question, and depending upon how your SQL Server database solution is set up to lock data during updates, you could be stopping others from updating any information, and you could even cause a deadlock, also known as a deadly embrace. If a deadlock occurs, SQL Server will choose one of the deadlocks and kill the process; there is no way of knowing which process SQL Server will select. Keep your transactions short, and, when dealing with multiple tables within a transaction, keep the same order of table access as you would find in other transactions.
A deadlock is where two separate data manipulations, in different transactions, are being performed at the same time. However, each transaction is waiting for the other to finish the update before it can complete its update. Neither manipulation can be completed because each is waiting for the other to finish. Then a deadlock occurs, and it can (and will) lock the tables and database in question. So, for example, transaction 1 is updating the customers table followed by the customer transactions table. Transaction 2 is updating the customer transactions table followed by the customers table. A lock would be placed on the customers table while those updates were being done by transaction 1. A lock would be placed on the customer transactions table by transaction 2. Transaction 1 could not proceed because of the lock by transaction 2, and transaction 2 could not proceed due to the lock created by transaction 1. Both transactions are “stuck.” So it is crucial to keep the order of table updates the same, especially where both could be running at the same time.
It is also advisable to keep transactions as small and as short as possible, and under no circumstances hold onto a lock for more than a few seconds. You can do this by keeping the processing within a transaction to as few lines of code as possible, and then either roll back (that is, cancel) or commit the transaction to the database as quickly as possible within code. With every second that you hold a lock through a transaction, you are increasing the potential of trouble happening. In a production environment, with every passing millisecond that you hold onto a piece of information through a lock, you are increasing the chances of someone else trying to modify the same piece of information at the same time and the possibility of the problems that would then arise.
There are two parts that make up a transaction: the start of the transaction and the end of the transaction, where you decide if you want to commit the changes or revert to the original state. You will now look at the definition of the start of the transaction, and then the T-SQL commands required to commit or roll back the transaction. The basis of this section is that only one transaction is in place and that you have no nested transactions. Nested transactions are much more complex and should be dealt with only once you are proficient with SQL Server. The statements you are going through in the upcoming text assume a single transaction; the COMMIT TRAN section changes slightly when the transaction is nested.
Transaction Commands
A transaction, as I just mentioned, has two parts, the command that denotes the start of the transaction and the command that denotes the end. The end can be to commit the data or to roll back the changes, just as I have discussed. Let's take a quick look at these commands.
BEGIN TRAN
The T-SQL command, BEGIN TRAN, denotes the start of the transaction processing. From this point on, until the transaction is ended with either COMMIT TRAN or ROLLBACK TRAN, any data modification statements will form part of the transaction.
It is also possible to suffix the BEGIN TRAN command with a name of up to 32 characters in length. If you name your transaction, it is not necessary to use the name when issuing a ROLLBACK TRAN or a COMMIT TRAN command. The name is there for clarity of the code only.
COMMIT TRAN
The COMMIT TRAN command commits the data modifications to the database permanently, and there is no going back once this command is executed. This function should be executed only when all changes to the database are ready to be committed.
ROLLBACK TRAN
If you wish to remove all the database changes that have been completed since the beginning of the transaction—say, for example, because an error had occurred—then you could issue a ROLLBACK TRAN command.
So, if you were to start a transaction with BEGIN TRAN and then issue an INSERT that succeeds, and then perhaps an UPDATE that fails, you could issue a ROLLBACK TRAN to roll back the transaction as a whole. As a result, you roll back not only the UPDATE changes, but also, because they form part of the same transaction, the changes made by the INSERT, even though that particular operation was successful.
To reiterate, keep transactions small and short. Never leave a session with an open transaction by having a BEGIN TRAN with no COMMIT TRAN or ROLLBACK TRAN. Ensure that you do not cause a deadly embrace.
If you issue a BEGIN TRAN, then you must issue a COMMIT TRAN or ROLLBACK TRAN transaction as quickly as possible; otherwise, the transaction will stay around until the connection is terminated.
Locking Data
The whole area of locking data—how locks are held, and how to avoid problems with them—is a very large, complex area and not for the fainthearted. However, it is necessary to be aware of locks, and at least have a small amount of background knowledge about them so that when you design your queries, you stand a chance of avoiding problems.
The basis of locking is to allow one transaction to update data, knowing that if it has to roll back any changes, no other transaction has modified the data since the first transaction did.
To explain this with an example, let's say you have a transaction that updates the CustomerDetails.Customers table and then moves on to update the TransactionDetails.Transactions table, but hits a problem when updating the latter. The transaction must be safe in the knowledge that it is rolling back only the changes it made and not changes made by another transaction. Therefore, until all the table updates within the transaction are either successfully completed or have been rolled back, the transaction will keep hold of any data inserted, modified, or deleted.
However, one problem with this approach is that SQL Server may not just hold the data that the transaction has modified. Keeping a lock on the data that has just been modified is called row-level locking. On the other hand, SQL Server may be set up to lock the database, which is known as database-level locking, found in areas such as backups and restores. The other levels in between are row, page, and table locking, and so you could lock a large resource, depending on the task being performed.
This is about as deep as I will take this discussion on locks, so as not to add any confusion or create a problematic situation. SQL Server handles locks automatically, but it is possible to make locking more efficient by developing an effective understanding of the subject and then customizing the locks within your transactions. You will come across more on transactions in the next section as well as in Chapter 10, when you look at updating data.
Deleting Data
Deleting data can be considered very straightforward. As you read this next section, you will see how easy it can be. However, mistakes made when deleting data are very hard to recover from. Therefore, you must treat deleting data with the greatest of care and attention to detail, and especially test any joins and filtering via a SELECT statement before running the delete operation.
Deleting data without the use of a transaction is almost a final act: the only way to get the data back is to reenter it, restore it from a backup, or retrieve the data from any audit tables that had the data stored in them when the data was created. Deleting data is not like using the recycle bin on a Windows machine: unless the data are within a transaction, it is lost. Keep in mind that even if you use a transaction, the data will be lost once the transaction is committed. That's why it's very important to back up your database before running any major data modifications, or have audit tables that record the actions and data on the overlying table.
This section of the chapter will demonstrate the DELETE T-SQL syntax and then show how to use this within Query Editor. It is also possible to delete records from the results pane within SQL Server Management Studio, which will also be demonstrated.
However, what about when you want to remove all the records within a table, especially when there could be thousands of records to remove? You will find that the DELETE statement takes a very long time to run, as each row to delete is logged in the transaction log, thus allowing transactions to be rolled back. Luckily, there is a command for this scenario, called TRUNCATE, which is covered in the section “Truncating a Table” later in the chapter. However, caution should be exercised when using this command, and you'll see why later.
First of all, it is necessary to learn the simple syntax for the DELETE statement for deleting records from a table. Really, things don't come much simpler than this.
DELETE Syntax
The DELETE statement is very short and sweet. To run the command, simply state the table you wish to delete records from, as shown here:
The FROM condition is optional, so your syntax could easily read as follows:
DELETE tablename

WHERE where_condition
The only area that really needs to be mentioned is that records can be deleted from only one table at a time, although when looking for rows to delete, you can join to several tables, as you can with SELECT and UPDATE and will see demonstrated in Chapter 10. If you are joining to other tables, then you do need to name the table you are deleting from. I realize that you have not yet covered how to join two tables, but for reference the syntax when you are deleting from one table but using at least one other table to join as part of the filtering would be as follows:
DELETE

[FROM] tablename

JOIN tablename2 ON (join condition would be placed here)

... (for further joins if required)

[WHERE where_condition]
The WHERE clause can become optional as the filtering could be done by joining two tables. You will see why this can work in Chapter 10.
Before Demonstrating the DELETE Statement
At the moment, there is very little data in your database, and to demonstrate deleting data in the following section could mean that you have no data left for the remainder of the book. This is a minor inconvenience as it would be possible to reinsert the data that has already been generated after you have completed the data selection. However, deleting the data that currently exist is not ideal. Having a much larger set of data would be much better. Finally, having a larger set of data will be useful for the remainder of the book.
One method to insert data is to write INSERT statements one row at a time. You can also use SQL Server Management Studio in both methods demonstrated earlier. However, an easier method is to use a tool to generate data. I use a tool from a company called Red Gate, which has a random data generator called SQL Data Generator, which is one of many useful database tools by Red Gate (www.red-gate.com). By using this tool, I have generated SQL statements for the tables within ApressFinancial, and this script can be found along with the other code from the book at www.apress.com. The code will also be available from my web site, www.fat-belly.com. Please run in this code before proceeding further in the book. The SQL will be marked as “BulkInsert” for Chapter 9.
Using the DELETE Statement
Imagine that you're at the ATM and you are transferring money from your savings account to your checking account. During that process, a transaction built up of many actions is used to make sure that your money doesn't credit one system and debit the other. If an error occurs, the entire transaction will roll back, and no money will move between the accounts.
Let's take a look at what happens if you were to run this statement:
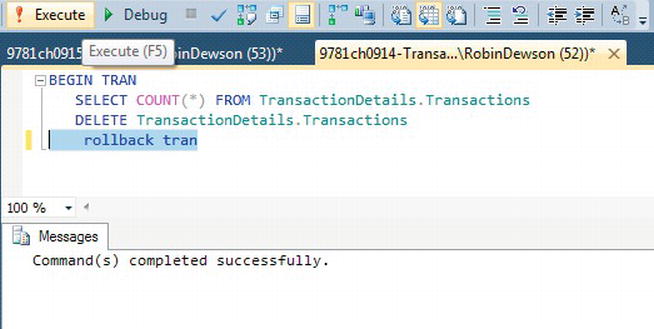
BEGIN TRAN

   DELETE CustomerDetails.Customers
When this code runs, SQL Server opens a transaction and then tentatively deletes all the records from the CustomerDetails.Customers table. The records are not actually deleted until a COMMIT TRAN statement is issued. In the interim, though, SQL Server will place a lock on the rows of the table, or if this was a much larger table, SQL Server may decide that a table lock (locking the whole table to prevent other modifications) is better. Because of this lock, all users trying to modify data from this table will have to wait until a COMMIT TRAN or ROLLBACK TRAN statement has been issued and completed. If one is never issued, users will be blocked until SQL Server decides to give up and chooses one of the processes as the “deadlock victim,” kills their data modification attempt, and rolls back their transaction. This problem is one of a number of issues frequently encountered in applications when analyzing performance issues. Therefore, never have a BEGIN TRAN without a COMMIT TRAN or ROLLBACK TRAN.
So, time to start deleting records while using a transaction. In the following exercise, it is a series of three short steps, in which you will see how to delete records with a rollback, when leaving the transaction incomplete and open, and finally a deadlock scenario.
TRY IT OUT: DELETING RECORDS
Truncating a Table
All delete actions caused by DELETE statements are recorded in the transaction log. Each time a record is deleted, a record is made of that fact. If you are deleting millions of records before committing your transaction, your transaction log can grow quickly. Recall from earlier in the chapter the discussions about transactions; now think about this a bit more. What if the table you are deleting from has thousands of records? That is a great deal of logging going on within the transaction log. But what if the deletion of these thousands of records is, in fact, cleaning out all the data from the table to start afresh? Or perhaps this is some sort of transient table? Performing a DELETE would seem to have a lot of overhead when you don't really need to keep a log of the data deletions anyway. If the action failed for whatever reason, you would simply retry removing the records a second time. This is where the TRUNCATE TABLE command comes into its own.
By issuing a TRUNCATE TABLE statement, you are instructing SQL Server to delete every record within a table, without any logging or transaction processing taking place. In reality, minimal data are logged about what data pages have been deallocated and therefore removed from the database. This is in contrast to a DELETE statement, which will deallocate and remove the pages from the table only if it can get sufficient locks on the table to do this. The deletion of the records with TRUNCATE TABLE can be almost instantaneous and a great deal faster than using the DELETE command. This occurs not only because of the differences with what happens with the transaction log, but also because of how the data are locked at the time of deletion. Let's clarify this point before progressing.
When a DELETE statement is issued, each row that is to be deleted will be locked by SQL Server so that no modifications or other DELETE statements can attempt to work with that row. Deleting hundreds or thousands of rows is a large number of actions for SQL Server to perform, and it will take time to locate each row and place a lock against it. However, a TRUNCATE TABLE statement locks the whole table. This is one action that will prevent any data insertion, modification, or deletion from taking place.
![]() Note A
Note A TRUNCATE TABLE statement will delete data from a table with millions of records in only a few seconds, whereas using DELETE to remove all the records on the same table would take several minutes.
The syntax for truncating a table is simple:
TRUNCATE TABLE [{database.schema_name.}]table
![]() Caution Use the
Caution Use the TRUNCATE TABLE statement with extreme caution: there is no going back after the transaction is committed outside of a transaction; you cannot change your mind. Also, every record is removed: you cannot use this command to selectively remove some of the records. If you are within a transaction, you can still use the ROLLBACK command.
One “side effect” to the TRUNCATE TABLE clause is that it reseeds any identity columns. For example, say that you have a table with an identity column that is currently at 2,000,000. After truncating the table, the first inserted piece of data will produce the value 1 (if the seed is set to 0). If you issue a DELETE command to delete the records from the table, the first piece of data inserted after the table contents have been deleted will produce a value of 2,000,001, even though this newly inserted piece of data may be the only record in the table!
One of the limitations with the TRUNCATE TABLE command is that you cannot issue it against tables that have foreign keys referencing them. For example, the Customers table has a foreign key referencing the Transactions table. If you try to issue the following command, you will receive the following error message:
TRUNCATE TABLE CustomerDetails.Customers
Msg 4712, Level 16, State 1, Line 1

Cannot truncate table 'CustomerDetails.Customers' because it is being referenced

by a FOREIGN KEY constraint.
Dropping a Table
Another way to quickly delete the data in a table is to just delete the table and re-create it. Don't forget that if you do this, you will need to also re-create any constraints, indexes, and foreign keys; therefore you don't tend to drop main tables but ancillary tables and even temporary tables. You will see one form of temporary tables in Chapter 10, when you generate a table using a SELECT…INTO, and this type of table would be one that is more suitable to drop. When you do this, SQL Server will deallocate the table, which is minimally logged. To drop a table in SQL Server, issue the following command:
DROP TABLE table_name
As with TRUNCATE TABLE, DROP TABLE cannot be issued against a table that has a foreign key referencing it. In this situation, either the foreign key constraint referencing the table or the referencing table itself must first be dropped before it is possible to drop the original table.
Summary
This chapter has demonstrated how to add and remove data by looking at the INSERT and DELETE statements.
There are different ways the INSERT statement can be executed. An INSERT can be flexible in the data you need to insert into a table, such as the order of columns, when there are default values, and even inserting multiple rows. How tables are defined can aid insertions through the use of NULLs and constraints, and so table design does form part of data manipulation.
The use of transactions for inserting and deleting data should be part of a large proportion of your coding so that you ensure consistency of your data. A transaction is not always required, but when one is used, ensure that you process your data against the tables in the same order to avoid deadlocks.
How to delete all the rows within a table using the DELETE statement was demonstrated. In Chapter 10, you will see how you can combine a WHERE filter to reduce and specify a single row or range of rows to delete.
Finally, the removal of every record within a table was also shown, along with dire warnings if you get it wrong. Really, use the TRUNCATE TABLE command only in development or with the utmost, extreme care within production.
