Interface Builder is Cocoa’s main development tool for creating user interfaces for your applications. It lets you graphically design the windows that your application will use, together with all of their associated menus, buttons, sliders, and other objects. After you’ve put together the basic interface for your application, IB lets you “wire” (connect) together the parts (objects) and save all these specifications so that your application can use them when it runs.
This chapter introduces you to IB. We’ll build a very simple interface for an application and test it with IB’s Test Interface command. We won’t use this interface beyond this chapter; we won’t even save it. Our only goal here is to give you a sense of the ease and power of IB.
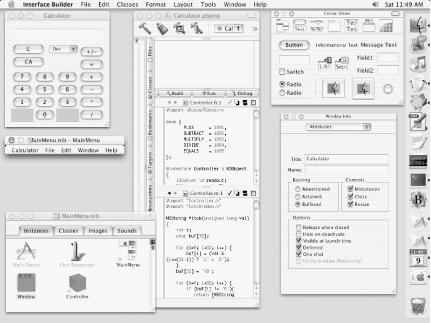
Let’s start by taking a look at a typical Cocoa developer’s screen, shown in Figure 3-1. The application being built is a simple calculator, and the IB development tool is the active application. The window at the top left that looks like a calculator is the interface for the calculator application under development. Similarly, the small window below the calculator window is the menu interface for the calculator application. The window at the bottom left and the two windows near the Dock are IB development support windows (and therefore aren’t part of the calculator application itself ). In the center of the screen is a Project Builder window containing source code for the calculator application. We’ll use both PB and IB in Chapters Chapter 5 through Chapter 8 to create this very calculator application. An important icon in the Dock is the icon for IB.
At first glance you might think of IB as only an application prototyping tool. While IB can be used for prototypes, its primary use is to build the actual graphical user interfaces for Cocoa applications. IB is much more than a prototyper; it is an integral part of the Cocoa programming environment.
IB works together with PB to provide a skeleton of source code to which a developer can add application-specific code. Note the hammer in PB’s icon.
To keep things simple, we won’t even use PB or build a complete project until the next chapter. However, in this chapter we do hope to delight you by demonstrating the powerful object-oriented development environment of Cocoa.
Launch IB by clicking its icon in your Dock (or Finder).
Choose Interface Builder → Hide Others to simplify your screen.
Your screen should look similar to the screen shot in Figure 3-2. IB’s main menu is at the top of the screen, its Starting Point window is on the left, and its Palettes window is on the right of the screen. The windows on your screen may be in different locations, and the Palettes window may show a different palette from the Cocoa-Menus palette shown in Figure 3-2 (click the buttons in the Palettes window toolbar to change the palette). You can specify which windows show up at launch time in IB’s Preferences dialog. Also, as with many Mac OS X applications, IB will remember its state from when it was last terminated.

Now that we’ve launched IB, we can start building our own application.
Make sure that Cocoa → Application is selected in IB’s Starting Point window (as in Figure 3-2), then click the New button.
The screen has now become more interesting, with the addition of three new items (see Figure 3-3). Near the top of the screen in Figure 3-3 is an empty window titled “Window” (again, note that the locations of these windows on your screen may differ slightly). On the left in the middle of the screen is a menu bar titled “Untitled - MainMenu”. Don’t try choosing commands from this menu right now — it’s the main menu for the application that you are building. In subsequent chapters we’ll show how you can tailor this menu with commands and submenus to suit a particular application.
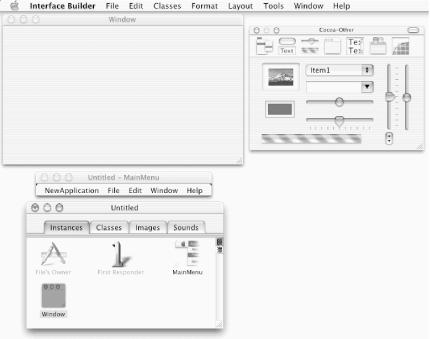
In the lower-left corner of the screen in Figure 3-3 is the Nib File window for the new application. The Nib File window and menu are titled “Untitled”, because you have yet to give the application a name. A nib is a file that contains information about an application’s interface; we’ll discuss nib files in great detail later. (Note that the Palettes window at the right in Figure 3-3 shows a new palette, the Cocoa-Other palette. We clicked the third item from the left in the Palettes window toolbar so you could see this palette in the figure).
The icons in the Nib File window under the Instances tab in Figure 3-3 (e.g., File’s Owner) represent predefined objects available to your new application. If you add more windows or panels to your application, icons representing these objects will also appear under the Instances tab in the Nib File window. When clicked, the other tabs (Classes, Images, Sounds) in this window show other resources available for your application. If there are too many objects to be displayed in the Nib File window, you can drag the window’s vertical scroll knob to see them all. You can also resize this window if you want. Most windows that have a scroller should be resizable; this is important to remember when you start designing your own applications.
Let’s look at the individual objects under the Instances tab for a new application, like the one shown in Figure 3-3:
- File’s Owner
In this example, the File’s Owner icon represents the main object in charge of running your application. This object is called “NSApp” and is of the NSApplication class type. We’ll go into more detail about what this object is and what it does later in this book. For now, just think of this icon as the object that controls the nib.
- MainMenu
The MainMenu icon represents the new application’s menu structure. At this point it consists of the five submenus (NewApplication, File, Edit, Windows, and Help) shown in the associated menu in the middle of Figure 3-3. These menu commands don’t do anything significant until you test or run the application.
- Window
The Window icon in the Nib File window represents the application’s main window — the bland window titled “Window” that IB automatically created when you chose Cocoa → Application. The Nib File window will contain an icon for every standard window and panel in your application. If a window or panel in the application you’re building isn’t visible (e.g., if it’s behind another window or was closed to simplify the screen), you can make it visible by double-clicking its icon in the Nib File window.
- First Responder
A responder is an object that receives and responds to Cocoa events. Most of these events come from the keyboard or the mouse. The First Responder icon represents the object that will receive keyboard events. This is usually the active control of your application’s key window — that is, the object inside the window (or dialog) with the highlighted title bar that will receive keyboard events. As your application executes, the First Responder changes based on user events. Being able to send messages to the First Responder, rather than to a specific object, is one of the many very useful features in Cocoa!
We’ve discussed the contents displayed under the Instances tab in IB’s Nib File window. Next, we’ll discuss what’s under the Nib File window’s other three tabs:
- Classes
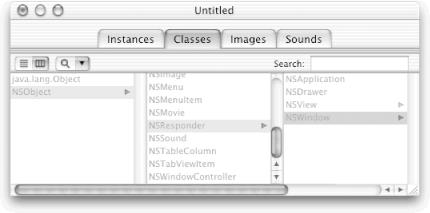
The Classes tab in the Nib File window shows the hierarchy of all the Objective-C classes that your new application knows about (see Figure 3-4). Classes define and create objects such as windows and buttons, as we’ll see in subsequent chapters. IB’s Classes menu commands work together with the classes in this hierarchy. You can add, modify, and perform other operations on classes within IB. In Figure 3-4, you can see the hierarchy of classes for the NSWindow class. We’ll discuss this hierarchy in more detail in later chapters.
- Images
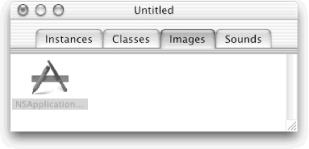
The Images tab in the Nib File window displays representations of the icons and other images that are available to the application. When you click the Images tab, IB will display the available images in the Nib File window, as shown in Figure 3-5.
Every Cocoa application is provided with a system icon called NSApplicationIcon — the generic application icon that shows up in the Dock and elsewhere for a running application that has no custom application icon. You can add your own image by dragging its file icon from your Finder and dropping it in the Nib File window. Alternatively, you can add an image by pasting it into this window.
All of the icons in the Instances, Images, and Sounds views in the Nib File window have their names displayed below them. Some of the names are in black, while others are in dark gray. The names in gray cannot be changed, but you can change a name in black by double-clicking it and typing a new name. Changing an icon’s name in the Nib File window has no effect on the rest of the application you’re building. For instance, if you change the name of the icon “Window” to “Steve’s Window”, the window itself will still be titled “Window”. These icon names in the Nib File window are generally only for the convenience of the developer.
- Sounds
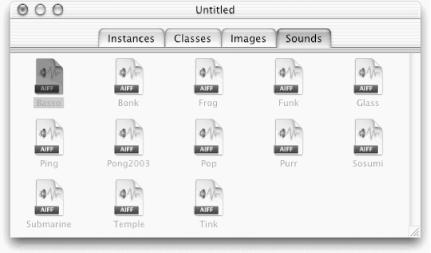
The Sounds tab in the Nib File window displays representations of the sounds that are available to the application. When you click the Sounds tab, IB will display icons for the available sounds in the Nib File window, as shown in Figure 3-6 (we’ve resized the window so you can see all of the icons).
Sounds are an integral part of many Cocoa applications. Used appropriately, sounds can make an application easier and more fun to use. One very appropriate use of a sound is to alert the user to an unexpected event. For example, when you try to copy a file to a folder that contains a file with the same name, the Finder alerts you by playing your chosen system beep.
Every Cocoa application is provided with numerous system sounds, such as Basso, Bonk, and Frog. These sounds are located in the
/System/Library/Soundsfolder. As with the Images tab view, you can add your own sounds to the application by dropping their file icons in the Nib File window.