Before we can get into the realms of building our home security system, there's a bit of preparation work needed to get our Raspberry Pi up and running. So, we're going to go through the initial steps needed to get our Pi ready to be worked on.
In this chapter, we will cover the following topics:
- Exploring the different versions of the Raspberry Pi that are available
- Choosing the right Raspberry Pi version for your system
- Preparing the SD Card with the Raspbian Operating System
- Learning how to remotely access the Raspberry Pi over your home network
- Updating our operating system with the latest packages
- Exploring the time-keeping options on the Raspberry Pi
- Setting the user and root passwords to secure our Raspberry Pi
Since the Raspberry Pi was released in 2012, there have been several versions of the mini-PC board released. I'll go though each of the versions released with their respective features so that you can choose which one is suitable for your particular project.
The good news is that it doesn't really matter which version you use in terms of power, as our home security system doesn't necessarily need loads of processing power, depending on what you want your system to do, of course). You might have an older board kicking about that will work for you.
The other piece of good news is that the GPIO interface pin layouts are the same across all the versions. The later versions have more pins, but the original 26 pins still remain in the same place.
The latest Raspberry Pi Version 2
The baby of the family is the Model A; it was released as a lower-cost version of the Model B, shown in the following section. Its main differences from the Model B are that it features just 256Mb of memory and has no Ethernet port; so if you want to connect this board to a network, you are limited to using a USB Wi-Fi dongle.
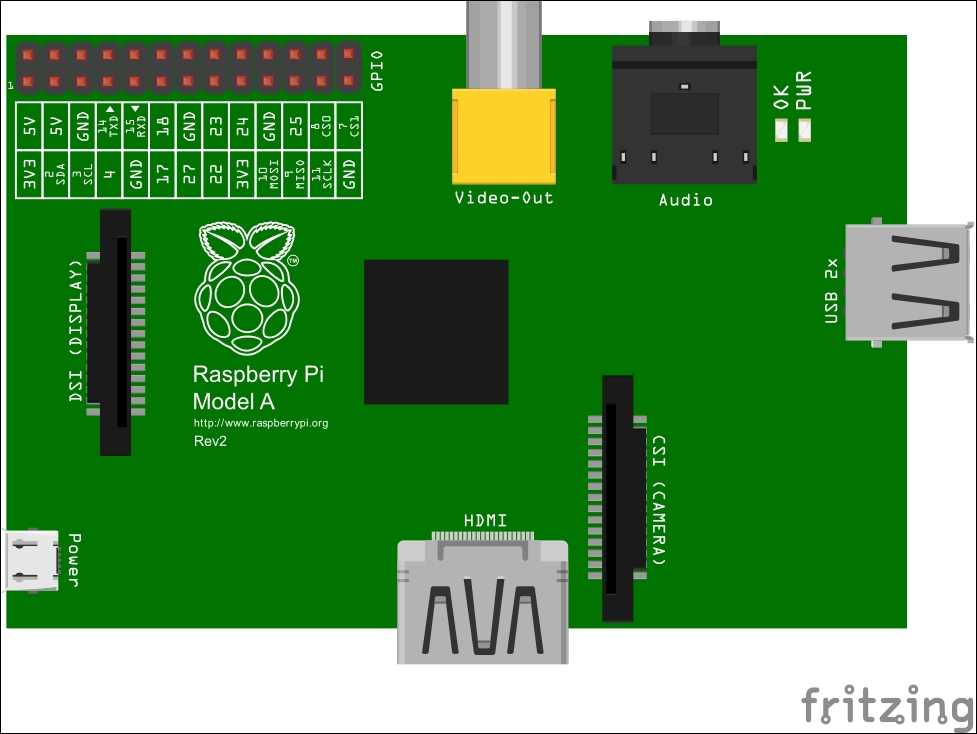
The Raspberry Pi Model A Board Layout
This was the first version of Raspberry Pi to be released; an updated revision, which improved the power system and USB port protection, came later. It features 512Mb of memory and has an Ethernet port for connecting to your network. This is probably the most common version used, and having the Ethernet port is incredibly useful, especially to get up and run quickly in order to set up and configure your Pi without the need for a keyboard and monitor.
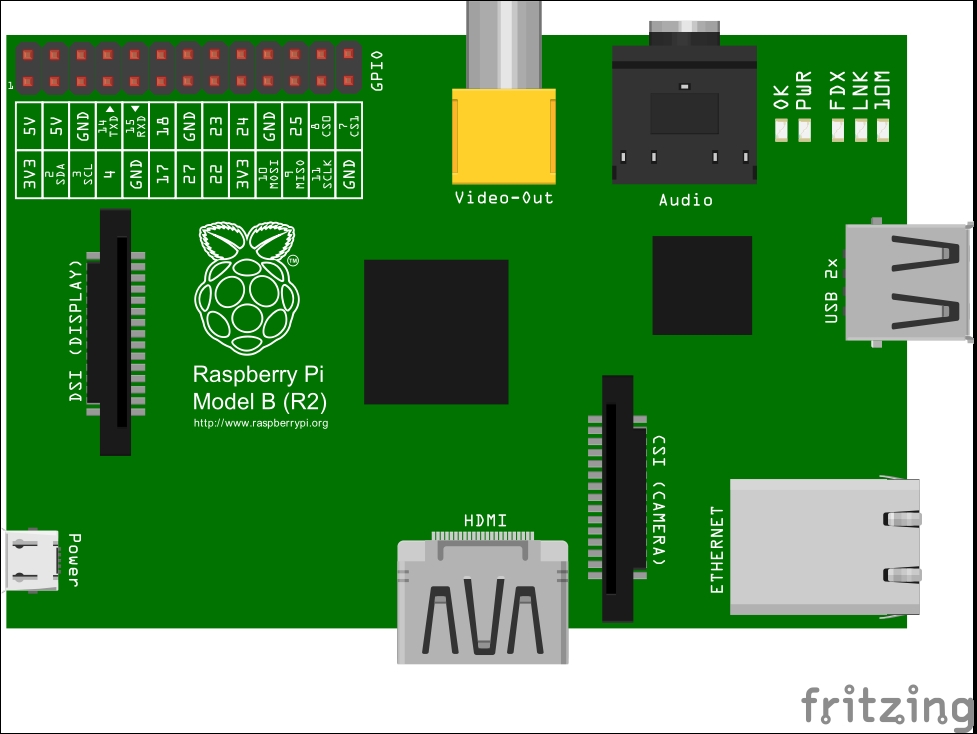
The Raspberry Pi Model B Layout
In 2014, the Raspberry Pi Foundation released a new version of the board that had some fundamental changes as compared to the previous version. The most fundamental changes were the board layout, form factor, and mounting points—much to the dismay of the many enclosure and accessory manufacturers out there.
In fact, we were in the middle of prototyping an enclosure for a commercial product that we were developing based on the Raspberry Pi—fortunately we caught wind of the board change in the nick of time and were able to change our enclosure to support the upcoming model B+.
The main electronic changes to this board are the addition of 2 more USB ports that can deliver more power to peripherals, an expanded GPIO interface, and the removal of the composite video port that is now consolidated into the audio jack. It also now uses a micro SD card with a better card slot.
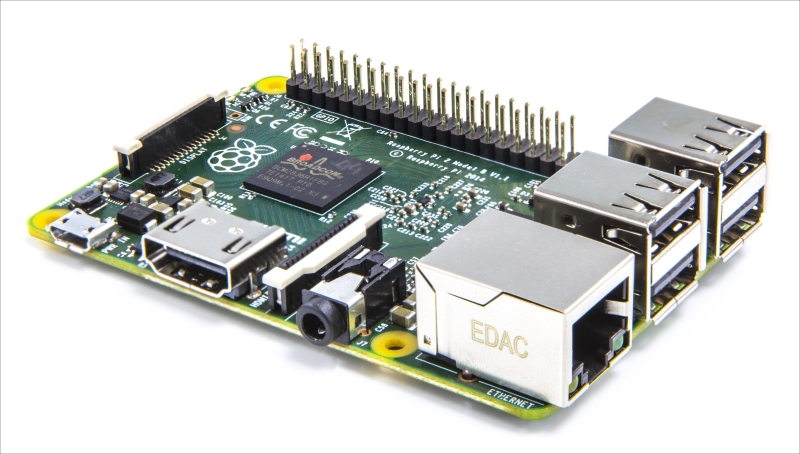
In February 2015, a more powerful Raspberry Pi was released: the Raspberry Pi Model 2. It's similar to the Model B+ in terms of form-factor and interfaces, but is now reportedly 6-times faster than the Model B/B+ with its upgraded ARM processor and 1Gb of memory.
At the same low cost of less than £30, it's a fantastic little board and a great power-house for embedded systems.
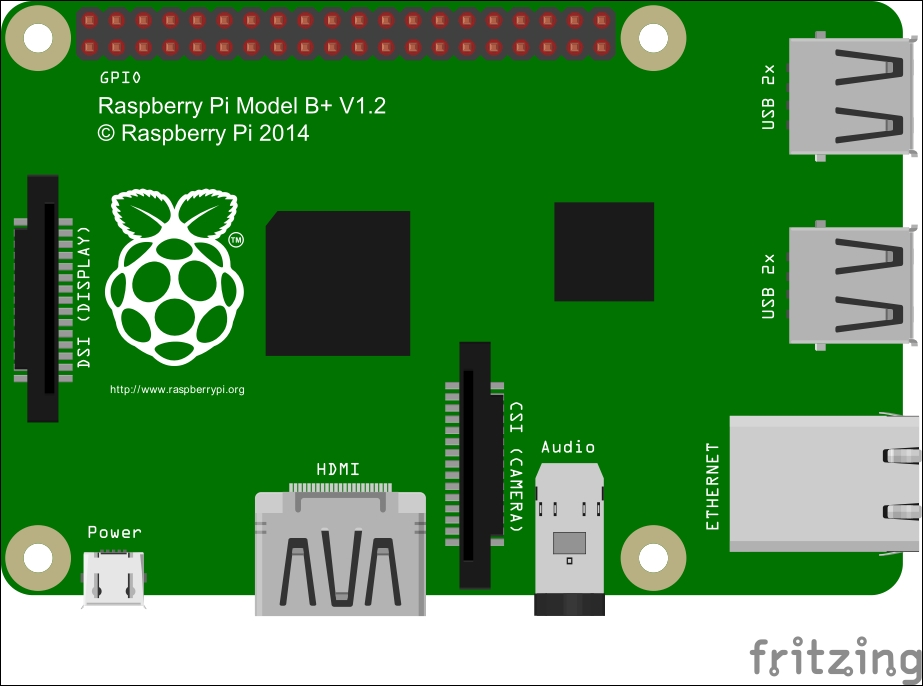
The Raspberry Pi Model B+ and Model 2 Layout
|
Model A |
Model B |
Model B+ |
Version 2 | |
|---|---|---|---|---|
Processor |
ARM1176JZF-S 700 MHz processor, VideoCore IV GPU |
Quad-core ARM Cortex-A7 CPU and a VideoCore IV dual-core GPU | ||
Memory |
256Kb |
512Kb |
512Kb |
1Gb |
USB Ports |
2 |
2 |
4 |
4 |
Ethernet |
No |
Yes |
Yes |
Yes |
No.GPIO Pins |
26 |
26 |
40 |
40 |
Storage |
SD Card |
Micro SD Card |
Micro SD Card | |
Essentially, any version of the Raspberry Pi will work with the modules presented in this book, but if you want to exploit features such as the camera, which may require more processing power and memory, or want to have an Ethernet connection, you'll need to use the Model B.
If you want to start plugging additional stuff into the USB port, such as a GSM modem, then I recommend that you use the Model B+ as it delivers more power to those kinds of devices without the need for additional USB hubs.
If you want to do more processing with video and images from an attached camera, or want to connect lots of things, then go for the latest Model 2 board. I'm going to assume that's the one you have chosen for this project, and that's the one I'll be using throughout this book; just be aware of any limitations if you choose to use an earlier model.
Note
The Raspberry Pi Foundation site has more detailed information about each model. You can visit it at https://www.raspberrypi.org/products.