Instead of using the Raspberry Pi Camera Module, it's also possible to use a standard USB webcam to take still images. You should be aware though that the dedicated camera module is far superior to a USB webcam in terms of image quality. Although, you may already have a webcam knocking about in your box of bits, so why not try it?
After you've connected your webcam to a USB port on your Pi, you can check whether it's been recognized using the lsusb command:
$ lsusb
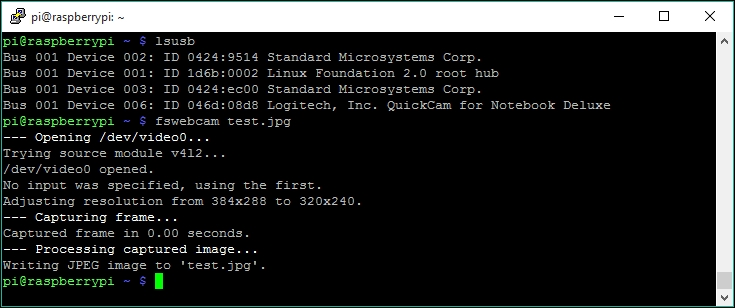
I'm using a Logitech webcam that gets reported as follows with lsusb (Device 006):
pi@raspberrypi ~ $ lsusb
Bus 001 Device 002: ID 0424:9514 Standard Microsystems Corp.
Bus 001 Device 001: ID 1d6b:0002 Linux Foundation 2.0 root hub
Bus 001 Device 003: ID 0424:ec00 Standard Microsystems Corp.
Bus 001 Device 006: ID 046d:08d8 Logitech, Inc. QuickCam for Notebook Deluxe
Note
Not all webcams will work with the Raspberry Pi. Even though it may be recognized as a USB device, it might not actually work properly with the operating system and create a video device (for example, /dev/video0). For example, an old cheap Trust webcam I had appeared as a USB device but wouldn't capture any images.
You can check whether your webcam is likely to work with the Pi by checking your make and model at http://elinux.org/RPi_USB_Webcams.
So, now that the Pi knows that we have a webcam device attached, we can use the fswebcam utility to capture image frames. You can find out more about
fswebcam from the developer's site at http://www.sanslogic.co.uk/fswebcam.
Install fswebcam with the following:
$ sudo apt-get install fswebcam
You can now test the webcam by capturing a still image, which can be done by running the following command:
$ fswebcam test.jpg
You should expect to see output similar to the following:
fswebcam doesn't take video streams, but you can set it up to take a series of frames at regular intervals. For example, to take a snap every 10 seconds, you can use the following command:
$ fswebcam frame.jpg -l 10
An example of how this would be useful can be demonstrated by setting the webcam to take a snap every few seconds in the background (the –q switch runs fswebcam in the background). When our security system is triggered, we could then take the latest image snapped with the webcam which could be looking down your pathway.
For the purpose of putting together our entire system later in this book, we'll be focusing on the Raspberry Pi Camera Module, but you can always replace the code with the previous examples if you want to use USB webcams instead.
You'll notice that fswebcam, unlike raspistill, has the ability to overlay the images with timestamp information, so you don't need to worry about overlaying text as we did previously. Look at the fswebcam command line options for more information.