The Raspberry Pi only boots from an SD card (or micro SD card for the B+ and v2 models), and cannot boot from an external drive or USB stick (well that's not strictly true, but is beyond the scope of this book).
It's recommended that you use a Class 10 SD card for performance, but a Class 4 or 6 card will be fine for this project. You'll need to have a minimum card size of 4Gb.
Now that we have our Raspberry Pi board and SD card to hand, we need to prepare the SD Card specifically for our home security system. We're going to use the standard Raspbian operating system as there really is no reason to use any other distribution; it's the de facto choice for the Raspberry Pi.
You'll need to grab the latest Raspbian OS image from the Raspberry Pi site at https://www.raspberrypi.org/downloads.
Download the Raspbian OS ZIP file containing the image to your PC.
Once downloaded, unzip the file and you'll have the file, 2015-09-24-raspbian-jessie.img.
The next thing to do is burn this image to your SD card…
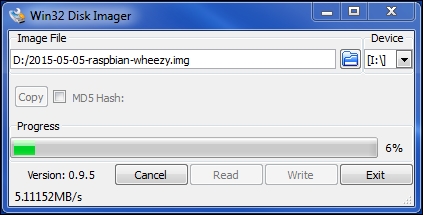
On a Windows PC, the best way to burn the image to your SD card is to use the Win32 Disk Imager utility. This can be downloaded from http://sourceforge.net/projects/win32diskimager.
It doesn't have an installer, and launches directly from the EXE file.
Now, it's time to create your SD card image:
- Insert your SD card into the PC and launch the Win32 Disk Imager.
- Select the SD card device drive letter (make sure it's right!).
- Choose the Raspbian image file you've just downloaded.
- Click on the Write button to create the SD card image.
On a Linux PC, you'll need to use the gparted and dd utilities to burn the image on your SD card.
Carry out the following steps to create your SD card image:
- Extract
2015-09-24-raspbian-jessie.imgto yourHomefolder. - Insert your SD card into the PC.
- If you're not already in a shell terminal window, open one (you can use Ctrl + Alt + T on most graphical-based desktop systems).
- Type the following command in the shell terminal:
$ sudo fdisk -lIn the list check, your SD card appears as a drive device (for example,
/dev/sdb). It's crucial that you ensure you use the right device in the next step. We'll assume that your device is/sdb. - To burn the image to the SD card, type the following command:
$ sudo dd if=2015-09-24-raspbian-jessie.img of=/dev/sdb - Hit Enter and go make a cup of tea or coffee as this will take a while. You'll know that it's finished when the command (
$) prompt re-appears. - When the command prompt does re-appear, type the following command:
$ sudo sync - Once that command has finished, you can remove the SD card from the PC.
You're now ready to boot up your Raspberry Pi. Pop your shiny new SD card into it and plug in the power.
Assuming that you have a monitor attached to your Pi, you should see your system booting up nicely. Although you could wait for it to boot up and connect to it via a terminal session (we'll look at that later), I recommend that you connect a monitor to it, at least in the first instance, just to make sure everything is working correctly.
In the new Jessie version of Raspbian, you'll boot straight into a desktop GUI, which is a major change from previous versions, where you'd be taken to the raspi-config utility, the first time the system is run, where you'd set up your Pi, and importantly, expand the file system to use the entire space available on your SD card.
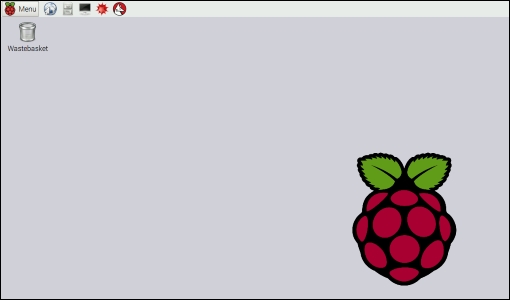
Debian Jessie boots into the GUI by default
When you first create your Raspbian SD card, you'll only be left with about 200Mb of space in the file system, regardless of the size of your SD card. This is not much use, so we want to expand the file system so that it uses all of the available space on the card.
Fortunately, this is very easy on the Raspberry Pi now, as this function is available in the Raspberry Pi Configuration Tool on the desktop.
To access the new configuration tool, go to Menu and select Preferences | Raspberry Pi Configuration.
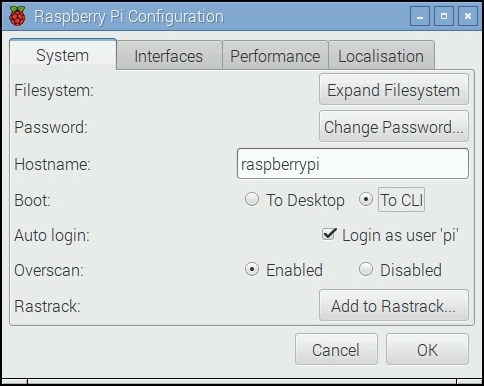
The new Raspberry Pi Configuration Tool
Anyway, now we click on the Expand Filesystem button, and in a couple of seconds, you'll see a confirmation message. The filesystem will be expanded when the system next reboots.
If you have an older version of Raspbian, or you're not using the desktop GUI, then you'll need to use the raspi-config utility (which is still better than the old days when we had to do this manually in the shell). The first time you boot up, you'll be taken straight to the raspi-config utility.
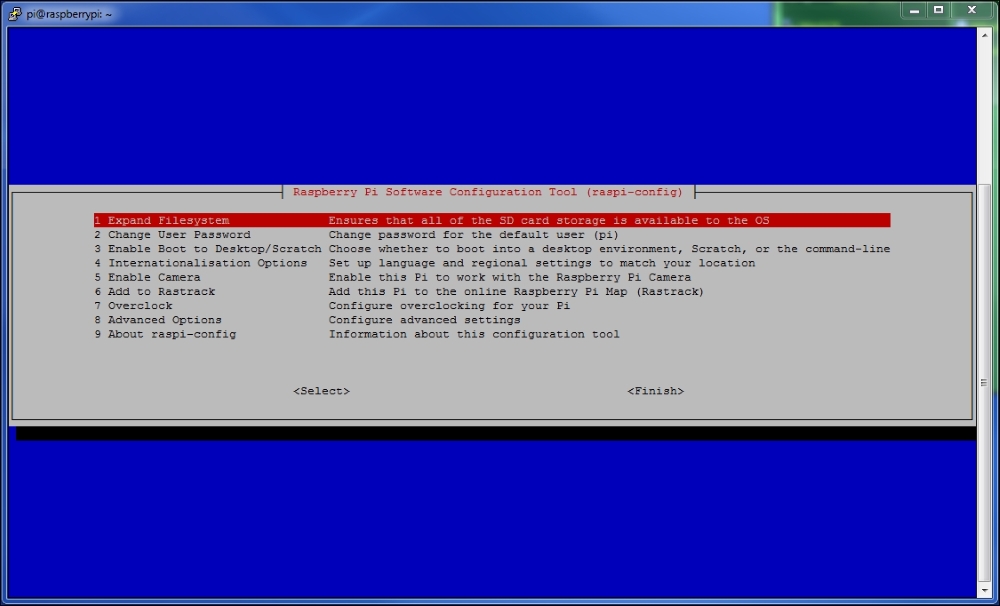
The first option is the Expand Filesystem option; select this and you'll see various commands scrolling up the screen. Once it's finished, you'll see the following message:
Root partition has been resized.
The filesystem will be enlarged upon the next reboot
Click on OK.
Select Finish on the config screen and reboot your Pi when prompted.
After your Pi reboots with its fuller file system, you'll be taken straight to the shell prompt where you can log in with the default user and password.
Login: pi
Password: raspberry