The standard Raspberry Pi camera is great for taking daytime snaps of people walking up the garden path, but when it comes to night time shots, it's not really suitable. There are two ways of dealing with this: the first is to illuminate the capture area with a bright light when the PIR detector is triggered, and the second is to use the Raspberry Pi NoIR camera module and an infra-red LED array to let the camera see in the dark. More about that in a minute.
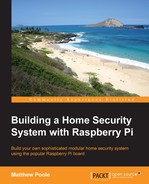
The Raspberry Pi NoIR camera module; it looks similar to the standard model
In order to switch on a light or LED array from the Raspberry Pi GPIO or our port expander circuit, we need something that will allow us to drive higher currents and voltages than can be provided by the GPIO ports alone.
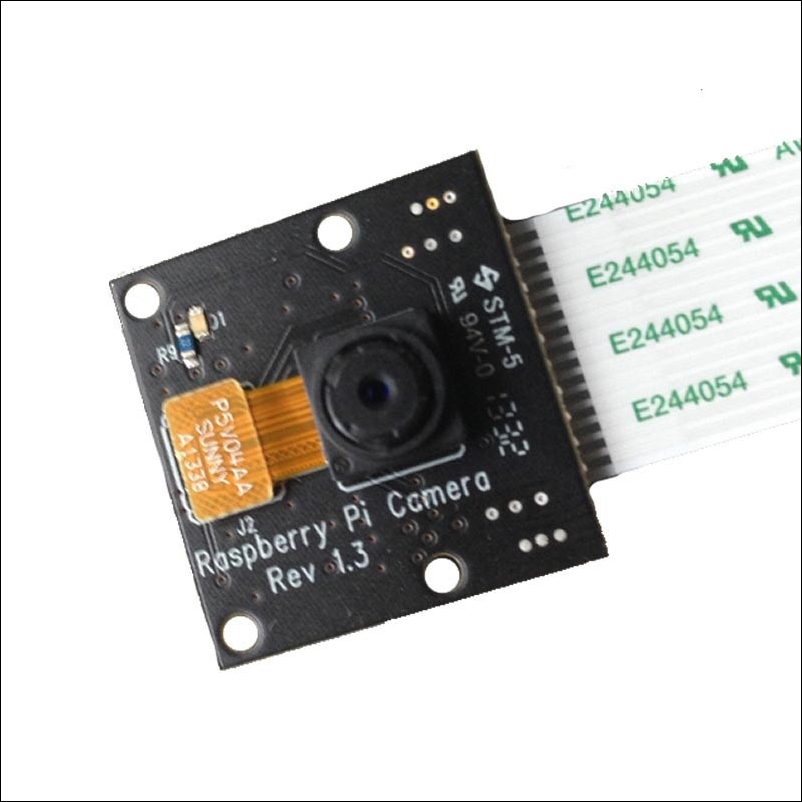
A good candidate for this is the TIP120 Darlington transistor, which will allow us to switch on and off loads of up to 80V and 5 A from our GPIO pins. In our full system later on, we're going to use Port B of our MCP23017 port expander to control outputs, but the principle stands for any of the GPIO outputs available to us.
TIP120 transistors can be bought cheaply but can drive large loads
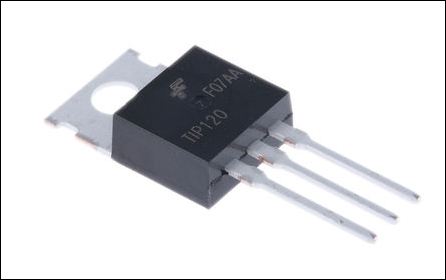
The following circuit shows how we can drive big loads from our GPIO port outputs.
In our example circuit, we're using a GPIO output pin to control the base of our transistor via a 220 ohm resistor. When the GPIO pin goes high, the transistor is switched on and allows the 12V circuit to flow through the LED array.
In the preceding circuit, there is no current limiting for the LEDs because they are connected in series, and so with nine of them, each dropping about 1.5V across, this is about right for a 12V supply (yes I know I've only included six LEDs here but it's just for illustration). Remember to adjust for your particular needs. This circuit could easily drive other loads, such as bulbs or sounders.
Note
If you intend to drive high power loads, you will probably need to attach the TIP120 to a heat sink that will dissipate any heat and prevent it from over-heating and burning out. In our circuit that was demonstrated previously, however, you probably won't need one as we're only driving a couple of hundred milliwatts at most.
Expanding once again on our elaborate light switch from previous chapters, we can once again write a Bash script that will switch on our camera light, take a snap with the camera, and e-mail it to us when a PIR detector is triggered.
For the following script, we're assuming that the output controlling the TIP120 transistor is the Raspberry PI GPIO17 pin (D0 or pin 11 of our connector), which replaces the LED in our earlier set-up. The input from the PIR trigger is, again, connected to the GPA0 (port A, data pin 0) of our MCP23017 port expander. All the other inputs are tied low, as before, using 10 K resistors:
#!/bin/bash

#set up the High Load GPIO pin
sudo echo 17 > /sys/class/gpio/export
sudo echo out > /sys/class/gpio/gpio17/direction

#set up port expander Port A for inputs
sudo i2cset –y 1 0x20 0x00 0xFF

#clear the output by default to switch light off
sudo echo 0 > /sys/class/gpio/gpio17/value


# loop forever
while true
do
  # read the sensor state
  SWITCH=$(sudo i2cget –y 1 0x20 0x12)

  #PIR is normally closed so pin is held high
  if [ $SWITCH != "0x01" ]
  then
    #PIR was triggered – pin taken low

    #switch on lamp driver
    sudo echo 1 > /sys/class/gpio/gpio17/value
    sleep 0.5

#take a still image
    sudo raspistill –o –image.jpg –h 768 –w 1024 –q 25

    #email the image
    mpack –s "Security Alert Photo" test.jpg [email protected]

    #switch off the lamp driver
    sudo echo 0 > /sys/class/gpio/gpio17/value

  fi
  #short delay
  sleep 0.5
done
pir-camera-trigger.sh
You'll now see that we've started developing the foundations of the software that will control our home security system.
If you don't want to illuminate an area before capturing an image, you can use infra-red lighting in conjunction with a compatible camera. The standard Raspberry Pi camera module won't work with infra-red lighting because it contains an infra-red filter, but we can use the NoIR version of the camera module instead.
The Raspberry Pi NoIR camera module is exactly the same as the standard one, except that it doesn't have an infra-red filter built in, which means it will see in the dark with the aid of infra-red lighting. This makes it good for watching badgers at night as well as for use in our home security system.
You will need an infra-red LED array or cluster to invisibly illuminate the area you want to capture with the camera. These are readily available in various form factors and intensities, or you can build your own using individual infra-red LEDs purchased from an electronics store.
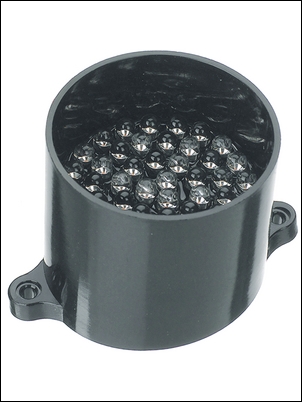
The Kingbright infra-red LED cluster runs from a 6V supply, which means you can connect two in series—one on either side of the camera.
Connecting and driving the LED cluster modules works exactly the same as our illuminating light above, using the TIP120 driver circuit. The only difference is that we humans can't see when the LEDs are on.