
6
Acquiring Host-Based Evidence
Host systems are the targets of malicious actions far too often. Host systems represent a possible initial target so that someone can gain a foothold in the network or a pivot point for additional attacks, or the end goal of threat actors. As a result, incident response analysts should be prepared to investigate these systems. Modern operating systems such as Microsoft Windows create a variety of evidentiary artifacts during the execution of an application, when changes to files are made, or when user accounts are added. All these changes leave traces of activity that can be evaluated by incident response analysts. The amount of data that’s available to incident response analysts is increasing as storage and memory in even the lowest-cost consumer systems continue to expand. Commonly available systems are routinely manufactured with extensive memory and storage in terabytes; there is a great deal of data that could assist incident responders in determining a root cause. As a result, incident response analysts should be prepared to acquire different types of evidence from systems for further analysis.
We will cover the following topics in this chapter:
- Preparation
- Order of volatility
- Evidence acquisition
- Acquiring volatile memory
- Acquiring non-volatile evidence
Preparation
In terms of preparation, incident response analysts should have the necessary tools at their disposal to acquire host-based evidence. The techniques that will be discussed within this chapter do not rely on any highly-specialized technology, but rather on tools that can be acquired for little or no cost. It is critical that the tools that are selected for the acquisition of evidence are those that are provided by reputable sources, have been proven effective by other CSIRT personnel, and have been validated for efficacy prior to use. Outside of software, the only additional hardware that is required is external hard drives and common desktop computers.
When supporting an enterprise environment, it is a good idea for incident response personnel to have a solid understanding of the types of systems that are commonly deployed. For example, in an enterprise that utilizes strictly Microsoft operating systems, the tools that are available should have the ability to support a wide range of versions of the Microsoft OS. In other circumstances, incident response personnel may support an enterprise where there is an 80/20 split between Microsoft and Linux systems; incident response personnel should be prepared with tools and techniques that support the acquisition of evidence.
Many of the tools and techniques that will be discussed in this chapter require administrator privileges. Incident responders should be provided with the necessary credentials to perform these tasks. It should be noted that analysts should only use existing accounts and that adding accounts to a possibly compromised system may make evidence inadmissible in a judicial proceeding. One technique is for incident response analysts to be given individual credentials that are enabled only during an incident. This allows the organization to separate the legitimate use of credentials from possible malicious ones. This also allows the incident response team to recreate their actions. It is worth noting that highly technical adversaries will often monitor the network they are attacking during an active compromise to determine whether they are being detected. Therefore, these credentials should not indicate that they are tied to the incident response analysts or other personnel investigating a possible breach.
Order of volatility
Not all evidence on a host system is the same. Volatility is used to describe how data on a host system is maintained after changes such as logoffs or power shutdowns. Data that will be lost if the system is powered down is referred to as volatile data. Volatile data can be data in the CPU, routing table, or ARP cache. One of the most critical pieces of volatile evidence is the memory currently running on the system. When investigating incidents such as malware infections, the memory in a live system is of critical importance. Malware leaves a number of key pieces of evidence within the memory of a system and, if lost, can leave the incident response analyst with little or no room to investigate. This can include such artifacts as registry data, command history, and network connections.
Non-volatile data is the data that is stored on a hard drive and will usually persist after shutting down. Non-volatile data includes Master File Table (MFT) entries, registry information, and the actual files on the hard drive. While malware creates evidence in memory, there are still items of evidentiary value in non-volatile memory. The following diagram shows the different levels of volatility of digital evidence that should be taken into account when determining the order of acquisition:

Figure 6.1 – Digital evidence volatility
In the next section, we will learn how to collect evidence.
Evidence acquisition
There are a variety of methods that are used to not only access a potential evidence source but also determine the type of acquisition that can be undertaken. To define these methods, it is important to have a clear understanding of the manner and type of acquisition that can be utilized:
- Local: Having access to the system under investigation is often a luxury for most enterprises. Even so, there are many times when incident response analysts or other personnel have direct physical access to the system. A local acquisition can often be performed via a USB or other device and, in some circumstances, using the system itself.
- Remote: In a remote acquisition, incident response analysts leverage tools and network connections to acquire evidence. A remote acquisition is an obvious choice if incident response analysts are dealing with geographical challenges. This can also be useful if incident response analysts cannot be on-site immediately. (The next chapter will focus on remote evidence acquisition.)
- Live acquisition: A live acquisition of evidence occurs when the incident response analyst acquires the evidence from a system that is currently powered on and running. Some of the techniques that will be demonstrated in this chapter have to be deployed on a live system (for example, capturing running memory). Completely acquiring digital evidence from a live system may be a technique that’s necessary for high-availability environments where a suspected system cannot be taken offline. These techniques allow incident response analysts to acquire and analyze evidence to determine whether a system is indeed compromised.
- Offline acquisition: The offline acquisition method is the one that’s often used by law enforcement agencies to preserve digital evidence on the hard drive. This technique requires that the system be powered down and the hard drive removed. Once the drive is accessed, specialized tools are utilized to acquire the hard drive evidence. There are some drawbacks to focusing strictly on offline acquisition. First is the loss of any volatile memory. Second, it may be time-consuming to acquire a suspect system’s hard drive, image it, and process the image for investigation. This may create a situation where incident responders do not have any idea of what has transpired for more than 24 hours.
Depending on the type of incident and any constraints in time or geography, incident response analysts should be prepared to perform any of these types of acquisitions. The best-case scenario is for a CSIRT to have the ability to perform both live and offline acquisition on any suspect system. This provides the greatest amount of evidence that can be analyzed. In terms of preparation, analysts should have the necessary tools and experience to conduct evidence acquisition through any of these methods.
To perform local acquisition, incident response analysts require an external hard drive or USB drive with sufficient space for the capture of at least the running memory of the system or systems that are being investigated, along with other files if deemed necessary. In order to ensure the integrity of the evidence being collected, it is advisable to configure the USB drive into two partitions. The first partition should contain the necessary tools to perform the evidence acquisition, while the second should act as a repository for the evidence. This also allows the incident response analyst to move evidence to a more permanent form of storage and subsequently, wipe the evidence partition without having to reinstall all the tools.
Evidence collection procedures
There are a number of parallels between digital forensics and other forensic disciplines such as trace evidence. The key parallel is that organizations acquiring evidence need to have a procedure that is sound, reproducible, and well documented. The following are some guidelines for the proper collection of digital evidence:
- Photograph the system and the general scene: One of the key pieces of equipment that can save time is a small digital camera. While it may seem overkill to photograph a system in place, in the event that actions that have been taken by incident responders see the inside of a courtroom, having photos will allow for proper reconstruction of the events. One word of caution, though, is to make sure that you utilize a separate digital camera. Utilizing a cell phone may expose the device to discovery in the event of a lawsuit or criminal proceeding. The best method is to snap all of the photos necessary at a convenient time and place and transfer them to permanent storage.
- Determine whether the system is powered up: If the system is powered on, leave it on. If the system is powered off, do not power it on. Several changes take place when turning a system on or off. If the system is powered on, the volatile memory will be available for capture. In addition, in the case of full disk encryption, leaving the system on will allow the responder to still acquire the logical disk volumes. If the system is turned off, preserving this state ensures that any evidence in the non-volatile memory is preserved. If incident response personnel feel that the system may be a danger to other systems, simply remove the network connection to isolate it.
- Acquire the running memory: This is a critical piece of evidence that can produce a wealth of data concerning running processes, DLLs in use, and network connections. Due to this, procedures for acquiring memory will be covered extensively in this chapter.
- Acquire registry and log files: While these files are non-volatile in nature, having near-immediate access is beneficial, especially when investigating malware or other exploitation means.
- Unplug the power from the back of the system: If the system is a laptop, remove the battery as well. This preserves the state of the system.
- Photograph the back or bottom of the system to capture the model and serial number: This procedure allows the incident response analyst to capture any information that’s necessary for the chain of custody.
- Remove the cover to the system and photograph the hard drive to capture the model and serial number: Again, this aids in the reconstruction of the chain of custody.
- Remove the hard drive from the system and package it in an anti-static bag: Secure the drive in a sealable envelope or box. Anti-static bags will protect the hard drive, and the packaging should ensure that any attempt to open it will be evident. This can be facilitated through purpose-designed evidence bags or simple mailing envelopes that can be sealed with tape. The seizing analyst should sign any seals. Furthermore, indicate the incident number, evidence number, date, time, and seizing analyst somewhere on the exterior of the packaging.
- Document all actions: Ensure that dates and times are recorded, as well as which incident response analyst performed the action. Incident reporting is often the last stage of any response. As a result, hours or even days can pass before analysts are able to record their actions. Due to this, pictures and notes that are taken during the initial seizure are invaluable when it comes to reconstructing the sequence of events.
In the next section, we will look at acquiring volatile memory.
Acquiring volatile memory
Traditional digital forensics, or what is often referred to now as dead box forensics, focuses on the hard disk drive that’s been taken from a shut-down system acting as the primary source of evidence. This approach works well when addressing criminal activity such as fraud or child exploitation, where image files, word processor documents, and spreadsheets can be discovered in a forensically sound manner. The issue with this approach is that to properly acquire this evidence, the system has to be powered off, thereby destroying any potential evidence that could be found within the volatile memory.
As opposed to traditional criminal activity, incident responders will find that a great deal of evidence for a security incident is contained within the memory of a potentially compromised system. This is especially true when examining systems that have been infected with malware or exploited by utilizing a common platform such as Metasploit.
Key pieces of trace evidence are often found within the running memory of the compromised system. As a result, before powering down the system and removing the hard drive, it is critical that the running memory is acquired for processing. There are several free and commercial tools that can be leveraged by incident response analysts to acquire running memory. Which tool is used will often be dependent on the techniques and tools used during the analysis phase, which is covered in Chapter 10.
Running memory can be acquired in two ways. First, memory can be acquired locally via a USB device or other writable medium that is directly connected to the suspect system. The other method of acquiring memory is through a remote connection. This can be facilitated through the use of specialized software that performs the acquisition over a network connection (remote acquisition techniques will be covered in the next chapter).
If an incident response analyst has physical access to a potentially compromised system, they have the option of acquiring the memory and other evidence locally. This involves the use of tools that are run from a USB device or a similar removable medium that is connected to the potentially compromised system. From there, the tools are run, and the evidence is collected. A local acquisition is often conducted in conjunction with seizing the hard drive and other evidence from the system. There are several tools that are available for local acquisition. For the purposes of this book, three such tools – Exterro’s FTK Imager, Velocidex’s WinPmem, and Belkasoft’s RamCapturer – will be examined.
When acquiring memory in this fashion, it is advisable to utilize an external drive with sufficient capacity for multiple files. Incident response analysts should make use of a USB device with two partitions. The first of these partitions contains the tools that are necessary to perform the memory acquisition, while the second partition will contain the evidence files. This way, incident response analysts can be sure that the evidence does not become commingled with their tools.
FTK Imager
Exterro’s FTK Imager is a Windows software platform that performs a variety of imaging tasks, including acquiring the running memory of a system. The software can be downloaded at https://www.exterro.com/ftk-imager. Let’s take a look at this platform:
- Once downloaded, install the executable in the Tools partition of the USB drive.
- Open the FTK Imager folder and run the executable as an administrator. (FTK Imager requires the use of drivers and, as a result, requires administrator privileges.) The following window will appear:

Figure 6.2 – FTK Imager main window
- Click on File and then on Capture Memory. This opens the following window:

Figure 6.3 – FTK Imager memory capture
- Browse to the Evidence partition of the USB drive attached to the system and provide a name for the capture file. This name should be a unique identifier such as Laptop1 or Evidence Item 1. Another option that is useful is to use the system name, such as in Figure 6.3. Also, check the Include pagefile checkbox. There might not be any information of evidentiary value within the pagefile, but it may become important later during the investigation (the pagefile will be discussed later on, in Chapter 10).
- Finally, there is the option to create an AD1 file; this is Exterro’s proprietary file format. This file is for the analysis of the captured image using the FTK analysis program. For the purposes of this book, the standard output is sufficient for the analysis that will be performed.
- Once the configuration details have been set, click on Capture Memory and the following screen will appear:

Figure 6.4 – FTK Imager memory capture progress

Figure 6.5 – FTK Imager page file extraction
- After running this, FTK Imager will indicate whether the memory capture was successful or not:

Figure 6.6 – FTK Imager memory capture success
Examining the evidence partition of the evidence drive reveals the two files, as shown in the following screenshot:

Figure 6.7 – FTK Imager output files
Memory file size
Depending on the system, the .mem file may not exactly match the onboard RAM of the target system. In this case, the target system has 16 GB of physical RAM but the .mem file is nearly 2 GB larger. This can occur with operating systems that use virtual memory. In other circumstances, the actual RAM file may be smaller. This is an expected and normal occurrence.
The one disadvantage that FTK Imager has is that it requires a good deal of access to drivers and has several features. This makes moving the tool from system to system difficult. It also significantly reduces the ability to utilize FTK Imager in a script.
WinPmem
On the opposite side of the spectrum from FTK Imager is WinPmem. This is a single command line executable that can be executed in the same way that FTK Imager is executed. The one main difference is that the tool is much easier to script, so it can be deployed across several systems at once or in conjunction with other evidence collection.
WinPmem is a free tool that is available at https://github.com/Velocidex/WinPmem.
Once downloaded, the executable can be placed anywhere the analyst needs. WinPmem is a command line tool so let’s examine the specific commands needed to capture the memory of the running system:
- To acquire the physical memory of the target system, open a Windows Command Prompt instance as an administrator. Typing E:winpmem_mini_x64_rc2.exe -help will produce the following help menu:

Figure 6.8 – WinPmem help menu
- Next, configure WinPmem to acquire the memory of the system by running the following command:
E:winpmem_mini_x64_rc2.exe Acc_LT09.raw
- The preceding command tells WinPmem to acquire the raw memory and output it to a file with the name Acc_LT09.raw, which will be created on the evidence partition of the USB drive in use. After entering the command, hitting the Enter key will produce the following:

Figure 6.9 – WinPmem output
- WinPmem then runs through the entire memory structure. During this process, it will produce the following output:
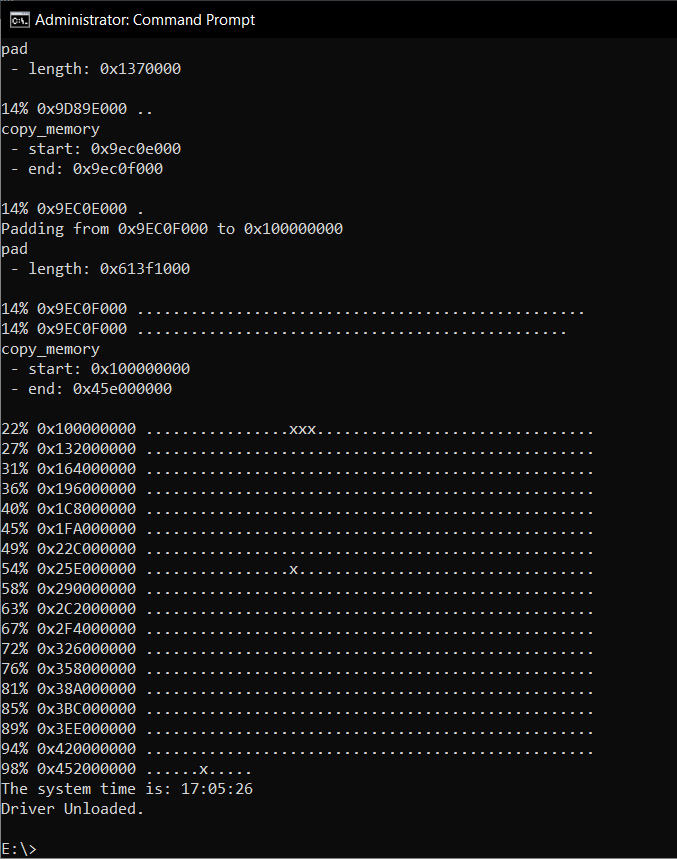
Figure 6.10 – WinPmem output
WinPmem provides the flexibility of a single executable that can be easily copied and deployed across multiple systems. The obvious drawback is the lack of a GUI. A good middle ground between FTK Imager and WinPmem is Belkasoft’s RAM Capturer.
RAM Capturer
RAM Capturer is a free tool provided by the software company Belkasoft. RAM Capturer is a simple tool to utilize and, like FTK Imager and WinPmem, it can be run from a USB. RAM Capturer combines the simplicity of WinPmem with an easy-to-use GUI like FTK Imager:
- Right-click on the RAM Capturer executable and choose Run as Administrator. This will produce the following window:

Figure 6.11 – RAM Capturer start window
- The only input that’s required for acquisition is to place the path of the folder where the memory image should be placed. Once the output has been set, click on the Capture! button and let it run:

Figure 6.12 – RAM Capturer progress

Figure 6.13 – RAM Capturer completion
When looking at memory acquisition tools, the best approach is to capture as much data as possible as efficiently as possible. Tools such as FTK Imager are highly reliable and allow for acquiring not just memory but also other key pieces of evidence. However, at times, this may not be possible, and responders will have to use a USB key with a lightweight tool such as RAM Capturer. The best option is to determine the type of forensic tools that will be used to examine the evidence and then select the appropriate tool to acquire memory.
When looking at acquiring memory, another key factor with these tools that make them useful is that they can also be leveraged if responders do not have physical access to the suspect system.
Virtual systems
Other systems that incident response analysts should prepare to address are virtual machines. The one distinct advantage that virtual systems have over physical systems is their ability to maintain the current state by either performing a snapshot of the system or simply pausing. This allows incident response analysts to simply copy the entire file over to an evidence drive for later analysis. It is recommended that analysts ensure that they conduct a hash of each component of the virtual machine pre- and post-copy to ensure the integrity of the evidence.
One key feature of popular virtualization software such as VMware is that the virtual machine utilizes two files for the running memory. The first of these is the Virtual Memory (VMEM) file. The VMEM file is the RAM or physical memory of the virtual machine. The second file is the VMware Suspended State (VMSS) file. The VMSS file contains the files that are saved as part of the suspended state of the virtual machine. Let’s take a look at this:
- To acquire the running memory from a VMware virtual machine, pause the system.
- Second, transfer the VMSS and VMEM files to a removable media source such as a USB. VMware software will often include the Vmss2Core.exe application as part of the installation process. This application combines the VMSS and VMEM files into a single .dmp file that can be analyzed with forensic tools. Both these files are required to create a complete memory capture.
- To create the .dmp file, run the following command:
C:Program Files (x86)VMwareVMware Workstation>vmss2core.exe suspect.vmss suspect.vmem
From here, the responder will have the necessary .dmp file to conduct analysis.
Acquiring non-volatile evidence
Although there is a great deal of data running in memory, it is still important to acquire the hard drive from a potentially compromised system. There is a great deal of evidence on these devices, even in the case of malware or other exploitation. Hard drive evidence becomes even more important when examining potential incidents such as internal malicious action or data loss. To ensure that this evidence is available and can be utilized in a court of law, incident responders should be well versed in the procedures we’ve discussed in this chapter.
In certain circumstances, incident responders may want to acquire two key pieces of data from suspected compromised systems before shutting down a running system. While not volatile in nature, the registry keys and event log files can aid analysts during their investigation. Acquiring these files from an imaged hard drive is largely dependent on the time that’s needed to image and then process the entire hard disk drive. As a result, there are a few techniques that can be leveraged to acquire these key pieces of evidence.
In the event that analysts have access to the system, they can utilize the command line to access the log files by running the following command:
C:wevtutil epl<Log Type> E:<FileName>.evtx
This command can be repeated for security, application, and system logs.
FTK obtaining protected files
FTK Imager also allows for the capture of registry key settings and other information that can aid in an investigation. Let’s take a look:
- Open FTK Imager and navigate to the File tab.
- Click on Obtain Protected Files. The following dialog box will appear:

Figure 6.14 – FTK protected files acquisition
- Click on Browse... and navigate to the evidence file location.
- Next, click the radio button for Password recovery and all registry files and click OK. Once the tool completes, the registry and password data will be transferred to the evidence folder. This command directs FTK Imager so that it obtains the necessary registry files to recover the system passwords. These include the user, system, SAM, and NTUSER.DAT files. From here, analysis can take place before the imaging process. This allows for a more rapid response to an incident.
The CyLR response tool
An open source tool that aids responders in this type of acquisition is the CyLR.exe application. This standalone executable, available at https://github.com/orlikoski/CyLR/releases, can be run from a USB or on the system. It is a small application but can acquire a great deal of evidence that can be leveraged as part of the initial investigation or possibly triage. Another key feature of CyLR.exe is its ability to send the data that’s been acquired to a remote system either for storage or processing, as we will demonstrate in Chapter 12.
To acquire the non-volatile log files and other protected files, navigate to the CyLR.exe executable via Command Prompt and run it as an administrator. The output directory containing the evidence files will be placed in the same directory as the CyLR.exe application. This is handy if you’re running this from a USB device as the output will land directly on the USB.
While the CyLR.exe application is running, the responder will be able to see the individual files that are being acquired:

Figure 6.15 – CyLR output
Depending on the processor and available RAM, CyLR.exe can be expected to run for a few minutes. Afterward, the following message will appear:
Figure 6.16 – CyLR completion message
Finally, a check of the directory where CyLR.exe was run will reveal a compressed file with the name of the system as the filename. Uncompressing the file reveals the extensive evidence that was collected:
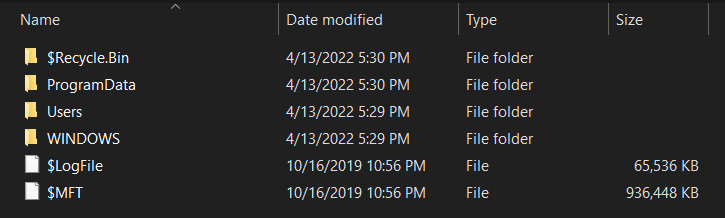
Figure 6.17 – CyLR acquired files
The output contains the log files, registry files, and master file table, which will be important in later chapters. The ability to acquire this data from a simple tool is a major advantage of using CyLR.exe to acquire evidence before a system is shut down.
Kroll Artifact Parser and Extractor
Like CyLR, the Kroll Artifact Parser and Extractor (KAPE) is a digital forensics purpose-designed tool that extracts forensically relevant artifacts and parses them to be analyzed using a variety of additional tools. KAPE utilizes a combination of modules and targets to extract the relevant evidence. This extraction can be performed on both live systems and disk images. KAPE can be downloaded from the Kroll website at https://www.kroll.com/en/insights/publications/cyber/kroll-artifact-parser-extractor-kape.
The entire toolset is contained within a single compressed file. Once downloaded, extract the contents of the folder. KAPE can be run on the local system or on a USB drive; this allows the analyst to simply attach the USB to the suspect system and execute all commands from there. There are two executables: kape.exe is a command-line version and gkape.exe is a GUI-based version. Run gkape.exe as an administrator and the following window appears:

Figure 6.18 – KAPE GUI
The number 1 in Figure 6.18 is where the analyst configures the target selection. Number 2 shows the target selections. These are the evidence-collection items that the analysts will select for extraction. The number 3 indicates where the KAPE command line will appear. For the following example, KAPE will be run against a live system. The following will capture the necessary evidence to conduct an initial triage analysis of the target system using a preset evidence list:
- In this example, KAPE will be run against the root directory of a Windows system, indicated by the drive letter C. The output files from the extraction will go to an Acct_LT009 folder on a removable USB drive, as seen in Figure 6.19:

Figure 6.19 – Setting target source and destinations
- Next, the analyst needs to select the target for extraction. In this case, the analyst is conducting an initial triage and selects the !SANS_Triage target:

Figure 6.20 – SANS_Triage target
- To see what each of the target selections extracts as artifacts, double-click on the selection. In this case, the following window displays the extracted artifacts:

Figure 6.21 – SANS target details
- After selecting the targets, KAPE provides the command line that will be used. KAPE can also be run on the command line with the kape.exe executable. This allows analysts to craft the command in the GUI and use the output in scripts if necessary:

Figure 6.22 – KAPE command-line command
The selection output the following command:
.kape.exe --tsource C: --tdest E:Acct_LT009 --tflush --target !SANS_Triage –gui
- Once the parameters are set, the analyst clicks on the Execute! button. A new window will open indicating that any contents of the target or module destination will be destroyed. Analysts should ensure the contents of the folder for the artifacts are free of any files. Click OK to proceed.

Figure 6.23 – Data destruction warning
- KAPE opens an additional window that shows the progress of artifact identification and extraction:

Figure 6.24 – KAPE command output

Figure 6.25 – KAPE targets acquired

Figure 6.26 – Details of KAPE acquired artifacts
Proper evidence handling starts the overall process that aims to determine the root cause of an incident and, potentially, identify the responsible party. For evidence to be of any use in an incident investigation, it has to be acquired in a sound manner. Incident responders should have a solid foundation in understanding the various types of acquisition and the tools and techniques that are available and apply those tools and techniques to the various situations that may arise. By applying solid techniques and properly documenting their actions, incident responders will be in a position to utilize the evidence to not only determine the root cause of an incident but also to back up their actions in a courtroom if necessary.
Summary
There is a wealth of information on a running system. Threats such as fileless malware require analysts and incident responders to act quickly while the system is still running. Capturing this evidence requires both preparation and proper execution of digital forensic tools. Over the course of this chapter, we examined how understanding the order of volatility of evidence is useful in crafting an acquisition strategy. We then examined the procedures that should be leveraged in live system acquisition. Finally, we pivoted into using command-line and GUI tools to acquire the needed artifacts. These techniques are invaluable to incident responders as they ensure that the evidence acquired is trustworthy and reliable.
In the next chapter, we will look at how to acquire similar evidence from a remote system.
Questions
Answer the following questions to test your knowledge of this chapter:
- When looking at the order of volatility, which of the following evidence categories should be acquired first?
- Random Access Memory
- Pagefile or Swap File
- Central Processing Unit, Registers
- Storage Drive
- It is a good practice to acquire the pagefile with RAM if using FTK Imager.
- True
- False
- When recreating the memory from a virtual system, responders should acquire both the VMSS and VMEM file.
- True
- False
Further reading
For more information about the topics covered in this chapter, you can refer to the following:
- Order of Volatility: https://www.forensicswiki.org/wiki/Digital_evidence#Order_of_Volatility
- The Advanced Data Acquisition Model: https://researchrepository.murdoch.edu.au/id/eprint/14422/
- Best Practices in Digital Evidence Collection: https://digital-forensics.sans.org/blog/2009/09/12/best-practices-in-digital-evidence-collection/