3
Fundamentals of Digital Forensics
Forensic science can be defined as the application of scientific principles to legal matters. In an incident, CSIRT (short for computer security incident response team) members may be called upon to perform analysis on digital evidence acquired during the incident, utilizing digital forensics tools, techniques, and knowledge. To make certain that the evidence is processed correctly and can subsequently be admitted in a courtroom, digital forensics examiners need to understand the legal issues, along with the fine points, of the digital forensics process.
In this chapter, we will examine the legal statutes that impact the CSIRT and digital forensics examiners, as well as the rules that govern how evidence is admitted in court. To provide context to the kinds of actions taken, we will also explore the digital forensics process and, finally, address the infrastructure necessary to incorporate a digital forensics capability into a CSIRT.
We will be covering the following topics in this chapter:
- An overview of forensic science
- Locard’s exchange principle
- Legal issues in digital forensics
- Forensic procedures during incident response
An overview of forensic science
In the last 20 years, we have seen an explosion in the interest in forensic science. Simply put, forensics is the application of science to legal matters. The actual practice of forensics is to take physical and digital evidence through a process of analysis and present scientific findings in a court of law. Despite its depiction within popular media, forensic science is a detailed and exacting process, which requires well-thought-out processes and procedures, technology, and experience.
Forensic science has become integral to a wide range of disciplines, even outside the purview of criminal justice. Air crash investigators use forensic techniques to investigate aircraft failures, for example. Accounts use very similar principles and techniques when conducting investigations into suspected fraud and money laundering schemes. Even the art world, known for historic fakes, employs forensic techniques to verify the authenticity of works of art.
The first high-profile case where forensics played a role was in the Jack the Ripper murders in the late 1800s. Investigators in the London Metropolitan Police were able to identify, collect, and later examine physical evidence left by the unknown perpetrator. Around that time, two other tried and true forensic practices, fingerprint comparison and crime scene photography, were added to the growing body of knowledge and practices.
These practices would continue to slowly build based on the available technology until after World War II. This seventy-five-year period would see the inclusion of DNA evidence as a powerful way to identify perpetrators. Technology was applied to tool marks and ballistics. It was also in the latter half of the twentieth century that digital forensics found its way into the various forensic science disciplines.
Locard’s exchange principle
A key principle that guides forensics is Locard’s exchange principle. Dr. Edmond Locard was a pioneer in the fields of forensics and criminalistics. His contributions to these fields led to many deeming him the Sherlock Holmes of France. His principle, simply put, is that every moment of contact with the physical world leaves a trace. For example, a burglar breaks a window to enter a home. They then crawl through this window and begin to grab the items around them. According to Locard’s exchange principle, the burglar will leave traces of dirt from their shoes on the carpet. Skin and hairs may fall away from their body onto the various surfaces of the home. Without gloves, the burglar might also leave fingerprints on the door handles.
This exchange is a two-way street. As our burglar leaves traces of themself around the house, traces of the house are left on them. Carpet fibers attach to their shoes. Fragments of the broken windows may also embed themselves into the burglar’s footwear and clothing. These pieces of trace evidence can tie the burglar to the scene.
This principle has been in force since the first criminal activity took place. What has changed is the ability of forensic scientists and criminalistic practitioners to detect and analyze this trace evidence. For example, DNA evidence has been around since Cain slew Abel. It is only recently that it has become useful in an investigation because methods and technologies have developed to the point that forensic scientists can definitively prove that biological material can be tied to a specific individual to the exclusion of every other human being.
There are a few considerations to keep in mind about this principle. First, there is a good deal of variation in how long trace evidence can be found. For example, some trace evidence, such as tool marks that are left when a pry bar is used to force open a door, may persist for months or even years. On the other hand, fingerprints exposed to the elements are easily rendered unsuitable days or even hours after they were left. Second, certain processes that maintain the integrity of trace evidence need to be followed. If trace evidence is not collected properly, it can be altered or destroyed, making it completely unusable for investigative purposes. Third, there needs to be a corresponding technology that aids in the analysis of trace evidence. DNA has existed since the dawn of life on Earth. The ability to leverage this trace evidence for investigative purposes relies on the technology to properly compare and analyze DNA samples. Finally, the human element is also present. Trace evidence needs to be handled by trained and qualified analysts who can review the data and draw conclusions.
It may seem a bit odd to be discussing Locard’s exchange principle within the field of digital forensics. The reality is that the same principle that underpins forensics in the physical world has the same applicability in digital forensics. For example, a simple connection to a system via the Microsoft Windows Remote Desktop feature leaves traces. In this case, an external threat actor has obtained valid user credentials and is able to connect through an exposed system. The connection itself would create a log entry on the exposed system. The use of valid credentials to log into the system would create a second log entry. Contained within this log entry is the IP address of the threat actor’s system. This IP address may also be contained within firewall logs. The threat actor would also have log entries and potentially files from the compromised system on their own system.
What is important to understand about Locard’s exchange principle is the concept of trace evidence. Threat actors will go to great lengths to remove their tracks the same way very good criminals will but there is still a trace. The key is having the tools and ability to discover these traces and tie them back to a threat actor.
Legal issues in digital forensics
As we saw in Chapter 1, a proper incident response involves key individuals from a variety of disciplines. This highlights one frequently held misconception: incident response is strictly a technological matter. One realm into which incident response falls heavily is the legal arena. There is a wide range of laws and regulations that directly impact an organization’s incident response capability, ranging from breach notification to privacy. These laws provide a framework for governments to prosecute offenders, as well as provide strict rules concerning topics such as how evidence is handled and presented in court.
Law and regulations
In the mid-1980s, as computer crime started to become more prevalent, jurisdictions began crafting laws to address ever-increasing instances of cybercrime. In the United States, for example, federal criminal law has specific statutes that deal directly with criminal activity when utilizing a computer, as follows:
- 18 USC § 1029—Fraud and related activity in connection with access devices: This statute addresses the use of a computer to commit fraud. This is most often utilized by prosecutors in connection with cases where cybercriminals use a computer, or computers, to commit identity theft or other fraud-related activities.
- 18 USC § 1030—Computer Fraud and Abuse Act (CFAA): Among the number of provisions within this law, the one most associated with incident response is that of unauthorized access to a computer system. This law also addresses the illegality of denial-of-service (DoS) attacks.
- The Electronic Communications Privacy Act (ECPA): This amendment to the Federal Wiretap Statute was enacted in 1986. It makes the unauthorized interception of communications through electronic means, such as telecommunications and the internet, illegal. The ECPA was further amended by the Communications Assistance for Law Enforcement Act (CALEA). CALEA imposed the requirement on ISPs to ensure that their networks could be made available to law enforcement agencies to conduct lawfully authorized surveillance.
Being familiar with the ECPA is critical for those organizations that have a presence in the United States. Provisions of the law make it a crime for an organization to conduct surveillance and capture traffic on networks, even those under their control, if the users have a reasonable expectation of privacy. This can lead to an organization being held liable for sniffing traffic on its own network if, in fact, its users have a reasonable expectation of privacy. For CSIRT members, this creates potential legal problems if they access network resources or other systems. This can be easily remedied by having all system users acknowledge that they understand their communications can be monitored by the organization and that they have no reasonable expectation of privacy in their communications when using computer and network resources provided by the organization.
- The Economic Espionage Act of 1996 (EEA): This law contains several provisions found in 18 USC § 1831-1839, and makes economic espionage and the theft of trade secrets a crime. This act goes further than previous espionage legislation, as it deals directly with commercial enterprises and not just national security or government information.
Rules of evidence
Federal rules of evidence serve as the basis by which evidence can be admitted or excluded during a criminal or civil proceeding. Having knowledge of the following rules is important for CSIRT members so that any evidence collected is handled in a manner that prevents contamination and the possibility of the evidence being barred from being seen in court:
- Rule 402—Test for Relevant Evidence: This rule has two parts. First, the evidence to be admitted into the proceedings must tend to make a fact more or less probable than it would be without the evidence. Second, the evidence (or the facts that the evidence proves) is of consequence to the proceedings. This makes clear that the evidence should not only be relevant to the proceedings but also it should prove or disprove a facet of the case.
- Rule 502—Attorney-Client Privilege and Work Product: One of the most sacrosanct tenets of modern law is the relationship between a client and their attorney. One of the provisions of the attorney-client privilege is that what is said between the two is not admissible in court. This applies not only to spoken communications but written communications as well. In the world of digital forensics, reports are often written concerning actions taken and information obtained. Oftentimes, incident responders will be working directly for attorneys on behalf of their clients. As a result, these reports prepared in conjunction with an incident may fall under attorney work product rules. It is important to understand this when you work under the auspices of an attorney and when these rules may apply to your work.
- Rule 702—Testimony by Expert Witnesses: Through the acquisition of experience and knowledge in digital forensics, an analyst may be allowed to testify as an expert witness. This rule of evidence outlines the specifics concerning expert witness testimony.
- Rule 902—Evidence that is Self-Authenticating: This rule has recently undergone a revision, as it relates to digital forensics. A new subpart has been added as of December 1, 2017. This new subpart permits the verification of digital evidence integrity through hashing (we will discuss the role of hashing in later chapters). Furthermore, this rule requires that a qualified person presents the evidence and that the evidence being presented has been collected according to best practices.
- Rule 1002—Best Evidence Rule: In civil or criminal proceedings, the original writings, recordings, or photographs need to be offered up as evidence, unless a reasonable exception can be made. In the physical realm, it is easy to produce physical evidence. Parties to a case can easily present a knife used in an assault. It becomes a bit more complex when the evidence is essentially magnetic polarity on a hard drive or log files that came from a router. In this case, courts have held that a forensically sound image of a hard drive is a reasonable substitute for the actual hard drive that was examined.
- Rule 1003—Admissibility of Duplicates: One of the most critical steps when conducting a forensic examination of digital media is to make an image or forensic copy of the media. This rule of evidence allows for such an image to be admitted in court. It is important to note that, if an image or forensic copy is to be admitted, the analyst who performed that action will most likely have to testify that they performed the action correctly.
Next, we will have a look at the fundamental procedures of digital forensics as they apply to incident response.
Forensic procedures in incident response
As was stated in the previous chapter, digital forensics is an important component of incident response. It is often the application of digital forensics methods that allows incident responders to gain a clear understanding of the chain of events that led to a malicious action, such as a compromised server or other data breach. For other incidents, such as internal fraud or malicious insider activity, digital forensics may provide the proverbial smoking gun that points to the guilty party. Before a detailed examination of tools and techniques available to incident responders, it is critical to address the foundational elements of digital forensics. These elements not only provide context for specific actions but also a method to ensure that evidence made part of an incident investigation is usable.
A brief history of digital forensics
Law enforcement first started to pay attention to the role that computers play in criminal activity in the mid-1980s. Prior to this, existing laws and law enforcement techniques were not adept at identifying and prosecuting computer criminals. As the use of computers by criminals began to gain more prominence, agencies such as the United States Federal Bureau of Investigation (FBI) decided to incorporate a dedicated digital and forensic investigation capability. This led to the creation of the FBI Computer Analysis and Response Team (CART). Other agencies, such as the Metropolitan Police Service, started to build a capability for investigating cybercrime.
FBI CART information
An excellent historical document that addresses the FBI’s CART is a short article in the United States Department of Justice Crime Laboratory Digest, dated January 1992: https://www.ncjrs.gov/pdffiles1/Digitization/137561NCJRS.pdf.
Two other seminal events brought the need for cyber investigations and forensics into the minds of many. The first was hacker Markus Hess breaking into the Lawrence Berkeley National Laboratory. This break-in might have gone undetected had it not been for the efforts of Clifford Stoll, who hatched a plan to trap the attacker long enough to trace the connection. These efforts paid off and Stoll, along with other authorities, was able to trace the hacker and eventually prosecute him for espionage. (The next chapter will go into Stoll’s efforts in depth, as they not only serve as a key event indicating the need for digital forensics but his investigative techniques also provide insight.)
The second high-profile event was the Morris worm, which was unleashed on the fledgling internet in 1988. The worm, created and released by Robert Tappan Morris, caused the denial of service on several thousand systems, subsequently causing damage worth more than $100,000. A post-incident investigation by several individuals, including Clifford Stoll, found that at least 6,000 systems were infected. The rapid spread of the worm and the damage associated with it led to the creation of the Carnegie Mellon CERT Coordination Center (CERT/CC).
Throughout the 1990s, as more law enforcement agencies began to incorporate digital forensics into their investigative capabilities, the need for the standardization of forensic processes became more apparent. In 1993, an international conference was held to specifically address the role of computer evidence. Shortly thereafter, in 1995, the International Organization on Computer Evidence (IOCE) was formed. This body was created to develop guidelines and standards around the various phases of the digital forensic examination process. In 1998, in conjunction with the IOCE, federal crime laboratory directors created the Scientific Working Group on Digital Evidence (SWGDE). This group represented the United States component of the IOCE’s attempt to standardize digital forensics practices.
As organizations continued to standardize practices, law enforcement agencies continued to incorporate digital forensics in their overall forensic capabilities. In 2000, the FBI established the first Regional Computer Forensic Laboratory (RCFL). These laboratories were established to serve law enforcement at various levels in a variety of cybercriminal investigations. The capability of the RCFL has grown over the last two decades, with 17 separate RCFLs spread across the United States. In addition, other federal, state, and local police agencies have formed task forces and standalone digital forensics capabilities. With ever-increasing instances of computer-related crime, these agencies will continue to perform their critical work.
The digital forensics process
Much like the incident response process, the digital forensics process defines the flow of digital evidence related to an incident from when it is first identified to when it is presented to either senior leadership or a trier of fact, such as a civil or criminal court. There are several schemas that define this process and they generally follow a similar path for the most part. Here, we will be utilizing the Digital Forensics Research Workshop (DFRWS) digital investigation framework. This framework is depicted in the following diagram:

Figure 3.1 – The digital forensics process
The framework contains six elements:
- Identification
- Preservation
- Collection
- Examination
- Analysis
- Presentation
From an incident response standpoint, personnel will not normally seize network components or critical systems and take them offline unless there is a compelling reason to do so. This is one of the balancing acts inherent in digital forensics and incident response. A purely digital forensics approach will take all relevant evidence, secure it, and process it.
This process can take months, depending on the type of incident. This approach, while thorough and detailed, can leave an organization without critical components for some time. The CSIRT may be able to tell the leadership which chain of events led to a breach after a month-long analysis but this would be pointless if a month’s revenue had been lost.
The examiners assigned to a CSIRT must be ready to balance the need for thoroughness against the need to resume or continue normal operations.
Identification
Starting the digital forensic process begins with the identification of potential evidence. This is where the previously discussed Lockard’s exchange principle comes into play. This principle can guide the identification of potential sources of evidence during an incident. For example, if a CSIRT is attempting to determine the root cause of a malware infection on a system, it will start by analyzing the infected system. As some malware requires access to a C2 server, analysts can search firewall connections or proxy logs for any outbound traffic from the infected system to external IP addresses. A review of those connection IP addresses may reveal the C2 server and, potentially, more details about the specific malware variant that has infected the system.
However, it should be noted that threat actors can very easily manipulate digital evidence, so reliance on a single piece of digital evidence without other corroborating evidence should always be treated with caution; it should be verified before it can be trusted.
Preservation
Once evidence is identified, it is important to safeguard it from any type of modification or deletion. For evidence such as log files, it may become necessary to enable controls that protect log files from removal or modification. In terms of host systems such as desktops, it may become necessary to isolate the system from the rest of the network, through either physical or logical controls, network access controls, or perimeter controls. It is also critical that no users are allowed to access a suspect system. This ensures that users do not deliberately or inadvertently taint the evidence. Another facet of preservation measures has been increased reliance on virtual platforms. Preservation of these systems can be achieved through snapshotting systems and by saving virtual machines on non-volatile storage.
Collection
The collection element is where digital forensics examiners begin the process of acquiring digital evidence. When examining digital evidence, it is important to understand the volatile nature of some of the evidence that an examiner will want to look at. Volatile evidence is evidence that can be lost when a system is powered down. For network equipment, this could include active connections or log data stored on the device. For laptops and desktops, volatile data includes running memory or the Address Resolution Protocol (ARP) cache.
The Internet Engineering Task Force (IETF) has put together a document titled Guidelines for Evidence Collection and Archiving (RFC 3227), which addresses the order of volatility of digital evidence, as follows:
- Registers and cache
- The routing table, ARP cache, process table, kernel statistics, memory (RAM)
- Temporary filesystems
- Disk images
- Remote logging and monitoring physical data configuration, network topology
- Archival media
It is imperative that digital forensics examiners take this volatility into account when starting the process of evidence collection. Methods should be employed whereby volatile evidence is collected and moved to a non-volatile medium, such as an external hard drive.
Proper evidence handling
Proper handling and securing of evidence are critical. Mistakes in how evidence is acquired can lead to that evidence being tainted and, subsequently, not forensically sound. In addition, if an incident involves potential legal issues, critical evidence can be excluded from being admitted in a criminal or civil proceeding. There are several key tenets for evidence handling that need to be followed, as listed here:
- Altering the original evidence: Actions taken by digital forensics examiners should not alter the original evidence. For example, forensic analysts should not access a running system if they do not have to. It should be noted that some of the tasks that will be explored have the potential to alter some of the evidence. By incorporating proper documentation and having a justifiable reason, digital forensics examiners can reduce the chance that evidence will be deemed tainted.
- Document: One central theme you will often hear in law enforcement is the phrase: If you didn’t write it down, it didn’t happen. This is especially true when discussing digital forensics. Every action that is taken should be documented in one way or another. This includes detailed notes and diagrams. Another way to document is through photographs. Proper documentation allows examiners to reconstruct the chain of events if the integrity of evidence is ever called into question.
Evidence handling guidance
There is a wide range of resources available from various law enforcement agencies on proper evidence handling in the field. You should become familiar with these procedures. The following guides are utilized by law enforcement agencies:
- http://www.crime-scene-investigator.net/SeizingElectronicEvidence.pdf
- https://www.ncjrs.gov/pdffiles1/nij/219941.pdf
- https://www.iacpcybercenter.org/wp-content/uploads/2015/04/digitalevidence-booklet-051215.pdf
Chain of custody
Chain of custody describes the documentation of a piece of evidence through its life cycle. This life cycle begins when an individual first takes custody of the piece of evidence and ends when the incident is finally disposed of and the evidence can either be returned or destroyed. Maintaining a proper chain of custody is critical. In the event that a piece of evidence has to be brought into a courtroom, any break in the chain of custody can lead to the piece of evidence being excluded from ever being admitted into the proceedings. It is therefore critical to ensure that the entire life cycle of the piece of evidence is recorded.
There are two primary ways that a CSIRT can record and maintain the chain of custody of a piece of evidence.
The first is electronically. There are manufacturers that provide organizations such as forensic laboratories or law enforcement agencies with hardware and software that automates the chain of custody process for evidence. These systems utilize unique barcoded stickers for each piece of evidence. A scanner then creates an electronic trail as it reads these barcodes.
The second method for creating and maintaining a chain of custody is the paper and pen method. This method makes use of paper forms that contain the necessary information to start and maintain a chain of custody. While the paper and pen method can be a bit cumbersome and requires more due diligence to ensure that the form is safeguarded from destruction or manipulation, it is a much more cost-effective solution for smaller CSIRTs that may not have the resources necessary to implement an automated solution.
In terms of what a proper chain of custody form contains, there are several sections, each with its own details that need to be provided. The following screenshot shows a template chain of custody form (an editable chain of custody form is available from NIST at https://www.nist.gov/document/sample-chain-custody-formdocx).

Figure 3.2 – The evidence chain of custody form
The first section that needs to be completed is the Incident Information section, as shown in Figure 3.3. The Intake ID field requires a unique identifier for the case or incident. This can be an incident number or a ticketing system number. The second field, Analyst, documents the analyst that is completing the first sections of the chain of custody form. Finally, each separate evidence item needs a Submission number. This ensures that each has its own separate chain of custody form.

Figure 3.3 – The Incident Information section on a chain of custody form
The second of these sections is a detailed description of the item. It may seem redundant to include several different elements but digital forensics is about details. Having the information recorded leaves no doubt as to its authenticity. This description should contain the following elements:
- Item Number: A unique item number should be included on the form. If there are multiple pieces of evidence, a separate chain of custody form will be completed.
- Description: This should be a general description of the item. This can be a simple statement, such as “500 GB SATA HDD.”
- Manufacturer: This detail assists when multiple pieces of evidence have potentially different manufacturers.
- Model: As there is a wide variety of model numbers for components, recording this provides further details about the item.
- Serial Number: This is critical in the event that an incident involves a number of systems with exactly the same configuration. Imagine attempting to reconstruct which chain of custody goes with which HDD if six were all seized together, and they had the same make and model number.
A completed first section for the chain of custody form will look like this.

Figure 3.4 – The Electronic Media Details section on a chain of custody form
An alternate section can be used in circumstances where the evidence may be a logical file, such as log files or images captured during the investigation. These include the following elements:
- Date/Time Acquired: It is important to be precise about the date and time at which specific files were acquired.
- Description: A brief description of the media that was acquired is useful. If a software application or forensic tool is utilized to acquire the evidence, it should be noted. In other circumstances, such as with log files, it might simply be a copy of an external hard drive.
- Storage Drive: In a later section, we will discuss the importance of having external media available for the storage of files. The exact drive used should be recorded on the chain of custody form.
- File/Image Name: The unique filename for the file or image is inserted here.
- Hash: For each individual file that is acquired, a unique hash value should be calculated.
A completed Image or File Details section of the chain of custody form will look like this.

Figure 3.5 – The Image or File Details section on a chain of custody form
The next section details the specific steps that the piece of evidence went through in its life cycle. For each stage, the following details should be captured:
- Tracking No: This number indicates the step in the life cycle that the piece of evidence went through.
- Date/Time: This is a critical piece of information in any chain of custody and applies equally to each step the evidence went through. This allows anyone who views the chain of custody to be able to reconstruct, down to the minute, each step in the chain of custody life cycle.
- FROM and TO: These fields can either be a person or a storage place. For example, if an analyst has seized a hard drive and is moving it to a secure storage locker, they would note it as the TO location. It is critical to have individuals named within the chain of custody sign the form when applicable to enforce accountability.
- Reason: Moving a piece of evidence should never be done without a reason. In this portion of the chain of custody form, the reason is described.
The following screenshot is a sample of the movement of the hard drive recorded in the previous screenshot. Each movement of each individual piece of evidence is recorded here. The first move is the actual seizure of the drive from the system. In this case, there is no individual custodian, as the drive has been taken from the data center. What is critical is that the author is the custodian of the drive until he can transfer it to Carol Davis of IRProactive for analysis. The details are as follows:

Figure 3.6 – Chain of custody details
The chain of custody is maintained throughout the life of the piece of evidence. Even when the evidence is destroyed or returned, an entry is made in the chain of custody form. These forms should be maintained with any other material generated by the incident and made part of any subsequent report that is created.
Examination
The examination phase details the specific tools and forensic techniques that are utilized to discover and extract data from the evidence that is seized as part of an incident. For example, in a case where malware is suspected to have infected a desktop system as part of a larger attack, the extraction of specific information from an acquired memory image would take part at this stage. In other cases, digital forensics examiners may need to extract Secure Shell (SSH) traffic from a network capture. The examination of digital evidence also continues the process of proper preservation, in that examiners maintain evidence with the utmost care during the examination. If the digital forensics examiner does not take care to preserve the evidence at this stage, there is the possibility of contamination, which would result in the evidence being unreliable or unusable.
Analysis
Once the examination phase has extracted potentially relevant pieces of data, the digital forensics examiner then analyzes the data, considering any other relevant data obtained. For example, if the digital forensics analyst has discovered that a compromised host has an open connection to an external IP address, they would then correlate that information with an analysis of a packet capture taken from the network. Using the IP address as a starting point, the analyst would be able to isolate that traffic. From here, the analyst may be able to determine that the compromised host is sending out a beacon to a C2 server. From here, using additional sources, the analyst may be able to determine which attack vector is linked to that IP address.
Presentation
The reporting of facts related to digital forensics needs to be clear, concise, and unbiased. In nearly all instances, a forensic examiner will be required to prepare a detailed written report, which addresses every action and captures the critical data required. This report should be thorough, accurate, and without opinion or bias. This report will often be made part of a larger incident investigation and aids in determining the root cause of an incident.
Another aspect of presentation is the role that a forensic examiner might play in a criminal or civil proceeding. Testifying in court may be required if the incident under investigation has yielded a suspect or other responsible party. It is during this testimony that the forensic examiner will be required to present the facts of the forensic examination, in much the same dispassionate manner as the report. The examiner will be required to present facts and conclusions without bias and may be limited as far as what the opinions they can testify are. How an examiner will be allowed to testify is often dependent on their training and experience. Some may be limited to presenting the facts of the examination. Other times, as an examiner acquires skills and has been deemed an expert witness, they may be able to offer an opinion.
The digital forensics lab
Digital forensics is an exacting process, which involves the use of proper tools, techniques, and knowledge in order to extract potential evidence from systems. It is imperative that forensic examiners have a location that is separate from normal business operations. The best approach to achieving this separation is to provide CSIRT members directly involved in the examination of digital evidence with a location that is completely separate from the rest of the organization. A digital forensics lab should have several key features to ensure that examiners have the necessary privacy, but also to ensure the integrity of the evidence while it is being examined.
Physical security
Access to the forensic lab needs to be strictly controlled. In order to maintain a chain of custody, only those with a justifiable need should be allowed access to the lab. This limitation is necessary to remove any chance that the evidence can be tampered with or destroyed. The lab should therefore remain locked at all times. Ideally, access should be granted via access cards or fobs, with a central management system granting access. This allows for a complete reconstruction of all personnel who access the laboratory within a specific time period.
The laboratory should also contain evidence lockers so that evidence can be properly stored while not being examined. Lockers should be secured, either through an onboard lock or through the use of a combination lock. The keys to these lockers should be secured within the laboratory and access should only be given to examiners. If the organization has adequate resources, each specific incident should have its own locker, with all the evidence contained within a single locker. This reduces the chance of digital evidence becoming commingled.
The climate and humidity should be controlled in much the same way as in any data center and should be set to the appropriate levels.
Tools
Depending on the specific examinations to be performed, it may become necessary to remove screws or cut wires. Having a small set of hand tools will be convenient for examiners. The laboratory should also be stocked with boxes for securing evidence. If examiners may have to process smartphones or tablets, Faraday bags should be available. These bags allow examiners to isolate a smartphone or tablet from the cellular network while still maintaining a power source.
Hardware
The laboratory should have sufficient computers and other hardware to perform a variety of necessary functions. Examiners will be tasked with imaging hard drives and processing gigabytes of data. As a result, a forensic computer with sufficient RAM is necessary. While there are personal preferences for the amount, a minimum of 32 GB of RAM is recommended. In addition to memory and processing power, examiners will often be looking at a large amount of data. Forensic workstations should have a primary OS drive that can contain forensic software and a secondary drive to hold evidence. The secondary drive should contain 2 TB of storage or more.
In addition to a forensic workstation, the examiner should also be provided with an internet-connected computer. The forensic workstation should have no internet connection to maintain security, but also to guard against the possible corruption of evidence during an examination. A secondary machine should be used to conduct research or write reports.
Another piece of critical information is a physical write blocker. This device allows for a connection between a hard drive seized as evidence and the forensic imaging machine. The critical difference between this physical write blocker and a USB or Thunderbolt connection is that the digital forensics examiner can be sure that there is no data written to the evidence drive. Figure 3.7 shows the Tableau eSATA Forensic Bridge physical write blocker:

Figure 3.7 – A physical write blocker
For digital forensics laboratories that conduct a higher number of imaging tasks, there is the option of including a dedicated forensic imaging station. This allows for quicker imaging of evidence drives and does not tie up a forensic workstation. The drawback is its expense: if the CSIRT member does not see a performance drop without it, it may be hard to justify such an expense.
The CSIRT should also invest in an inventory of high-capacity external USB drives. These are much easier to work with and use in the imaging process than traditional SATA or IDE drives. These drives are utilized to store an evidence drive image for further analysis. The CSIRT member should have at least six of these high-capacity drives available. Drives that have 2 TB to 3 TB of storage space can possibly store several images at a time. Smaller USB drives are also useful to have on hand to capture log files and memory images for later processing. With any of these USB drives, having the latest 3.0 version allows for faster processing as well.
Finally, digital forensics examiners that support a CSIRT should have a durable case to transport all the necessary hardware, in the event they have to conduct an off-site examination. Many of these tools are fragile and would not stand the pounding enacted by baggage handlers at the local airport. The CSIRT should invest in at least two hard-sided cases, such as those used for electronic or photographic equipment. One case can transport hardware such as external hard drives and the second can transport a forensics laptop and minimize the potential damage caused by rough handling.
Software
There are a number of software tools on the commercial and freeware market today. A digital forensics laboratory should have access to several tools to perform similar functions. At a minimum, the lab should have software that can perform imaging of evidence drives, examine images, analyze memory captures, and report findings.
There are several different types of forensic software that a digital forensics analyst can utilize. The first of these is forensic applications. These applications are purpose-designed to perform a variety of digital forensics tasks. They are often commercially available and are widely used in law enforcement and government communities, as well as in private industry. The following four forensic applications are the most common and widely deployed:
- Autopsy: This open source software, developed by Brian Carrier, provides a feature-rich application that automates key digital forensics tasks. As an open source project, Autopsy also has open source modules that provide a great deal of additional functionality. Autopsy will be covered in greater depth in later chapters.
- EnCase: Developed by OpenText, EnCase is a full-spectrum digital forensics application, which performs the entire gamut of tasks involved in the examination of digital evidence, primarily from hard drives and other storage media. Besides analyzing digital evidence, EnCase has a reporting capability that allows examiners to output case data in an easy-to-digest format. EnCase is widely deployed in government and law enforcement agencies. One drawback is the cost associated with the application. Some CSIRTs and forensic examiners on a limited budget will have trouble justifying this cost.
- Forensic Toolkit (FTK): This is another full-service forensic application that is widely used by government and law enforcement agencies. With many of the same features as EnCase, this may be an alternative that digital forensics analysts will want to explore.
- X-Ways Forensics: Another option is the X-Ways Forensics application. With similar functionality to FTK and EnCase, this is a great lower-cost option for CSIRTs who do not need functionality such as network access or remote capture.
Use validated tools
There are several high-profile cases where digital forensic tools were called into question. In the United States, Casey Anthony was on trial for the murder of her daughter. During the trial, the prosecution submitted Anthony’s internet browser history as evidence. The history was extracted with the tool CacheBack. A review of this software by the tool’s author found that it had a software bug. There is little evidence that the tool had an impact on the jury deliberations, but it does serve as a lesson to ensure that the tools used in digital forensics, specifically in cases that may proceed into the legal arena, are validated.
Linux OS forensic tools
There is also a wide range of Linux distributions that have been created for digital forensics purposes. These distributions, often provided for free, provide tools that can aid a digital forensics investigator. These tools are divided into two main types. The first of these are distributions that are intended as boot CD/DVD or USBs. These are useful for conducting triage or obtaining access to files without having to image the drive. These distributions can be placed onto a CD/DVD or, more commonly these days, a USB device. The examiner then boots the system under investigation into the Linux distribution. There are a number of these distributions available.
The following are two that are popular with digital forensics examiners:
- Digital Evidence and Forensic Toolkit (DEFT) Zero: This is based upon the GNU Linux platform. DEFT can be booted from a USB or CD/DVD. Once booted, the DEFT platform includes a wide range of tools that can be utilized by a digital forensics examiner to perform functions such as the acquisition of mass storage. For example, they may acquire the hard drive on the system from which it is booted. DEFT minimizes the risk of altering data on the system by not booting into the swap partition and not using automated mounting scripts, thereby ensuring the integrity of the system’s storage. We can see the DEFT OS in the following screenshot.

Figure 3.8 – The DEFT digital forensics OS
- Computer Aided INvestigative Environment (CAINE): This is another forensic distribution that will be put to further use in this book. CAINE is a GNU/Linux platform that includes several tools to assist digital forensics examiners. CAINE can be seen in the following screenshot.
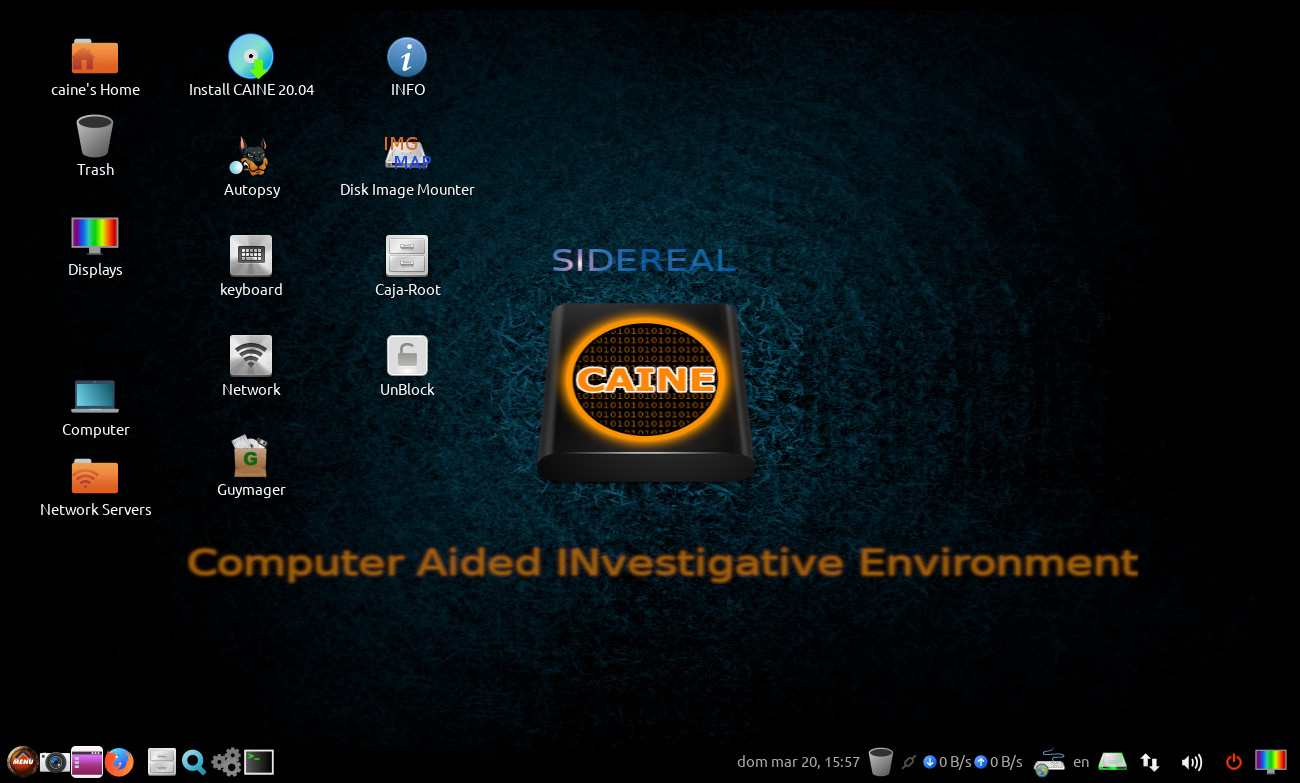
Figure 3.9 – The CAINE digital forensics OS
Another category of Linux distributions is those designed as platforms for conducting examinations of evidence such as RAM captures and network evidence. There are several distributions available:
- The SANS Investigative Forensic Toolkit (SIFT): This is a comprehensive forensic toolset, based upon the Ubuntu 20.04 Base OS. Tools are included for imaging, memory analysis, timeline creation, and a host of other digital forensics tasks. SIFT is provided for free by the SANS Institute as a standalone virtual machine, an ISO file, or as part of Windows Subsystem for Linux, available at https://www.sans.org/tools/sift-workstation. Once installed, there is a desktop based upon the Ubuntu distribution, with additional tools that are run from the command line or through a GUI, as can be seen in the following screenshot.

Figure 3.10 – The SANS SIFT Workstation
- CSI Linux: This is another feature-rich forensics platform in CSI Linux, as seen in the following screenshot. This digital forensics operating system includes 175 tools for conducting a wide variety of tasks. The tool is available as a preconfigured virtual system, as well as a bootable version that can be deployed via a USB. These are available at https://csilinux.com.

Figure 3.11 – The CSI Linux digital forensics OS
- REMnux: REMnux is a specialized tool that has aggregated a variety of malware reverse engineering tools into an Ubuntu Linux-based toolkit. Some of the tools available in REMnux have been created for analyzing Windows and Linux malware and for examining suspicious documents, and it also can intercept potential malicious network traffic in an isolated container. We can see REMnux in the following screenshot.

Figure 3.12 – The REMNUX digital forensics OS
Jump kits
One facet of incident response that can present a challenge to CSIRT team members is the possibility that they may have to respond to incidents outside their own location. Off-site response is quite common in larger enterprises and is even the norm in CSIRTs that consult for other organizations. As a result, CSIRTs may often have to perform the entire response at another location, without the support of a digital forensics laboratory. With this challenge in mind, CSIRTs should prepare several jump kits. These kits are preconfigured and contain the hardware and software necessary to perform the tasks a CSIRT would be called upon to carry out during an incident. These kits should be able to sustain an incident investigation throughout the process, with the CSIRT identifying secure areas at the incident location in which to store and analyze evidence.
Jump kits should be portable, able to be configured to fit within a secure hard-sided case, and ready to be deployed at any time. CSIRTs should ensure that after each incident, the jump kit is restocked with any items that were utilized in the last incident, and that hardware and software are properly configured so that analysts can be confident in their availability during an incident. An example of a jump kit can be seen in the following photo.

Figure 3.13 – A digital forensics jump kit
At a minimum, a jump kit should contain the following:
- A forensic laptop: This laptop should contain enough RAM (32 GB) to image a hard drive in a reasonable amount of time. The laptop should also contain a forensic software platform (as previously discussed). If possible, the laptop should also contain at least one Linux forensic OS, such as CAINE or SIFT.
- Networking cables: Having several CAT5 cables of varying lengths is useful in the event that the CSIRT team has to access a network or patch into any network hardware, such as a router or a switch.
- A physical write blocker: Each kit should have a physical write blocker, which can be used to image any hard drives that CSIRT personnel may encounter.
- External USB hard drives: The jump kit should contain several 1 TB or 2 TB USB hard drives. These will be used for imaging hard drives on potentially compromised systems.
- External USB devices: It is not forensically sound to store evidence collected from log sources or RAM captures on a potentially compromised system. The jump kit should contain several large-capacity (64 GB) USBs for offloading log files, RAM captures, or other information obtained from command-line outputs.
- A bootable USB or CD/DVD: While not utilized in every case, having several bootable Linux distributions can be useful in the event that the forensic laptop is currently performing another task.
- Evidence bags or boxes: It may become necessary to seize a piece of evidence and transport it off-site while an incident is ongoing. There should be the capability to secure evidence on-site without having to search around for a proper container.
- Anti-static bags: In the event that hard drives are seized as evidence, they should be transported in anti-static bags.
- Chain of custody forms: As previously discussed, having a chain of custody form for each piece of evidence is critical. Having a dozen blank forms available saves the trouble of trying to find a system and printer to print out new copies.
- A toolkit: A small toolkit that contains screwdrivers, pliers, and a flashlight comes in handy when hard drives must be removed, connections must be cut, or the analyst has to access a dark corner of the data center.
- A notepad and writing instrument: Proper documentation is critical; handwritten notes in pen may seem old-fashioned but they are the best way to reconstruct events as an incident continues to develop. Having several steno notebooks and pens as part of the kit ensures that CSIRT personnel do not have to hunt down these items when a critical event has just occurred. Jump kits should be inventoried at least monthly so that they are fully stocked and prepared for deployment. They should also be secured and accessible to CSIRT personnel only. Left in public view, these kits are often raided by other personnel in search of a screwdriver, network cable, or flashlight. For CSIRTs that support geographically dispersed organizations, with several kits at key locations, such as major office headquarters, data centers, or other off-site locations, it may be a good idea to have several of these jump kits prestaged for use. This avoids having to cart the kit through an airport. An example of some items to be stocked in a jump kit can be seen in the following photo.

Figure 3.14 – Contents of a jump kit
Congratulations on successfully completing this chapter!
Summary
Incident response spans a wide range of disciplines, from legal to scientific. CSIRT members responsible for conducting digital forensics examinations should be very familiar with the legal and technical aspects of digital forensics. In addition, they should be familiar with a wide variety of tools and equipment necessary to acquire, examine, and present data discovered during an examination. The proper application of forensic techniques is critical to provide insight into the chain of events that led to the deployment of the CSIRT to investigate an incident. In this chapter, we initially delved into the various legal aspects of digital forensics, such as the rules of evidence and laws pertaining to cybercrime. Next, we discussed the science of digital forensics, providing an understanding of how techniques should be applied to investigations. To enhance this knowledge, we looked at how these techniques fit into a framework of digital investigations. We then conducted an overview of the various tools available for digital forensics examiners.
In the next chapter, we are going to tie digital forensics into an investigative methodology for incident response.
Questions
- What is not a federal rule of evidence?
- A test for relevant evidence
- Locard’s principle
- A testimony by an expert witness
- The Best Evidence Rule
- A proper chain of custody should be maintained to ensure the integrity of digital evidence.
- True
- False
- Which items should be included as part of a digital forensics jump kit?
- A physical write blocker
- Notepad and pen
- Networking cables
- All of the above
- What is NOT a portion of the forensic process?
- Identification
- Courtroom testimony
- Collection
- Analysis
Further reading
- The Digital Forensics Research Workshop: https://www.dfrws.org
- ISACA’s Overview of Digital Forensics: http://www.isaca.org/Knowledge-Center/Research/ResearchDeliverables/Pages/overview-of-digital-forensics.aspx
- Historical background on the FBI CART: https://www.ncjrs.gov/App/Publications/abstract.aspx?ID=137561