By saving Visio drawings and diagrams as Web pages, you can share information with colleagues over a corporate intranet or with anyone who has a Web browser over the Internet. Many organizations use this method to make information available to employees across the organization—even if they don't have Visio. Web-based organization charts can help employees understand team and departmental relationships and can visually explain organizational changes. Each employee shape can also store custom property data so that these charts can be a source of up-to-date employee information, such as employee office location, telephone number, e-mail address, and so on.
Using Visio, publishing your diagrams to the Web or an intranet site is as easy as saving a file. Visio adds the HTML codes necessary to display the diagram in a Web browser, so all you have to do is make sure your diagram looks the way you want it to. To save a Visio diagram as a Web page, just click Save as Web Page on the File menu as you would for any other Office 2003 file. Navigation elements included in your diagrams, such as hyperlinks and page tabs, are retained in the Web page and any supporting images are saved in a folder that corresponds to the Web page.
In this exercise, you save an organization chart as a Web page. Then you view the Web page in your default Web browser, view custom property date in the Details pane, and navigate between pages using a hyperlink and the Go to Page pane.
OPEN the OrgChartWeb file in the My DocumentsMicrosoft PressVisio 2003 SBSCreatingCharts folder.
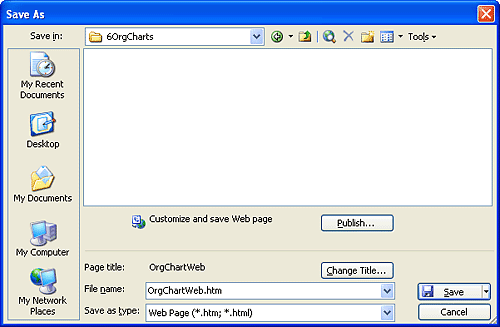
On the File menu, click Save as Web Page.
The Save As dialog box appears with OrgChartWeb.htm displayed in the File name box.
In the Save As dialog box, click Publish to open the Save As Web Page dialog box.
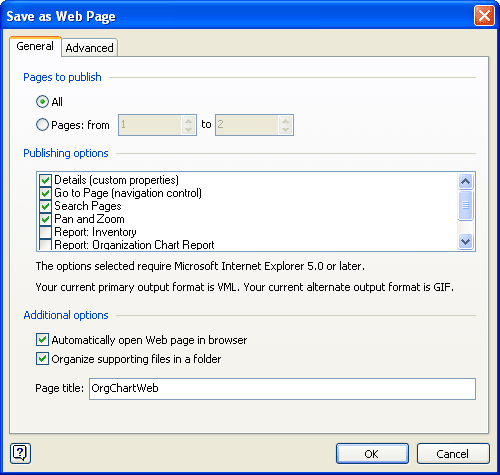
In the Pages to Publish area, make sure the All option is selected.
In the Publishing options area, make sure the Details (custom properties), Go to Page (navigation control), Search Pages, and Pan and Zoom check boxes are selected.
In the Additional options area, make sure the Automatically open web page in browser and Organize supporting files in a folder check boxes are selected, and then click OK.
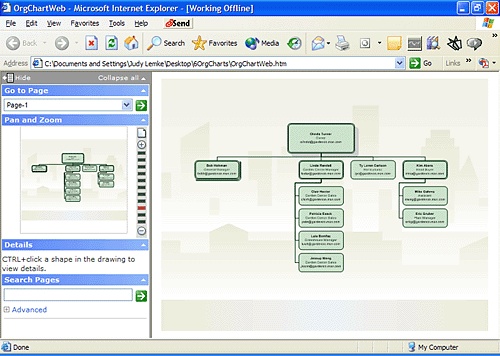
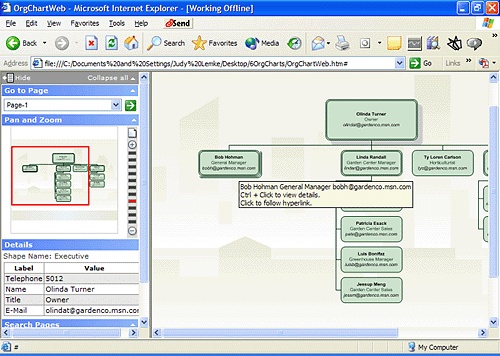
A progress bar appears as Visio saves the diagram as a Web page. The organization chart opens in your default Web browser, which also shows the blank Go To Page, Details, and Search Pages panes in the left side of the browser window. Visio saves the Web page and supporting files for it in a folder that corresponds to the Web page file.
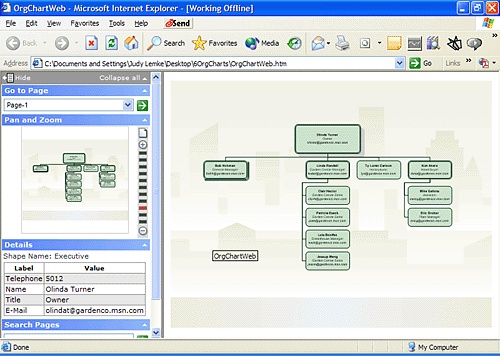
Hold down the
 key as you click the Olinda Turner shape to view its custom property data in the Details pane to the left of the drawing page.
Pause the pointer over the Bob Hohman shape.
The pointer changes to a hand to indicate that the shape includes a hyperlink. A ScreenTip also appears.
Click the Bob Hohman shape.
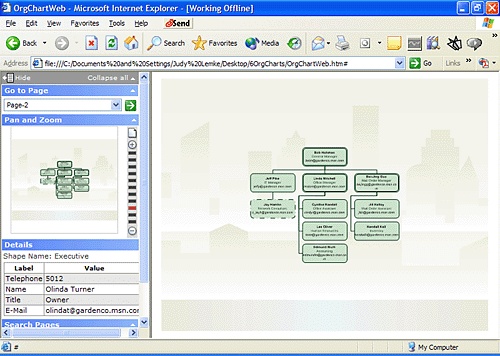
Visio displays Page-2, which contains the shapes that represent the employees in Bob Hohman's department. Notice that Page-2 appears in the Go to Page pane to the left of the organization chart.
In the Go to Page pane, click the down arrow, click Page-1, and then click the green arrow to return to the first page.
In the Web browser, on the File menu, click Close.
The Web page closes, and your original Visio diagram appears.
On the File menu, click Close, and then click No so you don't save the changes to the chart.