
13. Card Games: Higher or Lower, Video Poker, and Blackjack
Card games predate computers, but they have taken on a whole new life thanks to computer games. For instance, solitaire games are much easier and more fun when a computer does the dealing and keeps everything organized.
In this chapter, we’ll look at three card games, starting off simply with Higher or Lower. Then we look at two casino-style games in Video Poker and Blackjack.
In addition to learning how to represent a deck of cards in Flash, we also cover the concept of timed events. Instead of dealing out sets of cards all at once, we use Timers to deal them as a human would—one at a time.
Higher or Lower
To start with some card handling, we use a very simple single-player card game that goes by many names. Let’s call it Higher or Lower.
The basic premise is that cards are dealt one at a time. After the first card, the player must decide whether the next one will be higher or lower than the previous.
You can do this with a regular deck of 52 playing cards. But we’ll simply use a deck of 20 cards numbered 1 through 20.
The idea is to see how to make a deck of cards out of a single movie clip and then to present those in a simple game.
Source Files
A3GPU213_HigherOrLower.zip
Creating the Deck
So whether you are using 52 cards or 20, you might want to avoid having them all as separate library objects. Instead, make a single movie clip, and have each frame in that movie clip represent a single card in the deck.
This allows you to reuse elements across the cards. For instance, you can reuse the same border throughout all of the cards. One change to the border and it changes for all frame, or cards, of the deck.
Note

Another advantage of using a single movie clip for the deck of cards is that you can have an artist working on the deck in a separate Flash movie, and programmer developing the game at the same time. In the end, you can copy and paste the artist’s finished deck movie clip into your movie. You can even have different decks with different graphic themes that you can swap in and out for game variations.
Then, you can create a card on the screen by creating an instance of the Cards movie clip and then telling it to go to a specific frame to represent the card on that frame.
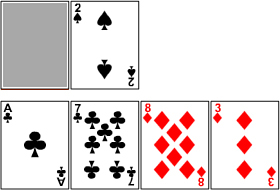
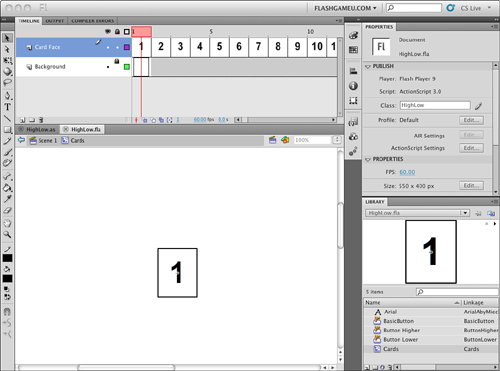
Figure 13.1 shows the Higher or Lower card deck, in the movie clip Cards. You can see the first card. In the timeline, you can see some of the other cards. They have different numbers in the Card Face layer, but they all share the same Background layer.
Figure 13.1 The Cards movie clip contains 20 cards each with a different face but the same background.
To put a card on the screen, all we need to do is create an instance of Cards, use gotoAndStop to set the card to a specific value, use x and y to set its position, and then use addChild to put it in the display list.
Besides the deck, all we need are three buttons in the library: one to start the game, and a Higher button and Lower button.
The game will also have two gameover frames: one for if the player wins by guessing right five times, the other for if the player guesses wrong during the game. The only difference is the text on the frames.
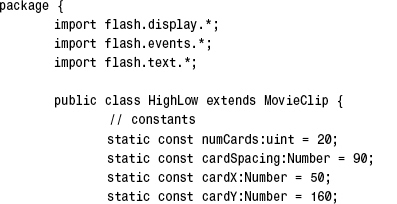
Setting Up the Class
So, the movie will be HighLow.fla, and the movie class HighLow.as. The class starts off with the most basic imports, and then we declare some constants. One is for the number of cards in the deck. The other three determine the starting position of the first card and how far apart to space the cards that follow:
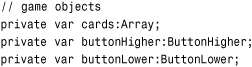
We store all the cards in an array as we deal them out. And then each button is referred to by its own variable, so we can easily remove them later on:
The only card values that matter during game play are the value of the current card showing and the value of the new card dealt. We store those numbers in these variables:
![]()
Starting the Game
We don’t use a constructor function for this game. Instead, we start the game on frame 2 and call startHighLow just as we have done for many of the games in this book.
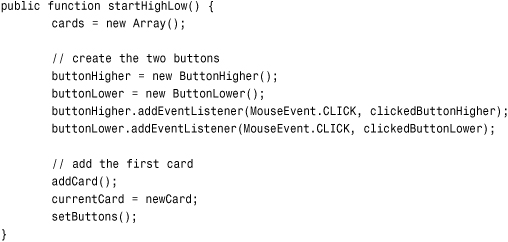
This function creates the cards array and create the two buttons. It also calls addCard to start the action. One of the things addCard does is to set the value of the variable newCard. Because this isn’t a card being requested by the player, we immediately copy that value into currentCard. Then a call to setButtons puts the Higher and Lower buttons directly under the card on the screen:
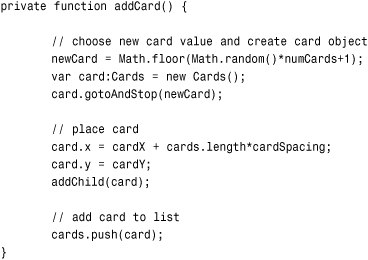
The addCard function is where a new card is created from the Cards movie clip. A random frame number is chosen, and gotoAndStop is used to set the movie clip. Then the position is set, and addChild makes it visible. The card is also added to the cards array:
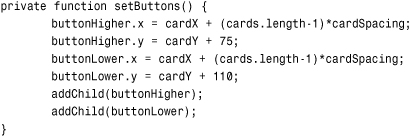
We could just have two buttons on the game play screen, one for Higher and one for Lower, and then just leave them there centered on the screen. But it is nicer to have the two buttons appear to move with each new card dealt. So, the setButton function sets the location of each of the two buttons to just under the newest card:
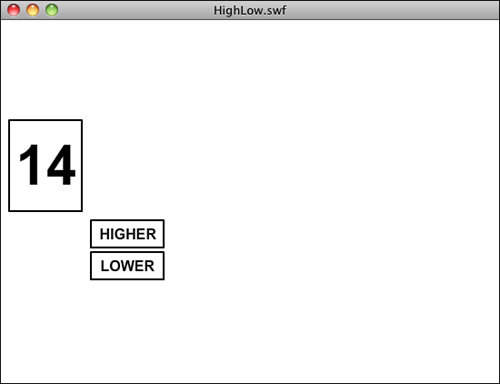
Take a look at Figure 13.2. You can see the first card dealt, and the buttons have moved to be right under it.
Figure 13.2 The first card has been dealt, and the buttons appear for the player to make a choice.
Responding to Player Moves
Each button has been assigned an event handler and a corresponding function. These next two functions will both add the next card to the game. Then, they will call checkCard with the value of "higher" or "lower":
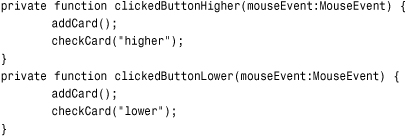
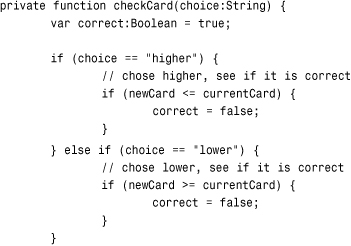
The checkCard function is the heart of the game. The choice is passed in as a string. Then it checks the value of newCard versus the value of currentCard. An assumption is made that the player is correct, so the if statements look for the player to be wrong. If so, then correct is set to false:
If the player is right, the number of cards is examined. The game goes up to only six cards, so if the player has made it this far, he or she gets to see the gamewon frame, and the buttons are removed from the screen. Otherwise, the buttons are repositioned, and the player must go on to choose again:

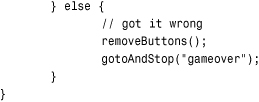
If the player guesses wrong, the buttons are removed, as well, but this time the player gets to see the gameover frame.
Cleaning Up
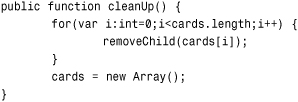
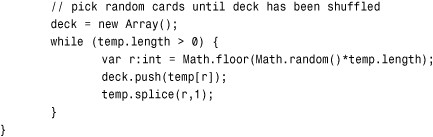
The removeButtons function is very simple, but important. We don’t want to allow the player to continue to make choices after the game is over:

Both the gamewon and gameover frame have a button on them to allow the player to try again. When players click it, the cleanUp function is used to get rid of the current set of cards:
That’s it for the class. It is worth looking at the one of the scripts on the final frames, however. These set up the button there to restart the game:

The function clickPlayAgain is used by both the gamewon and gameover frames, but it needs to be present only once. So, it is in the first of the two frames.
Modifying the Game
I tried to keep this game very simple. But if I were actually going to use this game for a project, the first thing I would do is to eliminate the chance that the same card would appear twice. Right now, the player can start with a 9, and then draw a 9 as the next card. That doesn’t mimic the real world very well, where once a card is chosen from a deck, it isn’t in the deck anymore.
In the following two games, we create a deck of cards represented by an array. Each element in the array will be a single card in the deck. Then we’ll shuffle the array and draw cards one at a time. This way, each card is present in the deck exactly once, as it would be in a real deck of cards.
Even with this simple game, you can still create some interesting flavor by including nice graphics with the cards and a nice screen background. You can sometimes see this game presented on big screens at baseball games, where they use baseball cards with the players’ numbers on them. That makes it topical and can help people learn the jersey numbers. That idea could also be used for a web site game to promote a school sports team.
Video Poker
Now let’s try a game that uses a real deck of playing cards. You can find this game on dedicated machines in most casinos, and it is popular as a just-for-fun game on websites.
Video Poker is a gambling game. You are given a number of points, or cash, to start—they are the same thing in this game. I use a dollar in this game by adding a dollar symbol when showing the score. But you could call one point a penny, or a euro, or anything.
Each time you play, you gamble one dollar. You are given five cards, and if the cards make a decent poker hand, you get more points. If the poker hand value is too low, you score zero points.
Note
Of course, poker is usually a game played against other people. But that is a very different type of game. In Video Poker, you are basically playing an interesting slot machine. And if the odds are set right, they favor the house. But for a more fun web-based game, you might want to let the player win. You can do that by changing the payouts in the winnings function near the end of the class.
You are given one opportunity to improve your hand by trading in one, several, or none of your cards for new ones. So, there is some strategy involved.
This game includes a few new concepts, including a shuffled deck of cards in an array and regularly timed events.
Source Files
A3GPU213_VideoPoker.zip
Shuffle Up and Deal
Each time a card was dealt in the Higher or Lower game, it was just a random number. You could have had two identical cards picked, for instance. There was no “deck” of cards—each one was just created out of nothing as the game played out.
For card games that use a real deck of playing cards, such as Video Poker and Blackjack, we need to create a deck of cards and shuffle it. We covered this basic technique back in Chapter 2, “ActionScript Game Elements,” in the section titled “Shuffling an Array.”
Creating the deck consists of just having an array of 52 card names. To keep things simple, let’s name the cards with a letter and a number. So c9 is the 9 of clubs, h5 is the 5 of hearts, and so on. The letters c, d, h, and s represent the four suits of clubs, diamonds, hearts, and spades, respectively. The numbers 2 through 10 represent those numeric values. The numbers 1, 11, 12, and 13 represent the ace, jack, queen, and king values.
Note
The reason the suit letter is first is that it is always one character. The number can be one character (such as 7) or two characters (such as 10). So, we can easily get the suit by extracting the first character, and the number by extracting all characters after the first.
After an array is created with all 52 card names, we need to shuffle it. This means creating a new array and then picking random cards from the original array at random locations and moving them to the new array. The result is a completely randomly shuffled list of card names.
We can then use pop to take one card name off the top of this deck and deal it out.
Timed Events
At the start of Video Poker, the player is given five cards. It is easy enough to put all five cards on the screen at once. But typically this isn’t how it is done. Instead, each card is dealt out with a slight delay between the appearance of each card.
So when it is time to show five cards, instead of putting them all on the screen at once, we deal one at a time. To do this, we use Timer objects to space the cards a fraction of a second apart.
Instead of dealing all five cards with one action, we put five “deal card” events in an array list. Then we start the Timer. Each time the Timer’s function is called it will take an event off the top of the events array and perform it.
Note
The key to doing timed events is to not allow the player to take an action until all the events have been acted on. We do this here by not giving players the buttons to click until the last event. Alternatively, you could make the buttons available and recognize when a button is pressed and there are still events left. In that case, those events get performed without delay before the player’s requested action is performed.
Not only do we use this for the initial deal, but also for the drawing of each replacement card later in the game.
Making the Deck
The deck of cards is single movie clip in the library, as before. This time, each frame is labeled according to the card value: c1, c2, c3, and so on. In addition, there are frames representing a turned-over card and a blank frame as well. Figure 13.3 shows the movie clip with the ace of clubs frame selected, and you can see it is named c1.
Figure 13.3 The Deck movie clip includes a frame for each card.
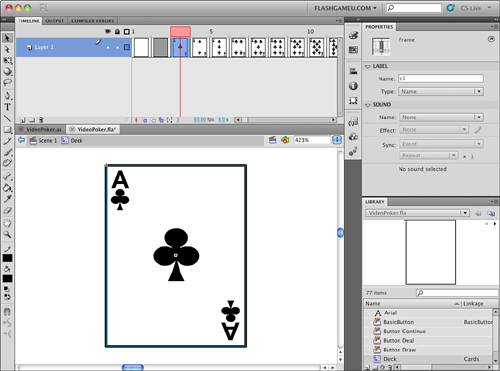
When we need to place a card on the stage, we just create a new instance of Deck, and then use gotoAndStop to set it to the image of the card we need.
Note
In the Movies library, you can find the movie clip with the cards, plus a whole folder filled with supporting graphics. The example deck is pretty simple. For a real game, you need to have pictures on the face cards. Those pictures are actually pretty specific. For instance, the king of hearts is the “suicide king” and has the sword behind his head (or through it, depending on your perspective). The jacks of spades and hearts are “one-eyed jacks” and have their heads turned to the side, so you can see only one eye. Make sure you or your artist have studied playing card artwork before creating the set of cards you will use.
Game Elements
Besides the deck, we need some buttons for this game. Like the Higher or Lower game, the buttons shown depend on the progress of the game. In Figure 13.4 you can see there are three buttons: Draw, Deal, and Continue. But we never want to have all three buttons present at the same time. Instead, the Deal button is there at the start of the hand. Then it is removed as the five cards are dealt. Then the Draw button appears. When the player clicks that, it disappears while the cards are replaced. Then the Continue button appears by itself at the end.
Figure 13.4 The main game frame includes three buttons, but only one will appear at a time.
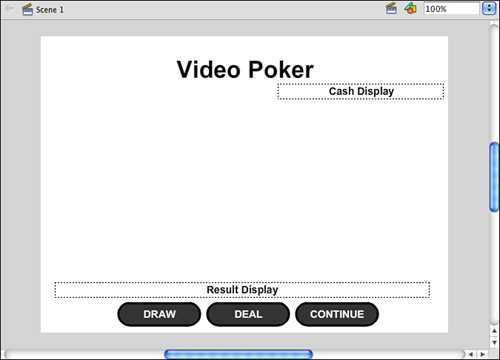
In this example game, the three buttons are next to each other. But because only one of them appears at a time, you can place them at the exact same location if you want.
The event listeners for these three buttons are assigned in the timeline script on the second frame, which also calls the game start function:

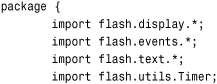
Setting Up the Class
In addition to the standard includes, we need to include Timer functions so that we can place the cards at timed intervals:
Then we need some properties of the class to keep track of the amount of cash the player has and how much money will be risked with each hand. In this case, the bet is a variable, but it could also be a constant. However, if you extend the game to allow the player to bet different amounts, it needs to be a variable.
There needs to be an array for the player’s hand also. A separate array will keep track of the card object instances so that we can easily remove them later on. The last array keeps track of which cards the player has chosen to have replaced:
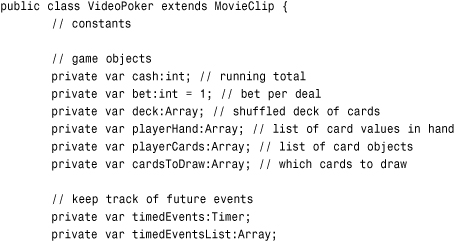
The last two lines declare a Timer object and an array. We use these when creating the timed events.
The game start function starts by setting the player’s cash to 100, and then calls showCash to display that in a text field. This function is called by the timeline script when the movie reaches that frame:
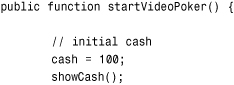
Next, it calls createDeck to create a deck of card names in an array and shuffle them. We look at that function next:
// start game
createDeck();
The timedEventsList is an array of things the game needs to do at regularly spaced intervals in the future. It starts off empty:
// set up timed events list
timedEventsList = new Array();
There will be three buttons on the screen. But at the start of the game, we don’t want all of them there. Which buttons are present depends on the progress of the game. We start by hiding all of them, and then let the different game functions unhide the buttons that are needed:
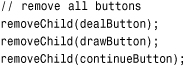
Note
Remember that removeChild only removes objects from the display list. All other properties, like the positions of the objects, remains set. So we can take objects away with removeChild and then add them back easily, just as they were before, with addChild.
Finally, the game starts with a call to startHand:
![]()
Shuffling the Cards
To create a shuffled deck of cards, we first need to build an ordered deck of cards. The array should be a set of strings starting with c1 and continuing to s13.
So we’ll start with an empty array and then loop through the four suit letters. We put each in an array, and then loop from 0 to 3 to get each of the four letters.
Inside that loop, we loop from 1 to 13 to get each of the numbers. Then we’ll add a single string consisting of the suit letter and the number to the array:
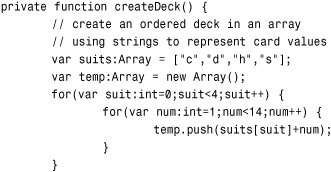
Notice that the array is created in a variable called temp. This is because the variable is temporary and we won’t be using it past this function. The real deck of cards will be in the deck variable. That will start off empty. Then, in a loop, we pick a random card from temp and place it in deck. We do this until temp is empty:
Now we have the deck array filled with all 52 card names in a completely random order.
Timed Events
Before we start the game, let’s look at the functions that will handle the timed events.
We start with two functions. The first will tell the game to start looking for timed events and perform them. It just creates a timer, sets an event listener to call playTimedEvents, and then starts it. Note that the number 250 represents 250 milliseconds, or one quarter of a second. That is how far apart the events will be spaced:

Here is the counterpart to stop looking for events. We call this when there are no more events to execute:

When we have an action that needs to be performed in sequence, we push it on to the timedEventsList by calling this next function:
![]()
The function that does all the work is playTimedEvents. It looks through an if statement to see what the string stored at the front of timedEventsList is supposed to do. Then it runs some code accordingly. The shift function is the counterpart to pop, taking an element from the front of an array instead of from the end:
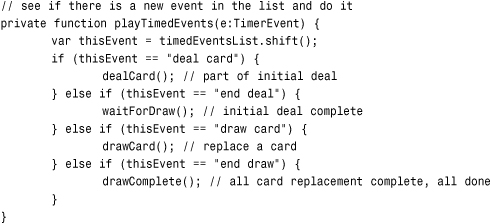
So for timed events, it is a matter of adding a string to the list of events and then making sure there is code in playTimedEvents to handle the event. You also have to remember that no events will be handled until you call startTimedEvents, and that any event that finishes a sequence should call stopTimedEvents when its code is done.
Here’s the Deal
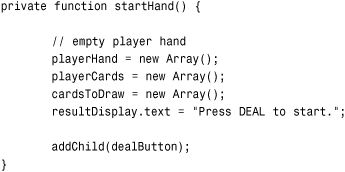
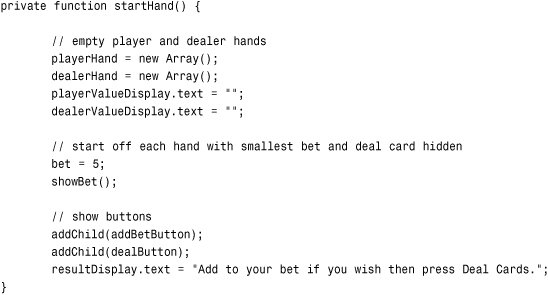
When the game starts, the startHand function is called. This doesn’t deal the cards; it simply resets the arrays and makes the Deal button visible so that the player can click it. It also places some help text in a text field to prompt the player:
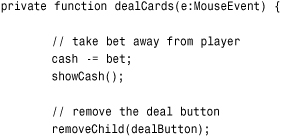
The dealCards function is the one that deals the initial five cards. It starts by subtracting the bet from the player’s cash and updating the display of cash. Then it removes the Deal button so that the player can’t click it again. At this point, all three buttons are invisible:
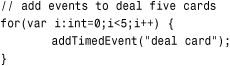
Next, five cards are dealt. Well, they aren’t dealt right now. Instead, they are added to the timed events list by sending the string “deal card” to the function addTimedEvent:
In addition to the “deal card” events, we also add an “end deal” event. This is what triggers the game to place the Draw button on the screen so that the player can make a move. Figure 13.5 shows what the screen looks like at this point in the game.
Figure 13.5 The initial five cards have been dealt, and the user can now decide which cards to replace.

After this last event is added, the game is ready to go. So, the startTimedEvents function is called to get the game processing those six events:

When the event “deal card” is encountered, a call is made to dealCard. This function gets the next card from the deck and then calls showCard with it. It also adds this card to the player’s hand:
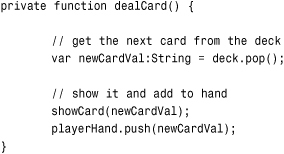
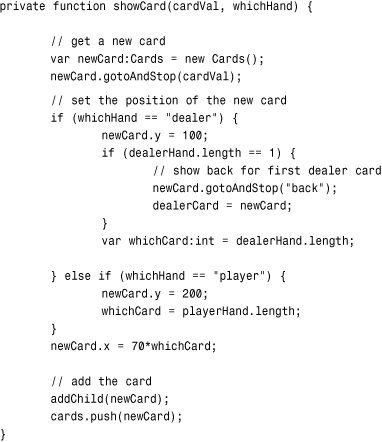
The showCard function is what creates the card object and places it in the right position on the screen, showing the right frame.
It also sets two properties of the card movie clip: the val and pos. The first is the value of the card, such as h11 for jack of hearts. The second is the position of the card in the hand, a number from 0 to 4. The position is obtained from the current length of the playerHand array:
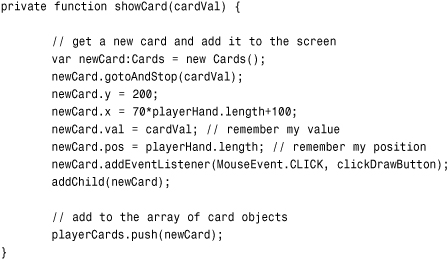
Another thing that the showCard function does is to set an event listener for the card. This turns the card into a button so the player can click it.
Drawing Cards
After five “deal card” events are handled in succession, an “end deal” event is handled. This calls the function waitForDraw, which basically puts the Draw button on the screen and updates the help text. It also calls stopTimedEvents since no more events are left to execute in the event array:
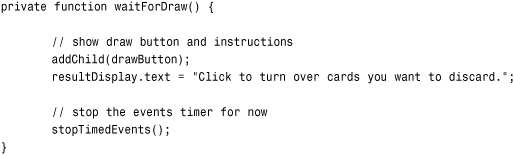
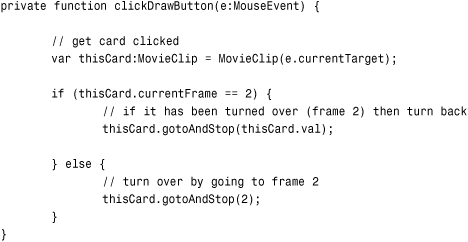
At this point, the game comes to a stop. It is up to the player to perform actions. The player can click any card or click the Draw button. If the player clicks a card, the event listener we put in place calls the clickDrawButton function.
This function places the card in the local variable thisCard. Then it handles two situations. The first is if the card is already showing frame 2, which is the back of the card. This means the card has already been turned over by the player and should be turned back. By turning back, we just mean using gotoAndStop to show the correct card value.
Note
Because the back of the card is only used in this game to indicate a card should be replaced, you might want to change the graphic to make that even clearer. Perhaps you’ll want to add the text “Draw” or “Draw New” on frame 2 of the cards movie clip. Or, even add text that floats below or above the card.
The other situation, which is the more common one, is that the card is face-up and the player wants to turn it over. In that case, we send the movie clip to frame 2. It still knows its value because we stored that in the val property:
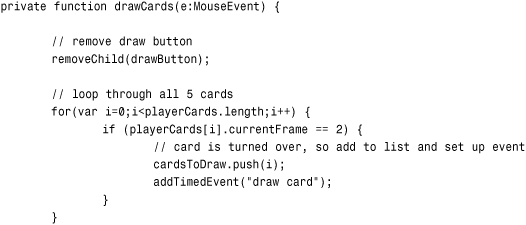
After the player has turned over any cards he or she wants to exchange, the Draw button moves the game forward. This function removes the Draw button. Then it loops through all the cards and looks for any that have been turned over. It adds those to the array cardsToDraw, which will, in the end, have a list of card positions where a new card is needed. For each of these positions, a “draw card” event is added to the events lists, as well:
Just as with dealing cards, we have a special event that signifies the end of drawing cards. After we add that, we can call startTimedEvents to kick off the event handling:

Drawing cards is similar to when they are dealt initially, but we have less to do. The “draw card” event is handled by calling drawCard. This function grabs the card position from the cardsToDraw array. Then it gets a new card value from the deck. It then changes the card that is already there to the new card value by setting the playerHand array in the right spot, and also using gotoAndStop to show the new value:
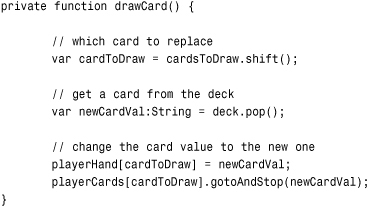
Notice the val property of the card isn’t changed. We don’t need to use that property anymore because it was for use only while the player was flipping cards over. At this point in the game, only the playerHand array matters.
Finishing a Hand
Once new cards have been drawn, the “end draw” event will trigger a call to drawComplete. This function calls handValue to see what the player has, and then winnings to see what it is worth. We’ll get to these functions soon.
Then these values are shown in the help text on the screen, and the winnings, if any, are added to the player’s cash. The Continue button is unhidden, and the timed events are turned off because there won’t be any more events until the next hand:
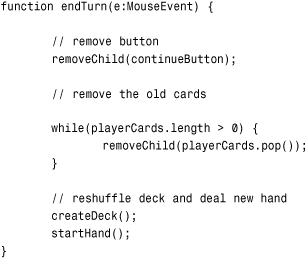
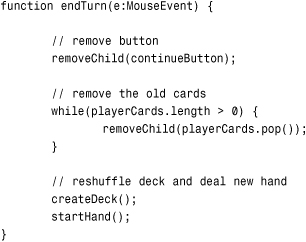
When the player clicks the Continue button, the cards are removed from the screen, and the whole process starts all over again with a call to createDeck to create a new deck of shuffled cards, and then startHand to begin a new deal:
The showCash function used many times just places this value in the text field:
![]()
Calculating Poker Winnings
The function handValue is a large one, and it has one job: to look at an array of five cards and determine what it is worth as a poker hand. For instance, the hand [c5, d8, h6, s7, h4] should return the value Straight.
Up until this point, every piece of code in every game has been shown here in this book. But in this case, I think it is best to leave it out. All it does is take an array and return a string. The calculations inside the function range from simple to complex. You can determine on your own whether it is worth knowing how it works.
You can look in to VideoPoker.as and see the function. I’ve added comments so that you can follow along with what it does well enough. In addition, I’ve written up a description of how it works for the website http://flashgameu.com.
The winnings function is more straightforward. It just assigns a numeric value to each poker hand string, according to how much cash should be won:

Note that a low pair returns 0. A low pair is a pair of cards lower than two jacks. While a high pair pays even money, a low pair is a loss. This is pretty standard in Video Poker games. If any pair paid even money, it would be too easy to break even with each hand.
Modifying the Game
The game of Video Poker is pretty well established, so there isn’t much you would want to do to modify how the basic game play works. But you certainly could polish the game up a bit.
For instance, a Cash Out button could let players leave the game with their imaginary winnings. They could then also restart a game that way with a fresh $100 in cash.
There should also be a watch kept on the player’s cash. If they fall below $0, the game should end, possibly going to the same screen that a Cash Out button does.
Another option is to allow players to vary their bet. Instead of just $1 for each deal, they could bet up to $5. In the next game, we cover that type of functionality.
Blackjack
Even more popular then Video Poker is the well-known game of Blackjack. It has many similarities to Video Poker, in that cards are placed on the screen at the start of the game and then the player must make choices to complete the game. In this case, players decide whether to hit or stay, and they may decide multiple times.
We’ll use the same deck, shuffling, and timed events functions from the previous game. But we’ll add in the ability to change the size of the bet before the cards are dealt.
A3GPU213_Blackjack.zip
Game Elements
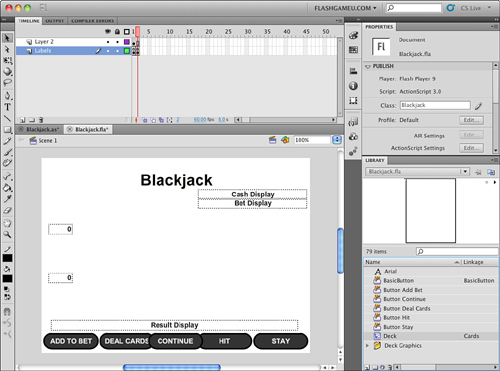
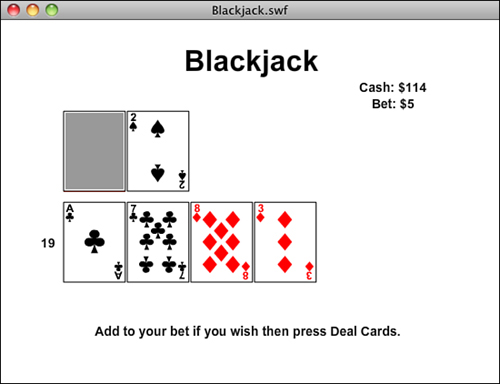
The setup of Blackjack is similar to Video Poker, but there are more buttons. The initial screen has a Deal button as before, but there is also an Add to Bet button. The Draw button is replaced by a Hit and a Stay button. There are also text fields for both the player’s total cash and this bet, and two more fields to show the total for the player and dealer’s hands.
Figure 13.6 shows the buttons. Notice they overlap. The Continue button doesn’t appear on the screen at the same time as the others, so it doesn’t matter. You could center the Add to Bet and Deal Cards button pair, and the Hit and Stay button pair, as well, because they are never on the screen at the same time.
Figure 13.6 The main screen for Blackjack includes several text fields and many buttons.
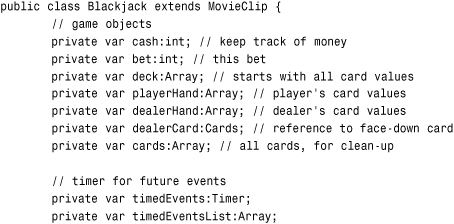
Setting Up the Class
The game uses the same imports as Video Poker and a similar set of game objects. But instead of just the player’s hand, we also need to represent the dealer’s hand. In addition, we need to keep track of one special card in particular (the first dealer card, which starts face-down and then gets turned over later in the game):
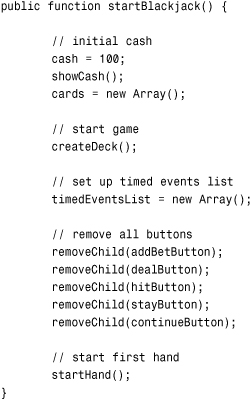
The function that kicks off the game looks almost identical to the Video Poker version. The only difference is there are more buttons to hide. This function is called by the timeline script when the movie reaches the second frame:
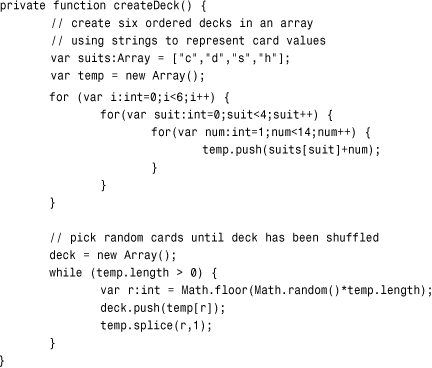
The createDeck function is actually a little different in Blackjack. Instead of a single deck of 52 cards, we use an array that holds six decks of cards. We do this by just looping six times to create six ordered decks. Then we shuffle the whole thing. It is common in casino Blackjack to use six or more decks:
Starting the Game
The startHand function sets up the arrays and cleans out the two fields that display the hand values. It sets the starting bet at $5. Then it puts the Add to Bet and Deal buttons on the screen:
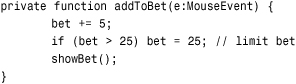
When the player clicks the Add to Bet button, it calls the addToBet function, which adds $5 to the current bet, but limits it to $25:
Then the player clicks Deal to start the game. The event listeners for both of these buttons, as well as the rest of the buttons, are assigned in the timeline script.
Timed Events
The startTimedEvents, stopTimedEvents, and addTimedEvent functions are the same as in Video Poker. One small exception is that I made the time delay 1,000 milliseconds rather than 250.
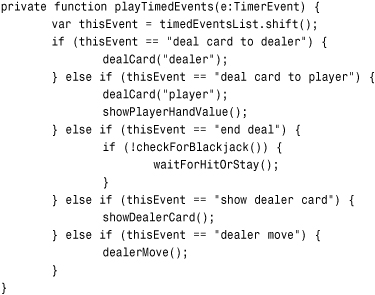
But the playTimedEvents function has to be different because Blackjack has a whole different set of events that occur. These are deal card to dealer, deal card to player, end deal, show dealer card, and dealer move. We address all of these as we look at the functions they call: dealCard, waitForHitOrStay, showDealerCard, and dealerMove:
When the player clicks the Deal button, the dealCards function pumps the events list full of things that needs to happen:

The Add to Bet and Deal buttons are removed from the screen at this point, and no buttons are visible because no user action is needed until the deal is done.
Dealing Cards
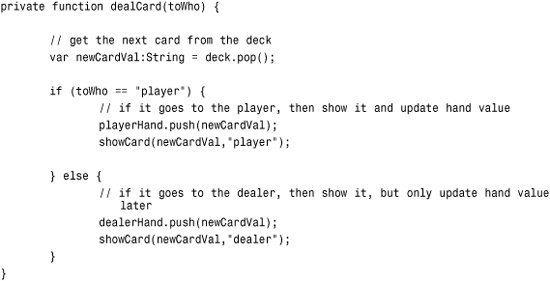
We could have two functions that deal cards: one to the player’s hand, and one to the dealer’s hand. Instead, let’s do it as one function. A parameter passed in specifies which hand to deal the card to. An if statement looks at that parameter and executes the appropriate code.
The code consists of adding that new card to the proper array and then calling showCard to place the card on the screen. The parameter of "player" or "dealer" is added to this call so that showCard knows where to put the card:
The showCard function looks more complex than it is. It merely creates a new card movie clip and then positions it on the screen depending on whether it is a player card or a dealer card. The movie clip is sent to the frame that depicts the card, unless it is the dealer’s first card. In that case, the movie clip goes to frame “back” to hide the value of this card:
Hit or Stay
Once the “end deal” event comes down, the game halts with a call to waitForHitOrStay. This function puts those two buttons on the screen and stops the event handler:
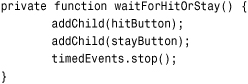
The two buttons already have event listeners assigned to them via the timeline script. Those listeners will result in the following two functions getting called when the player clicks those buttons.
The first is hit. This calls dealCard to give the player an extra card. Then it calls showPlayerHandValue to put the numeric value of the hand in the text field:
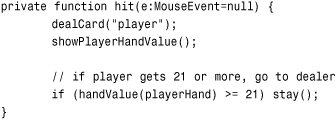
Finally, hit uses the handValue function to check to see whether the player either busts or has hit 21. Either way, the player shouldn’t be allowed to request any more cards. So the function stay is called automatically—the same function that is called when the player presses the Stay button. So it is as if the ActionScript code is pressing the Stay button for the player automatically.
Note
Notice the e:MouseEvent=null in the parameter space for the functions hit and stay? When you specify a default value, like null, for a parameter, that parameter becomes optional. Without it, the call from hit to stay would give you an error because stay would require one parameter. So we need it here in stay, and also put it in hit for consistency.
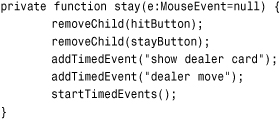
In addition to moving the game along by removing the Hit and Stay buttons, the stay function adds two new events to the events list and starts the timed events up again.
At this point, the game may look like Figure 13.7, where the player has hit several times but the dealer still has only two cards and the first is face-down.
Figure 13.7 The player is done, so it is time for the dealer to flip over his first card and then get any additional cards.
The Dealer’s Moves
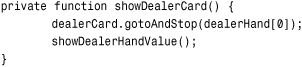
So, the first thing the dealer does is a one-time move triggered by “show dealer card” and executed by the showDealerCard function. It simply reveals the first dealer card, which had been hidden until this point.
Remember we stored a reference to the dealer’s first card in dealerCard? We now use that to set the proper frame for that card:
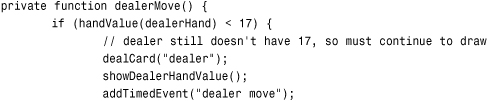
After this initial move, the next event is “dealer move.” This is where the dealer decides whether to hit or stay. The logic for this follows the way most casinos handle most Blackjack games. The dealer hits on anything 16 or lower. In that case, the dealer gets another card, and the total value is updated. Then another “dealer move” event is planned:
Otherwise, if the dealer is at 17 or higher, the game is over, and the only thing left to do is call a function named decideWinner to see who won:
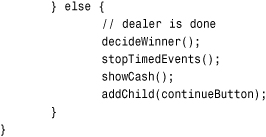
At the point the dealer is finished, the Continue button is also made visible so that the player can move on to the next hand.
Calculating Blackjack Hands
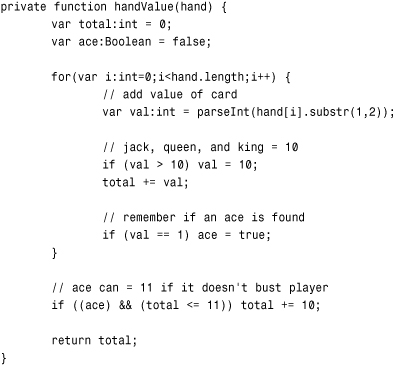
Before we go any further, let’s look at the critical function handValue. This is the function that takes the hand array and figures out what it is worth. This is a lot more straightforward than with Video Poker.
Basically, we want to loop through the hand and take the numeric value of each card and add it to the total. The only difference is that if an ace appears, it could be worth 1 or 11. It is worth 11 only if that makes the total value 21 or less. Otherwise, it is worth a 1.
So, we loop through the hand and add all the values, counting each ace as a 1. Then, at the end, if an ace is present, we add 10 to the total only if the current total is 11 or less:
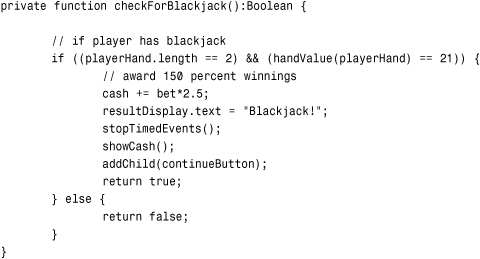
In addition to the value of a hand, there is one special case hand. That is if the hand is 21 with exactly two cards. This is a “blackjack” and is scored differently. The player gets 2.5 times the initial bet rather than 2 times the bet:
Next we have the decideWinner function. This one looks at the various situations at the end of the game and gives the player any cash he or she wins on the outcome.
The function starts by getting the values of each hand:

The first case is if the player busts (that is, has more than 21). In that case, the player loses:
if (playerValue > 21) {
resultDisplay.text = "You Busted!";
The next case is if the dealer busts. If the player didn’t bust, but the dealer does, the player wins two times his or her original bet:

If neither the dealer nor the player busted, and the dealer has a higher value than the player, the player loses:
} else if (dealerValue > playerValue) {
resultDisplay.text = "You Lose!";
If the dealer and player have the same value, the game is a draw, and the player gets his or her original bet back:
![]()
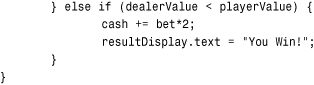
The only remaining outcome is that the dealer has a lower value than the player. In this case, the player wins and gets his or her bet back plus that much in winnings:
Other Game Functions
When the player clicks the Continue button, the entire process starts over again. One interesting thing that is done in Blackjack is that the deck is not reshuffled each hand. Instead, the same deck is used with the previous cards set aside. This is usually done until the stack of cards, called the shoe, is near depletion. In this case, we create a new array only when the shoe reaches 26 cards or fewer. Otherwise, we keep pulling new cards from the same array:

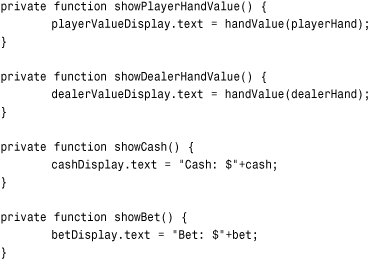
The next four functions are simply used to place information into fields on the screen:
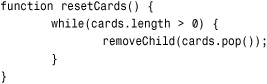
And, finally, here is the resetCards function that uses the cards array to clear the screen of all cards so that a new round can start:
Modifying the Game
If you play Blackjack, you probably recognize that two things are missing from this game: the ability to double-down and the ability to split. Doubling-down is fairly easy to add because it is like a hit to get a third card, but you double your initial bet at the same time, and you cannot take another card after doubling-down.
But splitting is much more complex. This move allows you to split a hand that has two matching cards, like two 10s, into two separate hands. So right there you can see the problem: Where on the screen do you put the two hands? And, how do you represent the two hands in the internal workings of the game. You would need to have an array of hands, not just a single hand.
But what if the split results in another hand that can be split? Then you could have three or more hands. Dealing with that on the screen and in the code can be a hassle and is beyond the scope of this book. But if you have been following along with each lesson, and believe that you are ready for a big challenge, then by all means go ahead and try to add these two features.