
Lesson 12. Tagging and Fixing Photos
Lesson Files
None
Time
This lesson takes approximately 90 minutes to complete.
Goals
Organize photos into albums
Select your favorite photos
Compare multiple photos
Use effects, fixes, and enhancements
Enhance a photo with brushes
Repair a photo with a brush
You are able to fit a lot of silly, touching, crazy, joyous, and humiliating snapshots on your iOS device. Some of those moments are sure to stand out as your favorites, your second-best favorites, and the photo that would be a favorite if the person next to you weren’t in it. Similar to the Mac version, iPhoto on iOS provides many of the same methods to identify and fix your photos.
In this lesson, you’ll learn how to view just your favorite photos, and how to flag and fix some others while you sit on the train or walk through the supermarket. One hand can grab the grapefruit while the other one tags, crops, and brightens a photo of your new puppy!
Organizing Photos into Albums
Besides showing your photos and videos in chronological order in the thumbnail grid, iPhoto also organizes them into albums: a collection of photos and videos grouped together based on common properties. You assign some of those properties and some are assigned automatically by iPhoto. In either case, the goal of creating albums is to make finding specific photos easier.
1. Open iPhoto, and return to viewing all the photos in the Photos view.
2. In the lower toolbar, tap the Albums button.
The events and albums selected and synced from iTunes appear in the Albums view in iPhoto for iOS. Other albums are created only when you start using iPhoto.
3. Tap the Recent album.
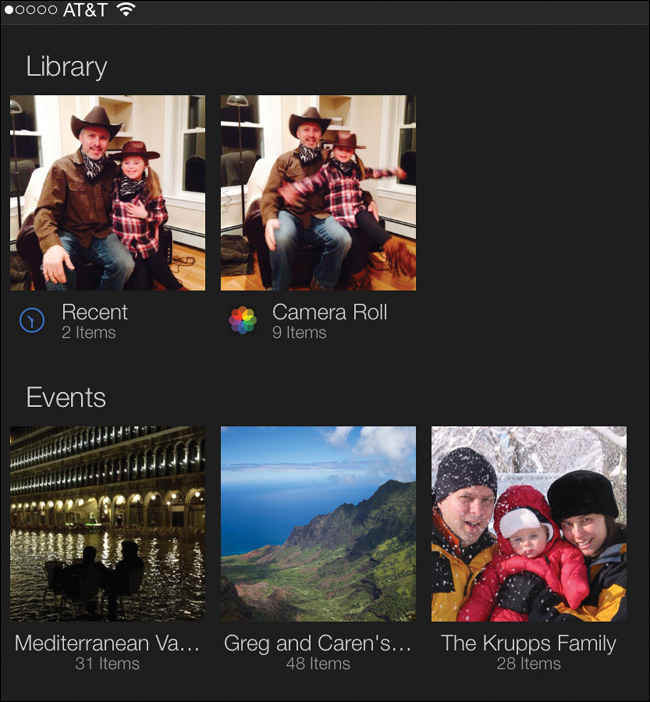
The Recent album—created by iPhoto on iOS—is a collection of your recently viewed photos. It updates every time you view a photo.
The photos in the Recent album are not moved or copied from their original locations. Photos can exist in multiple albums without taking up additional space on your device.
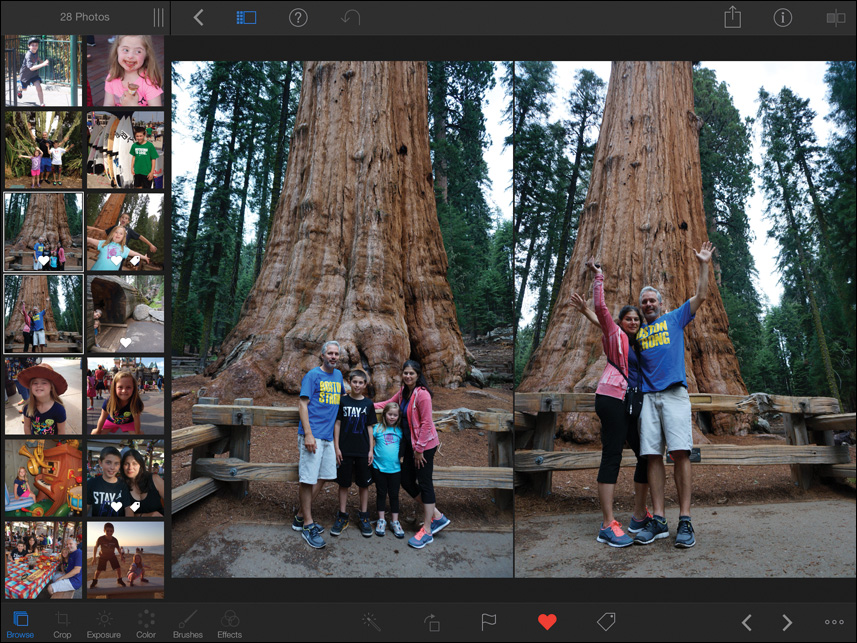
Collecting Your Favorite Photos
iPhoto creates some albums for you, which is nice, but you can also identify and select the photos you want to group together. One such grouping you probably want to create includes your favorite photos.
1. In the Recent album, select a photo you like.
2. In the toolbar, tap the Favorite button ![]() .
.

The Favorite button turns red to indicate that this photo is marked as a favorite, and a white heart is displayed on the thumbnail.
When you view albums, a Favorites album now appears.
3. In the upper toolbar, tap the Back button ![]() to view all your albums.
to view all your albums.
4. Tap the Favorites album.
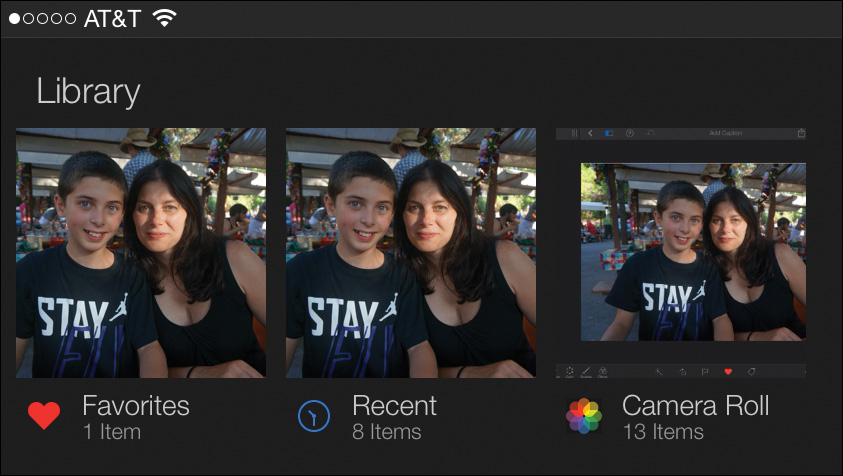
The Favorites album opens to show all your photos tagged as favorites.
Flagging Photos
A flag is a generic tag used to identify photos when the favorite tag isn’t accurate. For instance, you would flag a photo when you wanted to temporarily identify it for use in a slideshow, or when you later intended to make it black and white.
1. In the upper toolbar, tap the Back button to view all your albums.
2. Select the Camera Roll album to view the photos in the Camera Roll.
Remember, the Camera Roll album shows all the photos taken on this iOS device, saved from an email or text message, or beamed from another iOS device.
3. In the thumbnail grid, select a photo you would like to make black and white.
The photo becomes the current photo in the viewing area.
4. Tap the Flag button ![]() to apply the tag.
to apply the tag.
Tip
To remove the flag tag from a photo, tap the Flag button again.
The Flag button turns orange to indicate that the flag tag is applied to the photo, and a white flag appears on the thumbnail.
When you view albums, a Flagged album now appears.
5. Tap the Back button to view all your albums.
6. Tap the Flagged album.
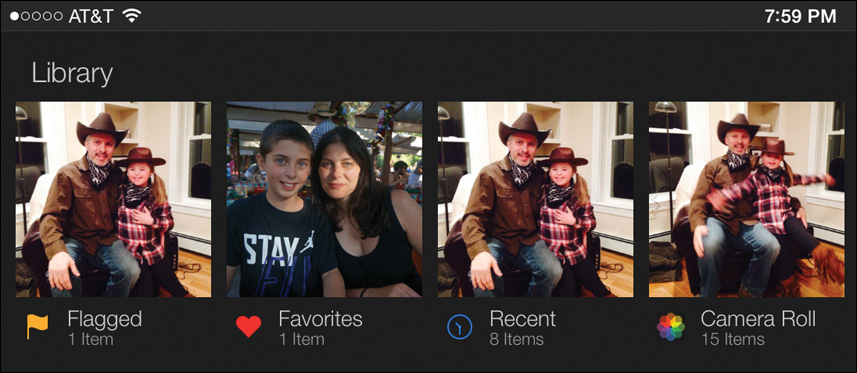
The Flagged album opens with all your flagged photos. You’ll use this flagged photo later in this lesson when you add effects.
Tagging with Keywords
Sometimes a descriptive keyword can be more helpful than a generic flag or favorite tag when trying to group photos.
1. While still viewing the photo you want to turn black and white, in the Flagged album, tap the Back button to view all your albums.
2. Tap Photos to view all your photos.
One of the keyword tags you might want to use is the name of people in a photo.
3. Tap a photo with a friend or family member in it.
4. Tap the Custom Tag button ![]() .
.
5. In the Tags popover, type the name you want to associate with the person in the photo, and tap Done.
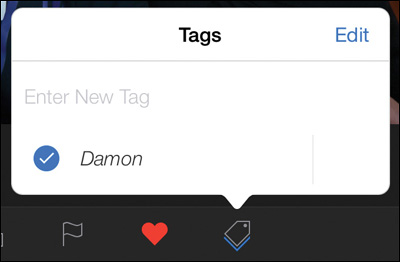
6. On the iPad, tap the current photo to hide the Tag popover.
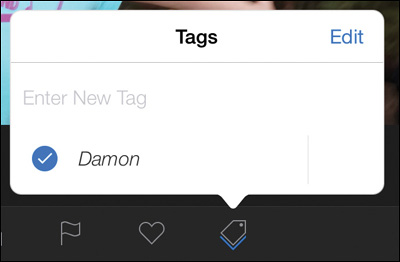
The Custom Tag button has a blue outline indicating that a tag was assigned, and a white tag icon appears on the thumbnail.
Tip
To remove a keyword applied to a photo, tap the Tag button, and tap the blue checkmark next to the keyword you want to remove.
The Tag popover displays a running list of all the keywords used to tag photos. So when you tag additional photos, you’ll have the choice to use existing keywords or enter new ones.
7. Select a photo from the thumbnail grid that contains the person you just tagged.
8. Tap the Custom Tag button to open the Tags popover.
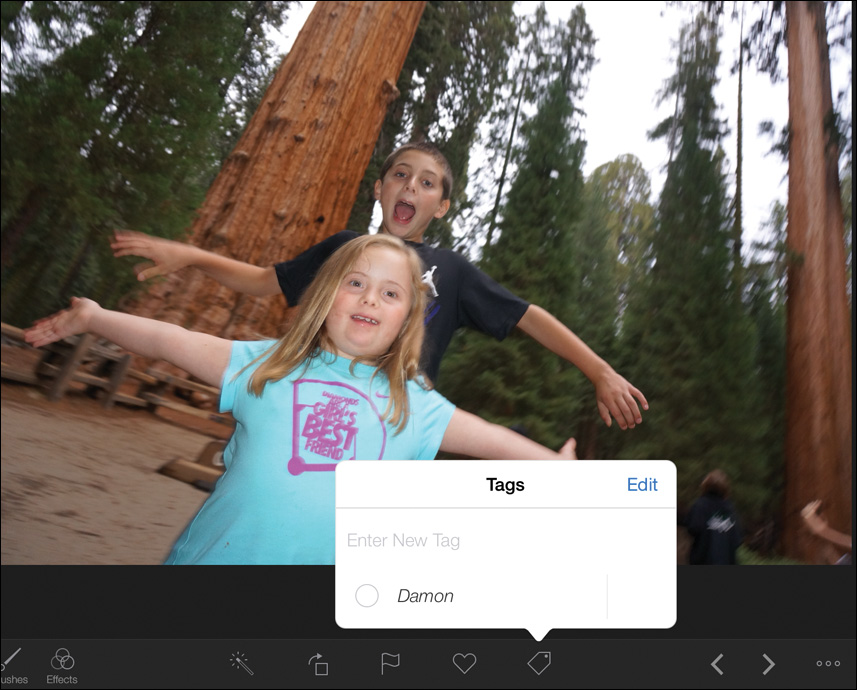
You can type a new tag, or tap any previously entered tag.
Note
A keyword applied to a photo cannot be deleted from the Tags popover.
9. In the Tags popover, tap the keyword you want to assign to the photo.
10. If other people appear in the photo, type any additional keywords you want assigned to the photo.
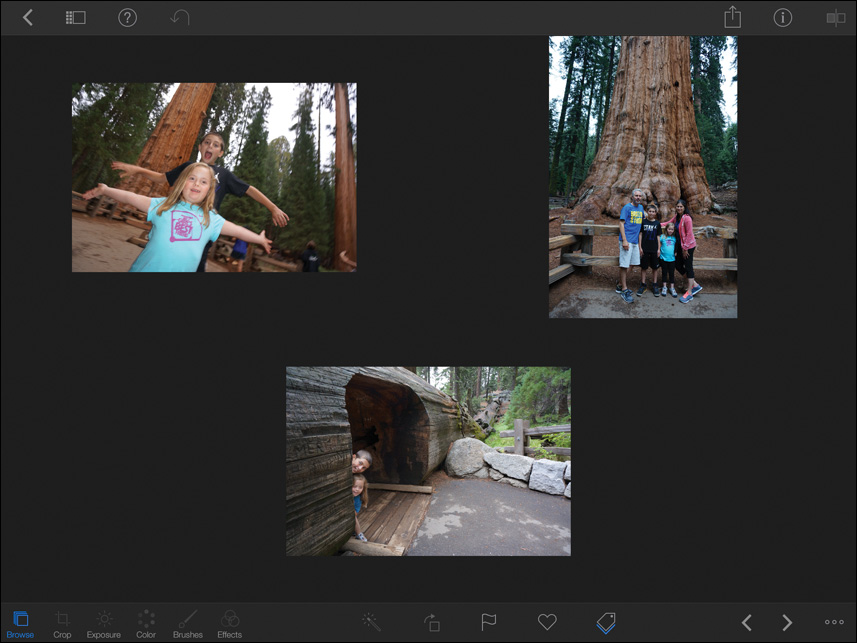
When you view albums, an album named for each tag now appears.
11. On the iPhone, tap Done.
12. Tap the Back button to view all your photos, and then tap Albums.
Tapping one of the new keyword albums displays all the photos with that tag assigned.
13. Tap a keyword album to view the photos tagged with that keyword.
Assigning custom tags is quick to do and offers a huge payoff if you do it regularly enough. The photos you always look for can be made much easier to find.
Comparing Multiple Photos
Nothing succeeds like excess, so the saying goes, and it certainly applies to taking iPhone snapshots. To find that successful photo, you generally have to wade through five others of the same object taken at only slightly different angles. iPhoto has a few ways to make comparing snapshots easier.
1. Tap Back to view all your albums, and then in the lower toolbar, tap Photos.
2. To view more than one photo in the viewing area, select a photo.
3. In the thumbnail grid, touch and hold any photo you want to add to the viewing area.

Tip
A swankier way to add photos to the viewing area is to swipe a photo from the thumbnail grid to the viewing area.
You can add as many photos as you want, but the value of the area diminishes with every photo. Eventually, the viewing area changes to display only two photos and adds text that reads “and ## more...”.
For the purpose of comparing photos, limit your selections to four photos in the viewing area. Even with four photos, the viewing area becomes a bit cramped. You can gain more room by hiding the thumbnail grid.
4. Tap the Split View button ![]() to hide the thumbnail grid. You now have more room to evaluate the four photos.
to hide the thumbnail grid. You now have more room to evaluate the four photos.
5. To eliminate a photo from its competition, swipe down over the photo you want to remove from the viewing area.
If you can’t quite narrow down your choice to one favorite photo from the group, you can tag multiple photos at once.
6. With more than one photo displayed in the viewing area, tap the Favorite button.
The Favorite button turns red to indicate that these photos are tagged as favorites.
7. Tap the Split View button to display the thumbnail grid.
White hearts are displayed on each selected thumbnail.
8. In the upper toolbar, tap the Back button to view all your photos.
9. Tap Albums, and then tap the Favorites album.
The newly tagged favorites have been added to your Favorites album.
Selecting a Range
If all the photos you want to view are next to each other in the thumbnail grid, you can select a continuous range without tapping each one.
1. Tap any album to view its photos.
2. Using two fingers at the same time, tap the first and last photos that encompass the range of five or six photos you want to view.
The range of photos from the first to the last is displayed in the viewing area.
3. Tap the Split View button to hide the thumbnail grid and open more room for the viewing area.
With five or six photos in the viewing area, picking which is the best is difficult. You can view each photo individually to see it up close.
4. In the viewing area, tap a photo you want to view larger.
The photo scales to fill the viewing area, while the other selected photos are dimmed in the background.
5. Swipe left or right to cycle to the next photo in the viewing area.
By continuing to swipe through the photos, you are able to see each one at a larger size.
6. When you locate a photo you want to eliminate from the group, swipe down to remove it and cycle to the next photo in the group.
With this technique, you will quickly be able to narrow down the selected photos to the one you like the best.
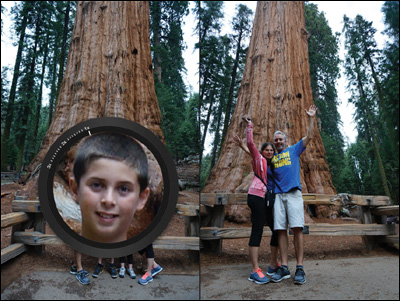
View Similar Photos
The iPhoto app for iOS uses face detection similar to that used in iPhoto on the Mac. The app can show photos that contain people who are similar in appearance. This boils down to photos taken around the same time that show the same people.
This feature works well as a way to locate duplicate photos for deletion.
1. In the upper toolbar, tap the Back button to view all your albums, and then tap Photos.
2. Tap a photo to display it as the current photo in the viewing area.
3. From the thumbnail grid, double-tap a photo of someone who appears in a series of similar photos.
A sound audibly indicates that similar-looking photos were found and will be added to the viewing area. Then you can decide which of the similar photos is the best and mark it as a favorite. If no similar photos are found, a different sound indicates that no similar-looking photos were found.
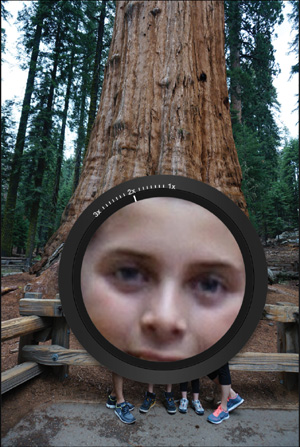
Checking for Focus
You’ve probably noticed that having multiple photos in the viewing area can make for small-sized photos. So even on a super-sharp iPad display, evaluating the clarity (or lack of clarity) in a photo can be difficult. With the iPhoto magnifier, you can see portions of a photo at actual size or even larger.
1. Still viewing the similar photos from the previous exercise, touch and hold two fingers on one of the photos.
A nifty little gadget called a loupe tool—a magnifier that shows the photo at its actual size—opens over the photo.
2. Drag the loupe to change its position within the photo.
Moving the loupe over edges of people’s eyes helps you determine if the photo is in focus.
3. Tap inside the loupe to increase the magnification.
Tip
You can also twist your fingers over the rim of the loupe as if you are turning a dial to increase and decrease magnification.
The image within the loupe is scaled up to two times its actual size. Now you are able to see real detail, and you can make better judgments on the quality of the photo.
4. Tap inside the loupe again to increase the magnification to 3x actual size.
5. Tap outside the loupe to close it.
With that level of magnification, you’ll be able to judge the focus and clarity of your photos on an iPhone as well as you could on your large Mac display.
Filtering the Thumbnail Grid
While viewing the thumbnail grid, you can use a simple method to filter the displayed photos based on various criteria.
1. Tap any album or event to view its photos.
2. Tap the label above the thumbnail grid.
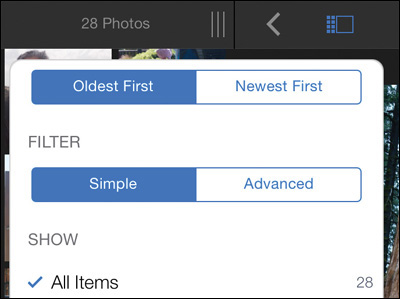
In the popover, the two buttons at the top allow you to change the sort order. The Show list allows you to filter the current thumbnail grid based on any of the listed criteria.
Tip
Changing the sort order changes it only in the thumbnail grid and only until you tap the Back button to view photos, albums, or projects.
3. From the popover, choose any filtering criterion.
The thumbnail grid displays only those photos that match the selected criterion. This is extremely helpful if, for instance, the album or event you are looking at contains many photos, but you want to see only the photos in a flagged album or event.
4. Tap the label above the thumbnail grid to reopen the popover.
5. Tap All Items to remove the filter from the thumbnail grid.
This was a simple filter. It used a single criterion to trim down the photos in the thumbnail grid. To filter the thumbnail grid using several criteria (for example, favorite photos with a specific keyword tag), you can tap the Advanced button.
6. Tap the label above the thumbnail grid to open the popover.
7. Tap Advanced to show the advanced filtering options.
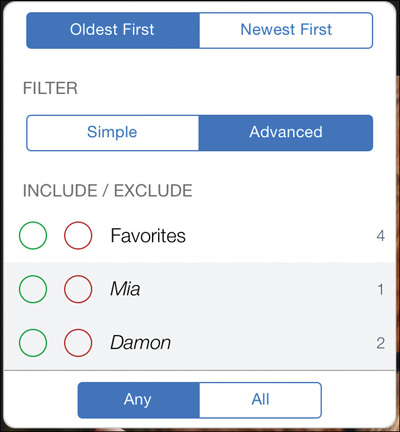
You can now tap items from the list to include or exclude them from the thumbnail grid display.
8. Tap the green circle to include those photos in the thumbnail grid.
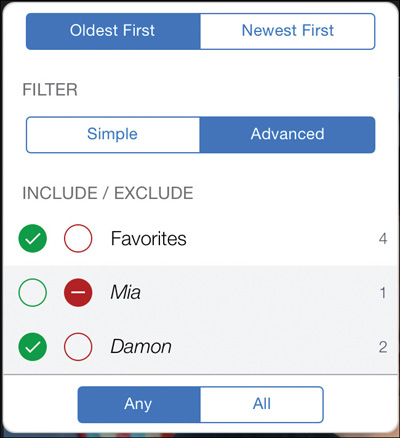
9. Tap the red circle to hide those photos in the thumbnail grid.
You can tap the Any and All buttons at the bottom of the popover to limit the filters further, by showing only those photos that match all the criteria (such as only photos that are both favorites and flagged), or show the photos that match any of the criteria (such as photos that are either favorites or flagged).
10. Tap the Simple button, and then tap All Items to view all the items in the thumbnail grid.
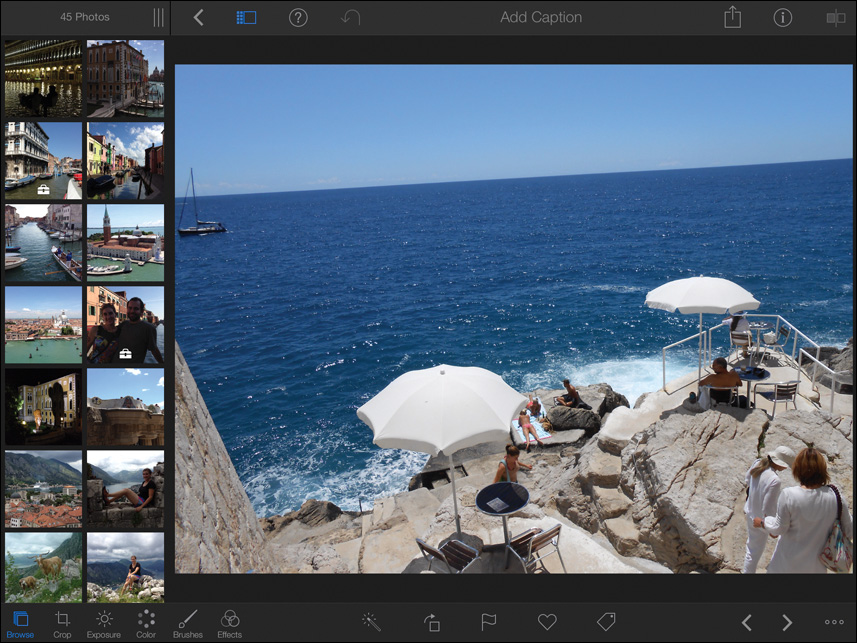
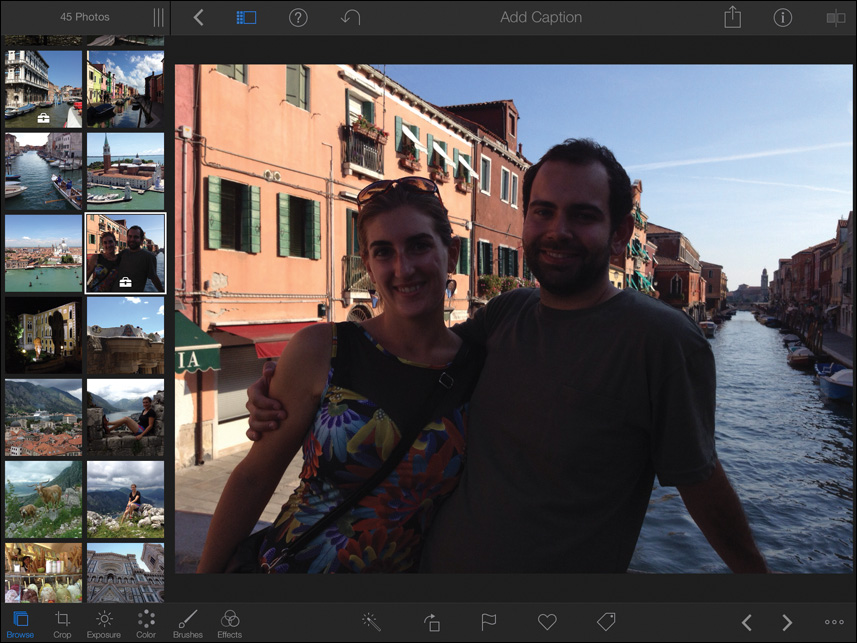
With so many ways to view and find your photos, I am sure you’ve come across more than a few that could use some fixing. The next few exercises touch on some of the enhancing and fixing capabilities as well as some fun and easy effects you can apply.
Using Effects, Fixes, and Enhancements
There isn’t a person alive, or a scenic vista created, that under certain environmental or technical conditions will not look ugly. That’s the reason we edit photos. iPhoto for iOS includes effects for quick stylized improvements, enhancements to make photos more vibrant, and fixes to correct human error. All of these are designed to make your good photos beautiful, and your ugly photos at least good.
Editing and Sharing Photos
Just as on your Mac, iPhoto on iOS does not permanently change the original photo when you add effects, crop, or modify the color and tone of a photo. As a result, you can easily return to the original photo at any time, which is known as nondestructive editing. It’s very handy for the most part, but it does cause some issues when you want to view those photos in other apps or on your Mac.
Generally, if you only want to view your photos on your iOS device and in iPhoto, you’re all set. Edit a photo, and the edits are there for viewing in iPhoto. The edited photos will even show up in the Photos app if they originated from the Camera Roll.
But if you edit a photo from an event or an album originally synced from iPhoto on the Mac, those edits will only show up in iPhoto—not in your Photos app, and not back in iPhoto on the Mac—if you try to import them.
To make sure (non–Camera Roll) edited photos show up on your Mac and in the iPhoto app correctly, use the Share menu to send the edited photos where you want them.
Stylizing Photos with Effects
Effects are probably the most popular form of photo editing because with one click they can create stylized, dramatic pictures. The iPhoto effects are perfect for mobile photography because they are quick to use, eye catching, and usually require only one finger.
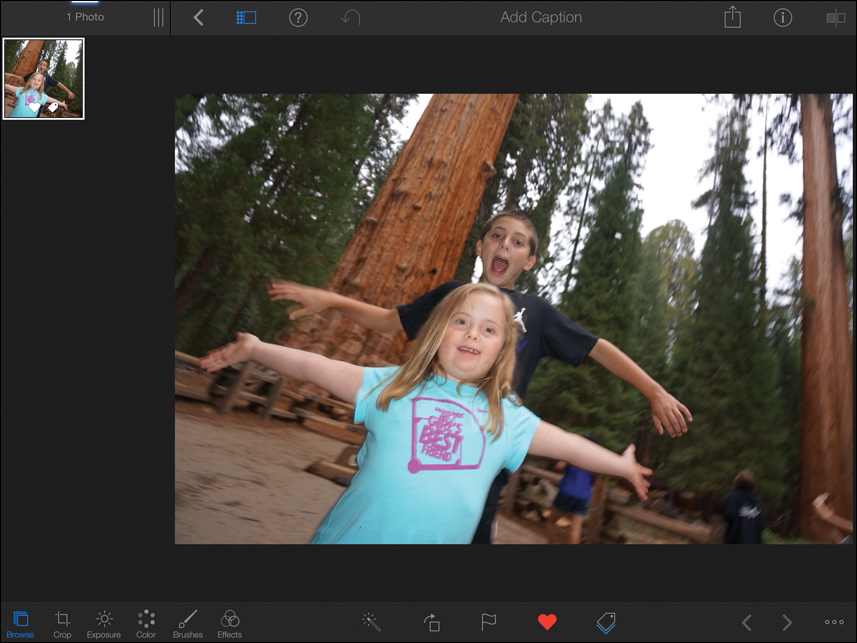
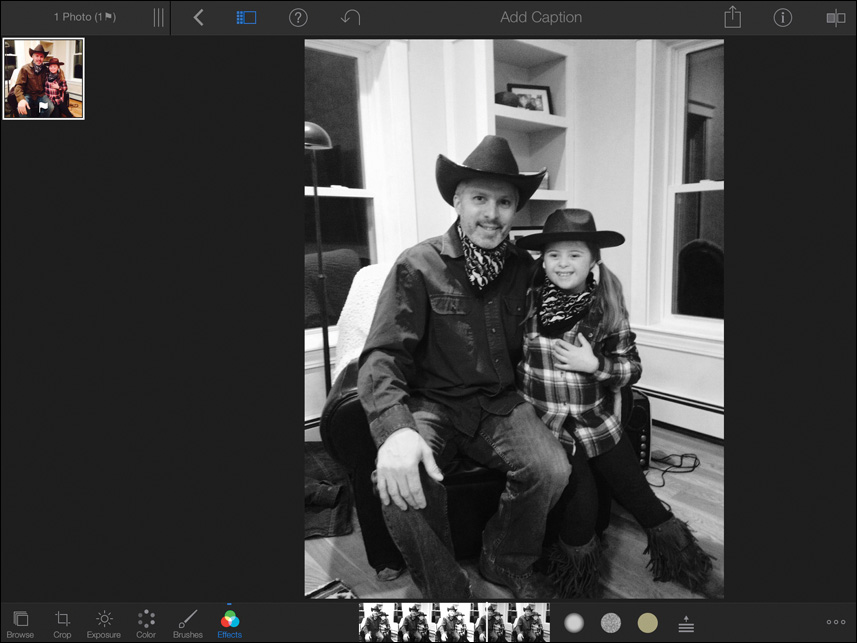
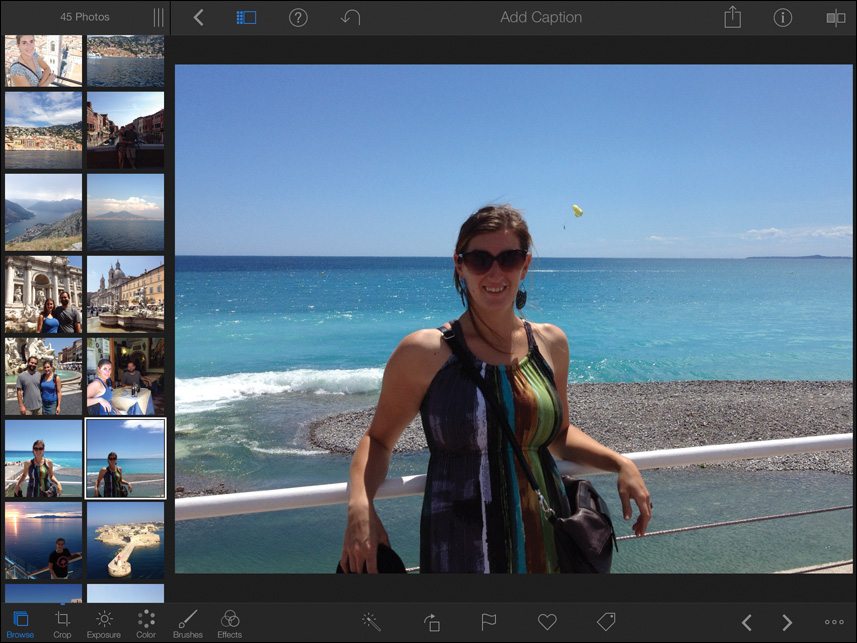
1. Open the Flagged album, and select a photo you’d like to turn black and white.
2. Do the following:
![]() On the iPad, in the lower toolbar, tap the Effects button
On the iPad, in the lower toolbar, tap the Effects button ![]() to view the effects.
to view the effects.
![]() On the iPhone, in the lower toolbar, tap the Toolbox button
On the iPhone, in the lower toolbar, tap the Toolbox button ![]() , and then tap the Effects button
, and then tap the Effects button ![]() to view the effects.
to view the effects.
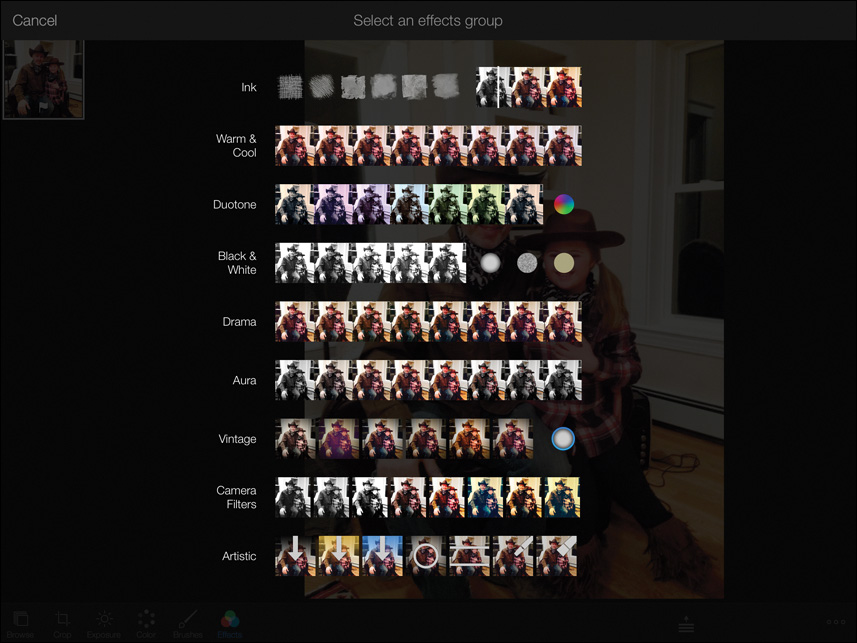
The effects are listed in groups, and within each effects group are many effect styles to choose from. Each style includes a small thumbnail.
3. Tap the Black & White effects group to apply it.
Tip
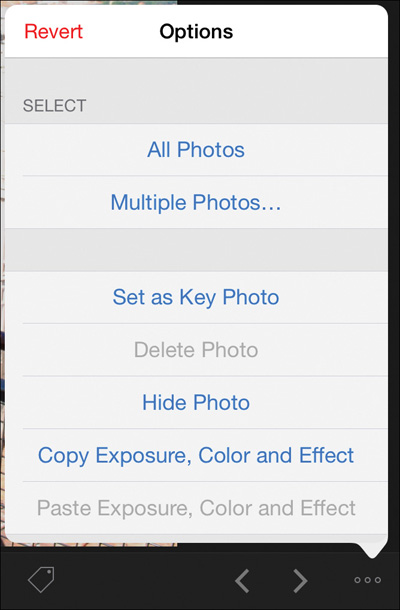
To remove an effect from a photo, tap the photo, and then tap the Effects button. Tap the Options button, and choose Remove Effect.
The effects groups are hidden, and the photo is shown with the effect applied. You can modify the effect using the image strip below the photo.
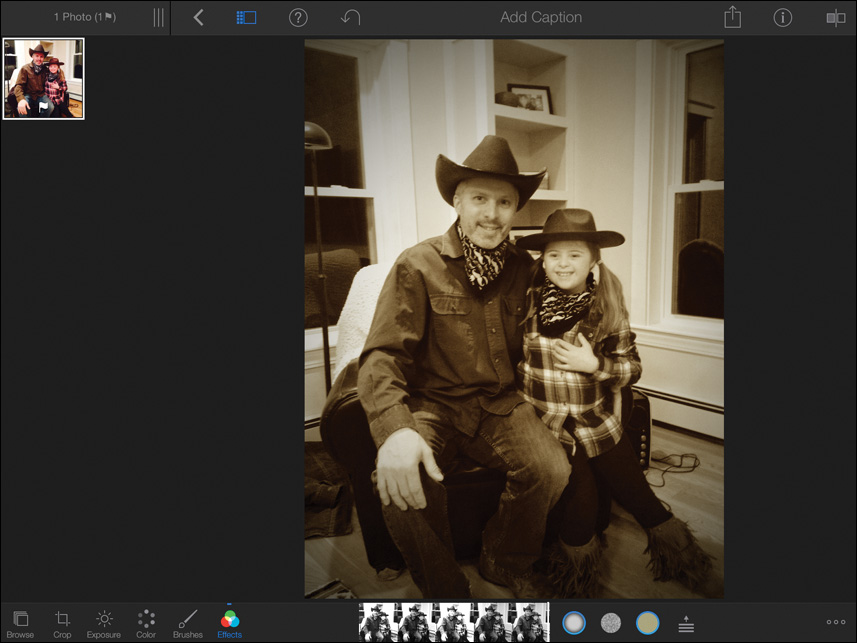
4. Drag over the strip in the lower toolbar to modify the black and white filtering.
Some effects have controls in addition to the image strip. The three circular buttons to the right of the image strip are for adding a vignette, grain, and sepia tint.
5. Tap the right-most of the three buttons, the Sepia button, to apply it.

The Sepia button applies a golden brown tint, giving the photo a vintage look.
6. Tap the left-most of the three buttons, the Vignette button, to apply it.
The vignette darkens a photo’s corners, focusing attention on the central area and drawing attention away from extraneous objects on the fringes of the photo.
You can change the vignette’s position by dragging directly on the photo.
7. Drag on the photo to reposition the vignette and keep the main subject bright.
Tip
To view the Flag, Favorite, and Tag buttons when you are viewing the effects image slider, on the iPad, tap the Browse button. On the iPhone, tap the Toolbox button, and then tap the Browse button.
Many other effects groups have touch controls that operate by dragging on the photo.
Replacing Effects
You can try different effects by choosing another effects group from the list.
1. To the right of the image strip, tap the Display button ![]() to show the effects groups.
to show the effects groups.

2. Tap the Camera Filters effects group to apply it.
Tapping a different effects group replaces the effect of the existing effects group on the image.
Tip
Applying a second effect to a photo isn’t as elegant, but it can be done. After applying the first effects, transfer the photo to the Camera Roll by tapping the Share button. Then in the Camera Roll album, tap the photo, and apply the second effect.
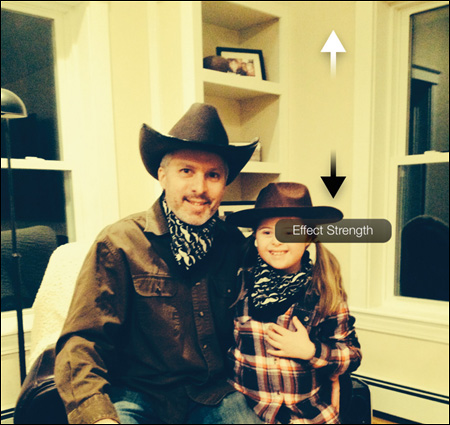
The Camera Filters effects group applies vintage style camera filters to a photo, and it also has its own touch controls.
3. Tap the right-most style in the image strip.
4. Drag on the photo to increase the strength of the effect.
5. To compare any effect with the original photo, in the upper toolbar, tap the View Original button ![]() .
.
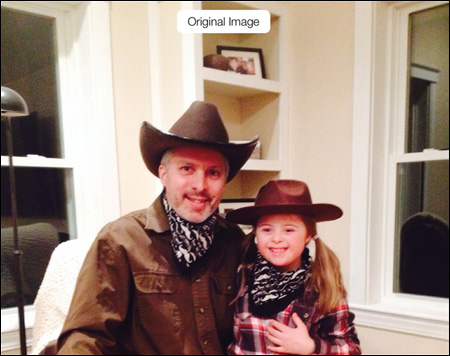
A small “Original Image” label appears at the top of the photo to indicate that you are viewing the original image.
6. Tap the View Original button to view the effect again.
7. Tap the Back button.
In many cases, playing with effects may be all you ever want to do. But in some cases, you may want to do a little bit more, especially when fixing problem areas in your photos.
Cropping and Straightening
Cropping trims the edges of a photo to remove unwanted objects. While cropping, you can also straighten a photo if it is tilted left or right.
1. Select a photo from an album or event.
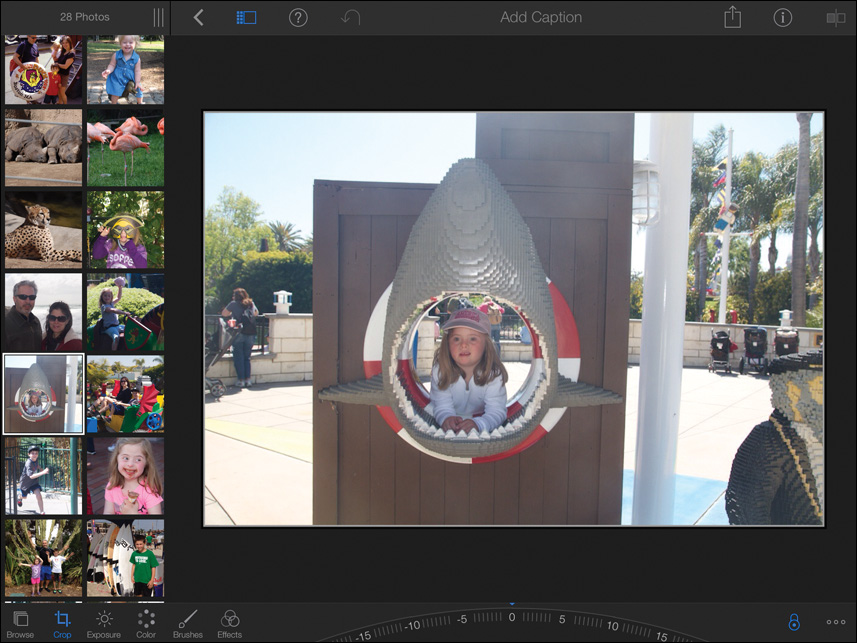
2. To crop the photo, do the following:
![]() On the iPad, in the lower toolbar, tap the Crop button
On the iPad, in the lower toolbar, tap the Crop button ![]() .
.
![]() On the iPhone, in the lower toolbar, tap the Toolbox button, and then tap the Crop button
On the iPhone, in the lower toolbar, tap the Toolbox button, and then tap the Crop button ![]() .
.
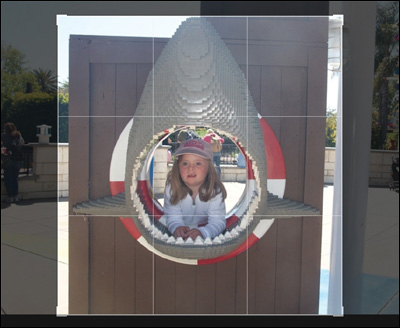
3. Drag a corner of the outline in toward the center of the photo to crop the image.
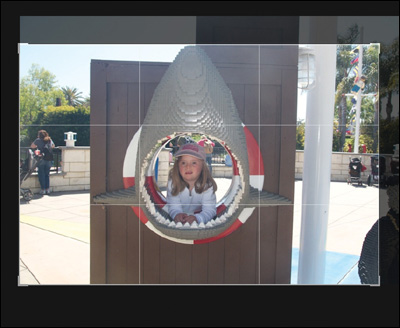
When you lift your finger from the screen, the crop is applied. In most cases, you’ll want to reposition the photo within the newly cropped frame.
4. Touch and hold in the center of the photo until the crop box appears.
5. Drag the photo to frame it within the crop box.
Tip
After cropping a photo, you can revert to the original photo by tapping the Crop button, and then tapping the Options button and choosing Reset Crop & Straighten.
Sometimes you’ll want to set the frame shape or aspect ratio of the crop box to a standard form. For instance, many social networks use a 1:1 square aspect ratio for profile pictures, and standard wallet-sized prints use a 2:3 aspect ratio.
6. To choose an aspect ratio from a list of presets, tap the Options button ![]() , and choose an aspect ratio.
, and choose an aspect ratio.
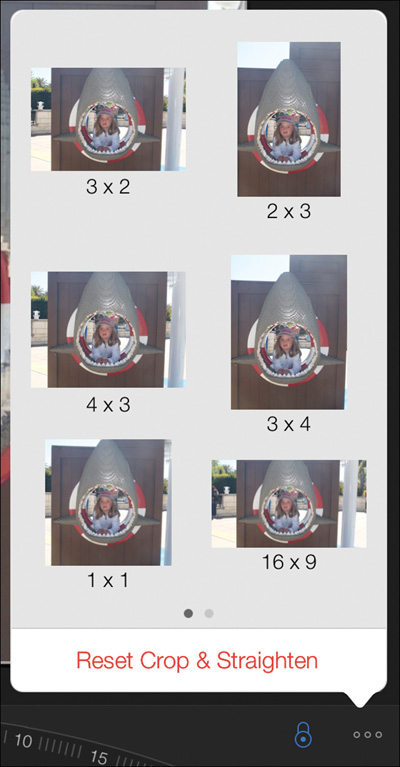
Once your aspect ratio is set, you can drag the photo inside the crop box again to reposition it within the frame.
1. Select a photo, and tap Crop.
If you are lucky enough to have a horizon in your photo, iPhoto will detect it and display a horizontal line matching the offset horizon line. You can tell iPhoto to use that line to automatically straighten the photo.
2. Tap the arrow on the side of the horizontal line to straighten the photo.

If you aren’t lucky enough to take only ocean-side photos, you can straighten the photo manually.
3. Drag the dial to tilt the photo left or right.
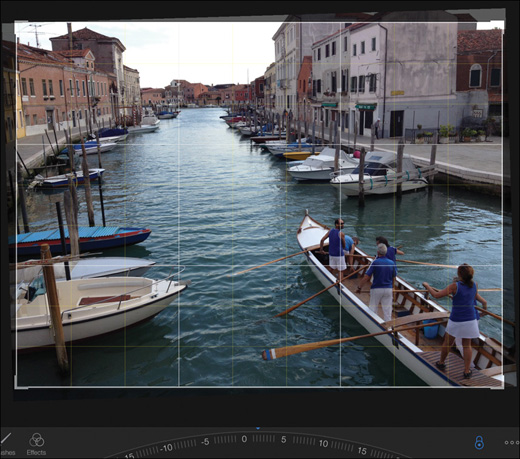
You can use the horizontal and vertical lines in the crop box as guides to align objects within the photo.
Brightening and Darkening Photos
The exposure controls allow you to brighten, darken, and otherwise adjust all the tones in between (midtones).
1. Tap a photo that needs to be brightened.
2. To brighten or darken a photo, do the following:
![]() On the iPad, tap the Exposure button
On the iPad, tap the Exposure button ![]() to display the exposure controls below the photo.
to display the exposure controls below the photo.
![]() On the iPhone, tap the Toolbox button, and then tap the Exposure button
On the iPhone, tap the Toolbox button, and then tap the Exposure button ![]() to display the controls below the photo.
to display the controls below the photo.

The exposure controls are identical to the Levels control you used in Lesson 6. However, some unique iOS touch controls allow you to select the area you are adjusting.
3. Touch and hold on an area in the shadows of the photo.
4. Drag up to increase the brightness of the shadow areas.
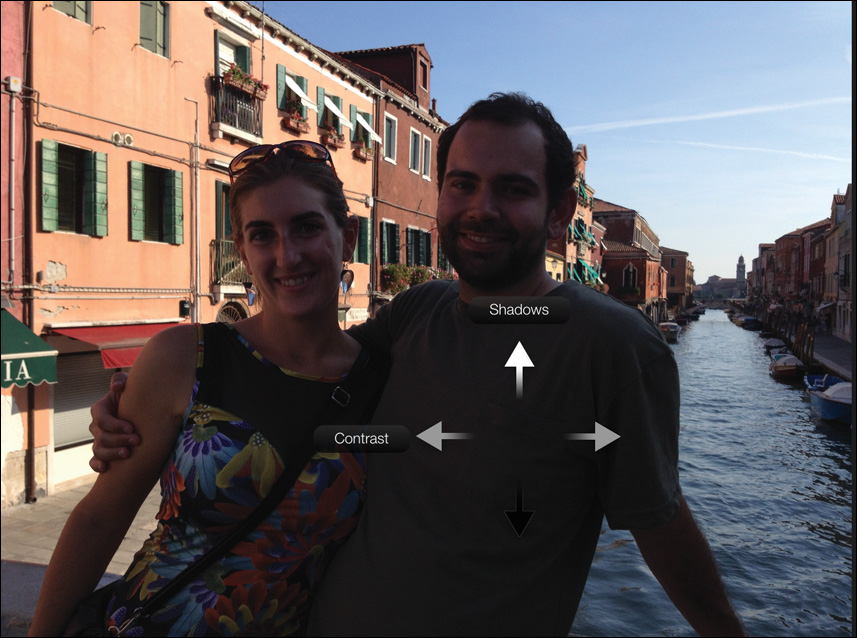
Touching and holding a shadow area selects the darkest points in your photo. Dragging your finger down decreases brightness in all shadow areas in the photo.
5. Touch and hold a bright highlight area in the photo.
6. Drag down to decrease the brightness of the highlights.
Touching and holding a highlight area selects the brightest points in your photo. Dragging up increases brightness in all highlight areas in the photo.
Tip
If you drag down too far after touching a shadow area or drag up too far after touching a highlight area, a red alert color appears behind the exposure controls below the photo. This is a warning that you may lose detail in those areas.
Touching and holding in the gray or midtone areas of the photo and dragging up or down will shift the overall photo brighter or darker.
Using similar touch controls, you can modify contrast.
7. Touch and hold anywhere on the photo, and then drag right to increase contrast or drag left to decrease contrast.
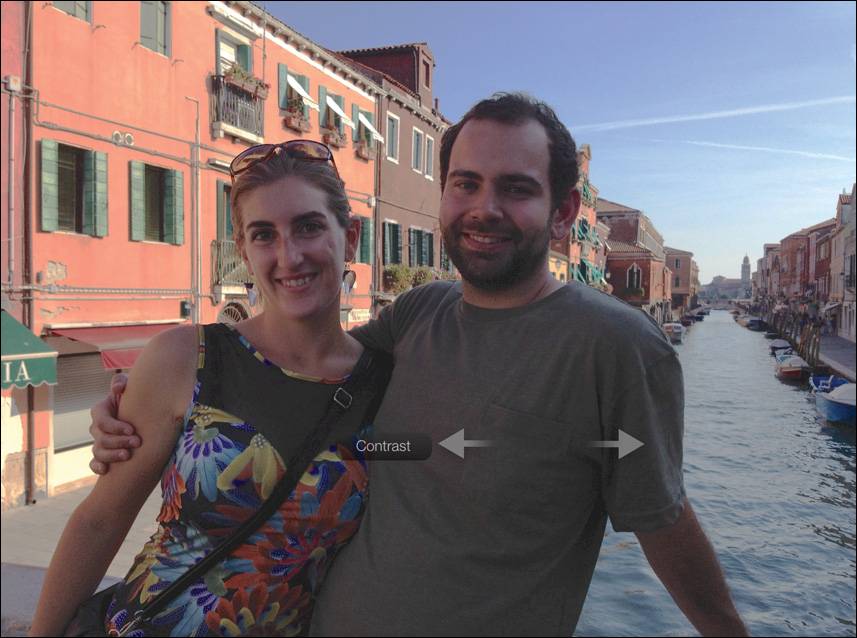
As you drag on the photo, the exposure controls below the photo update to match the changes in value.
8. To compare the effect with the original photo, tap the View Original button.
9. Tap the View Original button to view the effect again.
10. In the upper toolbar, tap the Back button to return to Albums.
11. If you aren’t happy with your adjustments, you can remove them by tapping the Exposure button, tapping Options, and then choosing Reset Exposure.
Fixing White Balance
If your photo has an overall blue, orange, or green tint, you can quickly correct it by fixing the white balance.
1. With a photo selected, do the following:
![]() On the iPad, tap the Color button
On the iPad, tap the Color button ![]() to display the color controls.
to display the color controls.
![]() On the iPhone, tap the Toolbox button, and then tap the Color button to display the color controls.
On the iPhone, tap the Toolbox button, and then tap the Color button to display the color controls.

2. At the far right of the color controls, tap the White Balance button  .
.

A strip of white balance options appear under the photo. The options are preset white balance controls for photos taken during sunshine, clouds, with a flash, in the shade, under incandescent light, under fluorescent light, or underwater. You can choose any light source that matches your photo’s conditions, or perform manual white balance based on skin tones or a gray area in the photo.
3. Tap the Skin Tone Custom white balance button ![]() .
.
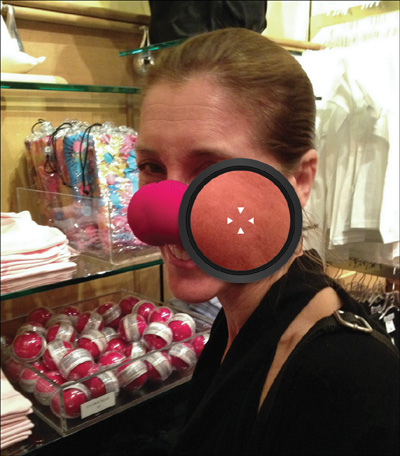
A loupe appears over the photo so you can more clearly select the forehead or a patch of skin.
4. Drag the loupe over a skin tone.
The tint in the photo shifts so the skin tones appear more natural.
Similarly, you can fix white balance by tapping the Custom White Balance button ![]() and positioning the loupe over a neutral gray area of the photo.
and positioning the loupe over a neutral gray area of the photo.
You also can drag the color control sliders to decrease color saturation, or make the photo warmer or cooler by increasing the blue, green, or orange hues in the photo.
5. Drag the warmth slider to the right to increase the warm orange, red, and yellow hues in the photo.

If skin tones become similar to an Oompa Loompa, you can limit the color sliders’ effect.
Tip
You can drag up or down over the photo to change saturation (similar to the Exposure controls). Dragging left or right decreases and increases the specific hue you start dragging.
6. Tap the Options button, and from the popover, turn on Preserve Skin Tones.
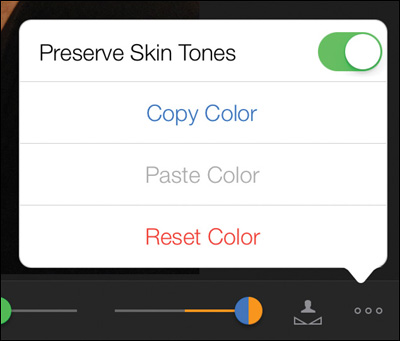
People look like people again.
Undoing Your Adjustments
If you aren’t pleased with the previous slider adjustments, but you don’t want to remove the entire effect, you can undo effects incrementally.
1. To remove the most recent changes you made using an effect, do the following:
![]() On the iPad, in the upper toolbar, tap the Undo button
On the iPad, in the upper toolbar, tap the Undo button ![]() .
.
![]() On the iPhone, shake your phone, and then from the dialog, tap Undo.
On the iPhone, shake your phone, and then from the dialog, tap Undo.
After making any adjustment, compare the white-balanced photo and the original.
2. Tap the View Original button.
3. Tap the View Original button to view the effect again.
4. In the upper toolbar, tap the Back button to return to your Photos, Albums, or Projects view.
5. You can always revert to the original photo by tapping the Color button, and then tapping the Options button, and choosing Reset Color.
Auto-enhancing Photos
Often the quickest and easiest way to make some basic adjustments and improve your photos is to let Auto Enhance do it all.
1. Select a photo.
2. To apply Auto Enhance, do the following:
![]() On the iPad, tap the Enhance button
On the iPad, tap the Enhance button ![]() .
.
![]() On the iPhone, tap the Toolbox button, and then tap the Enhance button.
On the iPhone, tap the Toolbox button, and then tap the Enhance button.

To access the Auto Enhance button when you are already viewing the controls for exposure, color, crop, effects, or brushes, on the iPad, tap the Browse button. On the iPhone, tap the Toolbox button, and then tap the Browse button.
If you aren’t pleased with the Auto Enhance result, you can remove it.
3. Tap the Options button, and in the popover, tap Revert.
Auto Enhance improves a photo by adjusting the exposure and color controls. You can further refine or remove some aspects of the Auto Enhance using those controls.
Enhance a Photo with Brushes
You can “finger paint” over specific parts of a photo to lighten, darken, saturate, desaturate, sharpen, soften, and remove red-eye.
1. Select a photo.
2. To select a brush type, do the following:
![]() On the iPad, tap the Brushes button
On the iPad, tap the Brushes button ![]() .
.
![]() On the iPhone, tap the Toolbox button, and then tap the Brushes button.
On the iPhone, tap the Toolbox button, and then tap the Brushes button.
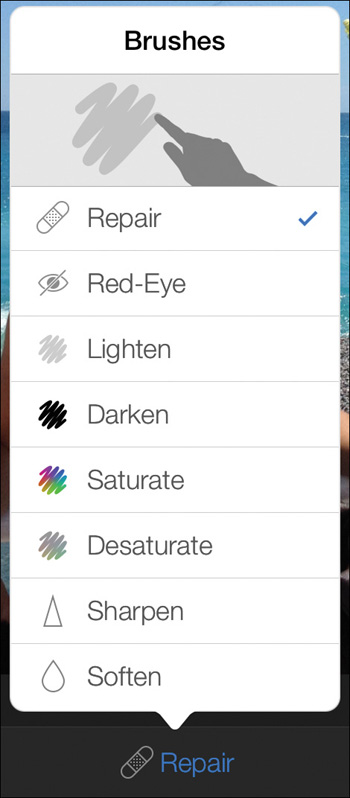
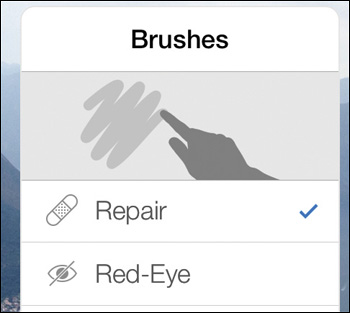
The Brushes popover appears with several brush styles to choose from.
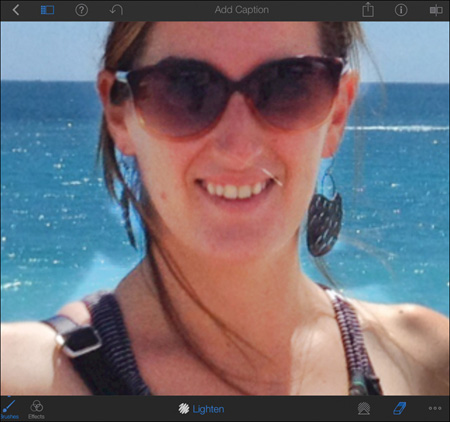
3. Choose Lighten to select the brush style.
4. Drag your finger over an area you want to brighten.

This is a useful tool when a face is more in shadow than you would like.
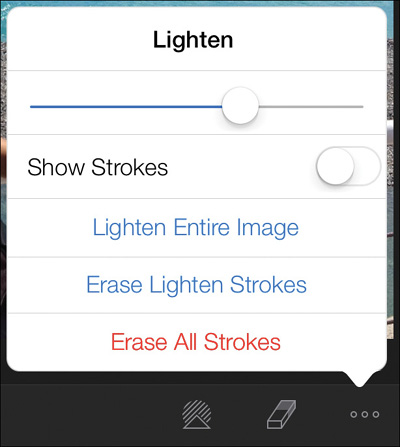
Don’t worry if the initial look is too bright for you. You can change the strength of the brush at any time.
5. Tap the Options button, and then drag the strength slider left to decrease the strength of the brush.
You can make finer changes by zooming in on the photo.
6. Using two fingers, pinch out to zoom in on the photo.
7. Again with two fingers, drag the photo to center the area where you want to paint.
You can further control your paint strokes by limiting each brush stroke to an area of the same color and brightness.
8. Tap the Detect Edges button ![]() to turn it on.
to turn it on.
The first color and brightness level you touch determines the area your brush strokes will be applied to. When you drag over an area of different color and brightness level, the brush stroke will not apply.
Erasing Brush Strokes
Even with Detect Edges turned on, you may need to erase some strokes that were in error.
1. To erase a brush stroke or a portion of a brush stroke, tap the Eraser button  .
.
2. Drag over the area that has the brush stroke you want to erase.
3. To completely remove a brush effect from a photo, tap the Options button, and choose “Erase (brush style name) Strokes.”
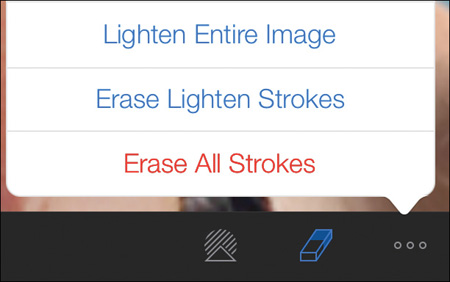
4. If you have used more than one brush style on a photo, you can remove them all by tapping the Options button and choosing Erase All Strokes.
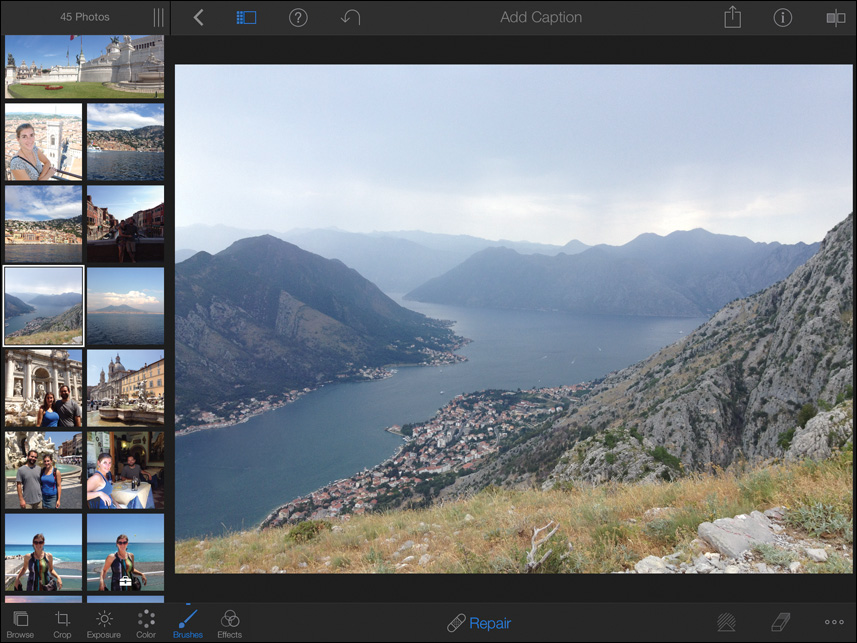
Repair a Photo with a Brush
You can use the Repair brush to cover minor problems, such as skin blemishes, dust spots, and other undesired marks. It works by copying an area from one part of the photo and using it to “paint” over another part. The Repair tool then blends the source colors to match the destination colors.
1. Select a photo.

2. To select the Repair brush, do the following:
![]() On the iPad, tap the Brushes button.
On the iPad, tap the Brushes button.
![]() On the iPhone, tap the Toolbox button, and then tap the Brushes button.
On the iPhone, tap the Toolbox button, and then tap the Brushes button.
The Brushes popover appears.
3. Choose Repair to select the brush style.
The Repair brush has no special controls, and Detect Edges doesn’t apply.
4. Drag over a small area you want to remove.
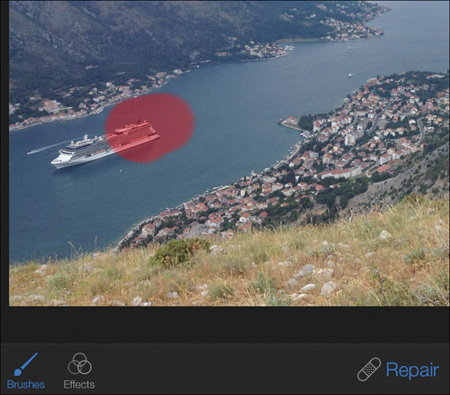
The Repair brush works best when the surrounding area is very uniform, such as a clear sky or a flat-colored wall. Don’t expect to remove an entire person from a photo.
You have a very nice-looking photo library now, if I may be so bold. As fun as it is to enhance and paint on your photos, it becomes a lot more interesting when you can take those great-looking photos and create projects with them. In the next lesson, you’ll learn how to use these photos in slideshows, photo books, and web journals.
Lesson Review
1. True or false? The Recent album shows recently imported photos.
2. How are events added to iPhoto on iOS?
3. Which of these three buttons creates an album when you apply it to a photo a.) ![]() , b.)
, b.) ![]() , or c.)
, or c.) ![]() ?
?
4. How do you choose the loupe when viewing a photo?
5. What does this button ![]() do?
do?
6. How do you set the crop aspect ratio?
7. Tapping what button allows you to brighten a photo?
8. What are the differences between button a.) ![]() , and button b.)
, and button b.) ![]() ?
?
9. How do you decrease the strength of a brush style?
10. True or false? The Repair brush works best when Detect Edges is enabled.
Answers
1. False. The Recent album shows recently viewed photos.
2. They are transferred from iPhoto on the Mac when you sync through iTunes.
3. a.) The Favorite button ![]()
4. Press and hold two fingers on one of the photos.
5. The Split View button hides or shows the thumbnail grid.
6. Tap the Crop button, tap the Options button, and choose the aspect ratio from a list of presets.
7. The Exposure button
8. Button a.) ![]() performs manual white balance based on selecting a skin tone in the photo. Button b.)
performs manual white balance based on selecting a skin tone in the photo. Button b.) ![]() performs manual white balance based on selecting a neutral gray tone in the photo.
performs manual white balance based on selecting a neutral gray tone in the photo.
9. Tap the Options button, and drag the strength slider to the value you want.
10. False. Detect edges does not work with the Repair tool.