16. Getting to Know the GoPro Plus Online Service
The easiest way to make your GoPro content easily accessible to all your Internet-connected computers and mobile devices is to store it online using the GoPro Plus service. From this chapter, you’ll learn
![]() Why you should become a paid GoPro Plus subscriber
Why you should become a paid GoPro Plus subscriber
![]() How to use the Auto Upload feature from your GoPro HERO5 Black camera
How to use the Auto Upload feature from your GoPro HERO5 Black camera
![]() How to upload content to your GoPro Plus account from your HERO Session or HERO5 Session camera
How to upload content to your GoPro Plus account from your HERO Session or HERO5 Session camera
![]() How to access content stored within your GoPro Plus account from your computer(s) or mobile device(s)
How to access content stored within your GoPro Plus account from your computer(s) or mobile device(s)
You’re probably already familiar with the concept of using cloud computing to store data, documents, photos, videos, and files online so they’re readily accessible from your Internet-connected computer(s) and mobile device(s). For example, Microsoft OneDrive is a cloud service that’s integrated with the Windows operating system, and Apple iCloud is a service that’s fully integrated with the Mac OS and iOS operating systems. There are also many independent and general-purpose cloud services, like Dropbox, as well as more specialized services, such as Adobe Creative Cloud.
GoPro Plus is a cloud service designed for GoPro camera users. As a subscriber, you can upload unlimited content shot with a GoPro camera to your account, and you can access it from any of your Internet-connected computers and mobile devices. The goal of GoPro Plus is to make it easy to access GoPro shot content from virtually anywhere. What sets this service apart from others is that it integrates directly with the HERO5 Black camera, as well as the GoPro mobile apps and computer software.
Getting to Know GoPro Plus
The GoPro Plus service offers a variety of benefits to GoPro camera users, including
• Online storage space for all the photos and videos you shoot using your GoPro camera or that you manually upload from other sources.
• If you have a GoPro HERO5 Black, the capability to automatically upload content from your camera to your GoPro Plus account. How to set up the Auto Upload feature is covered later in this chapter.
• The GoPro Plus service fully integrates with the GoPro QUIK mobile app and QUIK Desktop software. You can access content from the cloud and quickly incorporate it into the video productions you create. Then you can upload the production to the GoPro Plus service to be saved, archived, or shared.
• Using your iPhone or iPad as a conduit, content stored within your GoPro Plus account can be viewed on an HD television screen via iOS 10’s AirPlay feature and an Apple TV.
• GoPro Plus subscribers automatically receive a 20 percent discount on all GoPro mounts and accessories purchased online from GoPro’s website (www.gopro.com).
• You have access to a more extensive library of music tracks that can be incorporated into your QUIK mobile app and QUIK Desktop productions without having to pay licensing fees.
• If you need customer service from GoPro, you’re granted access to Premium Support by phone, online chat, or email. In addition to helping you solve GoPro camera-related problems, the GoPro experts answer questions to help you overcome challenges you encounter while shooting, plus offer tips and strategies for getting the most out of your GoPro camera, mounts, the GoPro QUIK Desktop and GoPro Studio software, and all of the GoPro mobile apps.
Setting Up Your GoPro Plus Account
A GoPro Plus account is different from the free GoPro account which you were encouraged to create the first time you used any of the GoPro mobile apps, the QUIK Desktop software, the GoPro Studio software, or registered your camera online. After you have a free GoPro account set up, you can upgrade it to a GoPro Plus subscription account using the same username and password.
Create a GoPro Plus Account
Creating and activating a subscription-based GoPro Plus account is easy using any web browser. The process, which takes less than three minutes, is shown here using Safari on an iPad:
![]() Use your favorite web browser to visit www.gopro.com from your computer or mobile device (not shown).
Use your favorite web browser to visit www.gopro.com from your computer or mobile device (not shown).
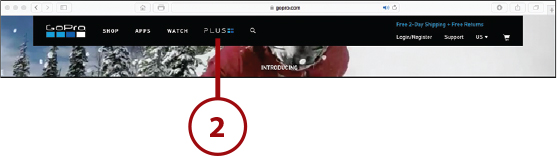
![]() Click or tap the GoPro Plus option.
Click or tap the GoPro Plus option.
Activate a GoPro Plus Account from a Mobile App
After you’ve installed any of the GoPro mobile apps (QUIK, Capture, or Splice), you can upgrade your GoPro account to a paid GoPro Plus account from within the app.
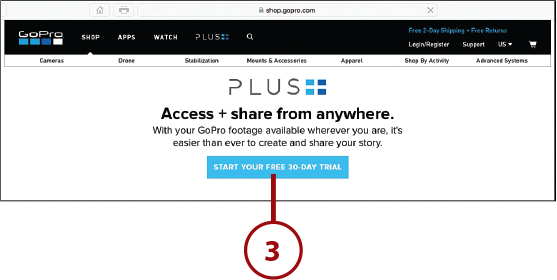
![]() Click or tap the Start Your Free 30-Day Trial button.
Click or tap the Start Your Free 30-Day Trial button.
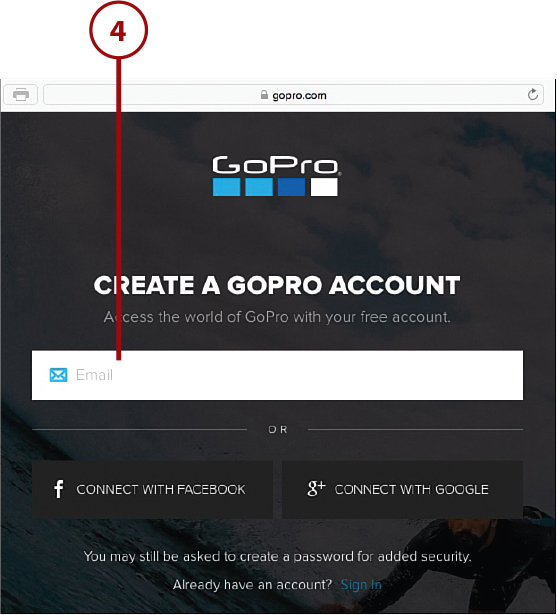
![]() If you haven’t already done so, create a free GoPro account by first providing your email address. However, if you already have a GoPro account, click or tap the Sign In option, and then enter your username (email address) and password.
If you haven’t already done so, create a free GoPro account by first providing your email address. However, if you already have a GoPro account, click or tap the Sign In option, and then enter your username (email address) and password.
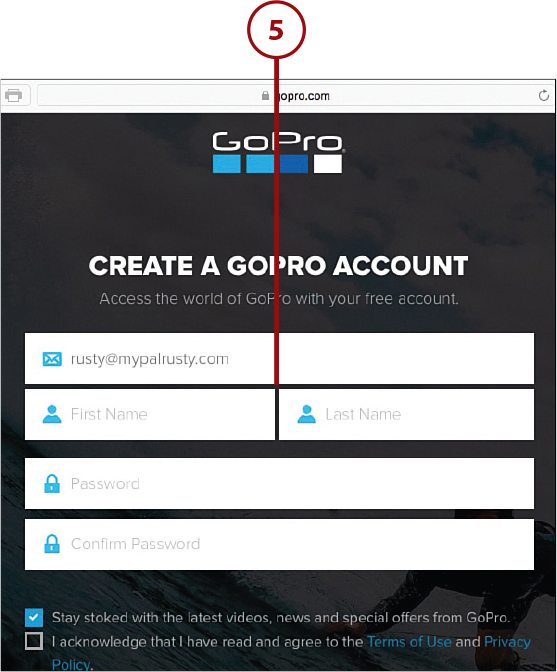
![]() Provide the additional information that’s requested. Finish by tapping the Create Account button and then verifying the new account by following the directions in the confirmation email you receive from GoPro.
Provide the additional information that’s requested. Finish by tapping the Create Account button and then verifying the new account by following the directions in the confirmation email you receive from GoPro.
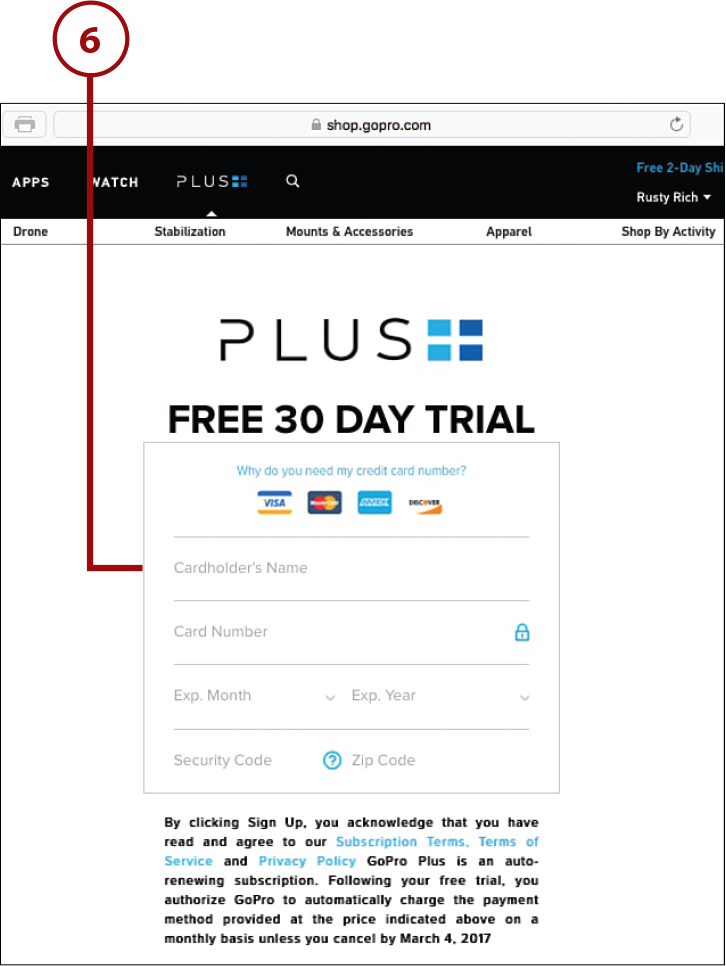
![]() Enter your credit or debit card information in the appropriate fields, and then click or tap the Sign Up button.
Enter your credit or debit card information in the appropriate fields, and then click or tap the Sign Up button.
![]() Your GoPro Plus trial immediately begins when this welcome screen is displayed. You’re prompted to download and install the QUIK Desktop software to your PC or Mac, as well as the QUIK mobile app to your smartphone or tablet (not shown).
Your GoPro Plus trial immediately begins when this welcome screen is displayed. You’re prompted to download and install the QUIK Desktop software to your PC or Mac, as well as the QUIK mobile app to your smartphone or tablet (not shown).
Auto-Recurring Monthly Charges Apply
A GoPro account costs nothing to set up and maintain, but when the trial period ends on the free, 30-day trial for a GoPro Plus account, the credit or debit card you provided to activate the GoPro Plus account will be charged $4.99 (plus tax) per month until you cancel the account.
Using the Auto Upload Feature with Your HERO5 Black Camera
One advantage to having a GoPro HERO5 Black camera is that its wireless capabilities are designed to integrate with the GoPro Plus service.
Set Up the Auto Upload Feature
To activate and use the Auto Upload feature for the first time, follow these steps (shown here on an iPad):
![]() Download and install the Capture mobile app onto your smartphone or tablet (not shown).
Download and install the Capture mobile app onto your smartphone or tablet (not shown).
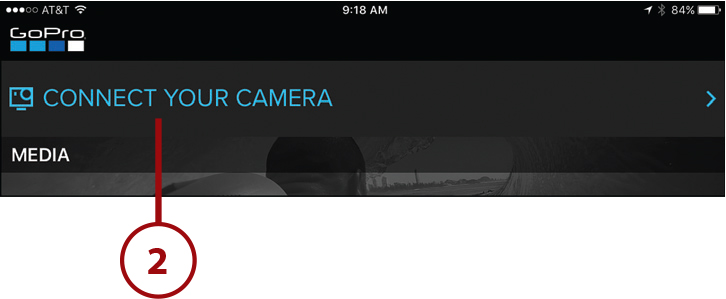
![]() From the Capture app’s main menu, tap on the Connect Your Camera option.
From the Capture app’s main menu, tap on the Connect Your Camera option.
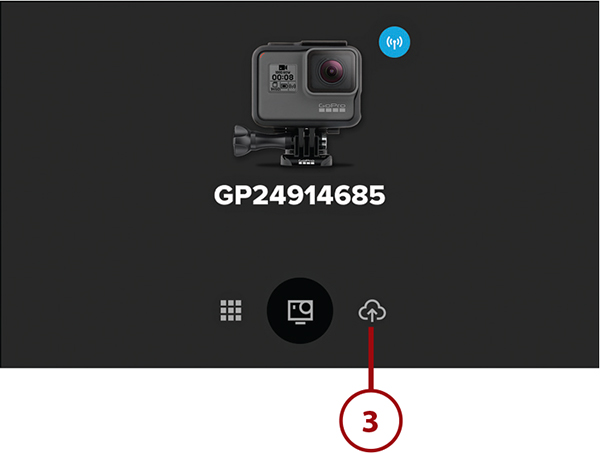
![]() Tap the cloud-shaped GoPro Plus icon.
Tap the cloud-shaped GoPro Plus icon.
![]() Place your camera within the signal radius of your home wireless Internet router (not shown).
Place your camera within the signal radius of your home wireless Internet router (not shown).
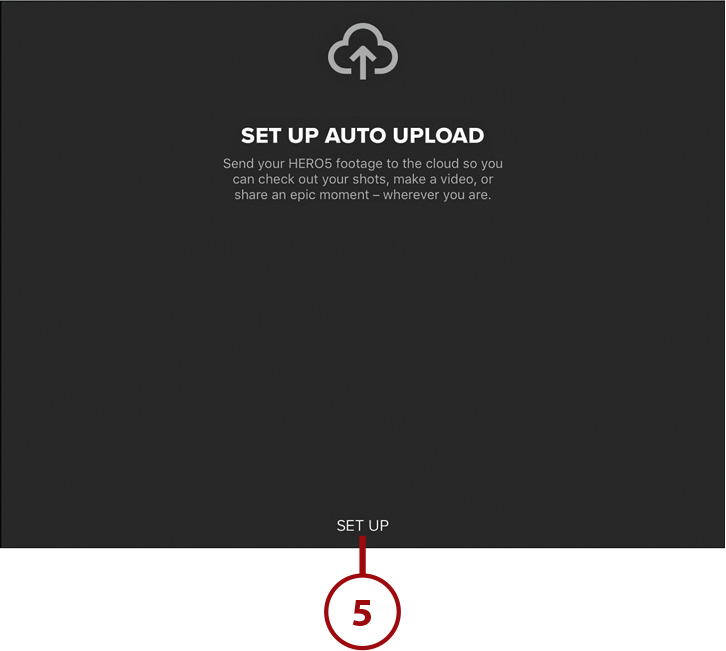
![]() Tap the Set Up button on the Set Up Auto Upload screen.
Tap the Set Up button on the Set Up Auto Upload screen.
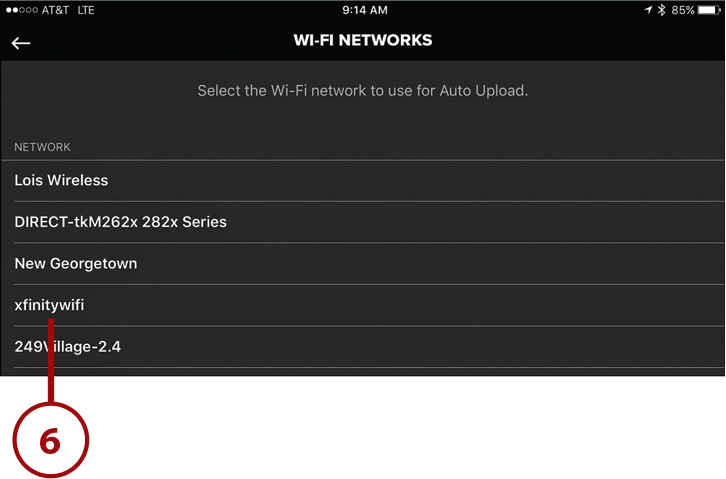
![]() Tap your Wi-Fi network’s name. (Remember to select your home wireless router’s network name, not the Wi-Fi hotspot that your camera generates.)
Tap your Wi-Fi network’s name. (Remember to select your home wireless router’s network name, not the Wi-Fi hotspot that your camera generates.)
![]() Enter your home Wi-Fi network’s password when prompted (not shown).
Enter your home Wi-Fi network’s password when prompted (not shown).
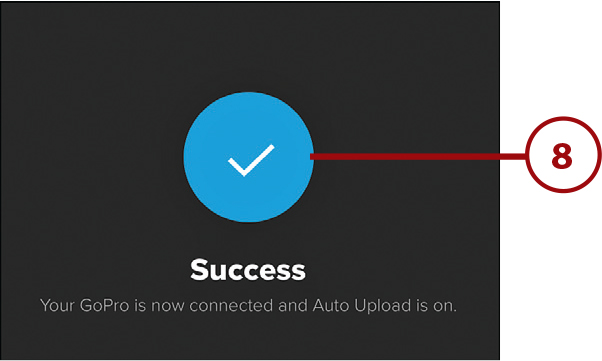
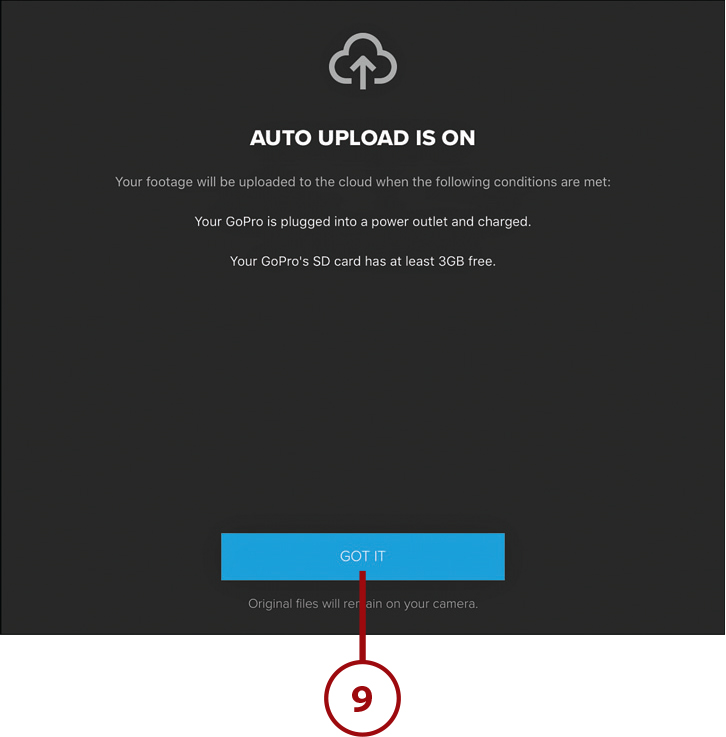
![]() The Connecting screen will be displayed for approximately one minute. A success screen will then appear for a few seconds.
The Connecting screen will be displayed for approximately one minute. A success screen will then appear for a few seconds.
![]() Tap the Got It button.
Tap the Got It button.
![]() Make sure your camera’s memory card has at least 3GB of available storage space (not shown).
Make sure your camera’s memory card has at least 3GB of available storage space (not shown).
![]() Plug your GoPro camera into an external power source to recharge its battery. For example, use the supplied USB cable with a GoPro Wall Charger or Supercharger adapter (not shown).
Plug your GoPro camera into an external power source to recharge its battery. For example, use the supplied USB cable with a GoPro Wall Charger or Supercharger adapter (not shown).
![]() As soon as the camera’s battery is fully charged, the Auto Upload process begins, and the content from your camera’s microSD memory card is uploaded to your GoPro Plus account (not shown).
As soon as the camera’s battery is fully charged, the Auto Upload process begins, and the content from your camera’s microSD memory card is uploaded to your GoPro Plus account (not shown).
![]() You see a message that indicates the process is complete (not shown). You can also manually access your GoPro Plus account from the Capture mobile app or from your computer’s web browser.
You see a message that indicates the process is complete (not shown). You can also manually access your GoPro Plus account from the Capture mobile app or from your computer’s web browser.
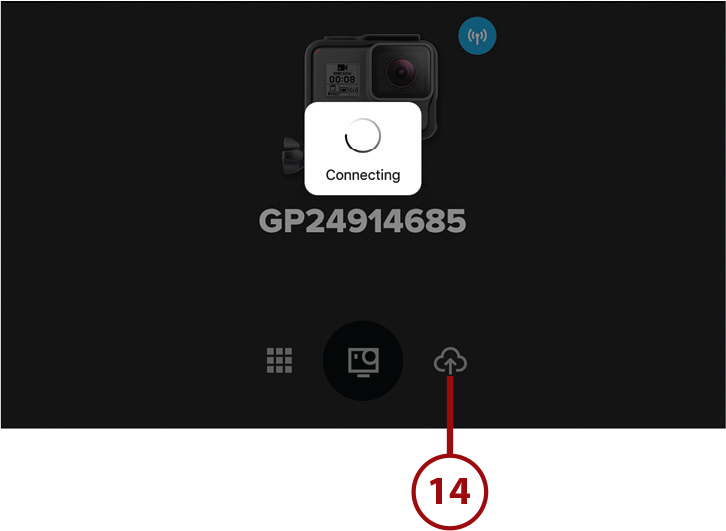
![]() Tap the GoPro App (cloud) icon. The Connecting message appears.
Tap the GoPro App (cloud) icon. The Connecting message appears.
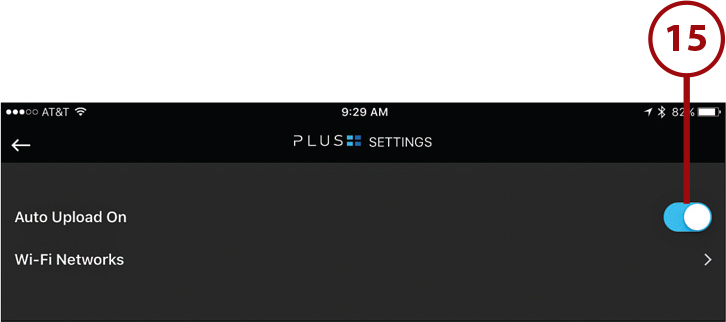
![]() The first time you activate GoPro Plus, this GoPro Plus Settings menu is displayed. Make sure the virtual switch associated with the Auto Upload On feature is turned on, and that your home wireless network is selected. From this point forward, content you shoot on your HERO5 Black uploads to your GoPro Plus account as long as your camera is within the signal radius of your home wireless network (not the Wi-Fi hotspot generated by your camera).
The first time you activate GoPro Plus, this GoPro Plus Settings menu is displayed. Make sure the virtual switch associated with the Auto Upload On feature is turned on, and that your home wireless network is selected. From this point forward, content you shoot on your HERO5 Black uploads to your GoPro Plus account as long as your camera is within the signal radius of your home wireless network (not the Wi-Fi hotspot generated by your camera).
Using GoPro Plus with Your HERO Session or HERO5 Session Camera
The Auto Upload feature offered by the HERO5 Black is not available on the HERO Session or HERO5 Session cameras. Thus, to transfer content from the camera’s memory card to the GoPro Plus online service, you must first manually transfer the content from the camera to the Capture mobile app on your smartphone or tablet. Then, you can automatically sync your device with your GoPro Plus account and become accessible from your other mobile devices and computers.
To set this up, from the Camera screen of the Capture app, tap the GoPro Plus (cloud) icon. From the GoPro Plus Settings screen, make sure the virtual switch associated with the Auto Upload On option is turned on. Next, tap the Wi-Fi Networks option, and tap the listing for your home wireless network. Enter your home wireless network password when prompted for it.
When this feature is turned on, anytime new content is transferred to the Capture mobile app from any GoPro camera, it’s automatically uploaded from your mobile device to your GoPro Plus account.
Accessing Stored Content from the QUIK Mobile App or QUIK Desktop Software
You can use GoPro’s QUIK mobile app or QUIK Desktop software to access and select content stored online within your GoPro Plus account, and then download that content to your mobile device or computer to import and incorporate it into a video presentation you create or edit. Also, content that you import directly into the QUIK mobile app or desktop software can be uploaded and stored online within your GoPro Plus account.
Access Content from GoPro Plus Using the QUIK Mobile App
To access and select content using the QUIK app, follow these steps (shown here on an iPhone):
![]() Launch the QUIK app from your mobile device (not shown).
Launch the QUIK app from your mobile device (not shown).
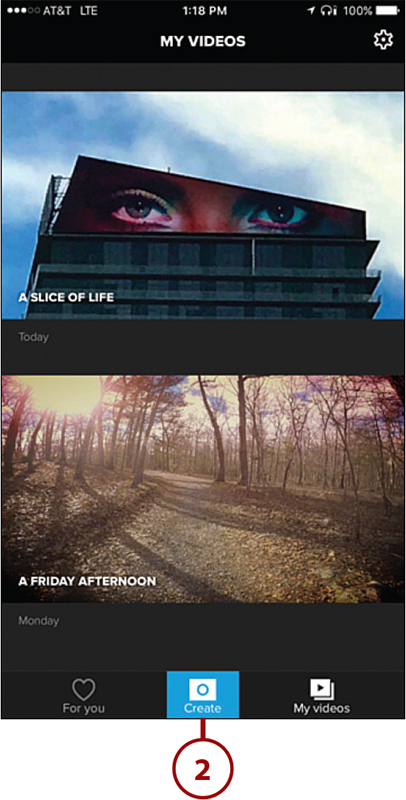
![]() Tap the Create icon.
Tap the Create icon.
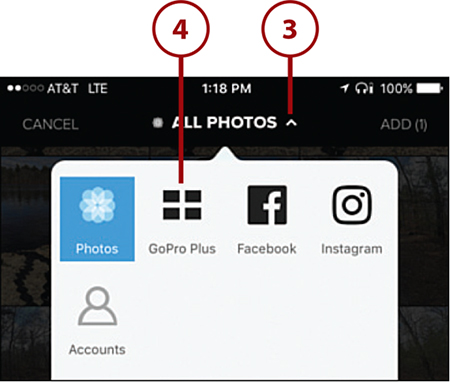
![]() Tap the Menu option at the top-center of the screen.
Tap the Menu option at the top-center of the screen.
![]() Tap the GoPro Plus icon.
Tap the GoPro Plus icon.
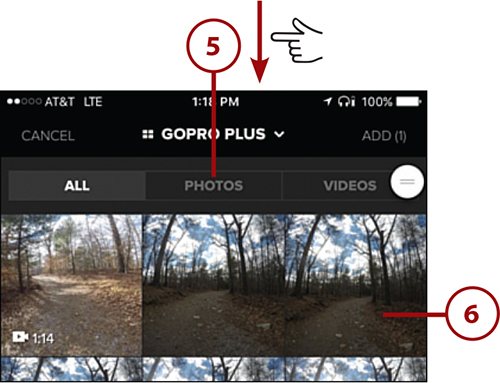
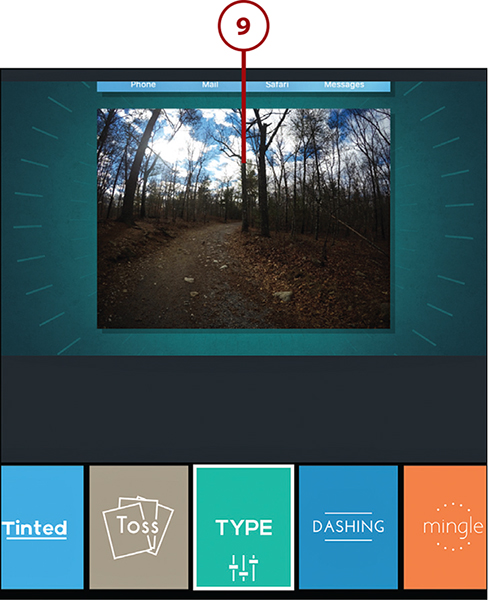
![]() Swipe your finger down to make the All, Photos, and Videos tabs appear. Choose which type of content you want to access and import by tapping the desired tab. You see thumbnails for the type of content you selected.
Swipe your finger down to make the All, Photos, and Videos tabs appear. Choose which type of content you want to access and import by tapping the desired tab. You see thumbnails for the type of content you selected.
![]() Tap the thumbnails for the content you want to download from your GoPro Plus account and import into QUIK.
Tap the thumbnails for the content you want to download from your GoPro Plus account and import into QUIK.
![]() Tap Add to import the selected content.
Tap Add to import the selected content.
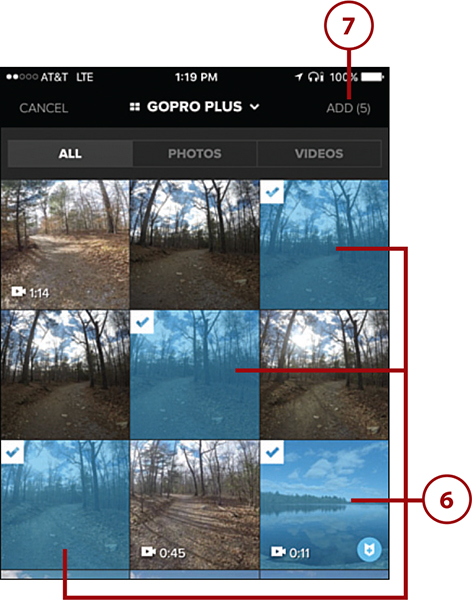
Choosing Your GoPro Plus Content
When selecting content to download from your GoPro Plus account to the QUIK mobile app, you must select at least five photos to import into a production. Alternatively, select at least one video file, or at least one video file with any number of photos in order to have enough raw content to get started.
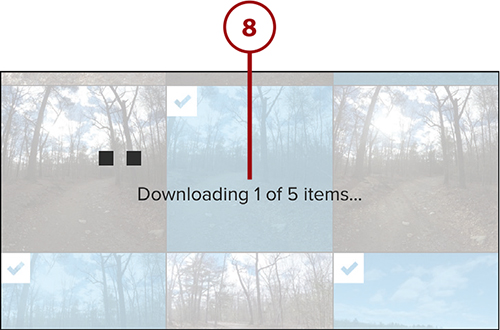
![]() The content is downloaded and imported into the QUIK app. How long this takes depends on the amount of content selected, the file sizes of the selected content, and the speed of your Internet connection.
The content is downloaded and imported into the QUIK app. How long this takes depends on the amount of content selected, the file sizes of the selected content, and the speed of your Internet connection.
![]() When the download and import process is done, use the QUIK mobile app to edit and create a video production. Directions for how to do this are included within Chapter 15, “Using Mobile Devices with Your GoPro Camera.”
When the download and import process is done, use the QUIK mobile app to edit and create a video production. Directions for how to do this are included within Chapter 15, “Using Mobile Devices with Your GoPro Camera.”
Access Content from GoPro Plus Using the QUIK Desktop Software
To access and select content via your GoPro Plus account to use in a presentation, follow these steps (shown here on a Mac):
![]() Launch the QUIK Desktop software (not shown).
Launch the QUIK Desktop software (not shown).
![]() Enter your email address and GoPro Plus account password. Click the Sign In button.
Enter your email address and GoPro Plus account password. Click the Sign In button.

![]() Click the Settings icon.
Click the Settings icon.
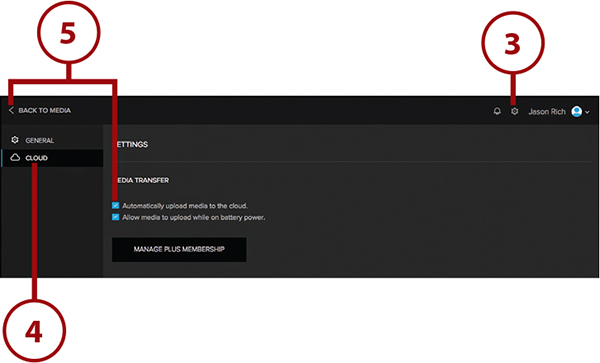
![]() Click the Cloud option.
Click the Cloud option.
![]() Add a check mark to the check box for the Automatically Upload Media to the Cloud option, and then return to the Media screen.
Add a check mark to the check box for the Automatically Upload Media to the Cloud option, and then return to the Media screen.
![]() Click Media, Recent, or Edits to sort and display the desired type of content.
Click Media, Recent, or Edits to sort and display the desired type of content.
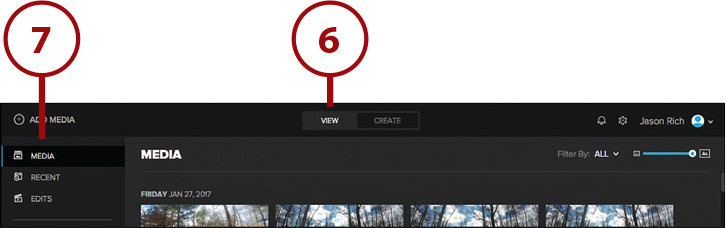
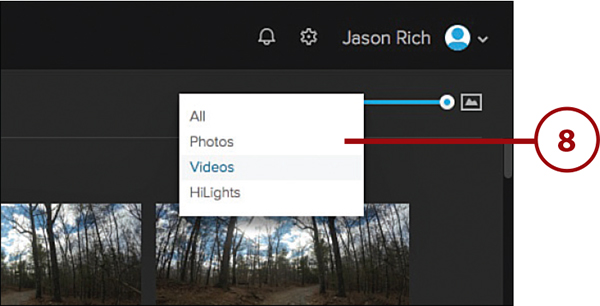
![]() Click the Filter By option, and choose between All, Photos, Videos, or HiLights to sort the content by that criterion.
Click the Filter By option, and choose between All, Photos, Videos, or HiLights to sort the content by that criterion.
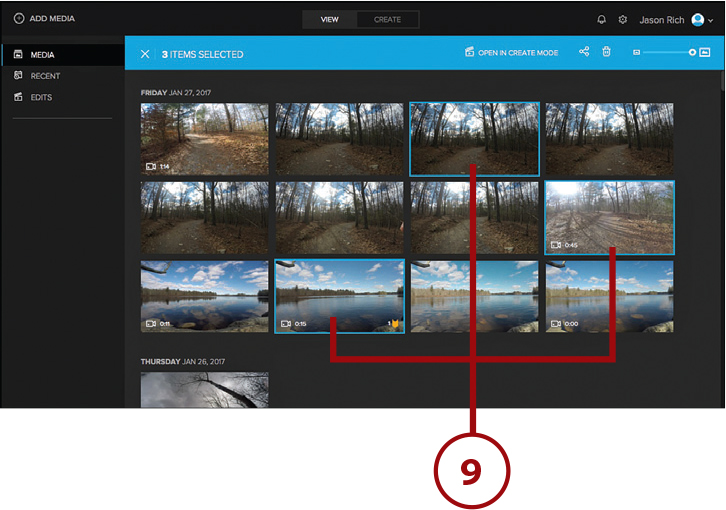
![]() Select content thumbnails you want to incorporate into a video production, and then click Open in Create Mode to import them. Selected thumbnails have a blue frame around them.
Select content thumbnails you want to incorporate into a video production, and then click Open in Create Mode to import them. Selected thumbnails have a blue frame around them.
The Transfer Process Takes Time
Depending on how many files you need to upload, the size of your content files, and your Internet connection speed, it could take an hour or longer to transfer the contents of your camera’s microSD memory card to your GoPro Plus account via the QUIK Desktop software. A progress meter is displayed along the right column of the screen. As content is transferred to the computer, it becomes accessible from the Media section in the QUIK Desktop software.
Accessing GoPro Plus Content from Any Web Browser
Using your favorite web browser on any Internet-connected computer (or mobile device), you can
• Access content already stored online within your GoPro Plus account
• Manually upload additional content from other sources to your account
• Share content stored within your online account with other people using the Private Link feature.
You handle these tasks from the GoPro Plus website using a web browser (shown here on a Mac).
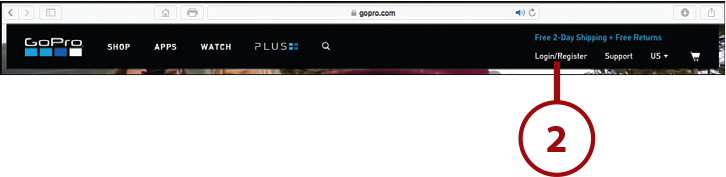
![]() Launch your favorite web browser and visit www.gopro.com.
Launch your favorite web browser and visit www.gopro.com.
![]() Click Log In/Register.
Click Log In/Register.
Already Signed In?
If you’re automatically signed into your account because your web browser remembers your username and password, click your username, which is displayed in the top-right corner of the screen, and then skip to step 5.
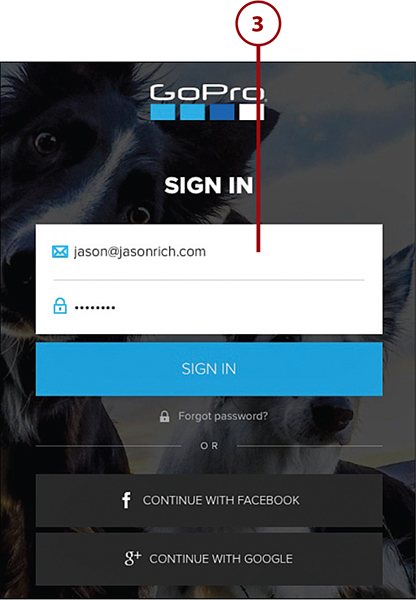
![]() Enter the email address and password associated with your GoPro Plus account. Click the Sign In button to continue.
Enter the email address and password associated with your GoPro Plus account. Click the Sign In button to continue.
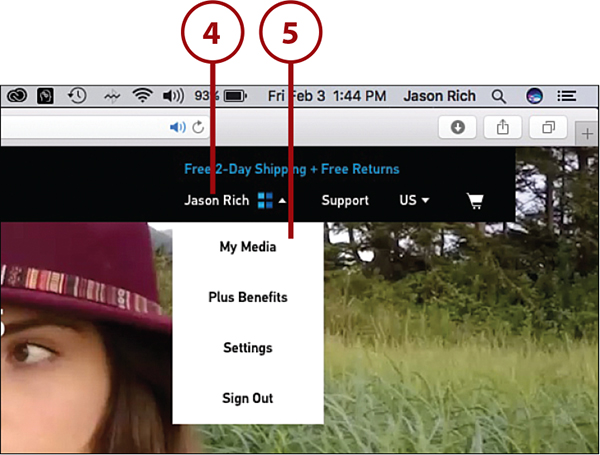
![]() Click your username.
Click your username.
![]() Click the My Media option in the drop-down menu.
Click the My Media option in the drop-down menu.
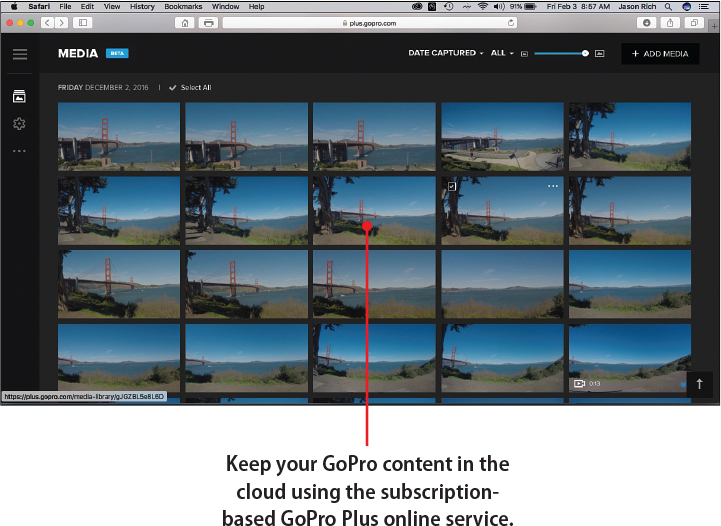
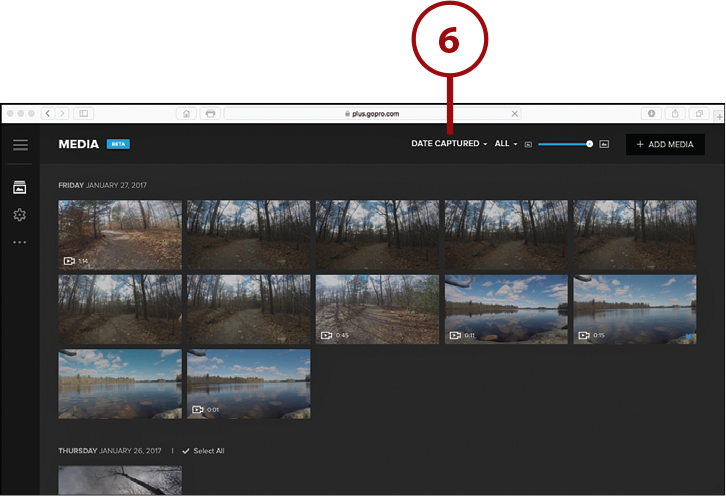
![]() The Media screen displays thumbnails for all the content that’s been uploaded to date.
The Media screen displays thumbnails for all the content that’s been uploaded to date.
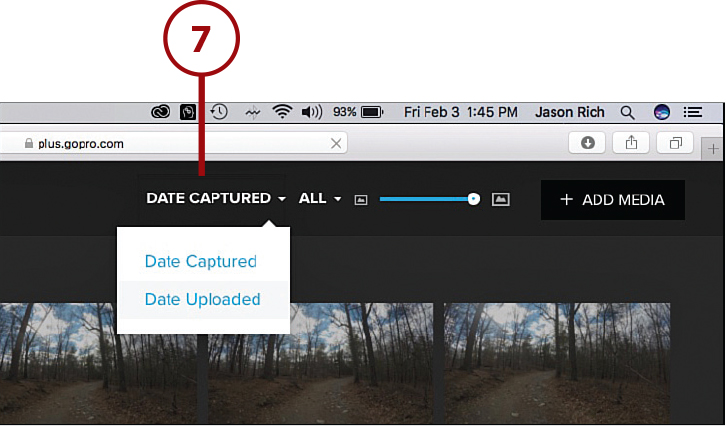
![]() Click the Date Captured or Date Uploaded option to toggle between sorting the content based on the date it was captured (shot) or the date it was uploaded to the GoPro Plus service.
Click the Date Captured or Date Uploaded option to toggle between sorting the content based on the date it was captured (shot) or the date it was uploaded to the GoPro Plus service.
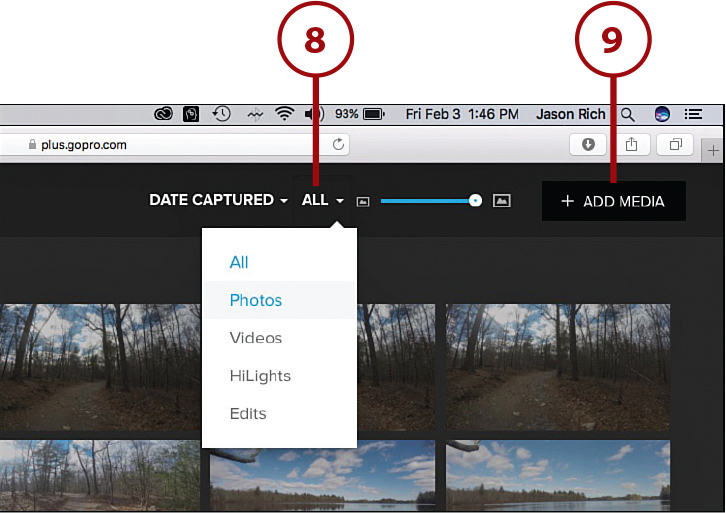
![]() Click the All option to display a specific type of content. The default All option displays all content. Select the Photos, Videos, HiLights, or Edits option to sort and display only a specific type of content.
Click the All option to display a specific type of content. The default All option displays all content. Select the Photos, Videos, HiLights, or Edits option to sort and display only a specific type of content.
![]() Add additional content to your GoPro Plus account by clicking the +Add Media option
Add additional content to your GoPro Plus account by clicking the +Add Media option
![]() Click the Upload Your Media button, or drag and drop content stored on your computer, a connected external hard drive, or a connected USB thumb drive.
Click the Upload Your Media button, or drag and drop content stored on your computer, a connected external hard drive, or a connected USB thumb drive.

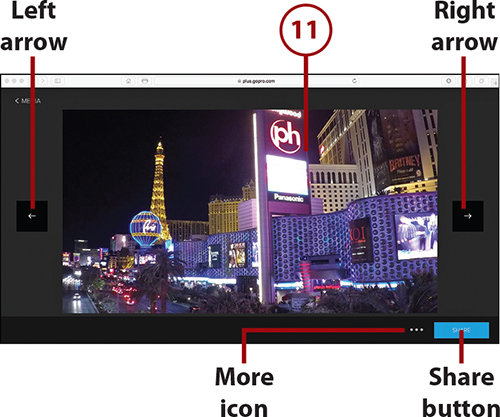
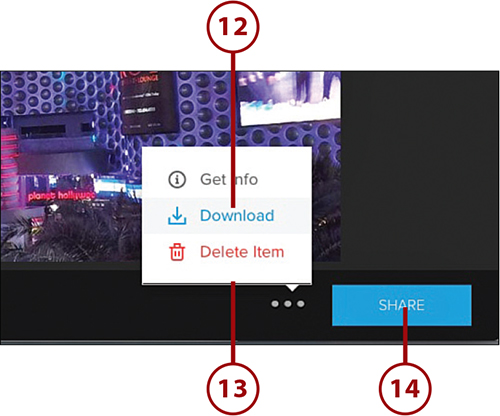
![]() Double-click the thumbnail for any content to access it and view it within a web browser window. Click the Share button to share that content. Click the left or right pointing arrow to scroll through your content.
Double-click the thumbnail for any content to access it and view it within a web browser window. Click the Share button to share that content. Click the left or right pointing arrow to scroll through your content.
![]() Download the selected content to the computer you’re using by tapping the More (...) icon, and then clicking the Download button. The selected content is downloaded to the computer’s Download folder.
Download the selected content to the computer you’re using by tapping the More (...) icon, and then clicking the Download button. The selected content is downloaded to the computer’s Download folder.
![]() Delete the selected content by clicking the More (...) icon and then clicking the Delete Item option. Confirm your decision by clicking the Delete button. There is no “undo” for this feature, so think twice before deleting content you might want or need later.
Delete the selected content by clicking the More (...) icon and then clicking the Delete Item option. Confirm your decision by clicking the Delete button. There is no “undo” for this feature, so think twice before deleting content you might want or need later.
![]() Create a Private Link for the content, which you can share with specific other people while keeping the rest of your content private, by clicking the Share option.
Create a Private Link for the content, which you can share with specific other people while keeping the rest of your content private, by clicking the Share option.
![]() Click Private Link. The invitees receive an email with a special website URL they can use to access the content.
Click Private Link. The invitees receive an email with a special website URL they can use to access the content.

Why Use a Private Link?
When you set up a private link, only the people you invite have access to the specific content you’re sharing via the GoPro Plus service. Invitees receive a private website URL they can use to access the content. Your other content stored on the service remains private.
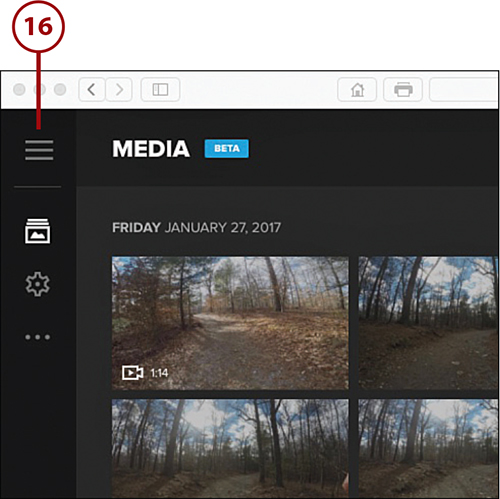
![]() Manage Private Links from the Media screen by clicking the Menu icon.
Manage Private Links from the Media screen by clicking the Menu icon.
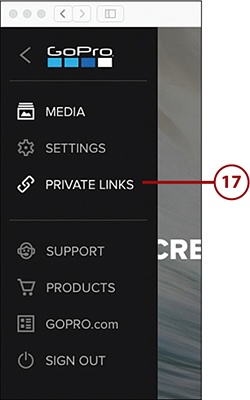
![]() Click Private Links. From here, you can add other invitees who will be able to access your content, or you can revoke access for people you had previously invited.
Click Private Links. From here, you can add other invitees who will be able to access your content, or you can revoke access for people you had previously invited.
Watch for New Features
The GoPro Plus service is continuosuly being updated and improved. Watch for additional menu options, buttons, and icons as you’re viewing the Media screen of the GoPro Plus website.