

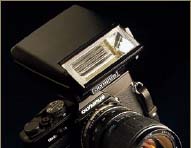
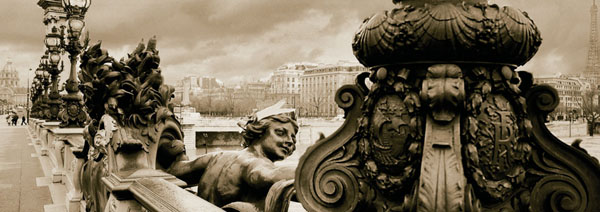
Photo by David J. Osborn.
Flatback Cameras and Picture-Taking
From a simple throwaway to large-format, any digital or traditional camera will allow you to discover the joys of panoramic photography. All you need to do is to crop the film or final print lengthwise!
The possibilities for taking a flatback panoramic photograph are numerous. Using a “non-panoramic” camera, one can mentally crop a horizontal, panoramic band in the viewfinder while taking the picture; then the print can be cut to the same dimensions. Some flatback cameras are specifically designed for panoramic photography, however, and will directly provide the desired result. These less bulky cameras contain panoramic viewfinders and use a film format that does not need to be cropped.. With these flatback cameras, one will obtain as much of a panoramic format as any rotational camera embracing a very wide field – so shouldn’t panoramic photography truly start here?

Photo by Hervé Sentucq.
Having remained unpopular for a long time, due to the prohibitive price and size of specialty cameras, flatback panoramic photography has recently expanded, in part due to panoramic-format APS cameras, certain throwaway cameras, and, more recently, the Hasselblad XPan II. Using the latter camera, which is hardly larger than either a compact camera or the celebrated M series Leica, one can make both regular 35 mm and 24 mm × 66 mm format photographs, discovering the satisfaction of transforming a street scene or a landscape into a panorama (although the really wide-open spaces still remain the domain of the Fuji 617, Linhof, and various 6 × 12 cameras).
We begin by discussing conventional, digital, and traditional cameras that are very easy to use for panoramas. We then discuss specialty cameras – also called rectilinear or orthoscopic – where one gains superior image quality without much added weight and bulk. And prior to ending the chapter with some advice on how to make pictures with these types of camera, we will describe some necessary accessories for the panoramic photographer to use.
Whether small in size, like APS cameras, or large, like studio monorail cameras, my use of the term “conventional camera” refers to all cameras that have a conventional format photograph – that is, a square or rectangle. The most conventional of these, of course, is the 35 mm camera. With these cameras you can make a photograph panoramic by cropping it lengthwise. Panoramic photography is at least possible with throwaway cameras, but expanded dimensions open up with the larger format cameras.
Throwaway, APS, and Compact Cameras
The APS format has popularized panoramic photography by allowing a longer rectangular framing to be selected at the time of exposure. By positioning built-in masks in front of the film, the camera can create a variety of formats, from conventional to elongated (16/9). However, one can criticize APS for the mediocre quality of the resultant image, largely due to the small size of the negative. But this format is in the process of disappearing.
Throwaway cameras are similarly marketed in a panoramic format. Their optical quality leaves much to be desired, however, since they lack sharpness, which is especially noticeable at the edge – but a fault that some photographers know how to exploit in creative and artistic ways. These cameras have the advantage of being neither costly nor fragile. One can take them without concern to difficult places such as street protests, mountains, and the like.
Some compact cameras are adapted for panoramas. Like APS cameras, these sometimes have a system of moveable masks that slide in front of the film when in the panoramic mode. And as we saw in Chapter Two, these cameras can allow for an indirect shift by cropping the top or bottom of the resultant photo, rather than from the middle of the print.
Hasselblad XPan, 45 mm lens; photo by Aurore de la Morinerie.
The horizontal field embraced by these types of camera is often limited, since it is rare for them to have zoom or really short, wide-angle lenses. Normally, it will be difficult to go wider than a 28 mm lens, or a horizontal angle of view exceeding 65°; however, certain throwaway cameras have a 17 mm lens with a 90° angle of view! With compact digital cameras, the situation is even more limited: not only is their sensor very small – under two million pixels – but the shortest focal length, without additional lenses, is often equivalent to a 38 mm lens with 35 mm, or 50°. On the other hand, if one decides to join several images together, it becomes possible to obtain a much wider angle of view (see Chapter Five, which addresses joined panoramic photography).
Sometimes nonspecialty cameras have the direct ability to make a panoramic format. Two shutters slide from the top and bottom of the film; because the useful part of the negative is significantly reduced, the image quality is often mediocre. This is even more true with the APS format, which is smaller than 35 mm.
Digital Cameras
As of this writing, digital cameras are becoming increasingly serious rivals to traditional cameras. Today, their sensors’ quality is already as good as 35 mm film and nearly as good as medium format. As a result, they are becoming more and more adaptable for panoramic photography.
Although the problem with aiming is the same as in traditional photography – one has to mentally imagine an elongated frame in the viewfinder – computer technology makes the problem of cropping very simple. It is almost always necessary to use a computer to process the digital files produced by the cameras, and all the image-processing software programs have framing tools allowing the dimension of the digital file to be changed. Afterward, the photographer only has to crop the photo to the desired dimensions.
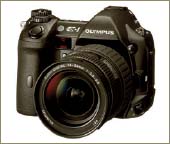
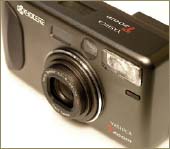
Digital camera.
35 mm is the most accessible format among nonspecialty traditional cameras, although increasingly its place is being taken over by digital cameras. Still, the market for 35 mm photography remains so large that one can choose from a wide variety of brands and focal lengths. In the best of cases, lenses will provide angles of view ranging from 4° to 115°; one exception, however, is the 180° fish-eye lens. Here it is truly possible to take up panoramic photography without buying any additional equipment or changing old working habits. And with a 14 mm or 17 mm lens, one can really start to explore a large visual field.
35 mm camera.
The widest angles of view are limited to the shortest focal lengths. Today, this is 115° with the 14 mm lenses made by various brands. However, here it also will be necessary to compose with significant anamorphic distortion at the edges and in the corners of the image. In other words, objects or persons at the limits of the photo will appear stretched out and deformed. So if you usually photograph people, remember that they may not always be happy about this!
In Chapter One we learned about the impact of the focal length on the resultant size of objects on the image matrix. Therefore it is necessary to prevent the finer details from being obscured by either the grain of the traditional film or the noise introduced by the sensor. Also, recall that the part of the film being used will measure only 12 mm × 36 mm after cropping. Thus, the shorter the lens focal length, the more miniscule the resultant details will be.
The cost of this type of lens is very high, approaching that of the Noblex brand of 35 mm swing-lens panoramic cameras, and something that could justify the purchase of the latter instead. Yes, a conventional 35 mm camera is lighter in the camera bag, but a Noblex 135 or a Horizon 202 is not all that bulky, and their weight is hardly more than a fast 35 mm lens with a lot of glass.
As we have seen in Chapter Two, concerning framing and composition, it is possible to shift the point of view in the following ways:
• Indirectly. A strip measuring approximately 12 mm in height can be cropped from anywhere from the length of a 35 mm exposure (i.e., from the top or bottom, and not necessarily from the middle of the photo).
• Directly. Using a shifting lens, when available, this is used to place the horizon line where one wants and to prevent the vertical lines of buildings from converging.
More common in the world of professional photography, medium-format cameras also are used by enthusiastic amateurs seeking to obtain better image quality than 35 mm can provide. A medium-format camera is any camera with a format ranging from 4.5 cm × 6 cm to 6 cm × 9 cm and that takes 120 or 220 roll film. These types of camera have greatly improved in recent years, in some cases becoming entirely automatic (e.g., focus, light-metering). The range of available lenses is also quite wide, although not yet as wide as 35 mm. To convert them to digital cameras, they need only to have a digital back attached that has been designed for them. As opposed to 35 mm models, here there even is a choice among different brands of sensor!
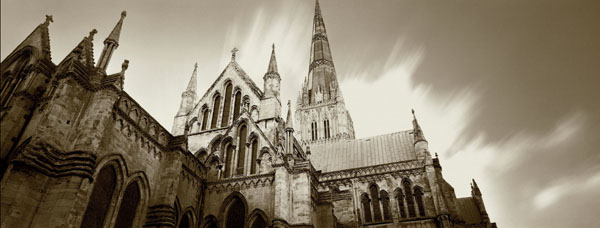
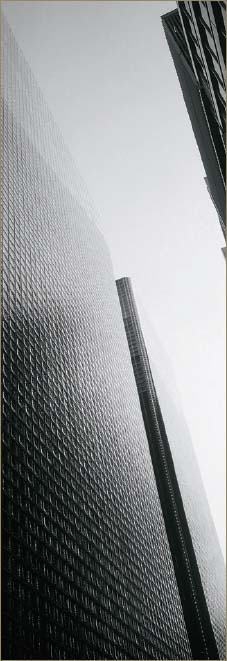
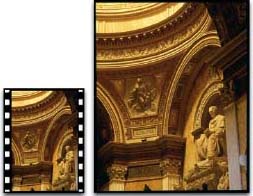
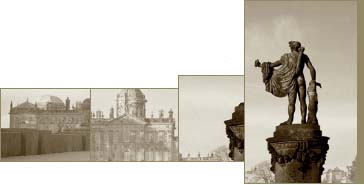
The full-sized photograph.

The top and bottom parts of the image have been cut away to create a panoramic photo and remove the less interesting areas of the image.
Photo by Arnaud Frich.
Medium-format cameras are certainly heavier and more bulky than 35 mm cameras, but the resultant image quality is really worth it.
Between 2.7 and five times larger than 35 mm film (on the left), medium-format (on the right) allows for greater tonal rendition and much finer details. Even with a small-sized print, one made from a medium-format negative will already have a different look. The landscape panoramist will definitely want to consider this format, even if it means moving away from a more specialized, panoramic-type camera.
These slightly particular cameras require a different way to produce photography, quite different from taking pictures with 35 mm. Panoramist or not, the photographer who uses one of these bellows cameras believes that the search for optimum quality is a higher priority than the bulkiness or weight of the equipment. Large-format photography is often formal, posed, and contemplative. Those who work with large format are not in a hurry to make a beautiful photograph. Also, learning how to work with a bellows camera takes time and experience, especially with regard to the movements, and the panoramist will certainly need to have this knowledge prior to the realization of any project that can be called artistic. These cameras also allow perfect control over framing, critical focus, depth of field, and – thanks to the shifting ability of the lens – perspective.
With a large-format camera, there is complete control over the image and the final result is wonderful. Having seen a large print made from a 4 × 5 or larger negative can really make you want to sell your 35 mm camera, regardless of whether you decide to crop your small negatives in a panoramic format!
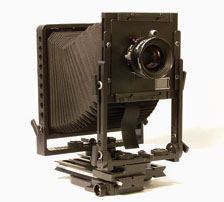
Large-format, 4 × 5 view camera. Because of its shifting movements and swings and tilts, there is complete image control.
By far, the most well-known specialty camera is the Fuji 617, but recently the Hasselblad XPan (now in model II) has started to eclipse the former camera’s fame. In addition to these two, we will discuss other flatback panoramic cameras. Other models will be mentioned but glossed over; the appendices will lead you to further information about them. As of this writing, a digital panoramic camera does not exist.
Orthoscopic
An orthoscopic line is a straight line that is perfectly rectilinear. Panoramic cameras that are orthoscopic do not distort horizontal or vertical lines in the form of an arc – rotating cameras are prone to do this. This is not to say that the lines do not converge to a vanishing point, just that they remain very straight.
These cameras have a lengthened format, and are essentially 6 × 7 cameras modified to use 35 mm. With these, one approaches medium format without wasting film since the final image will have a 24 mm × 65 mm dimension. In other words, this type of camera is already equipped with a cropped panoramic format. I remember using 6 × 7 cameras with 56 mm × 67 mm windows for 120 and 220 film. By a happy coincidence, with these newer cameras, one now can obtain a medium format-caliber image with a ratio approaching 3:1 on 35 mm film!
With cameras like these, the photographer cannot lose. The film is larger, has finer grain and more tonal depth, and the focal length is longer than an equivalent angle of view in 35 mm. Small details will appear larger, and the overall improvement in quality is spectacular. However, one condition does remain: it is necessary to work with slower lenses (less glass means smaller apertures); thus, these cameras are difficult to use without a tripod.
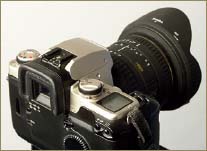
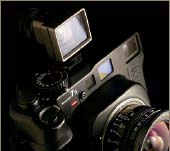
Hasselblad XPan II
The Hasselblad XPan II is a camera specifically designed for 35 mm film, but with two different formats: the standard, 24 mm × 36 mm format and one that measures 24 mm × 66 mm. Obviously, it’s the latter format that concerns us here. Currently, the XPan can be used with three lenses: 30 mm (104°), 45 mm (74°), and 90 mm (40°). This camera has revolutionized panoramic press photography. Modern, well made, motorized, quiet, equipped with automatic features, not very bulky, it has only one fault – its lens does not let in enough light. But then, the lenses would be unaffordable if they did.
Hand-held panoramic photography with the XPan demands a certain amount of experience. But the XPan II, appearing on the market in 2003, introduced shutter speed indications in the viewfinder that made photography in the field easier.
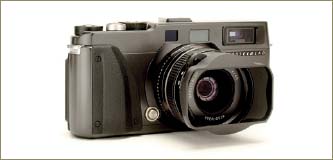
The Hasselblad XPan I and II have popularized the panoramic format’s use in journalistic photography. And it’s for this reason that they are reproached for not having fast enough lenses. Still, that has not prevented them from being used by many reporters, even on the battlefield, which is enough to prove their versatility.

Hasselblad XPan, 45 mm lens.
Photo by Aurore de la Morinerie.
As a result, many press and amateur photographers have started to use this exceptional camera. Its optical range does not allow for shifting lenses; but given that its primary purpose is for journalistic photography, this is not a significant problem
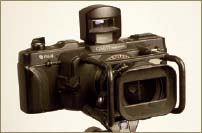
Mamiya 7 II
The Mamiya 7 II is a conventional 6 × 7 medium-format camera with an optional accessory that allows one to adapt the back to receive 35 mm film. . Mamiya also makes nicely performing lenses for the camera, ranging from 43 mm (84°) to 210 (20°); the problem here is it lacks shorter focal lengths. For example, a 38 mm would be better suited for the panoramic purpose of this camera accessory. Bulkier than the XPan, the Mamiya simply provides the photographer with a choice between panoramic and 6 × 7 formats. And like the XPan II, it is a modern camera with plenty of automatic features. These features are certainly enough to satisfy the demanding photographer, and the really demanding photographer will be impressed by the remarkable quality of its optics.
Convenient as it is, the Mamiya 7 II very much remains a medium-format camera, so one is faced with the same dilemma as with the XPan – choosing between the quality that the larger negative provides or the speed of faster lenses that come with the smaller format 35 mm cameras.
However, when used as a 6 × 7, this camera offers the additional advantage of allowing you to crop the negative as needed – above, below, and not just in the middle. Once again, this allows one to profit from indirect lens shifts, especially in architectural photography. But also like the XPan, the Mamiya 7 II does not have shifting (PC) lenses in its line of optical equipment.
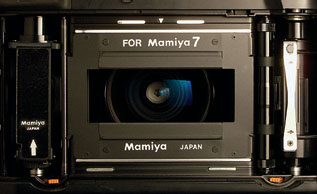
With its panoramic back, the Mamiya 7 can take 35 mm film. Here, the 6 × 7 window turns into a 24 mm × 66 mm window.
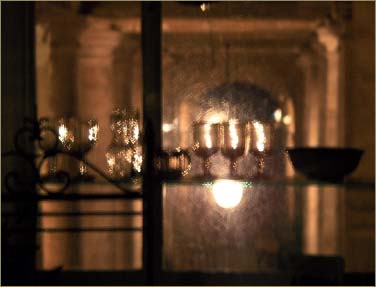
The XPan and Mamiya, being relatively light, are easy to handle. This compensates for what one loses in comparison to the image quality of the larger 6 × 17 cameras. Their lightness also allows for the exploration of other photographic horizons, like hand-held photography. The work of Aurore de la Morinerie and vincent b. are perfect examples of this.
Before advancing to the aforementioned 6 × 17 format cameras, there remains another interesting alternative: 6 × 12 cameras. Really, the size of their film places them in the category of large-format cameras, and very large prints made from them will be of an irreproachable quality. Many companies make these cameras – Cambo, Horseman, even Silvestri and Linhof. The exposure is made on 120 or 220 film, and the format has a ratio of 2:1. This ratio, cropped down to 3:1, again offers indirect shifting possibilities. However, some of the cameras described next also permit direct shifts, which is even more advantageous.
The makers of these panoramic cameras obtain their lenses from two of the best names in the business: Schneider and Rodenstock. Essentially, these are lenses designed for bellows cameras that are mounted on a threaded, helical housing that allows them to be easily focused by hand. On a view-camera, this would be achieved by racking the front and rear standards back and forth. All the lenses have the same range of shutter speeds: T, B, and then from one second to 1/500 second. In order to obtain the maximum quality, the photographer needs to stop down to at least f22. Used in this way, one will obtain a depth of field where the closest area in focus will rarely be less than one meter away. However, it is necessary to add that since these cameras do not possess a reflex viewfinder, the placement of the critical focus will have to be estimated. By determining the hyperfocal distance and by stopping down considerably, the results should never present any focusing problems.
All the 6 × 12 cameras have a viewfinder of high quality and remarkable clarity. Detachable, they can be brought along when scouting around and noting locations, or carried in the palm of the hand while hiking with the camera in a backpack.
Finally, these cameras are distinguished from the other 120 and 220 film cameras we will consider by their lack of light meters. Use of a separate light meter is therefore indispensable in order to measure the light correctly and to determine the adequate exposure. When a panoramic photographer uses this type of camera, he or she works slowly, attempting to achieve quality on all levels. Exposing the film when rushed and without adequately metering the light would be counterproductive.
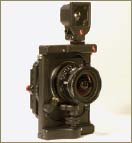
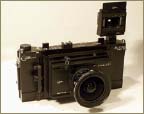
Cambo Wide DS
Relatively light and compact, the large-format Cambo Wide DS camera possesses an impressive range of Super-Angulon optics, from the 38 mm XL to the 72 mm XL, and soon, 90 mm. The angle of view reaches 115° at its widest, or the equivalent of a 14 mm lens with 35 mm (but here the format is 13 times larger). The normal lens is the 58 mm XL, with an 86° horizontal angle of view.
The Cambo allows one to shift the lens over a large area, ranging from +40 mm to –20 mm on the vertical axis and +/–20 mm on the horizontal, enabling the photographer to easily place the horizon line where her or she wants! Recall that, ideally, the horizon line should not be placed in the exact middle of the photograph. Because of this shifting ability, this would be the camera to use when one wants to avoid tilting the camera in order to prevent the convergence of vertical lines (notably with monuments). And with a shift of +40 mm allowed toward the top, it is possible to place this horizon line near the bottom of the film. The distance that separates the middle of 120 film with its edge is only 28 mm.
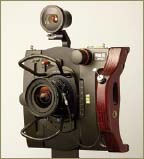
The size of the film, the quality of its lenses, and direct and indirect shifting abilities make the Cambo Wide DS a marvelous large-format, panoramic camera. Because of its shifting features, one might even prefer this format to the more conventional 6 × 17.
If this camera allows such significant shifts, that’s because it was originally designed to take 4 × 5 sheet film. Film backs can be interchanged for either 4 × 5 or medium format 120 or 220 roll film.
Horseman SW 612/SW 612 Professional
Similar in design to the Cambo but a little bit less bulky (since it does not permit the use of 4 × 5 film), the Horseman 612 SW Professional panoramic camera has less shifting ability: +/– 17 mm along the vertical axis and +/– 15 mm along the horizontal. Therefore, it will not be as useful for placing the horizon line where one wants, although it still remains possible to place it at the upper or lower third of the photograph. The SW 612 differs from the professional version because it does not have a lens-shifting capability.
Horseman’s very nice lenses are made by Rodenstock, Schneider’s rival, and range from a 35 mm lens to a 90 mm Grandagon or Apo-Grandagon. Warning: The angle of view of the 35 mm lens is so wide (115°) that it will prevent accessing the full range of the professional camera’s shifting capability.

Less bulky than the Cambo Wide, the Horseman SW 612 Pro has less shifting ability and does not take 4 × 5 sheet film.
Linhof 612 PC
This camera possesses one amusing particularity: the lens is mounted directly in the shifted position, and it is not possible to move it from there. When the camera is oriented toward the horizon, this is placed automatically at the lower third of the photo – or the upper third, if the camera is turned the other way (there is a tripod thread on the top as well). When this camera arrived on the scene in 1976, it offered a real advantage; but today, faced with the competition, it seems rather limited. Much the same holds true with the II model, dating to 1996. Still, the quality is remarkable, as is often the case with Linhof cameras.
Linhof’s optical line is made by Schneider and ranges from the 58 mm XL Super-Angulon to the 135 mm Apo-Symmar. The quality of the optics is really stunning, and they come with the further advantage that one can change them while in the middle of a roll of film, thanks to a protective slide located in front of film that prevents exposure.
Of top-notch construction, the Linhof 612 camera is also endowed with an off-centered lens position that is oriented toward the top. With this camera, architectural photography is quite easy. However, this advantage can also be a handicap in other situations.
Silvestri H
Modular in design, Silvestri cameras accept lenses by the best two names in large-format optics: Schneider and Rodenstock. Although these are essentially medium-format cameras, they also accept 6 × 12 backs and have the added benefit of direct shifting abilities. Thus, in this regard, they start to resemble large-format cameras. However, one is still obliged to use 120 and 220 film.
There are many Silvestri cameras. Model H is shown here.
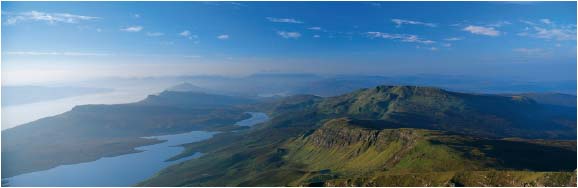
Fuji GX 617 II, 300 mm lens.
Photo by Hervé Sentucq.
This film format justifies the investment, since one naturally wants the best image possible. Until recently, the Fuji 617 was significantly more expensive than a 35 mm camera, but today, the game has definitely changed. An up-to-date 35 mm camera and two accompanying lenses costs about the same as a 6 × 17 camera with one lens. Of course, the level of versatility is not the same; rather, it’s the quality that is so much better. Popularized by Philip Plisson and Jean-Baptiste Leroux, both the format itself and the impressive quality of posters originating from images made with these large-format panoramic cameras have seduced a new generation of photographers, forcing everyone to consider panoramic photography in a new light.
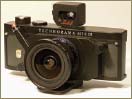
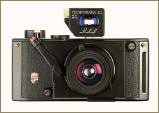
Since the arrival of the Photokina 2000, it is possible to buy Linhof Technorama cameras in a variety of colors.
No film is wasted either, since these cameras use 120 and 220 film, resulting in a large 6 cm × 17 cm image with a 3:1 ratio. These cameras now accept interchangeable lenses, ranging from a narrow 20° telephoto to a very wide-angle 105° that has the advantage of producing much less distortion in the corners and on the edges than an equivalent lens focal length in 35 mm (21 mm). Similarly, comparing equivalent, 90° angles of view, if one used a 15 mm lens in 35 mm, it would require a 72 mm lens with 6 × 17, the latter focal length being short telephoto in 35 mm. Viewed in this way, not only is the 6 × 17 format giant in comparison to the 35 mm format cropped down to 12 × 36, but the former also introduces a comparative telephoto effect that enlarges small details. Unlike 35 mm, these details truly stand out here, and are never buried in the grain of the film. Thus, prints resulting from 6 × 17 color transparencies, negatives, and scans are of excellent quality.
I find two problems with these cameras, however. Apart from the relatively unobtainable Gilde MST66-17, shifting the lens, directly or indirectly, is not permitted since one cannot cut film that is already at a 3:1 ratio. To shift indirectly, it would be necessary to buy a 5 × 7 view-camera and crop the film to a 56 mm × 170 mm format. Due to this shortcoming, it becomes necessary to tilt the camera upward or downward when moving the horizon line away from the middle, introducing vertical-line convergence. The other problem is that their bulkiness and weight often remind one that the progress of large-format lenses has made it possible to obtain similar quality with the smaller 6 × 12 format.
However, note that their high-quality viewfinders are detachable and can be carried separately when scouting around, so as to avoid the encumbrance of constantly having to lug the camera around.
Fuji GX 617
The best-known example of a specialty, large-format panoramic camera, the Fuji GX 617 can be outfitted with up to four reputable lenses. Although the image quality is quite good provided that one takes care to stop down to at least f22, the camera itself has a few inconveniences, like the impossibility of changing lenses without exposing the film due to the lack of a dark slide. Also, a battery is sometimes necessary – and not even a lithium battery can prevent the camera from freezing up in extremely cold weather (most notably in high mountains).
Also, it is important to mention that short focal length lenses (e.g., 90 mm and 105 mm) necessitate the use of a center-spot neutral density filter, as is equally the case with the other 6 × 17 cameras. We will return to this subject shortly, in the section dealing with accessories.
This large-format panoramic camera’s reputation is built on its relatively light weight – which makes hand-held exposures possible – and its reasonable price compared to other 6 × 17 cameras. Used, you also can find the first model of the Fuji 617, which dates to 1982 and has a fixed, 105 mm lens.
Linhof Technorama 617
Linhof 617 cameras first appeared in 1976. The present mark III version accepts three lenses: 72 mm, 90 mm, and 180 mm. Although expensive, each of these lenses is quite good, and each comes with a center-spot neutral density filter – a necessary item with color transparency film.
Of a well-made quality that equipment enthusiasts can appreciate, Linhof 617 cameras offer a much wider angle of view than the Fuji’s 90 mm lens is capable of, thanks to a Schneider 72 mm lens. Thus, the horizontal angle of view is wider than 100°.
As opposed to the Fuji 617 cameras, which require a battery, Linhof cameras are always fully mechanical. Therefore, one can operate them in extremely cold weather. Only slightly more bulky than the Fuji cameras, one can also make handheld exposures with them, if need be.
The Fuji GX 617 has a range of four lenses: 90 mm, 105 mm, 180 mm, and 300 mm (with rubber-coated protection bars that are very practical during transportation); these cover an angle of view ranging from 90° to 20°.
Kurt Gilde, a German doctor, makes three types of 6 × 12 and 6 × 17 camera by hand, which, in addition to high quality of their materials, is the reason for their high price. And the range of possibility available with these cameras easily makes them the Rolls-Royce of their kind. As proof of this, consider the following: their design makes it possible to attach any kind of large-format lens – not just Schneider and Rodenstock lenses, but also Nikkor and Fuji, telephoto lenses included. Changing formats from 6 × 7 to 6 × 17 is possible, even while in the middle of a 120 or 220 roll of film (thanks an inventively designed dark slide). Therefore, changing lenses in the middle of a roll of film also is permitted. These characteristics alone would make it a most versatile 6 × 17 camera, but that’s not all – the image control possibilities are also quite remarkable. With the top-of-the-line 66-17 MST camera (if I may call it that), it is possible to shift the lens +/–25 mm (as compared to only +15 mm with the other brands), as well as tilt it +/–10°. Very heavy – close to seven pounds without lens – these wonderful cameras require a tripod.
The Rolls-Royce of 617 cameras is obviously the most expensive, too. But what style and versatility! Swings and tilts, direct shifts when needed, this camera is extraordinary.
Here we describe some more or less indispensable accessories found in the camera bag of a panoramist. And although the camera bag itself is not specific to panoramic photography, for me this is simply a chance to sing the praises of backpacks, due to their practicality and therapeutic benefits. One quickly finds the following to be essential: a tripod (sometimes large), a set of filters (sometimes with very specific uses), one or two hand-held light meters, and other small accessories.
There are three large categories of camera bag: backpacks, shoulder bags, and fanny packs. Personal habit will determine one’s preference for a certain type, but I particularly appreciate the Lowe Pro Trekker backpack that I’ve had for more than six years. I find it has a number of advantages, the best of which is that it does not hurt the back of its owner! As the backpacks increase in quality, they offer the possibilities of attaching harnesses and specifically adapting to each individual’s build. If they are large enough, one can even hang a tripod on the outside, leaving the arms free, which is always preferable when hiking. In fact, the only thing I carry in my hand is a small viewfinder, which is far less heavy and bulky than a camera.
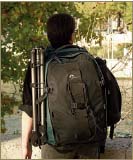
My backpack allows me to carry my tripod on the side. In this way, I avoid leaning backward because of a strong pull. A fanny pack will also prove useful here, enabling you to have small accessories like a light meter and filters on hand.
For those who always want to have their camera on hand, however, carrying a pack on the chest provides a nice alternative. This choice is also very practical for storing frequently used accessories, like hand-held light meters.
Certain large-format cameras are so heavy that a tripod is almost always required. But independent of the camera’s weight, another reason for a tripod exists. A panoramic photographer is often not in a hurry, preferring a creative and contemplative manner of working instead, which leads to a creative routine where the final result should be as close as possible to the photographer’s original vision. Thus, to frame a photo well becomes a deliberate act, making it necessary to take one’s time. Framing, exposure – everything requires care. The utility of a tripod, even a light one, makes this possible. Also, both dim lighting and stopped-down lenses result in longer exposure times, making the use of a tripod necessary. Much the same holds true for artistic, soft-focus effects.
Normally, any tripod will do; but sometimes bringing the camera close to the ground is called for, and at other times it needs to be very high (notably in the city). A tripod also needs to be as stable as possible. For a good combination of adjustability, quality, and economy, the Manfrotto tripods are very good. My Gitzo also works quite well, and has done so for a very long time.
Due to the arrival of the cameras like the XPan, a certain style of hand-held photography borrowed from journalism has started to gain acceptance. At first, those who experimented with this approach were few in number, due to the older cameras being large and heavy.
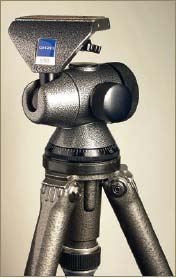
Gitzo Series 2 Reporter tripod. The rapport between weight and stability is very appealing here.
6 × 17 camera; photo by Benoît Ancelot.

Cropped medium-format image; photo by vincent b./chambre 5.

6 × 17 camera; photo by David J. Osborn.
If the camera does not have a level in the viewfinder, you should always carry one with you. When choosing to use a panoramic camera, it is primarily to photograph a wide field and a straight horizon; thus, it would be too bad to lose a photo due to an off-balance camera – unless, of course, one is seeking an original and creative effect.
Small levels located on tripods, or at the base of tripod heads, are not really useful. It’s the camera that needs to be level, not the tripod! Rather, the ideal level is one with two perpendicular markings, the level then being placed on the hot-shoe pad of the camera.
Another solution involves visually lining up the vertical lines of a scene with a ground glass marked with a grid. This makes a level nearly superfluous. Although the XPan and the Mamiya 7 do not permit this, it is possible with certain 6 × 12 and 6 × 17 cameras.

The form of a built-in, center-weighted light meter. This light meter thinks that the principal subject is in the center of the photo. Thus, it is necessary to know how to interpret its readings.
Except for the Hasselblad XPan II and Mamiya 7 II, no other panoramic cameras have built-in light meters. In these cases, a separate meter becomes necessary.
Because of the very narrow field of view embraced, from 1° to 5°, the reading of a true spot meter is done on a very small and precise area. These differ from spot readings that are sometimes built into reflex cameras. Actually, the latter work from a small round disc, which represents two to three percent of the total view rather than 1°. Thus, the reading will be very precise when done with a telephoto lens, but quite insufficient with a very wide-angle lens, which is more typical in panoramic photography.
Just about every conventional 35 mm camera has a light meter, though, which could be used for a panoramic camera, metering with it as usual. (This means that the following advice does not apply just to panoramic photography.)
Built-in light meters have come a long way in the last 10 years, and now are as intelligent as the microprocessor that directs them is powerful. Dot matrix, ESP, and the others are very precise, but not infallible. Understanding how they function and react, and verifying their readings with a second light meter is never superfluous. One other aspect tends to make one forget their shortcomings: they work very quickly.
With an 18 mm lens where the horizontal angle of view is, for example, 90°, the central disc will measure the light over an area covering 10°, which is far too wide, especially for meter readings at night.
Although the spot meter is very useful for making precise readings and for working with the Zone System, in certain lighting conditions, an incident light-meter reading allows you to work more quickly and confidently.
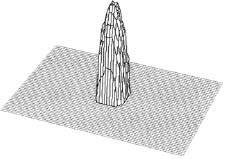
With an 18 mm lens where the horizontal angle of view is, for example, 90°, the central disk will measure the light over an area covering 10°, which is far too wide, especially for meter readings at night.
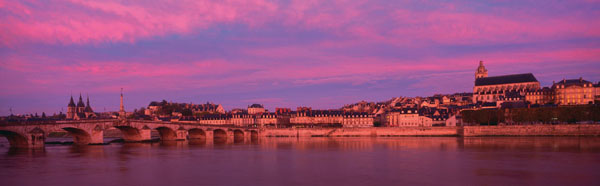
Photo by Hervé Sentucq.
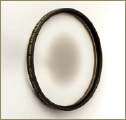
The more one approaches the center, the denser the spot filter will be. The exposure correction is between one and one-and-a-half stops depending on the lens’s angle of view. In this way, the fall-off caused by using a very wide-angle lens can be effectively corrected.
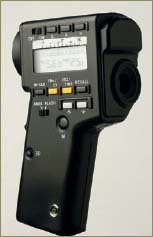
There are three main types of hand-held light meters: incident, reflected, and spot. Panoramic photographers often agree that the most practical and useful type is a spot meter, which measures from 1° to 5°. Because of the small details that it can read, I definitely prefer a 1° spot meter.
Hand-held light meters, especially spot meters, require a sound understanding of and experience with the light-metering process in order to correctly interpret the reading. In situations where one needs to work quickly or the when lighting conditions are right for it, an incident light meter renders a valuable service. And things are getting easier, since it is not hard to find hand-held meters that combine spot readings with the other kinds, like the latest Minolta VI flash-meter.
There are several categories of filters, but none are specifically designed for panoramic photography. Therefore, some restrictions need to be applied when using filters with panoramic photography because the angle of view is usually very wide. The most frequently used filters will be center-spot neutral density filters, suited primarily for large-format cameras with very short focal length lenses; and graduated neutral density filters. Other choices area polarizing filters, where again, it is necessary to avoid fields greater than 90°; and color filters, which correct predominant colors in traditional color photography, or improve contrast in black and white.
Lens filters are more applicable to large-format photography than panoramic photography, but as we saw in the section dealing with 6 × 17 cameras, certain specialty cameras have format characteristics overlapping this category as well.
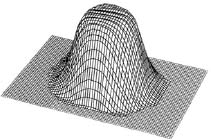
Shown in the opposite photograph is a center-spot neutral density filter. Being denser at the center than at the circumference, it is used to introduce an exposure correction between the center and borders of a wide-angle panoramic image. On average, a filter like this reduces exposure by a factor of two – the equivalent of one f-stop. So when using one in tandem with a hand-held light meter, always remember to give an extra stop of exposure.
Cosine Law
When photographing with a very wide-angle lens (as is the case with cropped panoramas), the angle of the light rays passing through lens becomes wider and wider in direct proportion to its distance from the optical center. Thus, the shorter the lens focal length, the wider the angle; and the wider the angle, the more noticeable the fall-off in exposure on the film. The well-known cosine law further explains this.
If light rays passing along the optical axis of the lens can be said to have a luminosity of 100 percent, then rays that obliquely strike the borders of the film would have the following luminosity (here, the angle of view of the lens is 80°, as would be the case with, say, a 105 mm lens and a 6 × 17 format):
100 × (80/2 cosa), where a = 4,
100 × (40 cosa) = 34%
Again, this difference is significant mainly between the center and the limits of the film, and it becomes more noticeable as the format size increases. So although this fall-off is fairly negligible with conventional 35 mm, a center-spot neutral density filter is required with the XPan 30 mm lens, as well as with wide-angle lenses for 6 × 12 and 6 × 17 cameras. Only this will guarantee correct, homogenous exposure with color transparency film.
Any conventional filter – polarizing, graduated neutral density, or color – can be used without hesitation since panoramic photography resembles normal photography in this regard. Here, I simply want to mention that a graduated neutral density filter with a coefficient of one stop is also very useful in landscape photography. This darkens the sky a little, keeping it from appearing too washed out, both on film and in digital files. Similarly, a polarizing filter will be beneficial for landscape work, provided that the angle of view does not exceed 90° (the filter also being most effective when the sun is positioned at a right angle). Once again, if the angle of view is greater than 90°, the effect of the filter will be noticeable only in one area of the photograph. Only one part of the sky will be darkened, and the result will probably not be very pleasing.
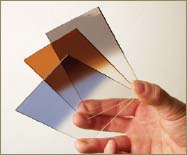
Graduated filters in different colors are made to cut down the light-level of the sky and to modify its tint slightly.
Another accessory that immediately comes to mind for inclusion in the camera bag of the true panoramic photographer is a cable release, for the obvious reason of the quality of the final image (unless one decidedly wants a little bit of camera shake). When equipped with a locking device, a cable release both prevents a photographer from vibrating the camera at the moment of exposure and allows for very long exposures to be achieved without the obligation of having to continuously hold the release. In nighttime panoramic work, this is absolutely necessary.
A cable release can take the form of a normal, cord-type release (preferably with a lock for long exposures) or a remote control, with or without cord (infrared), for use with high-tech digital and traditional cameras.
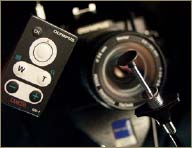
Two cable releases: on the left, an infrared remote-control and on the right, a flexible cable release with lock-down button.
Finally, but much less frequently, a flash sometimes finds a place in the camera bag of the panoramic photographer. Indeed, these can be used without any particular problems, provided that their spread capacity reaches that of the field taken in by the lens. Today, it is not uncommon to see a flash equipped with a diffuser that is able to spread as wide as a 21 mm or even 17 mm lens (i.e., 80° and 92°, respectively). Of course, their throw capacity also limits their field of action, but it is still possible to use them for an interior shots or to make the foreground subjects stand out.
Very useful with interior shots, a flash nonetheless needs to have a throw or spread matching the field of view embraced by the lens (wide-angle). Some flashes can cover the field of a 20 mm lens for 35 mm (more than an 80° horizontal angle) on their own, or aided by an accessory.
A Day in the Life a 6 × 17 Expert, Hervé Sentucq
Before starting a photographic project in the field, a large part of the work takes place indoors. Long periods of research in the library and on the Internet, concerning the subjects in question, result in note cards, maps, and a travel plan.
Arriving at the site, often in the middle of the day and therefore under harsh lighting, I am still a long way from the moment of clicking the shutter. The first question relates to the light, the season, the state of the place (e.g., the condition of the pathways), and so on. Is it better to return another time? If I think that the necessary conditions for showing this landscape to its best possible advantage are present, I then begin a long period of visual observation.
Locating the vantage point or points requires exploring the landscape thoroughly. While doing this, I carry only the detachable viewfinders that correspond to my lenses. In this way, the search for original compositions is done while traveling light. Gradually, I obtain a mental or interior vision of the landscape. And once the framing has been settled upon, I return to the place in question with the camera and the right kind of lens.

For the magic light, the one that really exalts a landscape, it is necessary to wait hours, even days, for something that often lasts only a few seconds! It is capricious, unpredictable, and ephemeral, often forcing me to return several times to the same place over the course of a few days. I give myself about 24 hours to observe a site under different lighting, weather, and coloration, preferring evening and just before dawn. With only four shots per roll of film, I want to have at least one good one, so it is not advisable to hurry things. After long periods of waiting, one becomes aware of every variation of light, and one tries to anticipate them.
During the day, I mostly prefer turbulent skies and storms. And with the goal of obtaining a highly nuanced illumination, I watch for the precise moment when the sun hides behind a cloud and the moment when it reappears. This trapped light enlivens the scene by casting more pronounced shadows. The landscape, transformed into two dimensions, maintains all of its three-dimensionality.
To profit from all the lighting variations at dawn and dusk, I have to sleep on the spot, in my vehicle. In other words, I force myself to be present at the place of exposure an hour before sunrise (which is around 5 A.M. in summer!). And to reach this place sometimes requires an hour of walking beforehand, using a flashlight so as to be able to move in the darkness. So it is not desirable to add driving in a car (e.g., from a hotel) to this, since it would only reduce my sleep that much more.
The equipment is heavy: nearly 45 pounds for the tripod (stable and sturdy) and the bag containing the panoramic equipment (consisting of the Fuji GX 617 camera, 90 mm, 180 mm, and 300 mm lenses, and rolls of Fuji Provia 100F film). The completely manual ritual of setting up the tripod and camera takes several minutes and puts me in a good mood. And while putting the finishing touches on my framing, my critical sense sharpens, preventing me from forgetting the constituent elements of a successful panoramic image. I seek only places that can be seen and visited by everyone, without having to pay a fee or be a top-level athlete to reach it. Everything is manual: installation of the viewfinder and cable release, various adjustments, focusing, setting the shutter speed and aperture, incident light-meter readings, cocking the shutter, advancing the film after every exposure, switching lenses in a changing bag, and so on. I generally seek to create an image with depth, profiting from the first significant foreground subject and an elevated point of view.
Large-format panoramic photography is costly and therefore reserved for exceptional photographs of refined subjects, both well-composed and literate. Often, one brings back only one photo after a whole day of work. The size of a 6 × 17 color transparency allows for very fine details and giant enlargements without seeing the grain of the film.
I took up photography in 1988 and became a panoramist toward the end of 1997. I also set up the first panoramic photo archive of artistic images of France and Scotland. My graphic string is fully calibrated and I digitize and process my photos myself. My activity as a photographer-author is oriented mostly toward advertising and illustrating themes dealing with tourism and the environment. To find out more about my exhibits and publications, visit the following Web site: www.panoram-art.com.
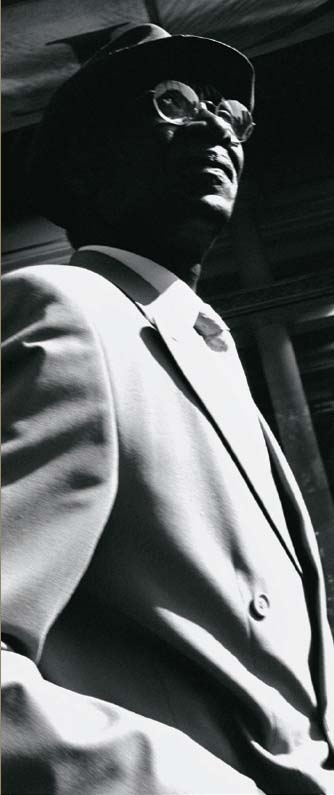

Photo by Hikaru Ushizima and vincent b./chambre 5.
Although one naturally thinks about using a tripod to create pictures of urban or natural landscapes, many current photographers have also started creating journalistic photographs with panoramic formats – these being mainly hand-held since the arrival of the Hasselblad XPan. Achieving maximum depth of field requires stopping down considerably, however, necessitating longer exposure times. And only a tripod will allow one to prevent the lack of focus caused by a moving camera.
Yet, in spite of these forewarnings, it does remain possible to make a hand-held panoramic photo of a landscape, even with large format – something at least better than returning home empty-handed! But the resultant image will neither be truly focused, due to camera movement, nor evenly exposed, because the lens was not stopped down enough. So to be able to work with these harmful effects, the photographer must accept them as much as possible.
With large format (e.g., 5 × 7), a 90 mm lens is equivalent to the angle of view of a 21 mm lens with 35 mm.
The fundamental principles of framing and composition in panoramic photography have already been considered in Chapter Two. What remains is to study the peculiarities of each category of flatback camera in order to get the most out of their creative potential.
Flatback cameras are distinguished from swing-lens and rotational cameras mainly by much smaller angles of view, but also by their more conventional distortions of the image, which are equivalent to those encountered with a normal camera equipped with a very wide-angle lens.
To conclude this subject, I will discuss the problem of exposure and light metering with this kind of camera, which is quite similar to normal cameras.
Choice of the Angle of View
It’s really the vision that one has of a subject and what lenses are available that determines the angle of view and composition of a photograph. In all cases, it is necessary to crop a part of a conventional rectangular format photo (e.g., 35 mm, 6 × 7, 4 × 5, 8 × 10). Masking the top and the bottom of an image turns it into a panoramic format (i.e., a ratio of at least 2:1).
Many specialty cameras are founded on this principle. The angle of view is determined by using one of the short focal length lenses in the optical range of the original format. They simply use a smaller film size, so less is wasted. 35 mm becomes 12 mm × 36 mm with an angle of view varying from 70° to 110° (28 mm to 15 mm) without changing the film. 6 × 7 and 6 × 9 become 24 mm × 65 mm with an angle of view varying from 35° to 94° (90 mm to 30 mm), as is the case with the Hasselblad XPan II, which uses 35 mm film instead of 120. 5 × 7 becomes 56 mm × 170 mm with an angle of view varying from 45° to 100° (180 mm to 72 mm) in the case of the Fuji 617 and Linhof Technorama (with 120 or 220 film), although not with sheet film.
In this way, the angle of view is always that of a conventional wide-angle lens with the top and bottom of the image removed. The large format of the Fuji 617 allows one to obtain a much better quality enlargement, while offering exactly the same perspective and horizontal angle of view as a picture made with a 35 mm camera with equivalent lens, as we saw in Chapter Two.
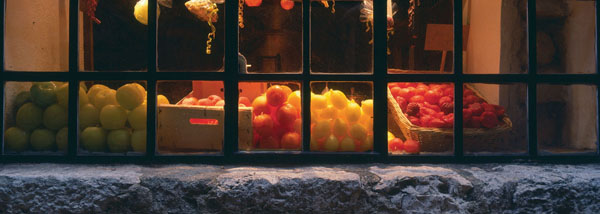
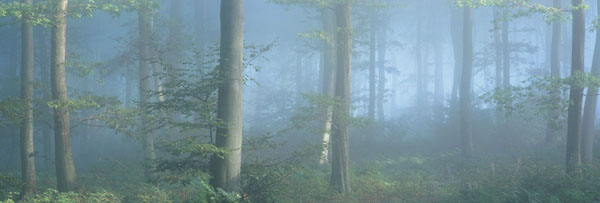
Photo by Hervé Sentucq.
Because of a proper use of depth of field, the photographer has succeeded in obtaining a photograph where just about all the planes are in focus, from foreground subjects all the way to the horizon.
Photo by Peet Simard.
It goes without saying that with this kind of camera, framing resembles framing in conventional photography. The horizontal lines remain horizontal, even when the camera is tilted for a low-angle shot – that is its primary advantage. A vertical convergence effect will also inevitably appear in tilting the camera, something that only a shifting lens could prevent. All too often, this kind of camera does not allow for lens shifts.
With these cameras, the optical quality will have a tendency to degrade on the borders, especially in the corners. One can also observe an enlargement of the image in the corners when the angle of view is greater than 80°. This is not a problem in journalistic photography, but it needs to be guarded against in architectural photography.
Parallax
As is the case with all nonreflex cameras, it is a good idea to be vigilant when framing a subject that is nearby because of parallax – the difference between what is seen in the viewfinder (often placed above the camera) and what is actually photographed.
The further the viewfinder is from the film, the more noticeable parallactic effect will be. However, this inconvenience is not that important with cameras that allow one to remove the viewfinder from its support and place it at the height of the film. This advantage pertains almost exclusively to large-format cameras; although smaller format cameras like the XPan II and the Mamiya 7 II do permit one to attach a supplementary removable viewfinder with really short lenses. This being the case, note that the shortest distance that can be focused with these lenses is rarely less than a yard, so the ability to come in really close is limited. Much the same holds true for correcting extreme close-up parallax problems as well.
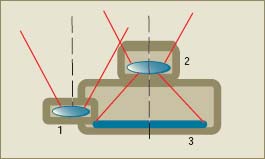
Parallax only becomes significant when focusing on fairly close subjects and with cameras that have nonreflex viewfinders. In these cases, if the subject is too close to the camera, the viewfinder and the lens will not even be aimed at the same spot.
1. Viewfinder
2. Photographic lens
3. Film or digital sensor
Depth of Field and Hyperfocal Distance
A panoramic photographer often is seeking the maximum depth of field. This is why it is important to consider the hyperfocal distance once the lens has been stopped down. And again, depth of field is one of the reasons why the exposure time will be long and a tripod will be necessary.
Different scenarios are possible, depending on the type of camera used:
1. The cameras have either a manual or an autofocus focusing system and a reflex viewfinder. This often is the case with modern cameras, and makes it easy to control the focus. Some cameras even have a depth of field preview that allows one to see all that is in focus, through the viewfinder. This feature is especially useful in determining the hyperfocal distance.
2. A rangefinder in certain specialty cameras, like the XPan I or II and medium-format cameras, allows one to control the focus precisely. However, here the depth of field preview is often lacking. In this case, it is necessary to consult the depth of field scale on the lens barrel, using it to move the critical focus to the hyperfocal distance.
3. Large-format specialty cameras have a hand-held viewfinder, and the focus remains relatively fixed. Here the use of the hyperfocal distance has already been calculated, guaranteeing a reliable and regular result, in spite of the lack of a focusing control.
Whether it is done with a built-in light meter or one that is hand-held (incident, reflected, or spot), light metering in panoramic photography resembles light metering with a conventional camera and a wide-angle lens. The most frequent problem is thinking that the main subject of interest is larger than it actually is. Actually, the main subject often appears small on the film, so a high quality of exposure is needed to minimize this. The only way to achieve precise measurement of small details is to use a spot meter, which is why it is so popular among panoramic photographers.
Normally, from the start, one takes an overall light-meter reading for the entire scene, resulting in one or two combinations of f-stop and shutter speed. If there is a large difference between the left and right areas of the photo (or the shadows and highlights) using this method, it will be essential to take note of this, in order to determine what specific area to base the exposure on (which also depends on the type of film or sensor used). At this stage, it is important not to measure areas that are significantly brighter or darker than the rest of the scene, since this would bias the light meter. For example, in this way one would purposely avoid metering very bright light sources like a lamp or the sun directly. Once the overall exposure time is determined, it is necessary to take more precise measurements in order to account for local contrast differences – if there is enough time, of course.
In this way, making a good exposure is a matter of compromise. Neither the digital sensors nor the film can record more than a predetermined range of contrast between the brightest and darkest areas of a scene. This range (often fairly limited with digital sensors, which resemble color transparency film in this regard) is frankly more extended with black-and-white and color negative film. But “extended” does not always imply “sufficient.” If the film or the sensor is incapable of registering all of the nuances of a landscape, the photographer will need to know how to give preference to certain areas and sacrifice others.
If the photograph is made with either a digital camera or color transparency film, the choice of the final exposure will depend on the highlights, which above all should not be blocked up or “cooked.” If these two kinds of image recorders are overexposed, they subsequently become unusable, since the overloading of information is irretrievable. Conversely, if the shadow areas are not exposed enough, it can always be corrected with retouching software or in the darkroom, when making the print. In the former case, much of this will depend on the quality of the digital camera’s sensor; while in the darkroom or with a color transparency scanner, the talent of the printer comes to the fore. Thus, with these types of image recorders it becomes necessary to be very attentive when metering the highlights with a spot meter. If one places the highlights – as is done in the Zone System – the shadows risk being under-exposed. So, for example, in the case of a landscape photograph with a fair amount of sky, a graduated neutral-density filter would be called for. The photographer can also decide to sacrifice a little of the highlights, but only a little, in order to avoid underexposing the shadows in a way that would be detrimental to the image.
When the image is taken with black-and-white or color negative film, the opposite holds true. Here, it is necessary to expose for the shadows and correct for the overexposed highlights during the subsequent development. As opposed to the positive and digital processes, if there is not enough information on the film due to underexposure, one cannot add any later! On the other hand, if the highlights have received a little overexposure, it will always be possible to reduce the time of development to prevent them from blocking up. However, if correcting overexposure by development is still not enough to obtain a desired end result, then the photographer needs to make a compromise at the time of exposure by choosing one part of the image – the area deemed more essential in expressing one’s actual sentiment – over another. This choice cannot be made by the light meter, no matter how intelligent it is.
As you can see, all this refers back to the problems encountered in light metering with conventional photography, which is equally important in panoramic photography.
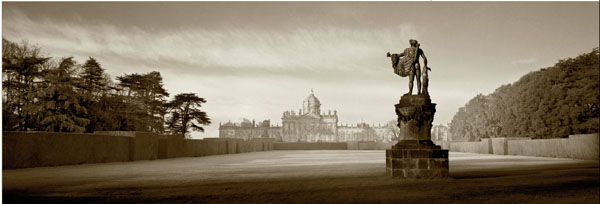
Photo by David J. Osborn.