
Like add-ins, macros are another common extensibility option built into Visual Studio. As discussed in Chapter 50, macros have many benefits over add-ins (quick to create, and Visual Studio actions can be recorded to a macro), but also many downsides (they must be written in VB, can't be compiled, and have limited abilities). It's a tradeoff as to which means you use to automate Visual Studio based upon your requirements. If you perform the same set of actions repetitively in Visual Studio, macros are a great way to reduce these down to a single action.
This chapter takes you through the process of recording a macro and running it again, creating macros from scratch, and deploying macros to other developers once you've created them.
A Visual Studio macro (it's actually called VSMacro but is commonly known just as a macro among developers) is code that can be run by the Visual Studio IDE to automate a task. The code is not compiled, but is interpreted — it's essentially a scripting language for Visual Studio. A macro is implemented as a public method in a module that takes no parameters and does not return a value. Like add-ins, macros use the Development Tools Extensibility (DTE) API to automate the Visual Studio IDE. Macros can't display any user interface elements in Visual Studio (such as a tool window) — if you need this sort of functionality, you should consider creating an add-in instead.
Macros exist in code modules, and these code modules are contained in macro projects. Macro project files have a .vsmacros extension, and are much like a standard Visual Studio project file (in concept); however, the various modules and associated files in the project are embedded into this project file (rather than existing in their own individual files). In addition, a code module can contain one or more macros, so you can include multiple macros in a module.
If you are a VB developer, you will have no problem coding macros, because VB is the native language used by macros. Unfortunately, C# is not supported as a macro language, and therefore C# developers will need to learn VB or create add-ins instead.
Before you look at the tools for creating macros, take a look at the Macro Explorer tool window that can help you manage and run the macros available to you. If the tool window is not visible, select the View
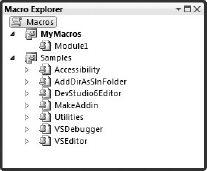
As you can see from Figure 52-1, there is a top-level Macros node under which macro projects live. Each macro within that project is listed as well.
This dialog is very useful in enabling you to select and run a macro (simply double-click the macro to run it), and edit a macro (right-click the macro and select Edit from the context menu). When you select to edit a macro, its code will be opened in the Macros IDE, which is discussed in the next section of this chapter.
You'll notice that two projects are already displayed in the Macro Explorer: MyMacros and Samples. MyMacros is the default project in which to create your macros (although you can create additional macro projects as required). The Samples macro project consists of example macros that you can use to help you learn how to write macros and work with the Visual Studio automation model.
As you can see in Figure 52-2, the Visual Studio Macros IDE is quite similar to the Visual Studio IDE, despite being a completely separate program. It being a somewhat familiar user interface should help you navigate your way around the IDE.
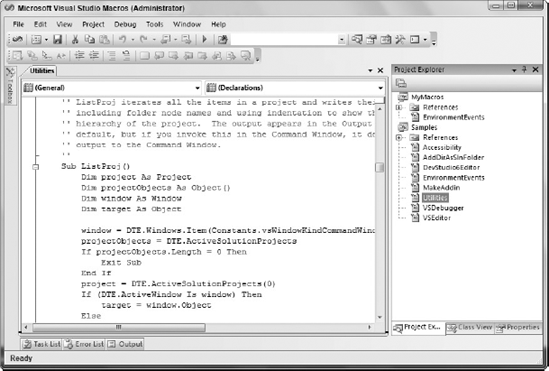
Of particular note is the Project Explorer tool window (akin to the Solution Explorer tool window in the Visual Studio IDE, on the right side of the screen). This window enables you to navigate the various macro projects and the modules/files they contain. You'll note that as opposed to the Macro Explorer in the main Visual Studio IDE, which displays the available macros under each macro project, this window displays the modules and files within each macro project. The Macro Explorer hides the modules from you, and just collates all the macro functions across all the modules to be displayed under the macro project. When you open a module, it's just the same as opening a code file in Visual Studio.
Note
The Visual Studio Macros IDE can't run as a standalone program and can only be loaded via Visual Studio.
You have two ways of creating a macro: one is to start from scratch and write the code yourself, and the other is to record a set of actions in Visual Studio using the macro recorder for later playback. This section looks at both methods, starting with recording macros because that's the easiest way to get started creating macros.
If you simply want to automate a predefined set of actions in Visual Studio, the easiest way to create a macro to perform those actions is to use the macro recorder to record you performing those actions, and then play it back when required. The macro recorder will take all the actions you do in the Visual Studio IDE while it's recording and document them in code form. If necessary, you can then tweak the code that the macro recorder generated to work exactly the way you want. This can save you having to learn the Visual Studio automation model and manually write code against it. It's also a great way of learning how to create macros.
To record a macro, select Tools
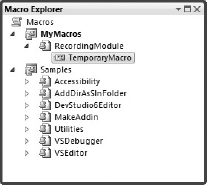
After performing the actions that you want to record, click the stop button in the macro recorder toolbar (or press Ctrl1 Shift1 R again). Now, if you look in the Macro Explorer you will see that a module has been created in the MyMacros project (by default) called RecordingModule, and that a macro called TemporaryMacro has been created (as shown in Figure 52-4).
You should now rename the macro by right-clicking it, selecting Rename from the context menu (or simply selecting it and pressing F2), and entering a new name in the textbox for it so it isn't overwritten the next time you try to record a macro. You can now run the macro by double-clicking its name and testing it.
Note
You can change the project that the macro is recorded to by right-clicking the project in the Macro Explorer and selecting the Set as Recording Project menu item. However, the module that the macro is recorded to cannot be set, and will always go into RecordingModule.
Although the macro recorder can help a lot in creating a macro, it won't capture every action you perform in Visual Studio, and more than likely won't be able to capture everything (such as all the logic) that you want it to do. That's when you will have to turn to modifying the code it outputs to add the appropriate additional logic that you require.
When you create a macro, you can choose to create a new macro project (useful if you want to distribute this macro to other developers), or use an existing one. If you want to create a new macro project, you will no doubt be surprised to find no option to create one within the Macros IDE.
Instead, you will have to do it back in the Visual Studio IDE from either the Macro Explorer by right-clicking the root Macros node and selecting New Macro Project from the context menu, or using the Tools
Note
Two good ways exist to get up to speed with writing macros. The first is to look at the samples (all the macros in the Samples macro project) and how they work. Try to find one that does something similar to what you need to do and work from that. Another good way to get started is to just use the macro recorder to record various actions when working with Visual Studio, and then examine the code that it generates. You can then take pieces of this code and use it in the macro you are working on.
You can add additional modules as required by right-clicking the macro project and selecting Add
Let's work through an example of creating a very simple macro that inserts some text at the current cursor position in the code editor to state that the code below was modified (consisting of // Modified by [Name] at [DateTime], with appropriate values replacing the square bracket placeholders).
Because you plan to deploy this macro to other machines, you'll create a separate macro project for it called CodeNotes (right-click the Macros node in the Macro Explorer tool window and select New Macro Project from the context menu). Rename the default module that was created under it from Module1 to CodeModificationNotes (right-click the module and select Rename from the context menu). Double-click the CodeModificationNotes module to open it in the Macros IDE. Add the following function to the module (this will be the macro):
Public Sub InsertCodeModificationNote()
    Const MY_NAME As String = "Chris Anderson"
    Dim textSelection As EnvDTE.TextSelection

    textSelection = CType(DTE.ActiveDocument.Selection(), EnvDTE.TextSelection)
    textSelection.Text = "// Modified by " & MY_NAME & " at " & DateTime.Now
End Sub
Now you can debug your macro by placing the cursor within the function and pressing F5 (Run). The Visual Studio IDE will quickly become active as the macro runs, returning to the Macros IDE when complete. If you return to the Visual Studio IDE and look in the Macro Explorer, you will note that the macro now appears under the module, and can be run by double-clicking its name.
You have a number of ways to run a macro once you've created it that we've already discussed. As a recap you can:
Double-click the name of the macro in Macro Explorer.
Press F5 in the Macros IDE when the cursor is inside the macro code.
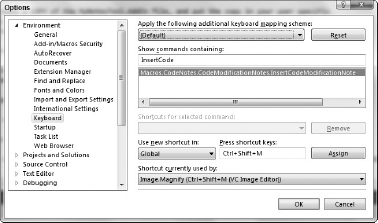
In addition, you can also assign keyboard shortcuts to macros that you use regularly to make them easier to activate and run. Go to Tools
For long-running macros, a tape icon will appear in the bottom-right corner of the IDE, and in the taskbar. If you right-click this icon, you can choose to stop any macros currently running.
Debugging macros is similar to debugging any other type of .NET application. You simply start your macro project in Debug mode by pressing F5 or choosing appropriate menu items in the Macros IDE. You also have the same debugging tools as in Visual Studio, enabling you to set breakpoints, step through code, and view the value of a variable by putting your mouse over it.
Because macros can't be compiled, when you deploy a macro you are actually deploying its source code, which any user can view. Therefore, be sure you're not including any sensitive code in your macro project. You cannot deploy just a single macro — you need to deploy the entire macro project. If you have other macros in the project that you don't want distributed, you should first move the macro to a new macro project and deploy that instead.
For the macros to be available to a developer automatically in Visual Studio, the macro projects must be deployed to the My DocumentsVisual Studio 2010ProjectsVSMacros80 folder in that user's Windows profile.
As with add-ins, you can deploy your macro to another user's machine using a simple XCOPY operation, a Windows installer package (.msi), or a Visual Studio Content Installer package. Creating a Visual Studio Content Installer package is probably your best option, and is created in much the same way as the one demonstrated for add-ins. Let's take a look at deploying the macro project using a Visual Studio Content Installer package.
Create a text file called CodeNotes.vscontent in the same location as your .vsmacros file, with the following content:
<VSContent xmlns="http://schemas.microsoft.com/developer/vscontent/2005">
    <Content>
        <FileName>CodeNotes.vsmacros</FileName>
        <DisplayName>Code Notes</DisplayName>
        <Description>A macro project to put notes in code.</Description>
        <FileContentType>Macro Project</FileContentType>
        <ContentVersion>1.0</ContentVersion>
    </Content>
</VSContent>
Now, in Windows Explorer (or your favorite zip tool), combine the CodeNotes.vsmacros and CodeNotes.vscontent files into a zip file, and name it CodeNotes.vsi (do not include the .zip extension). Now when someone double-clicks this .vsi file, the macro will automatically be installed and ready to use when he or she next opens Visual Studio.
This chapter discussed how macros can be used to automate repetitive tasks in Visual Studio by either recording those actions or coding them against the Visual Studio automation model. You looked at the support that Visual Studio has for macros, how to create them, run them, and finally, deploy them to other developers.