
Topics and tasks in this chapter
A few years ago, if you wanted a computer network in your home, you were automatically considered a nerd who built robots in the garage.
Now, networks are for average, everyday folk. Many families today are on their second or third computer, having outgrown the first a few years ago. Throw in a netbook or laptop, and it's not strange to see a computer in every room.
And that's when a network comes in handy, to let all the computers talk amongst themselves. Connecting your computers with a network lets them all share a single Internet connection, a printer, or even the stash of music and videos stored on other computers.
Whatever your networking needs may be, this chapter explains how to set up a simple home network between your computers, letting them chat through cables or wirelessly through the air waves.
No matter what type of network you use, you're likely to stumble into some very odd terminology when shopping online or reading packaging on the boxes lining the store shelves. Here are translations for the most common stumbling blocks:
Network adapter: Most computers already come with a network adapter: a gadget that can communicate with other parts of the network. A wired network adapter looks like an extra-wide phone jack. Wireless network adapters — commonly found on laptops, netbooks, expensive cellphones, and even the latest TV sets — send and receive network signals.
Router: This little box sends information between your networked computers, letting each computer access both the Internet and your other computers. Most routers today let you plug in at least four computers, as well as send and receive wireless network signals to dozens of other computers. Buy a router that includes the cryptic phrase "802.11n" (a speed rating) on its box.
Tip
Routers make fantastic firewalls, as explained in Chapter 16. Because the router sits between your computers and the Internet, the bad guys can't get in nearly as easily.
Network cables: Also called Ethernet cables, these wires connect your computer's network adapters to your router. (Wireless adapters skip the wires and just broadcast the signal like miniature radio stations.) Network adapters and the router are the two main parts of any network.
Local area network (LAN): A relatively small group of connected computers, modems, and printers. When you create a network, you create a LAN. The Internet, by contrast, is a wide area network, also known as a WAN.
Gateway: A connection between a smaller network and a larger one. A router, for example, works as a gateway that lets all the computers on your home network connect to the biggest network of all: the Internet.
Encryption: A coding method for keeping information private. Each computer on an encrypted network uses an automated password system to scramble and descramble information sent between them. Wireless networks use encryption to weed out eavesdroppers.
WEP (Wired Equivalent Privacy), WPA (Wi-Fi Protected Access): These two different security methods use encryption to keep eavesdroppers out of your wireless network. Although Windows 7 supports both types of encryption, choose WPA — if your equipment allows it — as it's much more secure than WEP.
IP (Internet protocol) address: Each computer on a network has an IP address — a unique identifying number. By routing information to and from IP addresses, the network enables everything to communicate.
This task presents your shopping list and offers some help in picking out the items that meet your own particular needs.
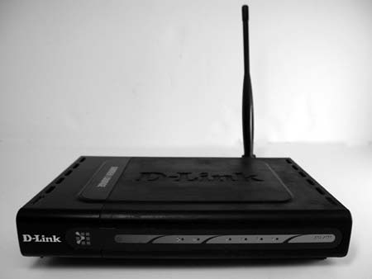
Buy a wireless 802.11n router, as it's the brain of the network: Every computer must connect with it. Most routers include built-in wireless that will connect dozens of other computers farther than a cable stretch away. If your computers sit close to the router, however, skip wireless and just connect the cables to the router's built-in ports. Cables transfer information more quickly and securely than wireless connections, so feel free to run long cable to any of your stationary computers.
Buy one Ethernet cable for each computer that won't be using wireless. Ethernet cable comes packaged with a wide variety of names, including 1000Base-T and CAT-5e. But if you're hunting for it at the computer store, just look for the network cable that looks like telephone cable and says "CAT-5e" or "Category 5e" on the label. Buy each cable several feet longer than you think you need, because they'll flow around corners and desktops.
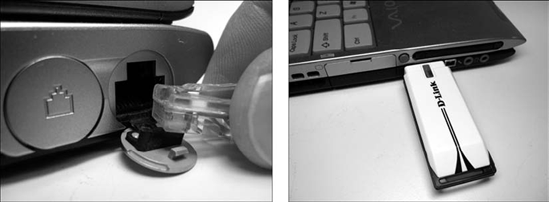
Buy network adapters, if necessary. Each computer needs its own network adapter, either wired or wireless. Most computers and laptops already include built-in wired adapters, into which you can plug an Ethernet cable (left); most netbooks and laptops include wireless, as well. If one of your computers lacks a wired or wireless network adapter, they come as both plug-in USB gadgets (right) and internal cards, which cost less and perform just as well or better than their USB counterparts.
Chances are, you won't need to bother with this task. Most computers come with built-in wired or wireless network adapters. If you own one of those few deadbeat computers that lacks a network adapter, you have several options:
USB adapters: The easiest solution, these come in both wired and wireless models that plug into any computer's USB port. If Windows doesn't automatically recognize and install it, run the bundled software, and you're done: Head to the "Setting Up Windows 7 Computers to Connect Wirelessly to a Wireless Network" task.
PC Card adapters: These slim adapters simply slide into a laptop's PC Card slot, that credit-card sized slot in the side of some laptops. Again, Windows usually recognizes the cards, but run the card's bundled software if Windows doesn't take notice.
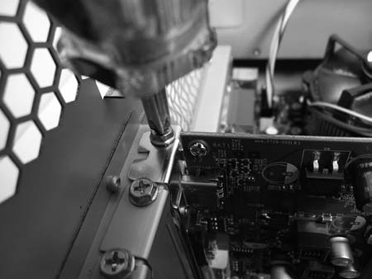
PCI card: The fastest and cheapest wired adapters come on cards that slide into a slot inside your desktop computer. If you're not afraid of a screwdriver, you can save a few bucks and transfer files more quickly between your computers.
To install a network card — either wired or wireless — into a desktop computer, follow these steps:
Turn off your PC, unplug it, and remove your computer's case, as described in this book's Cheat Sheet, downloadable from
www.dummies.com/cheatsheet/upgradingandfixingcomputersdiy.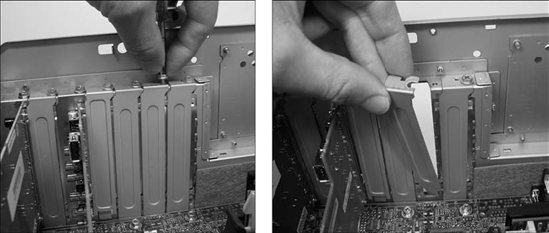
Look inside your computer and find an empty plastic slot on your computer's flat, circuit-filled motherboard. Then find the row of metal slots toward the back of your computer's case. Those metal slots are where you plug in many of your computer's cables. With a small screwdriver, remove the single screw that holds that card in place. Save that screw, as you need it to secure the new card in place.
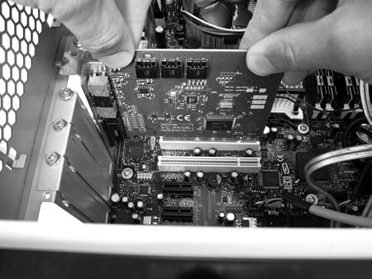
Push the new network adapter card into its slot; its network port will be visible through the metal slot on the back of your computer. Line up the tabs and notches on the card's bottom with the notches in the slot. Push the card slowly into the slot. You may need to rock the card back and forth gently. When the card pops in, you can feel it come to rest. Don't force it!
Secure the card in the slot with the screw you removed in Step 2. Yep, those delicate electronics are held in place by one screw.
Replace the computer's case, plug the computer back in, and turn it on. Windows usually recognizes newly installed cards and automatically sets them up to work correctly. If your network adapter came with a CD, be sure to insert it if Windows 7 begins clamoring for drivers — translation software that helps Windows 7 talk to new parts. (I cover drivers more thoroughly in Chapter 17.)
Now that all of your computers have network ports, you're ready to begin setting up your router. Some of today's routers include a broadband modem bundled inside, letting you skip one of these steps. (And if you're replacing only a broadband modem, head to Chapter 14's task, "Installing a Broadband (Cable or DSL) Modem.")
Follow these steps to connect both your broadband modem and any cable-connected computers to your router:
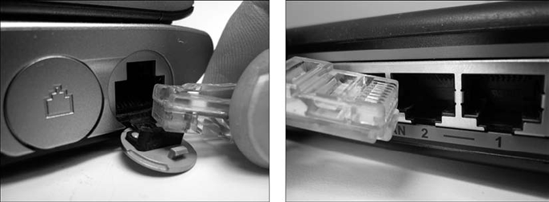
Connect the cables between your computer's network adapters (left) and the router (right). The cables all snake around until they plug into a numbered port on the router. (Most routers come with four ports.) You may need to route cables under carpets, around doorways, or through a hole in the floor or ceiling to move between floors.
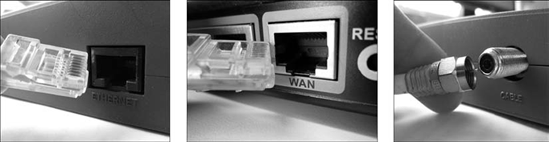
If your router doesn't include a built-in broadband modem, connect a network cable between your broadband modem's Ethernet port (left) and the only port on your router that's labeled WAN (middle). If your router includes a broadband modem, screw the modem's coaxial cable into the router/modem's cable port (right).
Plug the power cords for your modem and router into the wall outlets, and then turn on your computers and their monitors, if necessary. Windows usually recognizes newly installed equipment and automatically sets up everything to work correctly.
Select a location for your network. When Windows 7 wakes up and notices the newly attached network equipment, it asks you for your network's location: Home, Work, or Public Network. Choose whether you're working at home or work (safe) or in public (less safe), and Windows 7 automatically adds the proper security level to protect you. If you choose Home as your location, take Windows up on its offer and follow its instructions to let your computers share files. To see the other computers on your network, click the Start menu and choose Network.

Wireless connections bring a convenience enjoyed by every cellphone owner. But they're also more complicated to set up than wired connections. You're basically setting up a radio transmitter — your router — that broadcasts to little radios attached to your computers. You need to worry about signal strength, finding the right signal, and even entering passwords to keep outsiders from listening in.
Unfortunately, different brands and models of wireless routers all come with slightly different setup software for controlling the wireless signal, so there's no way I can provide exact instructions for setting up your particular router.
However, the setup software on every wireless router requires you to set up these three basic things:
Choose Network Name or Service Set Identifier (SSID). Enter a short, easy-to-remember name in this spot to identify your particular wireless network. Later, when you tell Windows 7 to connect to your wireless network, you'll select this same name to avoid accidentally connecting to your neighbor's wireless network.
Choose Infrastructure instead of the alternative-and-rarely-used mode, Ad Hoc. Ad Hoc lets two computers connect without a router, a mode usually reserved for engineers playing games surreptitiously during board meetings.
Choose your security option and password: This option encrypts your data as it flies through the air. Turn it on using the recommended settings. Some routers include an installation program for changing these settings; other routers contain built-in software that you access with Windows' own Web browser.
As you enter settings for your network name and password, write them on a piece of paper. You'll need to enter those same settings when setting up your computer's wireless connection, a job tackled in the next task.
After you've set up your wireless router to broadcast your network, described in the preceding task, you must tell Windows 7 how to receive it. You'll follow these same steps, whether connecting to your own wireless network; your neighbor's; or one in a hotel, airport, or coffee shop.
To connect to any wireless network, follow these steps:
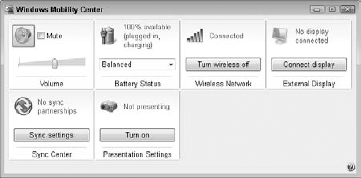
Turn on your wireless adapter, if necessary. Many laptops and netbooks turn off their wireless adapters to save power. To turn it on, open the Control Panel from the Start menu, choose Mobile Computer, open the Mobility Center, and click the Turn Wireless On button. Not listed? Unless you find a "Wireless On/Off" switch on your laptop, you'll need to pull out your laptop's manual, unfortunately. (Some laptops and netbooks toggle their wireless by holding down a key labeled Fn and pressing a Function key, such as F2.)
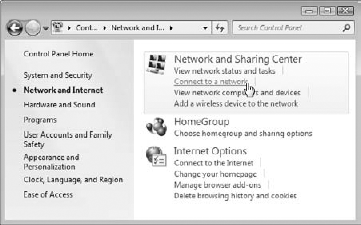
Open the Start menu, choose Control Panel, choose Network and Internet, and choose Connect to a Network from the Network and Sharing Center section. (Alternatively, you can click the tiny Network icon in your taskbar's bottom-right corner.) Windows lists the names, also known as SSIDs, of all the wireless networks it finds within range, including wireless networks run by your neighbors. (That's why security is important.)
Tip
When Windows 7 says that it can't connect to your wireless network, it offers two choices: Diagnose This Connection or Connect to a Different Network. Both messages almost always mean this: Move Your Computer Closer to the Wireless Router.
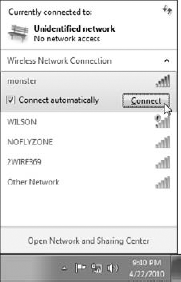
Connect to the desired network by clicking its name and clicking the Connect button. Choose the SSID name you gave your wireless router when you set it up in the preceding task, for example, or select the name of the wireless network offered by the coffee shop or hotel. Don't see your network's name listed? Then move the laptop or computer closer to the router and try again. The little vertical bars next to each network's name resemble a cellphone's signal strength meter: The more bars you see, the stronger the signal.
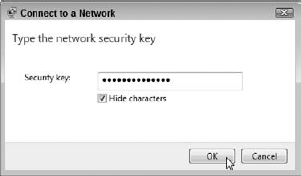
Choose the type of security, if required, enter your password, and click OK. On your own network, this will be the same password you entered when setting up your router. Networks listed as Unsecured Network don't require a password: You can hop aboard and start surfing the Internet for free. Unsecured, however, means they aren't encrypted, which allows snoops to eavesdrop. Unsecured networks work fine for quick Internet access — checking airline arrival times, for example — but aren't safe for anything requiring a password.
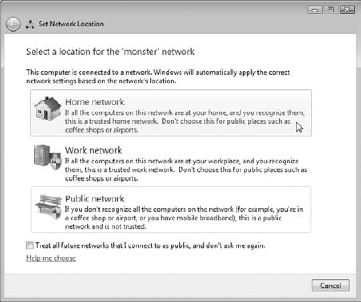
Choose whether you're connecting from Home, Work, or a Public Network. Windows 7 asks whether you're connecting from Home, Work, or a Public Network so that it can add the right layer of security. Choose Home or Work only when connecting to a wireless connection within your home or office. Choose Public Location for all others to add extra security. If you choose Home as your location, take it up on its offer and follow its instructions to let your computers share files. To see the other computers on your network, click the Start menu and choose Network.
Note
Unless you specifically tell it not to, Windows 7 remembers the name and password of wireless networks you've successfully connected with before, sparing you the chore of reentering all the information. Your computer will connect automatically whenever you're within range.
Windows 7's Homegroup system works very well for trysts between Windows 7 computers. But what about that lonely Windows XP or Windows Vista computer? Those folks aren't allowed to join a Homegroup, effectively locking them out. When those poor folks try to connect to a Windows 7 computer, they see only a username/password screen, not your files.
Here's how to lighten up Windows 7's security enough to let your Windows XP or Vista computers in on the action:
Create a working network on your Windows XP and Windows Vista computers. I describe how to create networks on those versions of Windows in my books, Windows XP For Dummies and Windows Vista For Dummies (Wiley).
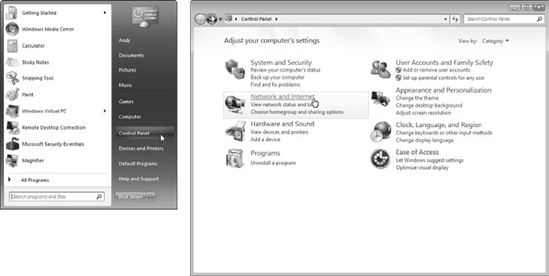
On each Windows 7 PC, click the Start button, choose Control Panel (left), and choose Network and Internet (right).
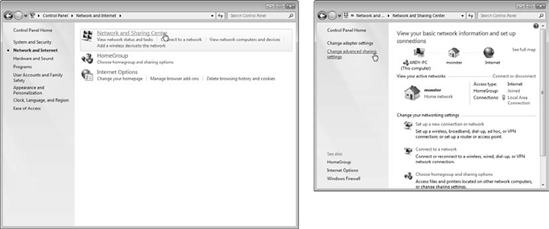
Click Network and Sharing Center (left), then click Change Advanced Sharing Settings from the left pane of the Network and Sharing Center window (right).
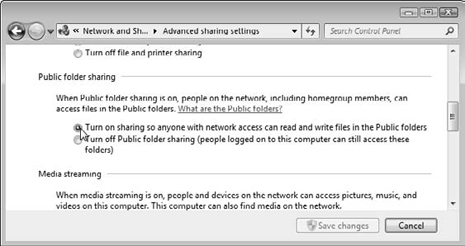
When the Advanced Sharing Settings window appears, make sure Public Folder Sharing is turned On. To share files and folders with others, place them into your computer's Public folder. The Public folder lives one click away in every Windows 7 folder: The contents of everybody's Public folders are automatically listed in everybody's libraries.
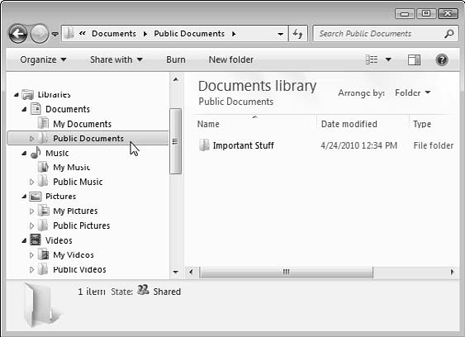
To move items to the Public Documents folder, for example — or to see what items are already there — click the little arrow next to the word Documents to see two folders: Your documents (the My Documents folder) and Public Documents, which shows you the contents of what everybody on the network has stored in their Public folders.
Tip
I explain more about libraries and public folders in Windows 7 For Dummies (Wiley).