
Topics and tasks in this chapter
Choosing compatible drivers
Discovering whether you're running a 32-bit or 64-bit version of Windows
Automatically installing a new driver
Running a driver's installation program
Installing drivers that refuse to install
Finding a new driver
Updating an old driver
Rolling back to an earlier driver
Sometimes upgrading a computer goes as smoothly as throwing a well-catered party. You install the new part, and Windows instantly recognizes it, announcing its name in a merry pop-up window for everybody to see. Windows embraces the latest arrival, hands it a drink, and immediately introduces it to all parts of your computer.
Other times, well, it's a party disaster. Windows snubs the part when you plug it in, and the computer turns a cold shoulder, as well. Or when you turn your computer back on, your computer responds with an antisocial error message that ruins the fun for everybody.
Installation problems rarely lie with the part itself, but with its driver — the software that lets Windows put the part to work. Although Windows 7 comes with thousands of drivers, some of your computer's parts will probably go unrecognized. This chapter shows you how to go about finding and installing competent drivers. If a driver doesn't seem to be doing the job, you discover how to replace it politely, with a minimum of hard feelings on everybody's account.
And if the new driver does an even worse job than the old one, heaven forbid, this chapter reveals the button hidden in Windows 7's Secret Panel: At one click of a button, Windows fires the new driver and puts the older driver back in place until you can find a suitable replacement.
This is a meaty chapter, and troubleshooters will spend a lot of time here.
Whenever anything goes wrong in Windows, nearby computer gurus often exclaim, "Sounds like a driver problem! You'd better get an update." Of course, it's an easy conversation stopper, freeing the guru from fixing your computer.
But what exactly does that mean? What's a driver? Where do you find an updated one? How do you know which driver works the best?
A driver is a piece of software that enables Windows to communicate with a specific computer part — it's an interpreter, if you will. Some drivers use several files to carry out their duties; others use just one. Their names vary widely. But every piece of hardware in your computer needs its own, specific driver, or Windows doesn't know how to communicate with it.
Note
Because outside companies — your printer's manufacturer, for example — write drivers for their own products, tech support people like to pass the buck. If you have a problem with your printer, your printer's tech support people may say you have a Windows problem and should contact Microsoft. Microsoft's tech support people, in turn, tell you that you have a driver problem, and that you should contact your printer's manufacturer.
Unfortunately, that leaves the job of finding and installing drivers up to you. To equip you in your search for compatible drivers, here are the terms you'll constantly encounter:
Version: Well-established manufacturers continually update their drivers and release replacement versions. Sometimes new versions add new features. More often, they fix problems with the old driver. And sometimes, if a version is too new to be tested under a wide variety of conditions, that new version doesn't work as well as the old driver.
Version number: Manufacturers usually assign the number 1.0 to a driver when it's first released to the public. Whenever they release a new version of the driver, they increase its version number. Version 1.1 is newer than version 1.0, for example. And version 2.5 is even newer.
Tip
The driver bearing the highest version number is the most current release. It's usually (but not always) the most reliable. Windows' Device Manager, described later in this chapter, lets you view a driver's version number.
Version history: The best companies stock their Web sites with a detailed description of every driver's version number, its date of release, and the features that each version repaired or added. By examining a driver's version history, you can easily spot the newest driver and discover whether it repairs the problems that you've been experiencing.
Device Manager: Windows collects more information about drivers than your local DMV. Windows Device Manager, the archive of driver details, lists the drivers used by every part of your computer. Device Manager serves as the starting point for anything to do with drivers, including their installation, update, or removal.
Device provider: Listed in Device Manager, the device provider is the company that created the driver. Most manufacturers write their own drivers for their products. They then hand the drivers to Microsoft; Microsoft then bundles those drivers with each new release of Windows. When you install Windows, it can then recognize and begin using a computer's parts.
Many manufacturers balk at creating drivers for their older parts, unfortunately, because the companies are too busy pushing newer products. Not wishing to strand the millions of people still using older computers, Microsoft picks up the stick and writes its own drivers. Drivers listing Microsoft as the device provider often came bundled with Windows.
Microsoft's drivers are often generic, though. Microsoft writes a driver that recognizes all game controllers, for instance, allowing any game controller to move things around on the screen. However, manufacturers often write separate drivers for specific models of a game controller. When you update to the manufacturer's driver, Windows suddenly realizes that your game controller has seven programmable buttons, for instance, and finally enables you to use them.
Driver signing: Desperate to keep drivers on the straight and narrow path, Microsoft wants to inspect each newly released driver and, if it meets approval, stamp it with the Windows logo. If you install a driver that hasn't been through Microsoft's approval process, Windows flashes an "unsigned driver" warning message.
Tip
Despite the warning message's fearful appearance, it usually appears when you're installing parts created by smaller companies. Those small companies don't have enough time or money to wait for Microsoft to approve their drivers. So, install the driver anyway, if allowed. (You're not allowed to install unsigned drivers in the 64-bit version of Windows.) If the new driver doesn't work, you can revert to the old one, as described in this chapter's last task, "Rolling Back to an Earlier Driver."
Note
Paying for drivers is something you needn't worry about. All drivers are free. If anybody tries to charge you for one, walk, run, or double-click your way out of there quickly.
You may have heard about Windows 7 coming in both a 32-bit version and a 64-bit version. That information doesn't matter much until it comes to drivers — the programs that let your computer talk to its physical parts.
If you're running a 32-bit version of Windows, you need to install 32-bit drivers. Likewise, the 64-bit version of Windows requires 64-bit drivers.
So, how do you know whether you're running the 32-bit or 64-bit version of Windows 7? By following these steps:
Click the Start menu, right-click Computer, and choose Properties from the pop-up menu. The View Basic Information about Your Computer window appears.

Look for the line beginning with the words "System Type." There, Windows reveals whether you're running a 32-bit or 64-bit version of Windows. That little line lets you know which type of drivers you need to install for your computer.

Sometimes installing a driver is an automatic, one-time-only process — especially when you insert a plug-and-play device into a USB or FireWire port. It works like this:
Plug in the new part and turn it on, if necessary. For example, plug a digital camera into your computer's USB port, and turn on the camera. Watch as Windows recognizes and greets your new part. Windows tosses up a message saying it notices a new part.

Windows rarely takes more than a few seconds to recognize that you've attached a new part. It searches for drivers. If it finds them, Windows sends up a second message, saying the new part is ready to use.

If Windows doesn't find a driver, though, a less comforting message appears, saying Device Driver Software Was Not Successfully Installed. That's your cue to take matters into your own hands.

Note
Windows almost always beeps in excitement when you plug something into a USB port. If Windows doesn't beep, unplug the device, wait about 15 seconds, and then plug it back in. Never quickly unplug and plug in a device. Instead, give Windows a chance to recognize whether the part's being plugged in or unplugged.
Windows isn't always smart enough to recognize every part you plug into your computer. That's why many computer gadgets come with their own setup software on a CD or DVD. The setup software automatically installs the drivers and programs that help your computer put your new part to work.
Whether you've downloaded an installation program from the Internet or you're running the software that came with a product, you'll follow steps slightly similar to these:
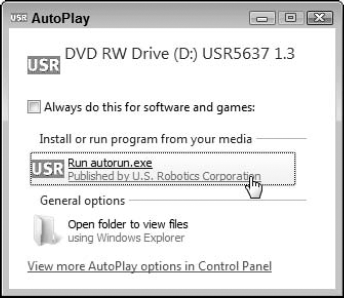
Double-click your downloaded driver's installation file, or insert your installation or setup disc into your computer's CD or DVD drive. Windows usually sends up a window automatically asking for permission to run the setup program. Click Yes to let it run the highlighted program, and click Yes to the permission screen that follows.
Choose your language, if asked, and click Next.

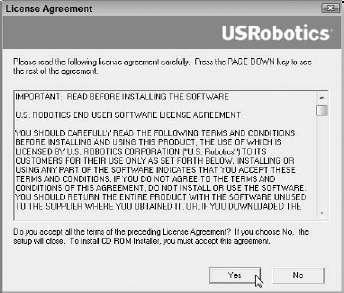
Click to approve the licensing agreement, if asked, and the program installs the driver. Windows often ends the setup process by asking you to restart your computer. When the computer wakes up, Windows takes notice of the new part and begins its welcome messages as shown in the preceding task.
Tip
If the part still doesn't work after you insert the installation disc, don't start worrying quite yet. The driver is probably on the disc, but the manufacturer didn't write software to install it automatically. In that case, move on to the next task, "Installing Drivers That Refuse to Install." That task walks you through making Windows locate the driver on the disc and install it for you.
If you install a new part and Windows doesn't recognize it, the first thing to try is to fire up the bundled software that came with the part, described in the previous task. Most bundled software discs install the part for you, but a few leave you stranded. When that happens, let Windows' handy Device Manager install the driver by following these steps:
Click the Start menu, type Device Manager in the Search box, and press Enter. (Or click the words "Device Manager" that appear at the top of the Start menu's search window.) Device Manager rises to the screen.

Device Manager lists every part connected to your computer, as well as whether they're working correctly. Device Manager flags any malfunctioning part with special symbols, letting you know something's wrong. The USB Modem entry shown here, for example, wears an icon bearing an exclamation point inside a yellow triangle.

Click the item that needs attention, click Action from the Device Manager menu bar, and click Update Driver Software from the drop-down menu. The Update Driver Software window appears, ready to help you resuscitate the problem part.

Choose Search Automatically for Updated Driver Software. That tells Windows to track down the missing driver in the usual spots. If you're lucky, Windows finds the driver, installs it, and much rejoicing is heard around the office.

If you're not lucky, though, click Close, and repeat Step 3: Click the malfunctioning part, click View from the Device Manager menu bar, and choose Update Driver Software. The Update Driver Software window appears, once again.

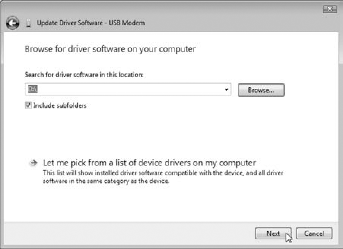
This time, however, take the manual approach by choosing Browse My Computer for Driver Software. Click the Browse button and navigate to the CD/DVD drive containing the installation software. (Or navigate to the folder where you've placed a downloaded driver.) Then click Next, which tells Windows to search for the driver in your specified location.
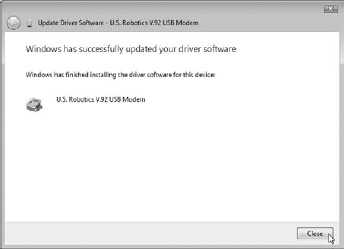
When Windows finds the driver, click Install to give Windows approval to install it. Finally, after the driver is installed, click Close to give Device Manager a rest. You've both earned it.
Tip
If Windows doesn't find the driver, however, the burden falls on your own shoulders, a chore I cover in the following task.
Occasionally, Windows forces you into the role of grunt worker, and you have to ferret out a driver for a computer part. Your part might not be working well with the current driver, or you might want a newer driver that fixes problems or adds features.
The most reliable way to find a driver is to search the Internet for the manufacturer's Web site and, hopefully, the part's driver. This task walks you through the basic procedure, although it varies from site to site:
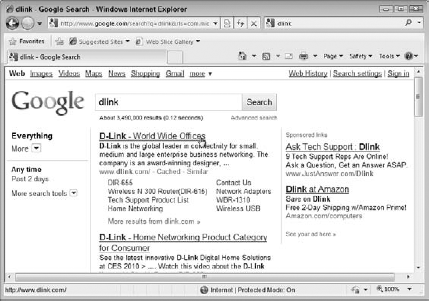
Find the manufacturer's name by examining the part's box, packaging, or the part itself. Sometimes the manufacturer's name (and the part's model number) appear in fine print etched on the part's circuits. After you've found the manufacturer's name, head for
www.google.comwith your Internet browser, type the manufacturer's name into the search box, and click the Google Search button. When you spot the manufacturer's Web site, click its name to visit.Find the Web site's page containing the downloadable driver. Some sites list a menu for Downloads or Drivers on the opening page. With others, look for Customer Support or Technical Support. Try clicking a Site Map, if you spot one, and search for downloadable drivers from there.

Enter your part's name and model number to visit its support page.

Locate the correct driver for your part and Windows 7, either 32-bit or 64-bit. No Windows 7 driver available? Download the Windows Vista driver, instead, which will probably work. Don't bother with drivers for earlier Windows versions, though, because they probably won't work.

Save the driver into a folder on your computer. Windows 7 usually saves downloaded files in your Downloads folder. You can find those downloaded files by clicking the Start menu, clicking your username, and opening the Downloads folder. (To extract the drivers from your newly downloaded file, right-click the file name and choose Extract All.)

If the driver came with an installation program, install it by following the steps in the "Running a Driver's Installation Program" task. No installation program? Then install it by following the steps in the task, "Installing Drivers That Refuse to Install."
Even after installing a brand-new part and installing its bundled driver, sometimes the thing still doesn't work right. That's probably because the manufacturer put that driver in the box several months ago, yet technology kept moving. Chances are, a newer and better driver awaits you on the company's Web site.
If your current driver isn't working correctly, or you want to switch to a newer driver with more features, follow these steps:
Click the Start menu, type Device Manager in the Search box, and press Enter. (Or click the words "Device Manager" that appear at the top of the Start menu's search window.) Device Manager rises to the screen.

Right-click the problem part — the mouse, for example — and choose Properties from the pop-up menu.

When the Properties window appears, click the Driver tab. Then, find the driver version and driver date, both listed on their own lines near the top of the box. Write them down so that you know when you find a newer driver.

Find and download an updated driver, as described in the preceding task, "Finding a New Driver." Be sure to remember where you've saved the new, updated driver.
After you've downloaded the newer driver, repeat Steps 1-3 to return to the Driver tab. This time, though, click the Update Driver button. From there, the steps are the same as Steps 5-7 in the "Installing Drivers That Refuse to Install" task. (Basically, you browse to the new driver's location, click its name, and click Next for Windows to install it.)

Tip
If your new driver makes things even worse, feel free to roll back to the original driver using Windows' Roll Back Driver feature, described in the next task.
Sometimes the new driver isn't the panacea you'd hoped it would be. Your computer doesn't work any better at all. In fact, sometimes you've not only wasted your time searching for a new driver, but you've made things much, much worse.
Fortunately, Windows keeps your previous driver in its back pocket for times like this. Tell Windows to roll back — reach into its back pocket and put the original driver back in place. To do just that, follow these steps:
Follow the first two steps in the preceding task, "Updating an Old Driver," to fetch Device Manager and examine the Properties box for the item with the bad driver.
This time, however, click the Roll Back Driver button.

Click Yes at the approval screen. Windows dutifully removes the new driver you just installed and replaces it with the previous driver — the one that worked better. Changed your mind and decided that the new driver really was working better? Feel free to install it again. And then roll back again if you change your mind. You can spend hours doing this.

Note
Yes, indeed, you can spend a lot of time with this entire chapter. Finding a driver that works perfectly makes it all worthwhile, though. If a device gives you constant trouble, keep checking the manufacturer's Web site for an updated driver.
Tip
If you're still having troubles with the latest driver, spend some time on Google. By searching for your Windows version and the part, you can often encounter other people who've described similar problems and, hopefully, solutions as to which driver version works the best. I describe how to find help online in Chapter 21.