Chapter 20. Using Windows and Frames
Now that you’ve gotten your feet wet with basic JavaScript functionality, let’s return to some specific aspects of the Document Object Model (DOM). In this chapter, you’ll learn more about some of the most useful objects in the DOM—browser windows and frames—and how JavaScript can interact with them.
Controlling Windows with Objects
In Chapter 15, “Working with the Document Object Model (DOM),” you learned that you can use DOM objects to represent various parts of the browser window and the current HTML document. You also learned that the history, document, and location objects are all children of the window object.
In this chapter, you’ll take a closer look at the window object itself. As you’ve probably guessed by now, this means you’ll be dealing with browser windows. A variation of the window object also enables you to work with frames, as you’ll see later in this chapter.
The window object always refers to the current window (the one containing the script). The self keyword is also a synonym for the current window. As you’ll learn in the next sections, you can have more than one window on the screen at the same time and can refer to them with different names.
Properties of the window Object
Although there is normally a single window object, there might be more than one if you are using pop-up windows or frames. As you learned in Chapter 15, the document, history, and location objects are properties (or children) of the window object. In addition to these, each window object has the following properties:
• window.closed—Indicates whether the window has been closed. This only makes sense when working with multiple windows because the current window contains the script and cannot be closed without ending the script.
• window.defaultstatus and window.status—The default message for the status line and a temporary message to display on the status line. Some recent browsers disable status line changes by default, so you might not be able to use these.
• window.frames[]—An array of objects for frames, if the window contains them. You’ll learn more about frames later in this chapter.
• window.name—The name specified for a frame or for a window opened by a script.
• window.opener—In a window opened by a script, this is a reference to the window containing the script that opened it.
Note
The properties of the window.screen object include height, width, availHeight, and availWidth (the available height and width rather than total), and colorDepth, which indicates the color support of the monitor: 8 for 8-bit color, 32 for 32-bit color, and so on.
• window.parent—For a frame, a reference to the parent window containing the frame.
• window.screen—A child object that stores information about the screen the window is in—its resolution, color depth, and so on.
• window.self—A synonym for the current window object.
• window.top—A reference to the top-level window when frames are in use.
Creating a New Window
One of the most convenient uses for the window object is to create a new window. You can do this to display a document—for example, a pop-up advertisement or the instructions for a game—without clearing the current window. You can also create windows for specific purposes, such as navigation windows.
You can create a new browser window with the window.open() method. A typical statement to open a new window looks like this:
WinObj=window.open("URL", "WindowName", "LIST_OF_FEATURES");
The following are the components of the window.open() statement in the previous example:
• The WinObj variable is used to store the new window object. You can access methods and properties of the new object by using this name.
• The first parameter of the window.open() method is a URL, which will be loaded into the new window. If it’s left blank, no web page will be loaded. In this case, you could use JavaScript to fill the window with content.
• The second parameter specifies a window name (here, WindowName). This is assigned to the window object’s name property and is used to refer to the window.
• The third parameter is a list of optional features, separated by commas. You can customize the new window by choosing whether to include the toolbar, status line, and other features. This enables you to create a variety of “floating” windows, which might look nothing like a typical browser window.
The features available in the third parameter of the window.open() method include width and height, to set the size of the window in pixels, and several features that can be set to either yes (1) or no (0): toolbar, location, directories, status, menubar, scrollbars, and resizable. You can list only the features you want to change from the default.
This example creates a small window with no toolbar or status line:
SmallWin = window.open("","small","width=100,height=120,
toolbar=0,status=0");
Opening and Closing Windows
Of course, you can use JavaScript to close windows as well. The window.close() method closes a window. Browsers don’t normally allow you to close the main browser window without the user’s permission; this method’s main purpose is for closing windows you have created. For example, this statement closes a window called updateWindow:
updateWindow.close();
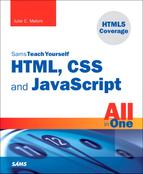
As another example, Listing 20.1 shows an HTML document that enables you to open a small new window by pressing a button. You can then press another button to close the new window. The third button attempts to close the current window. Depending on your browser and its settings, this might or might not work (for example, by default, your browser might disallow scripts from closing windows that the script itself did not create or open). If the script does close the window, most browsers will ask for confirmation first.
Listing 20.1 An HTML Document That Uses JavaScript to Enable You to Create and Close Windows
<?xml version="1.0" encoding="UTF-8"?>
<!DOCTYPE html PUBLIC "-//W3C//DTD XHTML 1.1//EN"
"http://www.w3.org/TR/xhtml11/DTD/xhtml11.dtd">
<html xmlns="http://www.w3.org/1999/xhtml" xml:lang="en">
<head>
<title>Create a New Window</title>
</head>
<body>
<h1>Create a New Window</h1>
<p>Use the buttons below to open and close windows in JavaScript.</p>
<form name="winform" action="">
<p><input type="button" value="Open New Window"
onclick="NewWin=window.open('','NewWin',
'toolbar=no,status=no,width=200,height=100')," /></p>
<p><input type="button" value="Close New Window"
onclick="NewWin.close();" /></p>
<p><input type="button" value="Close Main Window"
onclick="window.close();" /></p>
</form>
</body>
</html>
This example uses simple event handlers to do its work by providing a different handler for each of the buttons. Figure 20.1 shows the result of pressing the Open New Window button: It opens a small new window on top of the main browser window.
Figure 20.1 A new browser window opened with JavaScript.
Moving and Resizing Windows
The DOM also enables you to move or resize windows. You can do this using the following methods for any window object:
• window.moveTo() moves the window to a new position. The parameters specify the x (column) and y (row) position.
• window.moveBy() moves the window relative to its current position. The x and y parameters can be positive or negative and are added to the current values to reach the new position.
• window.resizeTo() resizes the window to the width and height specified as parameters.
• window.resizeBy() resizes the window relative to its current size. The parameters are used to modify the current width and height.
As an example, Listing 20.2 shows an HTML document with a simple script that enables you to resize and move the main window based on values entered in a form.
Listing 20.2 Moving and Resizing the Current Window
<?xml version="1.0" encoding="UTF-8"?>
<!DOCTYPE html PUBLIC "-//W3C//DTD XHTML 1.1//EN"
"http://www.w3.org/TR/xhtml11/DTD/xhtml11.dtd">
<html xmlns="http://www.w3.org/1999/xhtml" xml:lang="en">
<head>
<title>Moving and Resizing Windows</title>
<script type="text/javascript">
function doIt() {
if (document.form1.w.value && document.form1.h.value) {
self.resizeTo(document.form1.w.value, document.form1.h.value);
}
if (document.form1.x.value && document.form1.y.value) {
self.moveTo(document.form1.x.value, document.form1.y.value);
}
}
</script>
</head>
<body>
<h1>Moving and Resizing Windows</h1>
<form name="form1">
<p><strong>Resize to:</strong> <br/>
<input size="5" type="text" name="w" /> pixels wide and <br/>
<input size="5" type="text" name="h" /> pixels high </p>
<p><strong>— AND/OR —</strong></p>
<p><strong>Move to:</strong> <br/>
X-position: <input size="5" type="text" name="x" />
Y-position: <input size="5" type="text" name="y" /> </p>
<div><input type="button" value="Change Window"
onclick="doIt();" /></div>
</form>
</body>
</html>
In this example, the doIt function is called as an event handler when you click the Change Window button. This function checks whether you have specified width and height values. If you have, it uses the self.resizeTo() method to resize the current window. Similarly, if you have specified x and y values, it uses self.moveTo() to move the window. If you have set both pairs of values, the script will both resize and move your window.
Caution
Moving or resizing windows is a JavaScript feature you should think twice about before using. These methods are best used for resizing or moving pop-up windows your script has generated—not as a way to force the user to use your preferred window size, which most users will find very annoying. Because browser settings may be configured to prevent resizing or moving windows, make sure your script still works even without resizing.
Depending on their settings, some browsers might not allow your script to resize or move the main window. In particular, Firefox can be configured to disallow it. You can enable it by selecting Options from the menu. Select the Content tab, click the Advanced button next to the Enable JavaScript option, and enable or disable the Move or Resize Existing Windows option. Other browsers are likely to have similar options available in the Options or Preferences menus.
Using Timeouts
Sometimes the hardest thing to get a script to do is to do nothing at all—for a specific amount of time. Fortunately, JavaScript includes a built-in function to do this. The window.setTimeout method enables you to specify a time delay and a command that will execute after the delay passes.
Note
Timeouts don’t actually make the browser stop what it’s doing. Although the statement you specify in the setTimeout method won’t be executed until the delay passes, the browser will continue to do other things while it waits (for example, acting on event handlers).
You begin a timeout with a call to the setTimeout() method, which has two parameters. The first is a JavaScript statement, or group of statements, enclosed in quotes. The second parameter is the time to wait in milliseconds (thousandths of seconds). For example, the following statement displays an alert dialog box after 10 seconds:
ident=window.setTimeout("alert('Time's up!')",10000);
A variable (ident in this example) stores an identifier for the timeout. This enables you to set multiple timeouts, each with its own identifier. Before a timeout has elapsed, you can stop it with the clearTimeout() method, specifying the identifier of the timeout to stop:
window.clearTimeout(ident);
Normally, a timeout only happens once because the statement you specify in the setTimeout statement is only executed once. But often, you’ll want your statement to execute over and over. For example, your script might be updating a clock or a countdown and need to execute once per second.
Caution
Like event handlers, timeouts use a JavaScript statement within quotation marks. Make sure that you use a single quote (apostrophe) on each side of each string within the statement, as shown in the preceding example.
You can make a timeout repeat by issuing the setTimeout() method call again in the function called by the timeout. Listing 20.3 shows an HTML document that demonstrates a repeating timeout.
Listing 20.3 Using Timeouts to Update a Page Every Two Seconds
<?xml version="1.0" encoding="UTF-8"?>
<!DOCTYPE html PUBLIC "-//W3C//DTD XHTML 1.1//EN"
"http://www.w3.org/TR/xhtml11/DTD/xhtml11.dtd">
<html xmlns="http://www.w3.org/1999/xhtml" xml:lang="en">
<head>
<title>Timeout Example</title>
<script type="text/javascript">
var counter = 0;
// call Update function 2 seconds after first load
ID=window.setTimeout("Update();",2000);
function Update() {
counter++;
textField = document.getElementById("showText");
textField.innerHTML = "The counter is now at " + counter;
// set another timeout for the next count
ID=window.setTimeout("Update();",2000);
}
</script>
</head>
<body>
<h1>Timeout Example</h1>
<p>The counter will update every two seconds.</p>
<p>Press RESET or STOP to restart or stop the count.</p>
<hr/>
<form name="form1">
<p id="showText"></p>
<div><input type="button" value="RESET"
onclick="counter = 0;" />
<input type="button" value="STOP"
onclick="window.clearTimeout(ID);" />
</div>
</form>
</body>
</html>
This program displays a message inside a specially named <p> tag every two seconds, including a counter that increments each time. The <p> tag is given an id value of "showText" and the Update() function includes two lines that tells the script that the text should be placed between these two tags:
textField = document.getElementById("showText");
textField.innerHTML = "The counter is now at " + counter;
The first line creates a variable called textField that holds the value of the element given the id value of "showText". The second line says that given that value, the text about the counter and the counter number should be placed inside the starting and ending tags of the element with the id value of "showText"—that is the purpose of the innerHTML method.
After the script has loaded and begun the counting, you can use the Reset button to start the count over and the Stop button to stop the counting.
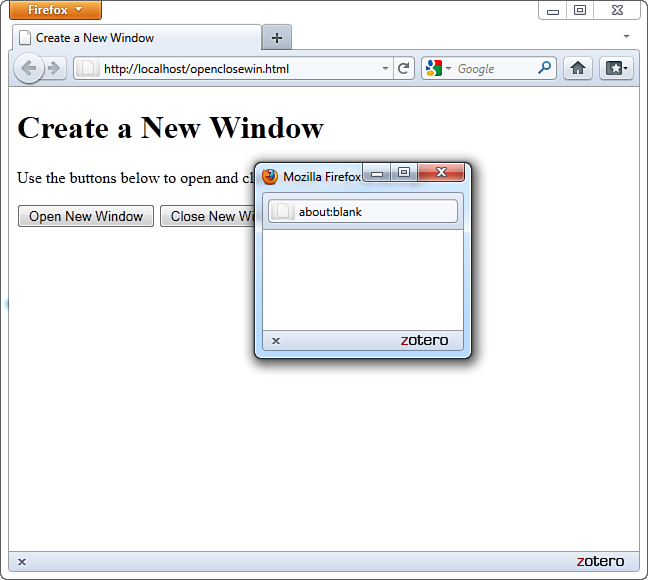
This script calls the setTimeout() method when the page loads and again at each update. The Update() function performs the update, adding one to the counter and setting the next timeout. The Reset button sets the counter to zero, and the Stop button demonstrates the clearTimeout() method. Figure 20.2 shows the display of the timeout example after the counter has been running for a while.
Figure 20.2 The output of the timeout example.
Displaying Dialog Boxes
The window object includes three methods that are useful for displaying messages and interacting with the user. You’ve already used these in some of your scripts. Here’s a summary:
• window.alert(message) displays an alert dialog box. This dialog box simply gives the user a message.
• window.confirm(message) displays a confirmation dialog box. This displays a message and includes the OK and Cancel buttons. This method returns true if OK is clicked and false if Cancel is clicked.
• window.prompt(message,default) displays a message and prompts the user for input. It returns the text entered by the user. If the user does not enter anything, the default value is used.
Tip
You can usually omit the window object when referring to these methods because it is the default context of a script (for example, alert("text")).
To use the confirm and prompt methods, use a variable to receive the user’s response. For example, this statement displays a prompt and stores the text the user enters in the text variable:
text = window.prompt("Enter some text","Default value");
As a further illustration of these types of dialog boxes, Listing 20.4 shows an HTML document that uses buttons and event handlers to enable you to test dialog boxes.
Listing 20.4 An HTML Document That Uses JavaScript to Display Alerts, Confirmations, and Prompts
<?xml version="1.0" encoding="UTF-8"?>
<!DOCTYPE html PUBLIC "-//W3C//DTD XHTML 1.1//EN"
"http://www.w3.org/TR/xhtml11/DTD/xhtml11.dtd">
<html xmlns="http://www.w3.org/1999/xhtml" xml:lang="en">
<head>
<title>Alerts, Confirmations, and Prompts</title>
</head>
<body>
<h1>Alerts, Confirmations, and Prompts</h1>
<p>Use the buttons below to test dialogs in JavaScript.</p>
<form name="winform">
<div>
<input type="button" value="Display an Alert"
onclick="window.alert('This is a test alert.')" />
<input type="button" value="Display a Confirmation"
onclick="window.confirm('Would you like to confirm?')," />
<input type="button" value="Display a Prompt"
onclick="window.prompt('Enter Text:',
'This is the default.')," />
</div>
</form>
</body>
</html>
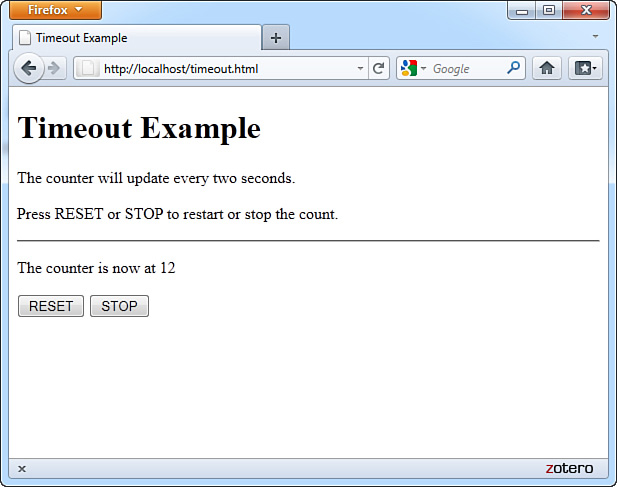
This document displays three buttons, and each one uses an event handler to display one of the dialog boxes.
Figure 20.3 shows the script in Listing 20.4 in action. The prompt dialog box is currently displayed and shows the default value.
Figure 20.3 The dialog box example’s output, including a prompt dialog box.
Working with Frames
Browsers also support frames, which enable you to divide the browser window into multiple panes. Each frame can contain a separate URL or the output of a script.
You might have visited websites in which the browser window seemingly allowed you to move between several different pages. The truth is that the browser really was allowing you to view several pages at once by separating the browser window into regions that contain separate web pages; each region is known as a frame. Of course, from the user’s perspective, everything comes together to form a single window of web content, but there are separate pages at work.
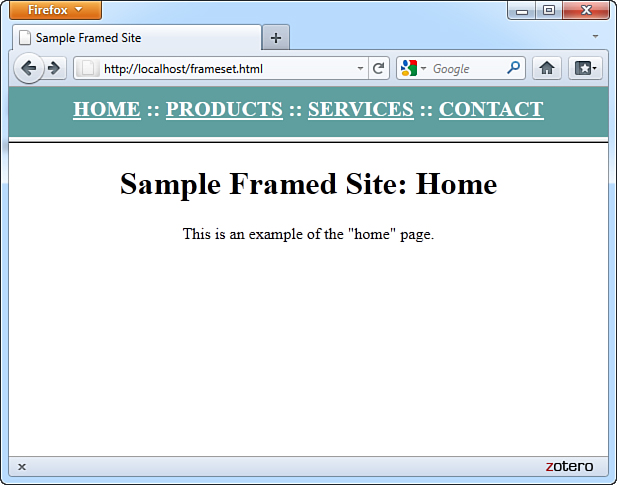
A frame is a rectangular region within the browser window that displays a web page alongside other pages in other frames. At first glance, Figure 20.4 might look like an ordinary web page, but it is actually two separate HTML pages, both displayed in the same web browser window. Each page is displayed in its own frame, arranged horizontally and separated by the horizontal bar.
Figure 20.4 Frames allow more than one web page to be displayed at once.
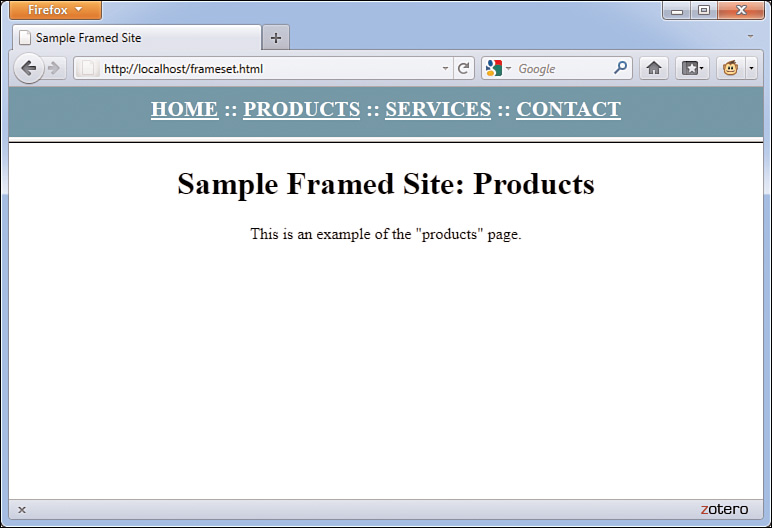
If frames are used, typically they are used to create a framed site that takes advantage of a static set of navigational links; you can see these links in the top frame of Figure 20.4. When one of the links in this example is clicked, the top frame will not change; a new page will be loaded and displayed in the bottom frame (see Figure 20.5).
Figure 20.5 Clicking Products brings up a new bottom page but leaves the top frame the same.
You should be aware that frames have long been a vexed issue in web design. The advantages have never really outweighed the disadvantages, yet due to differences in browser support for HTML and CSS standards, frames were seen as a way to achieve certain goals despite their shortcomings. As a web developer, I do not recommend the use of frames for the following reasons:
• Frames go against the fundamental concept of the Web, which is the hypertextual connection between individual instances of web content that can be accessed via a single web address (URL).
• Printing parts of a framed site is very difficult; unless you have clicked on the specific frame you want to print, and select Print this Frame from a context menu (if one is available), all that will print is the frameset itself, which will have no content in it.
• If a frame lacks proper coding, or if it has proper coding but the code is used for nefarious purposes, a user could get stuck inside a framed site unable to view external content outside of the frame.
• Frames have been used historically in lieu of standard, professional, accessible methods of web development and design. There is no reason to choose the lesser option when the better option of CSS layout is available.
• For these (and other) reasons, frames have been removed from the HTML5 standard. The antiquated <frame />, <frameset>, and <noframes> tags will simply not be available in the future.
Despite these shortcomings, in the next few sections you will learn how to create a very simple framed site. It is quite likely that you will still encounter framed sites, and you might need to know how to re-create the look and feel of the site but without using frames. In that case, it is important to understand how frames are constructed so you can successfully deconstruct them.
Additionally, you will learn about a type of frame—the <iframe>—that does serve an important purpose and will still be present in HTML5.
Building a Frameset
This section shows you how to create the simple framed site shown in Figures 20.4 and 20.5. The contents of each frame were created as ordinary HTML pages. The pages are top.html (for the navigation), home.html, products.html, services.html, and contact.html. These pages don’t contain any tags you haven’t already seen in other chapters. A special page known as a frameset document was used to put the pages together; in this case, that document is index.html.
Creating a Frameset Document
A frameset document is an HTML page that instructs the web browser to split its window into multiple frames and specifies which web page should be displayed in each frame.
A frameset document actually has no content. It only tells the browser which other pages to load and how to arrange them in the browser window. Listing 20.5 shows the frameset document for the sample framed site shown in Figures 20.4 and 20.5.
Listing 20.5 Frameset Document for the Site Shown in Figures 20.4 and 20.5
<?xml version="1.0" encoding="UTF-8"?>
<!DOCTYPE html PUBLIC "-//W3C//DTD XHTML 1.0 Frameset//EN"
"http://www.w3.org/TR/xhtml11/DTD/xhtml11.dtd">
<html xmlns="http://www.w3.org/1999/xhtml" xml:lang="en">
<head>
<title>Sample Framed Site</title>
</head>
<frameset rows="50,*">
<frame src="top.html" name="top" />
<frame src="home.html" name="main" />
<noframes>
<body>
<h1>Sample Framed Site</h1>
Your browser does not support frames. Sorry!
</body>
</noframes>
</frameset>
</html>
Listing 20.4 uses a <frameset> tag instead of a <body> tag. No tags that would normally be contained in a <body> tag can be within the <frameset> tag. The <frameset> tag in this example includes a rows attribute, meaning that the frames should be arranged on top of each other like the horizontal rows of a table. If you want your frames to be side by side, use a cols attribute (instead of a rows attribute).
Note
It’s important to notice that the DTD used in this sample page is not the familiar XHTML 1.1 DTD that you’ve been using throughout the book. This is because frames are not supported in the standard XHTML 1.1 DTD. Therefore, to validate a page with frames, you must instead use the XHTML 1.0 Frameset DTD, which is a special DTD designed just for pages that use frames.
You must specify the sizes of the rows or cols, either as precise pixel values or as percentages of the total size of the browser window. You can also use an asterisk (*) to indicate that a frame should fill whatever space is available in the window. If more than one frame has an * value, the remaining space will be divided equally between them.
In Listing 20.5, <frameset rows="50,*"> splits the window vertically into two frames. The top frame will be exactly 50 pixels tall, and the bottom frame will take up all the remaining space in the window. The top frame contains the document top.html (see Listing 20.6), and the bottom frame contains home.html (see Listing 20.7).
Listing 20.6 The top.html Navigation Bar for the Sample Framed Site
<?xml version="1.0" encoding="UTF-8"?>
<!DOCTYPE html PUBLIC "-//W3C//DTD XHTML 1.0 Transitional//EN"
"http://www.w3.org/TR/xhtml11/DTD/xhtml1-transitional.dtd">
<html xmlns="http://www.w3.org/1999/xhtml" xml:lang="en">
<head>
<title>Sample Framed Site</title>
<style type="text/css">
body { background-color:#5F9F9F; }
a { color: #FFFFFF; }
.main {
text-align:center;
color:#FFFFFF;
font-weight:bold;
font-size:16pt;
}
</style>
</head>
<body>
<div class="main">
<a href="home.html" target="main">HOME</a> ::
<a href="products.html" target="main">PRODUCTS</a> ::
<a href="services.html" target="main">SERVICES</a> ::
<a href="contact.html" target="main">CONTACT</a>
</div>
</body>
</html>
Tip
After the framesets in Listing 20.6, there is a complete web page between the <body> and </body> tags. Notice that the content of this page doesn’t appear at all in Figure 20.4 or Figure 20.5. All web browsers that support frames will ignore anything between the <noframes> and </noframes> tags.
All major browsers these days support frames, so the issue of frames compatibility is much less significant now than in years past. Even so, it’s easy enough to include the <noframes> tag and cover the few users who might still use ancient browsers—if you use frames at all, that is.
Listing 20.7 The home.html Single Content Frame Within the Sample Framed Site
<?xml version="1.0" encoding="UTF-8"?>
<!DOCTYPE html PUBLIC "-//W3C//DTD XHTML 1.1//EN"
"http://www.w3.org/TR/xhtml11/DTD/xhtml11.dtd">
<html xmlns="http://www.w3.org/1999/xhtml" xml:lang="en">
<head>
<title>Sample Framed Site</title>
<style type="text/css">
body { background-color:#5F9F9F; }
</style>
</head>
<body>
<h1 style="text-align:center">Sample Framed Site: Home</h1>
<p style="text-align:center">This is an example of the
"home" page.</p>
</body>
</html>
Note
The pages in Listing 20.6 and Listing 20.7 use the XHTML 1.0 Transitional and XHTML 1.1 DTDs, respectively. The XHTML 1.1 DTD is newer and much stricter, but the use of the target attribute in Listing 20.6 requires the use of the XHTML 1.0 Transitional DTD for validity; there is nothing in Listing 20.7 that is invalid in XHTML 1.1.
In this example, the top navigation frame has a fixed height of 50 pixels. But because you can’t predict the size of the window in which users will view your web page, it is often convenient to use percentages rather than exact pixel values to dictate the size of the rows and columns. For example, to make a left frame 20% of the width of the browser window with a right frame taking up the remaining 80%, you would type the following:
<frameset cols="20%,80%">
Whenever you specify any frame size in pixels, it’s a good idea to include at least one frame in the same frameset with a variable (*) width so that the document can grow to fill a window of any size.
Adding Individual Frames
Within the <frameset> and </frameset> tags, you should have a <frame /> tag indicating which HTML document to display in each frame. Note that if you have fewer <frame /> tags than the number of frames defined in the <frameset> tag, any remaining frames will be left blank.
Include a src attribute in each <frame> tag with the address of the web page to load in that frame. You can put the address of an image file, instead of a web page, if you just want a frame with a single image in it.
Linking Between Frames and Windows
The real power of frames begins to emerge when you give a frame a unique name with the name attribute in the <frame /> tag. You can then make any link on the page change the contents of that frame by using the target attribute in an <a> tag. For example, Listing 20.6 includes the following tag:
<frame src="home.html" name="main" />
This code displays the home.html page in that frame when the page loads and names the frame "main".
Note
Technically speaking, the name tag is outdated and has been replaced by the id tag.
However, current web browsers still rely on name instead of id when it comes to identifying frames as targets and the use of name is still valid XHTML. So, for now, you need to stick with the name attribute when identifying frames. Of course, it wouldn’t hurt to use both attributes.
In the code for the top frame, which is shown in Listing 20.7, you will see the following link:
<a href="services.html" target="main">SERVICES</a>
When the user clicks this link, services.html is displayed in the frame named main (the lower frame). If the target="main" attribute had been left out, the services.html page would be displayed in the current (top) frame instead.
Modifying Frame Borders
There are HTML attributes that you can use with your frame code to get rid of the frame dividers, make more space in small frames by reducing the size of the margins, and force frames not to have scrollbars. Listing 20.8 shows a modified version of the code in Listing 20.4. The two changes made to the code are the addition of the following attributes to the <frame> tags: scrolling="no" and frameborder="0".
Listing 20.8 Frameset Document for the Site Shown in Figure 20.6
<?xml version="1.0" encoding="UTF-8"?>
<!DOCTYPE html PUBLIC "-//W3C//DTD XHTML 1.0 Frameset//EN"
"http://www.w3.org/TR/xhtml11/DTD/xhtml11.dtd">
<html xmlns="http://www.w3.org/1999/xhtml" xml:lang="en">
<head>
<title>Sample Framed Site</title>
</head>
<frameset rows="50,*">
<frame src="top.html" name="top" scrolling="no" frameborder="0" />
<frame src="home.html" name="main" scrolling="no" frameborder="0"/>
<noframes>
<body>
<h1>Sample Framed Site</h1>
Your browser does not support frames. Sorry!
</body>
</noframes>
</frameset>
</html>
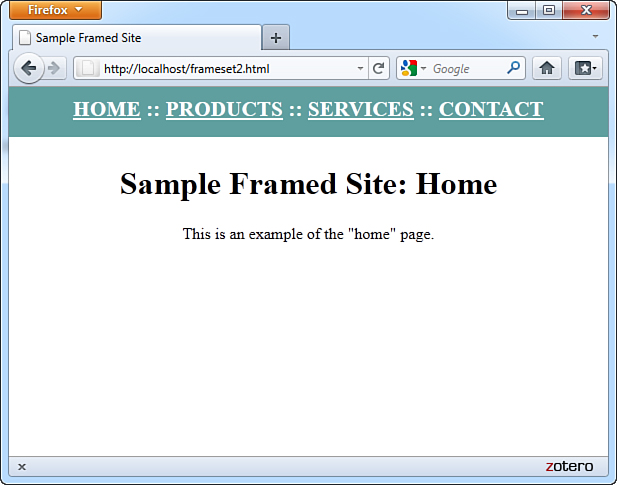
Figure 20.6 This is the page whose code is shown in Listing 20.8 after attributes were added to the <frame /> tags.
Using JavaScript Objects for Frames
When a window contains multiple frames, each frame is represented in JavaScript by a frame object. This object is equivalent to a window object, but it is used for dealing specifically with that frame. The frame object’s name is the same as the NAME attribute you give it in the <frame> tag.
Remember the window and self keywords, which refer to the current window? When you are using frames, these keywords refer to the current frame instead. Another keyword, parent, enables you to refer to the main window.
Each frame object in a window is a child of the parent window object. Suppose you define a set of frames using the following HTML:
<frameset rows="*,*" cols="*,*">
<frame name="topleft" src="topleft.html">
<frame name="topright" src="topright.html">
<frame name="bottomleft" src="botleft.html">
<frame name="bottomright" src="botright.html">
</frameset>
Note
If you use nested framesets, things are a bit more complicated. window still represents the current frame, parent represents the frameset containing the current frame, and top represents the main frameset that contains all the others.
This simply divides the window into quarters. If you have a JavaScript script in the topleft.html file, it would refer to the other windows as parent.topright, parent.bottomleft, and so on. The keywords window and self would refer to the topleft frame.
The frames Array
Rather than referring to frames in a document by name, you can use the frames array. This array stores information about each of the frames in the document. The frames are indexed starting with zero and beginning with the first <frame> tag in the frameset document.
For example, you could refer to the frames defined in the previous example using array references:
• parent.frames[0] is equivalent to the topleft frame.
• parent.frames[1] is equivalent to the topright frame.
• parent.frames[2] is equivalent to the bottomleft frame.
• parent.frames[3] is equivalent to the bottomright frame.
You can refer to a frame using either method interchangeably, and depending on your application, you should use the most convenient method. For example, a document with 10 frames would probably be easier to use by number, but a simple two-frame document is easier to use if the frames have meaningful names.
Using Inline Frames
Inline frames do not have the same usability issues that regular frames do, but inline frames are used for different reasons. Instead of being a pure layout trick, the <iframe> is used much like an <object> tag—to place a chunk of something within an existing document. In the case of the <object> tag, that “something” is usually multimedia. You can use an <iframe> to embed an entirely separate HTML document, image, or other source. Listing 20.9 and Listing 20.10 show the code to produce the inline frame shown in Figure 20.7.
Figure 20.7 Listing 20.9 calls the inline frame whose code is shown in Listing 20.10.

Listing 20.9 XHTML Code to Call an <iframe>
<?xml version="1.0" encoding="UTF-8"?>
<!DOCTYPE html PUBLIC "-//W3C//DTD XHTML 1.0 Transitional//EN"
"http://www.w3.org/TR/xhtml1/DTD/xhtml1-transitional.dtd">
<html xmlns="http://www.w3.org/1999/xhtml" xml:lang="en">
<head>
<title>Using an iframe</title>
<style type="text/css">
body { background-color:#CCCCCC; }
iframe {
width:500px;
height:100px;
border:1px solid black;
background-color:#FFFFFF;
}
</style>
</head>
<body style="background:#CCCCCC">
<h1 style="text-align:center">Inline Frame Example</h1>
<div style="text-align:center">
<iframe src="iframe_src.html">
<p>Uh oh...your browser does not support iframes.</p>
</iframe>
</div>
</body>
</html>
Listing 20.10 The Source of the <iframe> Called in Listing 20.9
<?xml version="1.0" encoding="UTF-8"?>
<!DOCTYPE html PUBLIC "-//W3C//DTD XHTML 1.1//EN"
"http://www.w3.org/TR/xhtml1/DTD/xhtml11.dtd">
<html xmlns="http://www.w3.org/1999/xhtml" xml:lang="en">
<head>
<title>iframe source</title>
<style type="text/css">
body { background-color:#FFFFFF; }
p {
color: #FF0000;
font-weight: bold;
}
</style>
</head>
<body>
<p>I AM A SOURCE DOCUMENT...inside an iframe.</p>
</body>
</html>
The only XHTML code you haven’t yet encountered in Listing 20.9 is the <iframe> itself. You can see that it requires a value for the src attribute—the source—and that you can use styles to define a width, height, border type, and background color (among other things). Listing 20.10 shows the source of the <iframe>, which is just a regular file with some text and styles in it.
Inline frames are often used to bring in content from other websites. Common uses include serving ads to users from third-party advertising services and using Google’s Site Search to display search results to your users (leveraging Google’s search technology). Figure 20.8 shows an instance of an <iframe> used to pull search results into a custom site template.
Figure 20.8 Using an <iframe> to display Google Custom Search results.
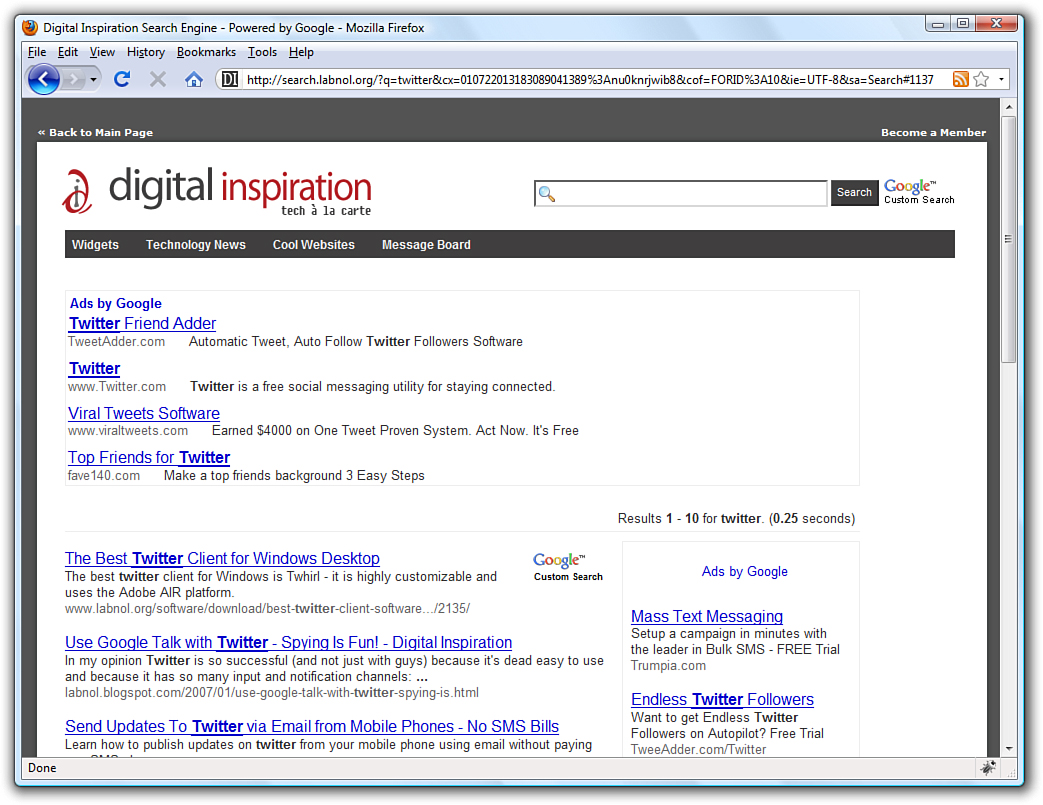
In Figure 20.8, everything in the white area is actually content in an <iframe>, with the source being a script on Google’s website that runs and then displays content within the template at the Digital Inspiration website. If you look closely at Figure 20.8—and I do not believe you can see it in the figure—you can see a faint gray border around the actual <iframe> itself.
Unlike the <frame /> you learned about earlier in this chapter, the <iframe> is here to stay and is still a part of HTML5.
Summary
In this chapter, you’ve learned how to use the window object to work with browser windows and used its properties and methods to set timeouts and display dialog boxes. You’ve also learned how JavaScript can work with framed documents.
As to the framed documents themselves, you learned how to display more than one page simultaneously by splitting the web browser window into frames. You learned how to use a frameset document to define the size and arrangement of the frames and which web content will be loaded into each frame. You learned how to create links that change the contents of any frame you choose while leaving the other frames unchanged. You also learned about a few optional settings that control the appearance of resizable borders and scrollbars in frames. Finally, you learned how to use the inline frame to display content from your site or other websites.
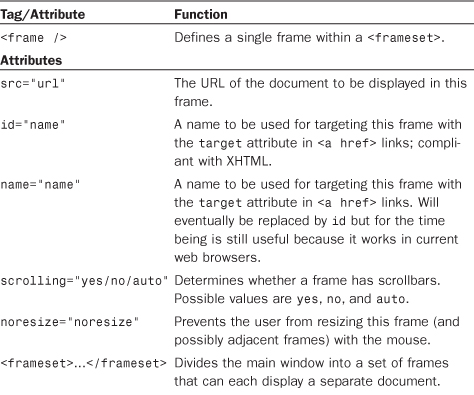
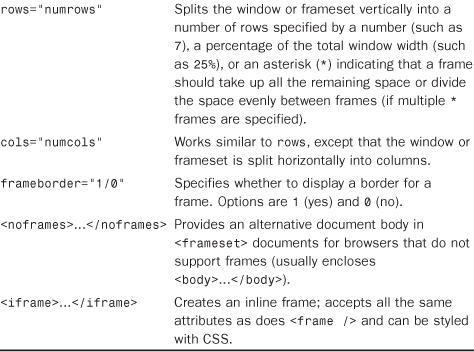
Table 20.1 summarizes the tags and attributes covered in this chapter.
Table 20.1 HTML Tags and Attributes Covered in Chapter 20
Q&A
Q. When a script is running in a window created by another script, how can it refer back to the original window?
A. JavaScript includes the window.opener property, which lets you refer to the window that opened the current window.
Q. How can I update two frames at once when the user clicks on a single link?
A. You can do this by using an event handler and including two statements to load URLs into different frames.
Q. Can I display other users’ web pages in one frame and my own pages in another frame at the same time? What if those other sites use frames, too?
A. You can load any document from anywhere on the Internet (or an intranet) into a frame. If the document is a frameset, its frames are sized to fit within the existing frame into which you load it.
For example, you could put a list of your favorite links in one frame and use a separate frame to display the pages that those links refer to. This makes it easy to provide links to other sites without risking that someone will get lost and never come back to your own site.
You should also be aware that framing somebody else’s pages so that they appear to be part of your own site might get you in legal trouble, so be sure to get explicit written permission from anyone whose pages you plan to put within one of your frames (just as you would if you were putting images or text from their site on your own pages).
Workshop
The workshop contains quiz questions and exercises to help you solidify your understanding of the material covered. Try to answer all questions before looking at the “Answers” section that follows.
Quiz
1. Which of the following methods displays a dialog box with OK and Cancel buttons and waits for a response?
a. window.alert
b. window.confirm
c. window.prompt
2. What does the window.setTimeout method do?
a. Executes a JavaScript statement after a delay
b. Locks up the browser for the specified amount of time
c. Sets the amount of time before the browser exits automatically
3. You’re working with a document that contains three frames with the names first, second, and third. If a script in the second frame needs to refer to the first frame, what is the correct syntax?
a. window.first
b. parent.first
c. frames.first
4. What <iframe> code would produce a borderless <iframe> with a white background that encompasses 98% of the width of the page and is 250 pixels high?
Answers
1. b. The window.confirm method displays a dialog box with OK and Cancel buttons.
2. a. The window.setTimeout method executes a JavaScript statement after a delay.
3. b. The script in the second frame would use parent.first to refer to the first frame.
<iframe src="some_source.html" style="width:98%;height:250px;
border:none; background-color:#FFFFFF;">
<p>Put message here for people not able to see the inline frame.</p>
</iframe>
Exercises
• Using timeouts and JavaScript to display date and time (which you learned earlier in this book), create a script to reload automatically every second or two to display a “live” clock.
• Think of some ways you can use an <iframe> or two in your site—perhaps for an ad or perhaps to leverage the free Google Site Search that you can offer to your users. Leave room in your design for that element.