
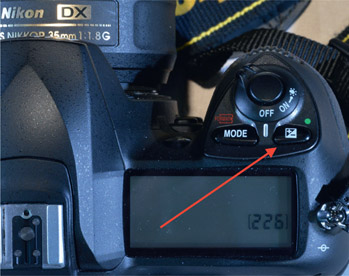
Figure 12.1:
EV compensation menu button.
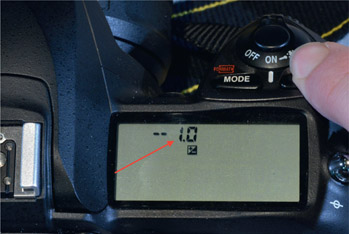
Figure 12.2:
Once pressed, you can access and change the EV compensation. This is currently showing an EV compensation of –1 stop.
Exposure value, or EV, is another way to talk about light values. One EV is the same as 1 stop, which continues to make our life easy. Exposure value (EV) compensation, sometimes also known as EV correction, is a semi-permanent change you can make to your camera’s light meter. When your camera comes out of the box, it will be set to an EV compensation of 0. Essentially, it is doing nothing to influence your camera’s meter one way or the other. By adjusting this setting, you are shifting your meter’s idea of what middle grey is either up or down the scale, which directly changes your meter readings and the resultant exposure settings. There are several reasons why you might want to adjust this setting; the two main reasons have to do with meter calibration and the metering behavior of your particular camera.
Most DSLR meters today should be very accurate, and, as usual, the more you spend, the more you can expect in terms of quality and calibration. In the days of film, camera meters could vary, and there was a fairly simple test you could do that involved taking some controlled shots of a neutral surface, developing the film, and then reading the amount of silver halide on the surface of the negative with a densitometer. Compared to a set of available tables, you could then determine if your meter read too light or too dark. Okay, maybe it wasn’t a simple test…
If you want to take your camera into a very controlled studio environment, you can use that 18% grey card we discussed in Chapter 3. If you set up a white light on the card, and photograph the card, there are ways to use that specific picture to influence the white balance and help you determine if your meter is properly calibrated. The methods for doing this vary by manufacturer, so you will have to do some research if you want to try this with your equipment. To be brutally honest, I’ve not done this with my DSLR, because the results I’ve been getting lead me to believe my meter is on the money, or at least close enough, especially when I’m bracketing.

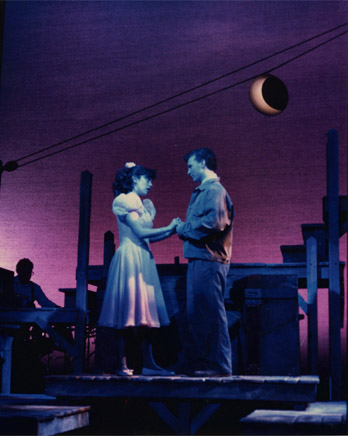
Figure 12.3:
“On the meter” exposure taken with an aperture set to f/2.8 and a shutter speed of 1/8000th.

Figure 12.4:
Same shot with –1 EV compensation.

Figure 12.5:
Same shot with +1 EV compensation.
You may find that the meter in your camera, or perhaps your camera’s interpretation of the information obtained from the meter, results in your photographs being too bright or too dark. You may even find that there is a difference between how accurate the meter is reading when you have the film speed set to ISO 400 versus ISO 1000. Try to shoot the grey card test shots with the settings you plan to use in your photo-call. If you find that your meter is reading a bit off, you can introduce an EV compensation to counterbalance that issue. If your shots are over-exposed, set the EV compensation to a negative value, and, conversely, if your shots are under-exposed, choose a positive EV value.
The second reason has more to do with how you are using your meter, and possibly anticipating exposure issues you might run into. If your shots are bright and fairly evenly exposed across the entire frame, then this won’t be as much of an issue, but as we discussed in Chapter 3, there are several ways to set up your camera’s metering. If you go with spot metering, then you can have far more control over just what part of the shot you want, but it might not be the brightest part of the shot, so maybe not the best thing to meter off of. I usually run with at least –1 stop of EV compensation, not because my meter is off, but to counteract the percentages that affect the camera’s meter when it’s in field metering mode.

Figure 12.6:
Test shot taken at an aperture of f/2.8, a shutter speed of 1/320th, and no EV compensation. This bracketed shot is under-exposed by 1 stop from being “on the meter.”

Figure 12.7:
Test shot taken at an aperture of f/2.8, a shutter speed of 1/160th, and no EV compensation. This bracketed shot is “on the meter.”
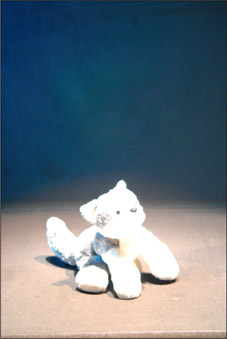
Figure 12.8:
Test shot taken at an aperture of f/2.8, a shutter speed of 1/80th, and no EV compensation. This bracketed shot is over-exposed by 1 stop from being “on the meter.”
The following set of shots is bracketed (more on bracketing in the next chapter), but because the meter is trying to give you the best exposure for the overall shot, the main object is over-exposed and the detail is blown out.
I have purposely set the camera to field metering in order to demonstrate the need for EV compensation, and this is a really fine example of what I was talking about when discussing field versus spot metering in Chapter 3. When you look at the picture, the wolf toy is less than 20 percent of the entire surface of the image, so the camera is trying to force the black portion of the picture to be middle grey.
Knowing that this will probably happen in advance, if I preset my camera for a –1 stop EV compensation, I can let the camera’s meter still do its job, but I don’t have to think about adjusting the exposure for any of the shots I’m taking. Once I’ve applied the EV compensation, my results will shift in exposure, as seen in Figures 12.9–12.11.
I found that the camera meter was having a tough time with the vast amount of black in the shot compared to the white, so I reset the EV compensation to –3 EV, and reshot the sequence, as shown in Figures 12.12–12.14.
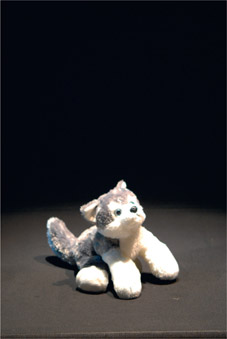
Figure 12.9:
Test shot taken at an aperture of f/2.8, a shutter speed of 1/640th, and an EV compensation of –1. This bracketed shot is under-exposed by 1 stop from being “on the meter,” but in reality, is 2 stops under-exposed.
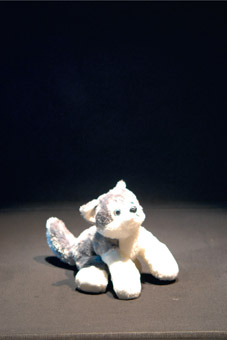
Figure 12.10:
Test shot taken at an aperture of f/2.8, a shutter speed of 1/320th, and an EV compensation of –1. This bracketed shot is “on the meter,” but in reality, is 1 stop under-exposed.
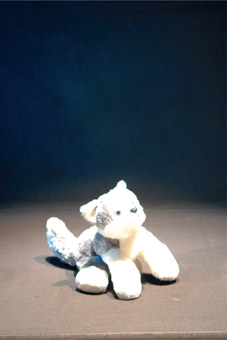
Figure 12.11:
Test shot taken at an aperture of f/2.8, a shutter speed of 1/160th, and an EV compensation of –1. This bracketed shot is over-exposed by 1 stop from being “on the meter,” but, in reality, is “on the meter.”
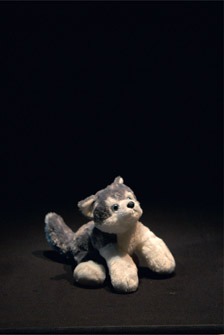
Figure 12.12:Test shot taken at an aperture of f/2.8, a shutter speed of 1/2500th, and an EV compensation of –3. This bracketed shot is under-exposed by 1 stop from being “on the meter,” but, in reality, is 4 stops under-exposed.

Figure 12.13:
Test shot taken at an aperture of f/2.8, a shutter speed of 1/1250th, and an EV compensation of –3. This bracketed shot is “on the meter,” but in reality, is 3 stops under-exposed.

Figure 12.14:
Test shot taken at an aperture of f/2.8, a shutter speed of 1/640th, and an EV compensation of –3. This bracketed shot is over-exposed by 1 stop from being “on the meter,” but in reality, is 2 stops under-exposed.
Now I finally have a set of shots that will be useful. I also know that if most of the show will be like this, I may just run the whole call with my EV compensation set at –3, or I might choose to vary it a little bit as the shots require. This is easy to do on the fly if your camera’s controls are set up for it, but not if it’s buried in a menu somewhere. If that’s the case, do some additional testing with a few cues before your shoot, so you can start with the best setting for the overall shoot. Depending on your equipment, this might be a setting you can roll in and out as the situation demands, but I tend to group this one into the “set-it-and-forget-it” pile.
EV-Compensation Practice Session
- 1. If your camera has EV compensation, figure out how to access and adjust it.
- a. To begin, ensure that your EV compensation is set to 0.
- b. Set up a high-contrast, well-lit still life, similar in values to the one I’ve used.
- c. Adjust the camera settings for field metering.
- d. Using one of the metering modes, take a few shots and see if you are experiencing any under-exposed or over-exposed areas.
- 2. Experiment with adjusting the EV compensation by 1 stop/EV value and retake your shots to see if they are turning out the way you want them now.
- 3. If that is helping, but not enough, try 2 stops/EV values.
- 4. If your camera does not have EV compensation, you may need to run things manually, and intentionally under- or over-expose your shots based on your experience with the above practice sessions. If this is also too difficult or time-consuming, then the next chapter on bracketing should help as well.