
![]()
Guidelines for the Examples in the Book
This appendix provides guidelines on how to use XAMPP and Aptana Studios together to create a development environment on your PC that will allow you to develop, run, and fix the examples given in the book.
Installing a Web Server
Nowadays, on the , you can easily find free software packages containing everything you need to set up a test environment for all your examples and for everything related to the web world in general.
These packages minimize the number of programs that need to be installed.More important, they may be acquired with a single installation. The packages generally consist of an Apache HTTP server; a MySQL database; and interpreters for the programming languages PHP, Perl, and Python. The most complete package is XAMPP (available for download at the Apache Friends web site [www.apachefriends.org/en/index.html]). XAMPP is totally free, and its key feature is that it is a cross-platform package (Windows, Linux, Solaris, MacOS). Furthermore, XAMPP also includes a Tomcat application server (for the programming language Java) and a FileZilla FTP server (for file transfer). Other solutions are platform specific, as suggested by the initial letter of their name:
- WAMP (Windows)
- MAMP (MacOS)
- LAMP (Linux)
- SAMP (Solaris)
- FAMP (FreeBSD)
In fact, XAMPP is an acronym; its letters stand for the following terms:
- X, for the operating system
- A, for Apache, the web server
- M, for MySQL, the database management system
- P, for PHP, Perl, or Python, the programming languages
Thus, choose the web server solution that best fits your platform, and install it on your PC.
Installing Aptana Studio IDE
Once the Web server has been installed, it is necessary to install an integrated development environment (IDE), which you need to develop your JavaScript code. In this appendix, you will install Aptana Studio as your development environment.
Visit the Aptana site (www.aptana.com), and click the Products tab for the Aptana Studio 3 software (at the time of writing, the most recent version is 3.4.2). Download the stand-alone edition (with the Eclipse IDE already integrated): Aptana_Studio_3_Setup_3.4.2.exe.
After the download is complete, launch the executable file to install the Aptana Studio IDE. At the end of the installation, in launching the application, you should see the workbench opening, as shown in Figure A-1.
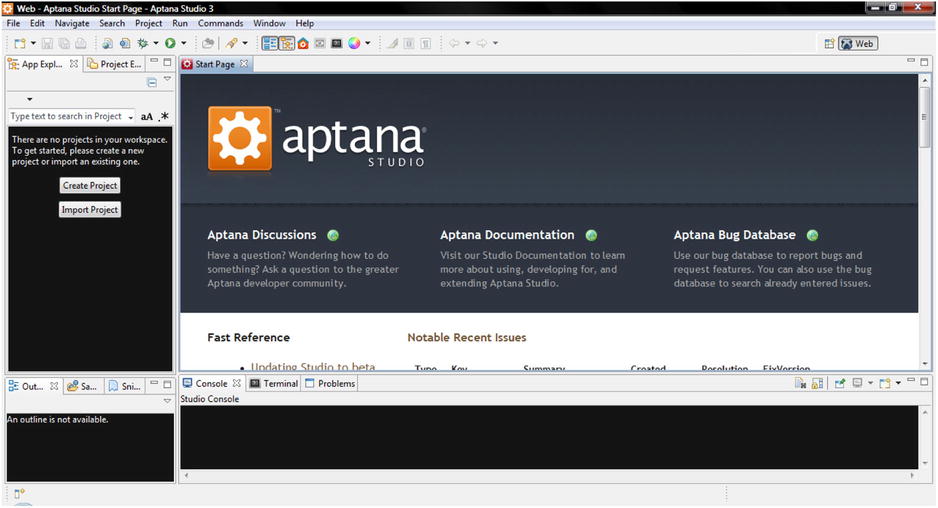
Figure A-1. The Aptana Studio IDE workbench
During the installation of Aptana Studio, the software detects the various browsers and the web server installed and configures itself accordingly.
Setting the Aptana Studio Workspace
Before starting to develop the examples in the book, you must create a workspace. First, you should set the workspace on Aptana Studio, where the Web server document root is.
These are typical paths with XAMPP:
- Windows: C:xampphtdocs
- Linux: /opt/lamp/htdocs
- MacOS: /Applications/XAMPP/xamppfiles/htdocs
Whereas with WAMP, this is the path:
- C:WAMPwww
Thus, select File ![]() Switch Workspace
Switch Workspace ![]() Other . . . from the menu. Then, insert the path of the web server document root in the field, as demonstrated in Figure A-2.
Other . . . from the menu. Then, insert the path of the web server document root in the field, as demonstrated in Figure A-2.
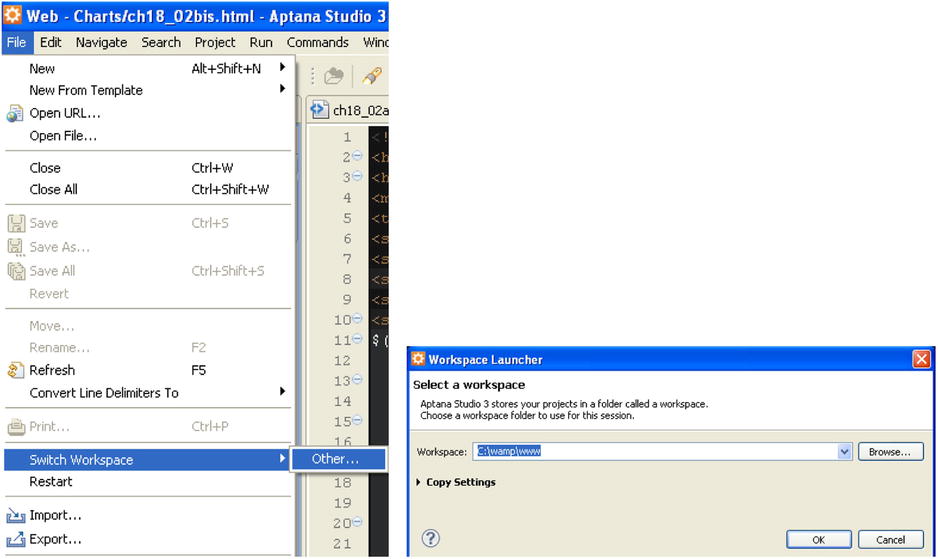
Figure A-2. Setting the workspace on the document root
Creating a Project
The next step in creating your workspace consists of creating a project in Aptana Studio:
- Select New
 Web Project from the menu.
 - A window such as that shown in Figure A-3 appears. Select Default Project, and click Next.
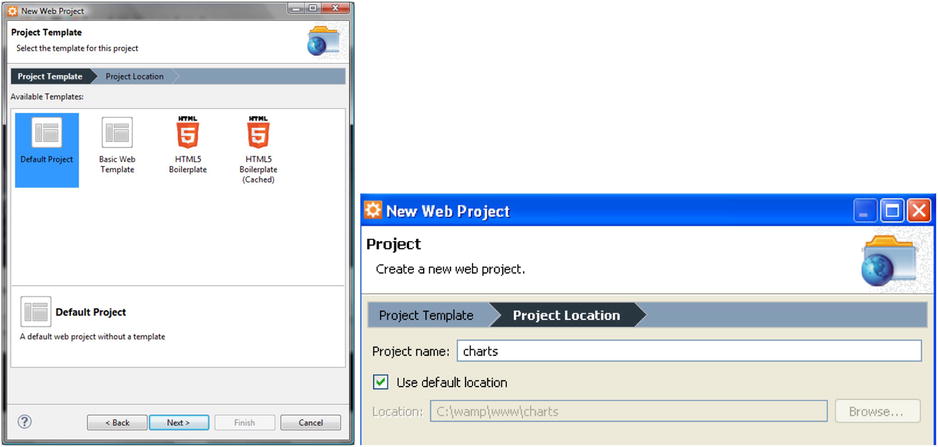
Figure A-3. Creating a default project
- Insert “‘charts” as the name of the project. This will be the directory in the workspace in which you will write all the example files described in the book, using Aptana Studio.
Completing the Workspace
Once you have set the Aptana Studio workspace and created a project, you complete the workspace.
Let us open the document root directory and create a new directory, named src. Now, the workspace on which you will be working throughout the book is composed of two directories:
- src
- charts
The src directory should contain all the files related to libraries.
The charts directory should contain all HTML, images and Cascading Style Sheets (CSS) files related to the examples in the book (which is in fact a project). Each example file should be created in this directory (if you prefer to do things differently, that’s fine, but it is important to take note of the different path reference in HTML pages in order to include the library files and images).
![]() Note The source code that accompanies this book (available from the Source Code/Download area of the Apress web site [www.apress.com]) is practically already packaged in a workspace. With it, you will find two versions of the charts project: content delivery network (CDN) and local. The charts_CDN directory contains all the examples referring to libraries remotely distributed from services. The charts_local directory offers all the examples referring to libraries found within the src directory.
Note The source code that accompanies this book (available from the Source Code/Download area of the Apress web site [www.apress.com]) is practically already packaged in a workspace. With it, you will find two versions of the charts project: content delivery network (CDN) and local. The charts_CDN directory contains all the examples referring to libraries remotely distributed from services. The charts_local directory offers all the examples referring to libraries found within the src directory.
Filling the src Directory with the Libraries
If you have chosen to develop HTML pages by referring to libraries locally, it is necessary to download all their files. These files will be collected in the src directory. This is a good approach, as you can develop several projects that will make use of the same libraries without having to copy them for each project.
The versions listed in this appendix are those used to implement the examples in the book. If you install other versions, there may be issues of incompatibility, or you may observe behavior different from that described.
D3 library version 3
- Visit the D3 site (http://d3js.org), and download the library: d3.v3.zip.
- Extract all content directly, and place in the src directory. Now, you should have two new files in the src directory:
- d3.v3.js
- d3.v3.min.js
You have thus obtained the src directory, which should contain the subdirectories and files shown in Figure A-4.
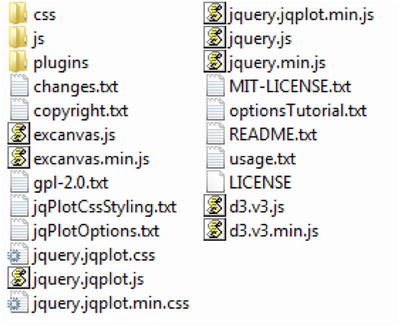
Figure A-4. The files and subdirectories contained in the src directory
![]() Note By convention you are developing the examples in the charts directory. If you want to do otherwise, you need to consider the new path when you will include the other files in a web page.
Note By convention you are developing the examples in the charts directory. If you want to do otherwise, you need to consider the new path when you will include the other files in a web page.
If you are developing the HTML page inside the charts directory, you need to use the following code:
<script type="text/javascript" src="../src/d3.v3.js"></script>
In contrast, if you prefer to develop it directly, in the document root, you use this:
<script type="text/javascript" src="src/d3.v3.js"></script>
In short, it is important to take the path of the file you are including into account, with respect to the page you are implementing.
Running the Examples
Once you have created or copied an HTML file in the workspace, to run it in Aptana Studio IDE, select Run ![]() Run from the menu, or click the Run button on the toolbar (see Figure A-5).
Run from the menu, or click the Run button on the toolbar (see Figure A-5).
![]()
Figure A-5. The Run button from the toolbar
Immediately, your default browser will open, with the selected HTML page loaded.
Look at Run Configurations (see Figure A-6), selecting Run Configurations . . . from the context menu of the Run icon. Let us set, for example, http://localhost/ as your base URL; to do so, you select the Append project name option, as shown. Then, you click the Apply button to confirm your settings.
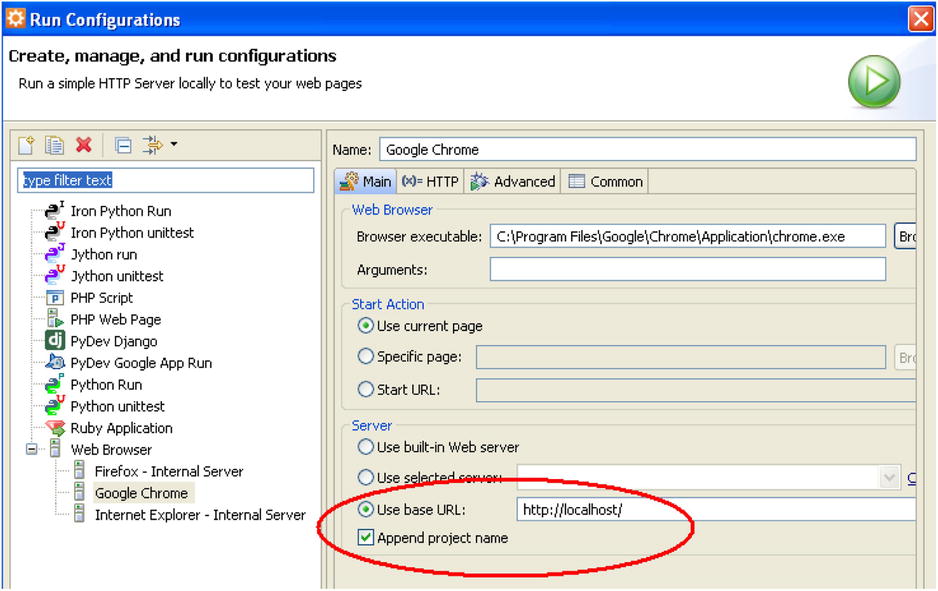
Figure A-6. The run configuration for each browser must be set correctly
Now, you have everything required to work easily on all the examples in the book.
Once you reach a certain familiarity with the Aptana IDE, you will find that it is an excellent environment for developing many other projects, both in JavaScript and in other programming languages (e.g., PHP).
And, now, have fun!
Summary
This appendix provides guidelines on how to use XAMPP and Aptana Studios together to create a development environment on your PC. The choice of using these applications is not mandatory, and many other solutions are possible; there are many applications available on the Internet for performing similar operations. But, if you wish to implement and quickly test the examples described in the book, this environment will prove a good choice.