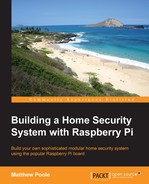
The Raspberry Pi Camera Module is an official Raspberry Pi accessory that works with all models of the Pi, and can be used to take high-definition stills and video images. It connects directly to the Pi board's camera serial interface (CSI) port, which is dedicated to these modules to enable high-speed operation.
The camera itself is a 5 megapixel fixed-focus sensor supporting 1080p, 720p, and VGA video modes and still captures.
The official Raspberry Pi Camera Module
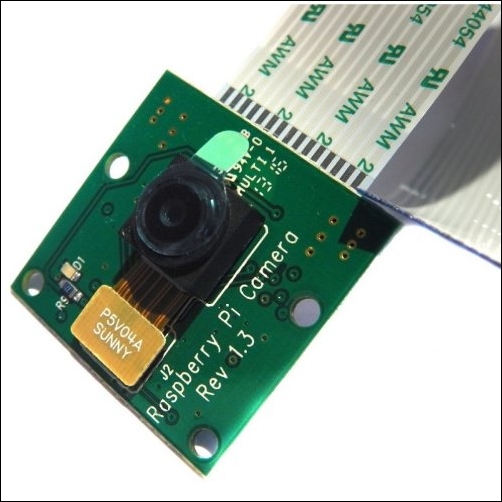
You can also obtain housings for the camera modules, which, unless you're going to build your own enclosure for the camera system, I recommend you use.
Raspberry Pi camera housings come in various colors and styles
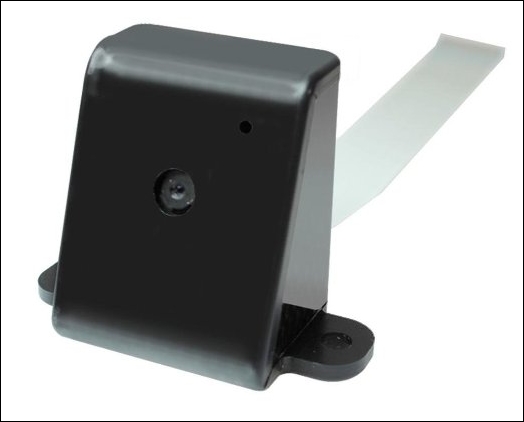
As previously mentioned, the module connects directly to the Raspberry Pi board via its dedicated camera interfaces, as shown in the following image. When connecting the camera, the contact side of the ribbon cable is toward the HDMI connector and the blue side of the cable is toward the network connector.
Connect the camera module to the dedicated interface
As you can see in the following image, the ribbon connector is not that long, so the camera needs to be located close to the Raspberry Pi. By using a camera enclosure, you could actually mount the camera directly on top of the Raspberry Pi case itself, if that works for you.

The camera module, housed within an enclosure
Before we can use the camera module, we need to enable camera support on the Raspberry Pi. To do this, we use the raspi-config tool, as we did with the I2C bus earlier in our journey.
- Connect to your Raspberry Pi the lazy way from your sofa using SSH, or directly using a keyboard and monitor.
- Once you've logged in, launch the config tool with the following command:
$ sudo raspi-config - And then, select
5 Enable Camera.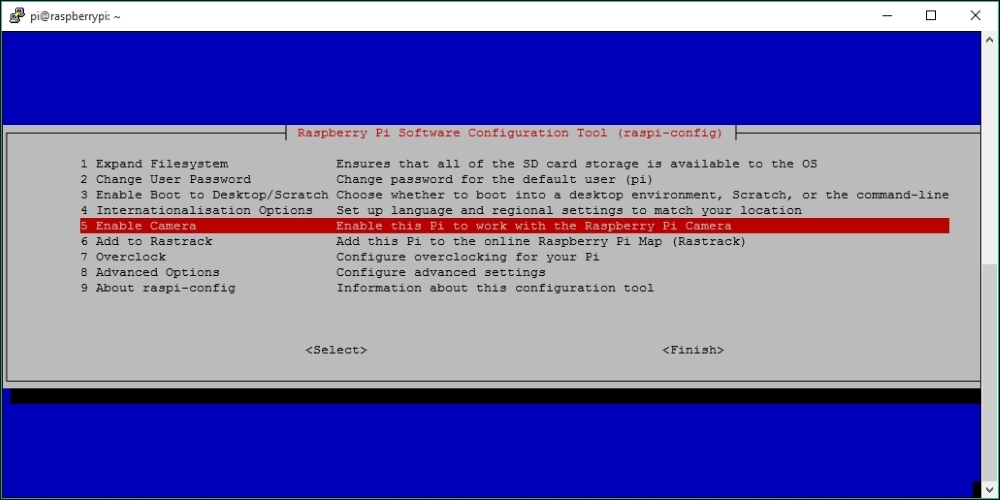
- You'll then be asked to confirm whether you want to enable camera support.
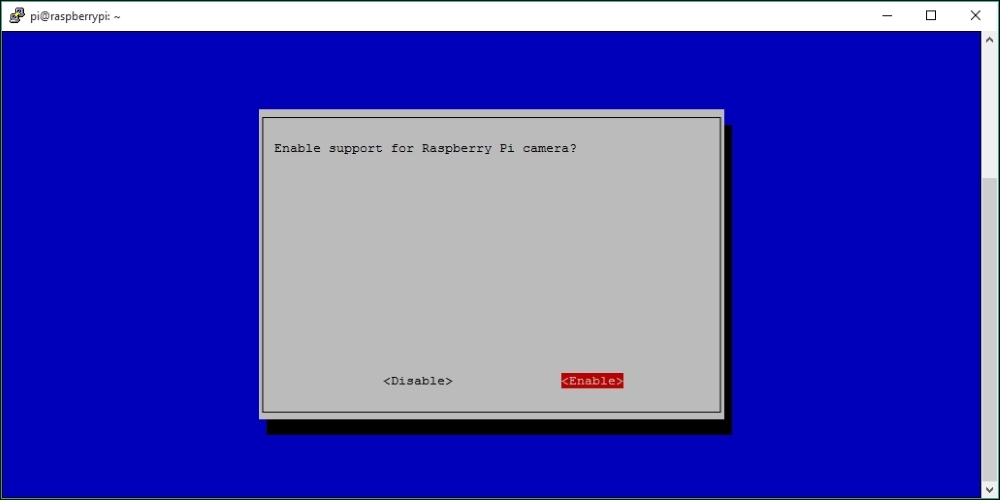
- Select
<Enable>. - Then, select Finish and reboot your Pi to enable the camera settings.
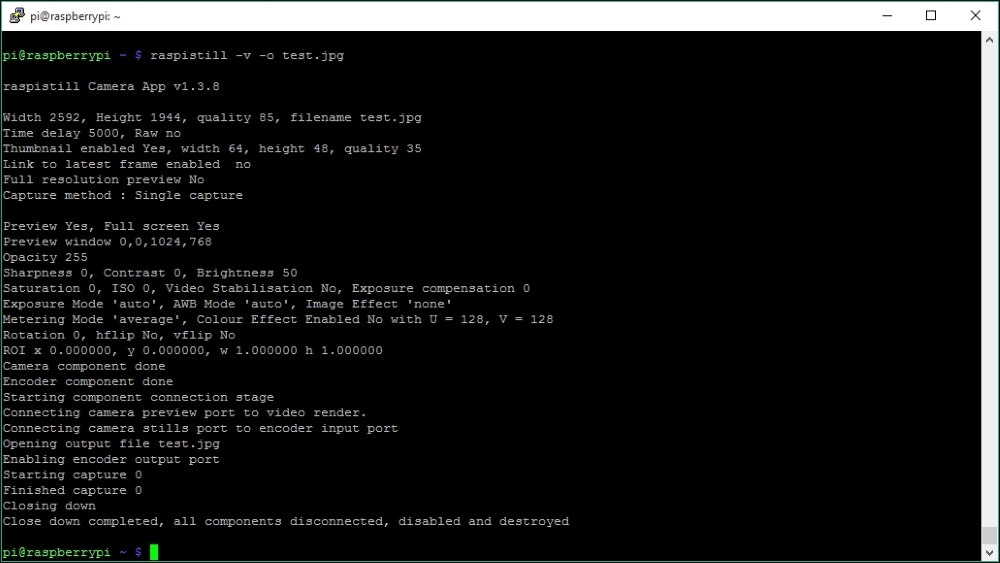
Once your Raspberry Pi has rebooted, your camera should be enabled. We can test this by taking a still image using the raspistill utility:
$ raspistill –v -o test.img
This will delay for 5 seconds then take a picture, while displaying various pieces of information, such as that shown in the following screenshot:
And if all goes well, you should find the file, test.jpg, in your home folder. As you're connected via the shell, you wouldn't have seen the 5 second preview image displayed when the command was running.
If you download the image file to your PC, you should see a nice quality snap taken by the camera module.
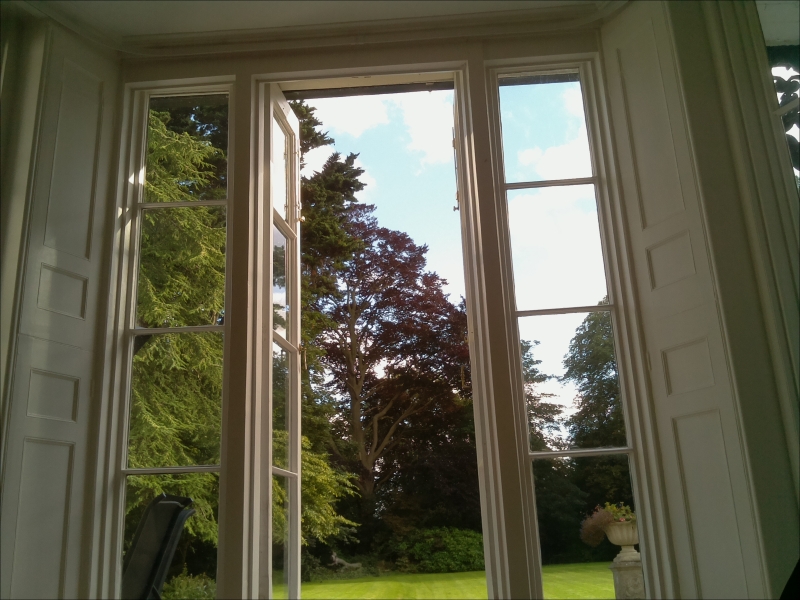
The test photo taken by the Raspberry Pi Camera Module
Tip
If you find that raspistill outputs errors when you run it, ensure that it is connected properly at both ends of the ribbon cable. One other catch is that sometimes the ribbon that connects the actual camera lens component to the tiny connector on the camera board can come loose. Just ensure that this is securely connected too. I've had this issue a couple times after the camera modules have been taken out of my box of random test bits to be used.
The raspistill utility has loads of options for manipulating the images it captures, and we'll use some of them a bit later in our capture script. In the meantime, to see the available options, run raspistill without any options and they will be listed:
$ raspistill