While we can set up our system to receive email alerts when our system detects an intrusion, it would be really useful to be able to access our Web-based control panel wherever we are so that we can perhaps arm and disarm the system or switch off certain zones when we're not there.
However, in order to make this possible we need to do a few things:
Most of us won't have a fixed IP address for the Internet connection in our home; it is likely to change from time to time, especially when we reboot or unplug our router, whereby our Internet service provider assigns us a new one when we next connect to them. Because of this, we can't rely on using the IP address to get to our home network when we're out and about. To solve this, we need to set up a dynamic DNS account that will allow us to set up a domain name for our home network (for example, myhomenetwork.com).
It works by having a service that runs inside your network, such as on your router or laptop, that updates the dynamic DNS service hosting your domain name with the current IP address of your Internet connection. Then, when you use your domain name in your browser, it will take you to a Web server on your home network.
Popular dynamic DNS providers out there include No-IP (www.noip.com) and DynDNS (www.dyn.com). You can also get a free DnsOMatic account with OpenDNS to manage your services (www.dnsomatic.com).

My Netgear NAS device has a DnsOMatic updater service add-on
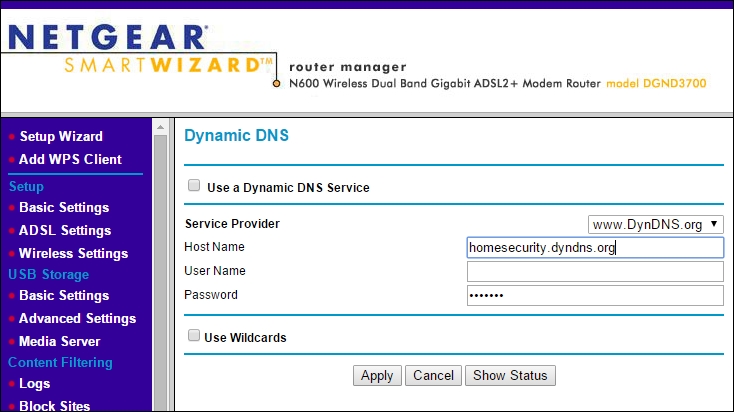
My Netgear Router has the option of updating a Dynamic DNS service
Since your Raspberry Pi-based home security system is likely to always be on, you might want to install the ddclient updater service on there instead:
$ sudo apt-get install ddclient
Once installed, you can set it up for your particular service and account details using the following config file:
$ sudo nano /etc/ddclient.conf
So that our home network always knows where to find your Raspberry Pi, we need to set up a static IP address on it, assuming that it currently acquires an IP address from your router's DHCP server each time it boots up.
- To do this, we need to edit the network settings on the Raspberry Pi. In Nano, open the following configuration file:
$ sudo nano /etc/network/interfaces - You'll probably find the Ethernet port configuration set to something like this:
auto eth0
allow-hotplug eth0
iface eth0 inet manual
- Change this configuration to be an unused static IP address on your network. In my case, I've set it to
192.168.0.99. The gateway setting is the IP address of my Internet router:auto eth0 allow-hotplug eth0 iface eth0 inet static address 192.168.0.99 netmask 255.255.255.0 gateway 192.168.0.1 - Now, we need to restart the networking service—note that you'll be disconnected from your terminal session. You'll need to reconnect using the new IP address:
$ sudo /etc/init.d/networking restart
If you have any issues, simply restart the Pi with sudo reboot and all should be good when it comes back up.
The final piece of this puzzle is to make sure that our Internet router will direct incoming traffic on a given port to our Raspberry Pi's Web server. For the purpose of this example, I'm going to assume that we are going to stick to the default, port 80, on our Web server.
Tip
A word about security
Given that our Web server will now be accessible from the outside world, we need to be mindful about securing our system properly. The two main ways to do this are to change the Web server port to a random number other than 80 (for example, 8799) and add password protection to your site by applying basic authentication. Both of these can be done in the lighttpd configuration file.
Most routers will allow you to set up port-forwarding as part of their firewall configuration. Essentially, setting this means that any incoming traffic from the Internet on a given TCP port will be allowed to pass through the router and will be directed to the device with the specified IP address. On my Netgear router, it's set up as shown in the following screenshot:

Setting up port-forwarding on a Netgear router
Now, when you enter your personal domain name in your browser, when you're away from home you should be taken to your alarm control panel.