
Until now we have always deployed the 3T application to GlassFish via NetBeans using the Run Project command. In production environments we deploy applications through the GlassFish admin console or from the command line using asadmin. We will now learn how to deploy the task-time-tracker-1.0.war file to GlassFish using the admin console.
Start GlassFish either in NetBeans or in a console window using the asadmin command. We recommend using asadmin as this is normally the way GlassFish is managed in an enterprise environment.
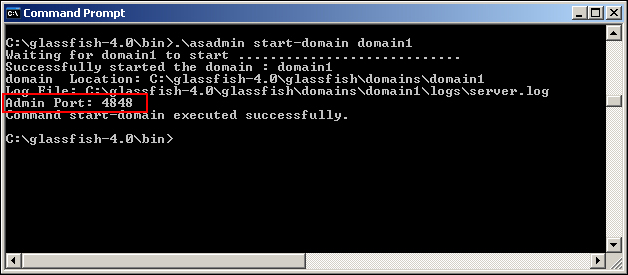
As we can see in the preceding screenshot, the default GlassFish Admin port value is 4848, as shown in the preceding screenshot, but it will be different if multiple GlassFish domains are configured. Open this location in the browser to display the GlassFish admin console:
Working on the localhost will normally not prompt you for a password when using the default GlassFish installation provided by NetBeans. If you are prompted, the default username is admin with a blank password. The previous versions of GlassFish had a default password of adminadmin; at the time of writing, this is no longer the case. You should be aware that this may change again in the future.
Working on remote hosts where GlassFish is running on a server other than the browser will always prompt you for a username and password when you try to access the admin console. This is the situation with enterprise environments where different servers are usually running multiple instances of GlassFish. In this environment, remote access to the admin console will be disabled by default and you will only be able to access the admin console from the localhost. Allowing remote access from different clients can be enabled by executing the following commands on the host running the GlassFish server:
asadmin --host localhost --port 4848 enable-secure-admin
asadmin restart-domain domain1
When enabling secure admin, you might be prompted with a message saying "your admin password is empty" (the default scenario). To solve this problem you will need to first change the admin password from the default (empty) password to another by using the following command:
asadmin --host localhost --port 4848 change-admin-password
You will then be prompted to enter the new password. Enabling secure admin will then be possible.
Note
It is beyond the scope of this book to delve too deeply into the world of the GlassFish server administration. We recommend you browse the excellent documentation and user guides at https://glassfish.java.net/.
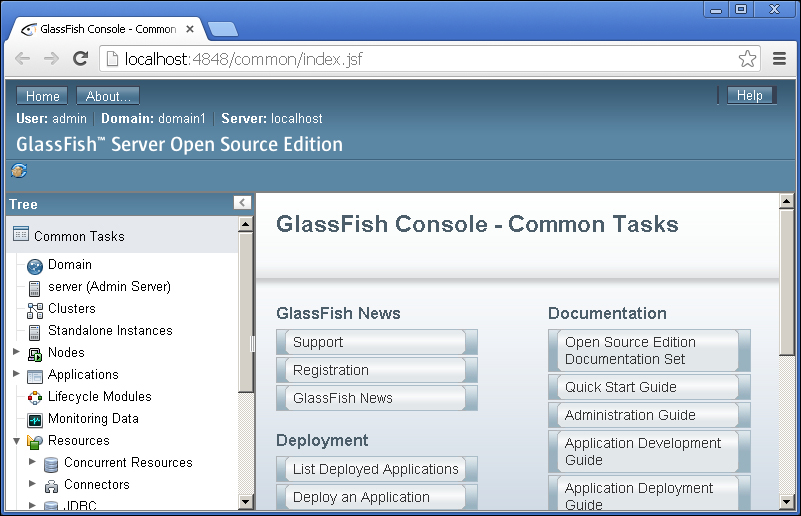
Deploying a web application via the GlassFish admin console is a simple process. After logging on to the GlassFish admin console, click on and open the Applications node as shown in the following screenshot:
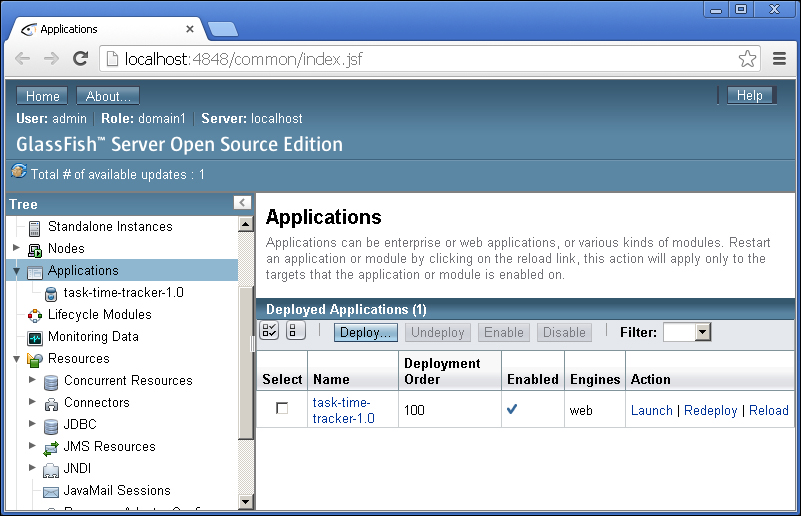
There may already be a task-time-tracker application deployed as a result of a previous NetBeans deployment (as shown in the preceding screenshot). If this is the case, select the checkbox next to the application name and then click on Undeploy.
Click on the Deploy… button and enter the following details:
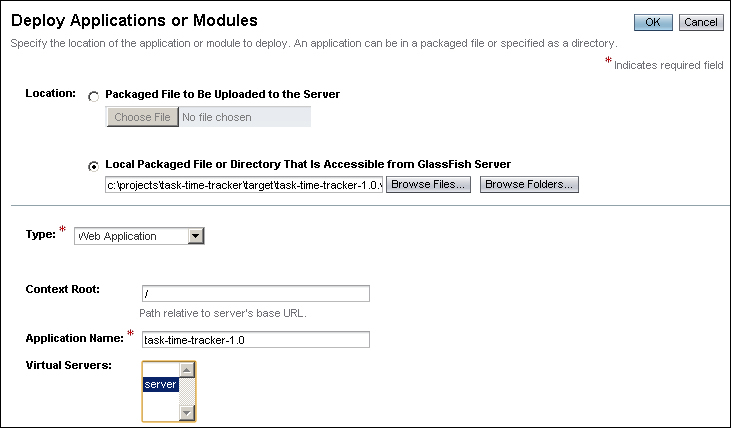
The Local Packaged File or Directory That Is Accessible from GlassFish Server field will define the location of the task-time-tracker-1.0.war file on the local file system. If deploying to a remote server, you will need to use the Package File to be Uploaded to the Server option.
The Context Root field defines the URL path to the deployed application. We will deploy the 3T application to the context root.
The Application Name field defines the name of the application within the GlassFish server and is displayed in the application listing.
The Virtual Server dropdown defines the virtual server(s) that will be used to host the application. A virtual server, sometimes called a virtual host, is an object that allows the same physical server to host multiple Internet domain names deployed to different listeners. It is possible to select multiple virtual servers (if configured) from this list.
Click on the OK button to deploy the task-time-tracker-1.0.war file. This action will then return you to the deployed applications listing:
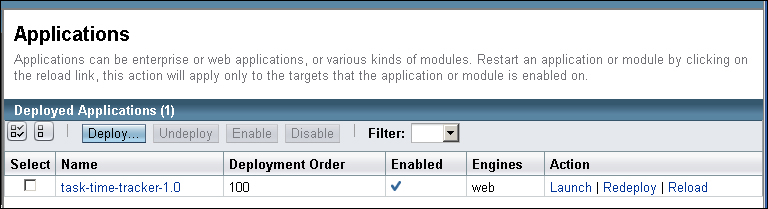
The task-time-tracker-1.0 application is deployed to the default Virtual Server with the name server and is accessible via the following two listeners:
http://localhost:8080/https://localhost:8181/
This is the default virtual server/HTTP service configuration after installing GlassFish. Note that in a production enterprise environment that allows user logons, only the HTTPS version would be enabled to ensure encrypted SSL connections with the server. You can now access these URLs to test the deployment. Opening the https://localhost:8181/ link will result in a warning due to an invalid certificate as shown in the following screenshot:
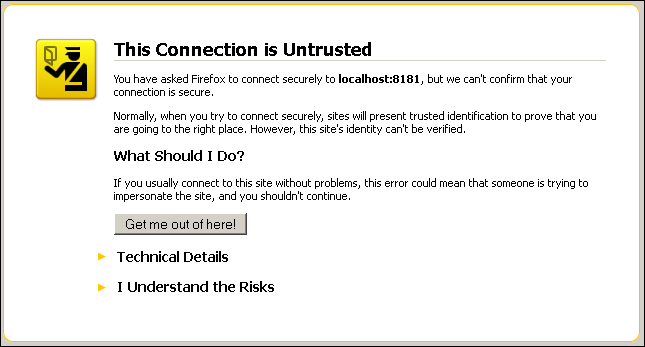
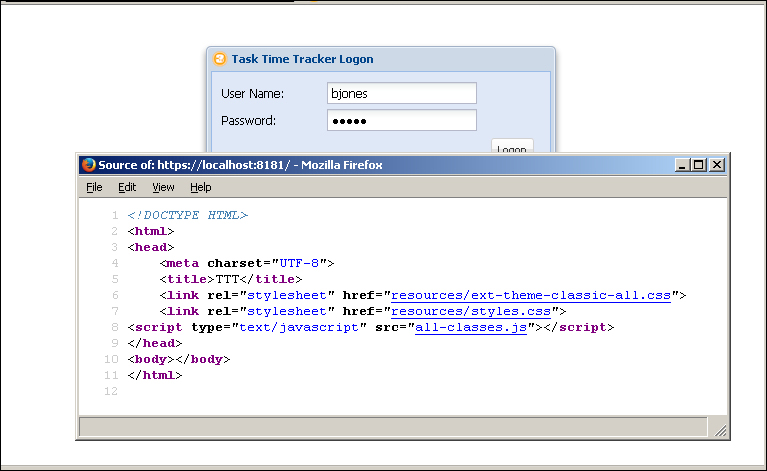
This can be ignored and you may continue to the link by clicking on I Understand the Risks and confirming the exception (the exact message displayed will depend on the browser). Right-clicking on the logon page and selecting View Page Source will confirm that you are working with the production WAR file; this can be seen in the following screenshot:
Note
Configuring HTTP listeners and virtual servers is once again beyond the scope of this book. We recommend you browse the appropriate documentation at https://glassfish.java.net/documentation.html.
It is also possible to deploy the task-time-tracker-1.0.war file using the asadmin command. This is a common situation in enterprise organizations where the GlassFish admin console is not enabled for security reasons. The syntax of the asadmin deploy command is:
asadmin deploy --user $ADMINUSER --passwordfile $ADMINPWDFILE
--host localhost --port $ADMINPORT --virtualservers $VIRTUAL_SERVER
--contextroot --force --name $WEB_APPLICATION_NAME $ARCHIVE_FILE
This command must be executed on a single line and each uppercase variable name prefixed with $ must be replaced with the correct value. The exact syntax and parameters may depend on the environment and we will not go further into the structure of this command. If you are interested in learning more about this command, you may browse the detailed documentation at http://docs.oracle.com/cd/E18930_01/html/821-2433/deploy-1.html; please note that this document refers to the GlassFish 3.1 reference manual.
The document at https://glassfish.java.net/docs/4.0/application-deployment-guide.pdf contains extensive and detailed explanations for deploying applications to the GlassFish 4 server. This document is more than 200 pages long and should be consulted for any deployment-related questions that have not been covered in this chapter.