
This chapter will install and configure your development environment. The Rapid Application Development (RAD) tool is NetBeans, an open source, cross-platform Integrated Development Environment (IDE) that can be used for creating visual desktop, mobile, web, and Service-Oriented Architecture (SOA) applications. NetBeans officially supports Java, PHP, JavaScript, and C/C++ programming languages, but it is best known for providing a complete toolset for all the latest Java Enterprise Edition (Java EE) standards (currently Java EE 7).
The database of choice for this book is MySQL, the world's most widely used open source Relational Database Management System (RDBMS). MySQL is the most popular choice of database for web applications hosted on Linux platforms and continues to deliver outstanding performance in a multitude of applications. Its small footprint and ease of use makes it perfect for development use on a single computer.
The application server used in this book is GlassFish 4, which comes bundled with the NetBeans download. GlassFish is installed as part of the NetBeans installation, and the tight integration between the two makes configuring GlassFish a simple process. GlassFish is an open source, production-quality application server that implements all the Java EE 7 features. It has enterprise-grade reliability and is considered by many to be the best open source application server available. GlassFish 4 is the Reference Implementation (RI) for the Java EE 7 specification, a full description of which can be found at https://glassfish.java.net/downloads/ri/.
All of these development tools are freely available for PC, Mac, and Linux. Each tool has extensive examples, comprehensive tutorials, and online support forums available.
It should be noted that although this chapter focuses on NetBeans, MySQL, and GlassFish, it is possible for you to configure any appropriate combination of tools that they are familiar with. The development tasks outlined in this book can just as easily be followed using Eclipse, Oracle, and JBoss—although some described configuration details may require minor modifications.
In this chapter, we will perform the following tasks:
- Install the MySQL Database server
- Install the Java SDK
- Install and configure the NetBeans IDE
- Create the application project and explore Maven
- Run the project in GlassFish
MySQL can be downloaded from http://www.mysql.com/downloads/mysql. Select the appropriate MySQL Community server for your operating system and architecture. It is important to follow the instructions, making note of installation directories and paths for future reference. After downloading and running the setup file, you should select the Developer Default installation for this book.
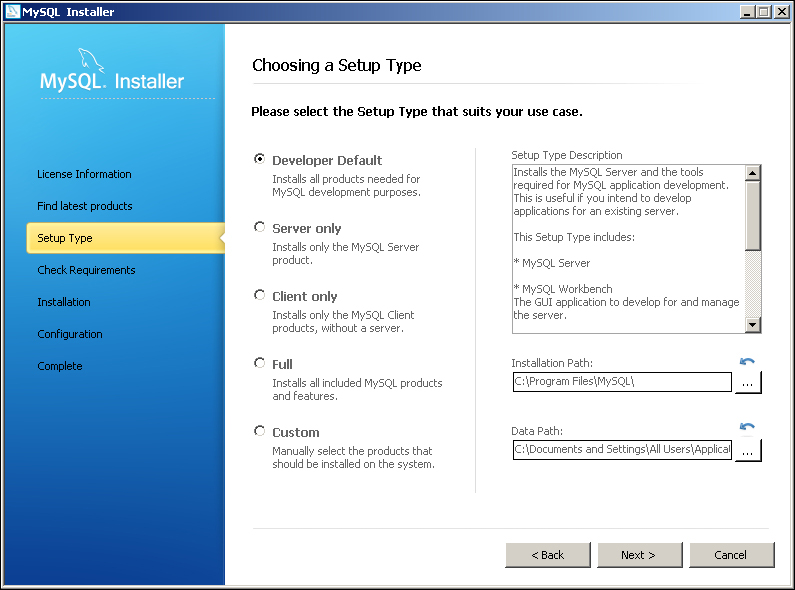
Choosing the default settings is best unless you are familiar with MySQL. This will include setting the default port to 3306, enabling TCP/IP networking, and opening the required firewall port for network access (not strictly required for a developer machine where all apps are running on the same environment, but required if you are configuring a dedicated MySQL server).
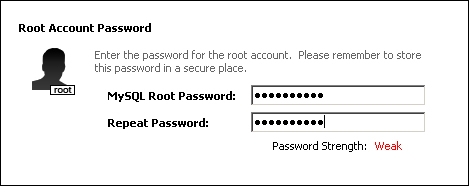
Regardless of the environment, it is important to set a root user password during the installation process. We will use the root user to connect to the running MySQL server to execute commands.
We recommend that the MySQL server is configured to start when the operating system starts. How this is done will depend on your environment, but it is usually performed at the end of the Initial Configuration action. Windows users will have the option to start the MySQL server at system startup. Mac users will need to install the MySQL Startup Item after the server has been installed.
Should you decide not to start MySQL when the operating system starts, you will need to start the MySQL server manually whenever required. How this is done will once again depend on your environment, but you should start your server now to confirm that the installation was successful.
Note
Unix and Linux users will need to install MySQL as appropriate for their operating system. This may include the use of Advanced Packaging Tool (APT) or Yet another Setup Tool (YaST), or even the installation of MySQL from source. There are detailed instructions for various operating systems found at http://dev.mysql.com/doc/refman/5.7/en/installing.html.
At the end of the configuration process, you will have a running MySQL server ready to be used in Chapter 2, The Task Time Tracker Database.