
The GlassFish 4 server bundled with NetBeans is automatically configured the first time you run the project. This means any required resources are set up dynamically based on the current state of the project. All such properties are copied to the glassfish-resources.xml file in the setup directory, as shown in the following screenshot:
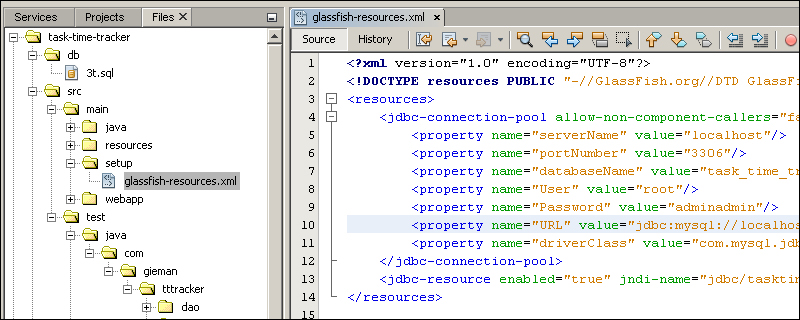
The glassfish-resources.xml file was modified during the database reverse engineering process to include the database connection pool and JDBC resources required by JPA. As a result, the contents of this file define the required GlassFish connection pool details.
It is important to understand that this file is used by NetBeans to dynamically configure the GlassFish server assigned to the project. In a real-world situation, the GlassFish server is configured by administrators and deploying a web application is done either from the command line or through the GlassFish administration console. You will not be deploying your application through NetBeans in a normal enterprise environment and it is hence very useful to have a fundamental understanding of how GlassFish is configured from first principals. This section is dedicated to configuring the GlassFish server connection pool for use with 3T. Although this is not strictly required to run 3T on NetBeans, we strongly recommend you take the time to configure your GlassFish server fully via the following steps.
This will ensure you understand what is required to configure a GlassFish server on a different physical server for running the 3T application.
- The first step in configuring your GlassFish server is to perform a Clean and Build:

- When the build is complete, navigate to
target/libas shown in the following screenshot to view the JAR files required by your project: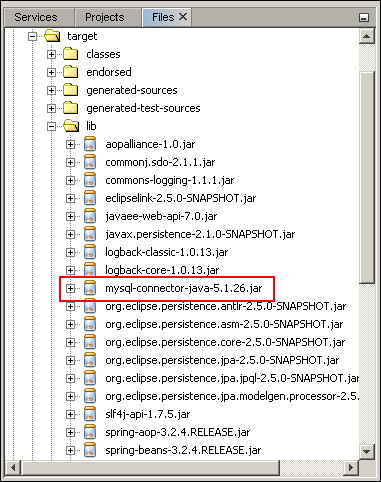
- Open a file explorer window (Windows Explorer or OS X Finder) to navigate to this directory and copy the
mysql-connector-java-5.1.26.jarfile to your GlassFish domainlibsdirectory, as shown in the following screenshot: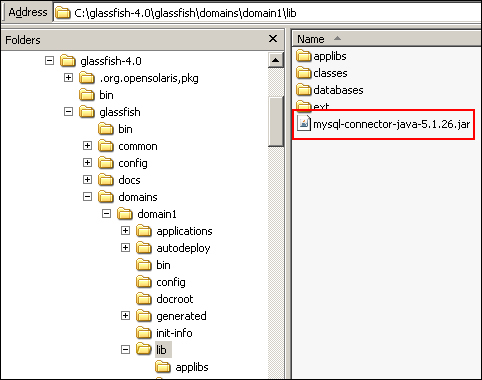
The setup directory, located at src/main/, contains the glassfish-resources.xml file and should be renamed to ensure NetBeans does not dynamically configure GlassFish with these properties. We suggest renaming the directory to setup-original.
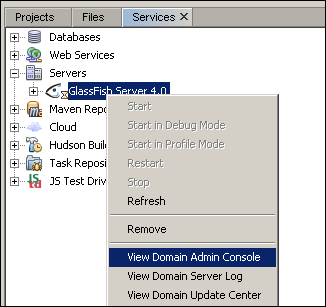
Navigate to the Services tab; by right-clicking on the GlassFish Server 4.0 node, select Start as shown in the following screenshot:
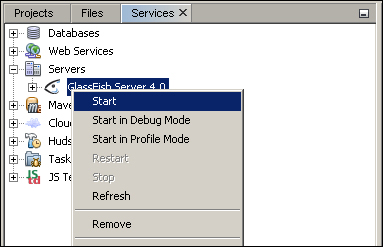
You should see server output at the bottom of the NetBeans IDE and the GlassFish Server 4.0 node reload. You can now right-click on the GlassFish Server 4.0 node and select View Domain Admin Console:
This will start your default browser and load the Domain Admin Console.
This section will use the GlassFish admin console to configure the JDBC connection pool and JDBC resource required by the 3T application.
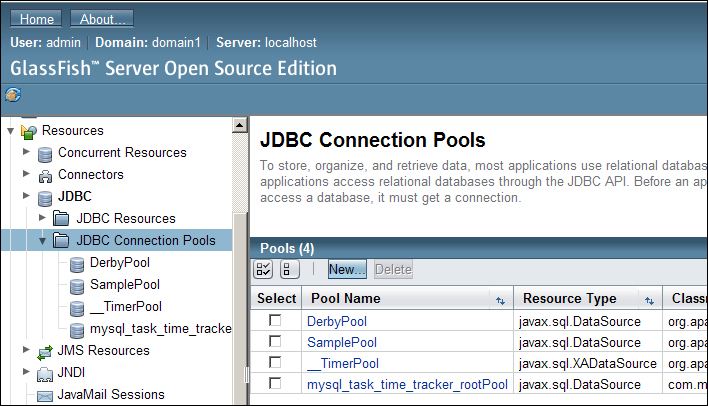
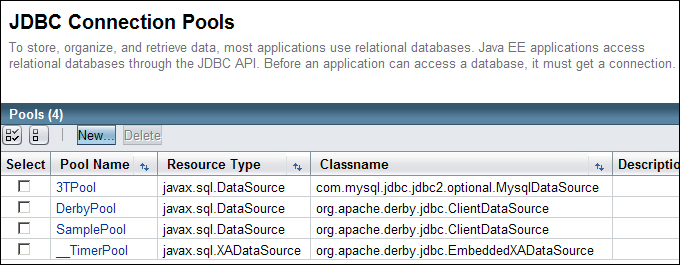
- Open the Resources node and navigate to the JDBC Connection Pools tab:
Note
You may see a connection pool named
mysql_task_time_tracker_rootPoolor something similar, as shown in the preceding screenshot. This was created by NetBeans during a previous run using the properties specified in theglassfish-resources.xmlfile. The remaining section may be skipped if you wish to continue using this connection pool. We recommend you delete this entry and continue to follow these steps to understand how to configure a GlassFish connection pool. - Click on the New button and enter the following details before clicking on the Next button:
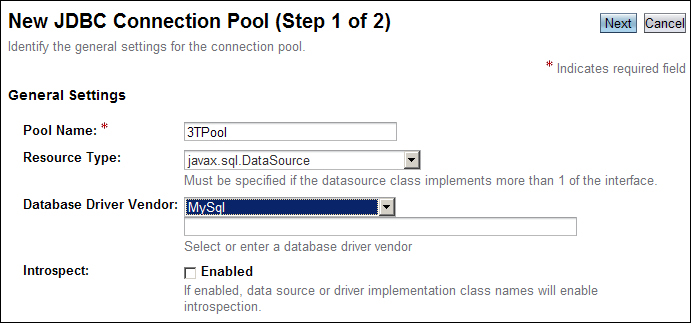
- The next screen looks daunting but only a few entries are required. Scroll all the way down until you can view the Additional Properties section:
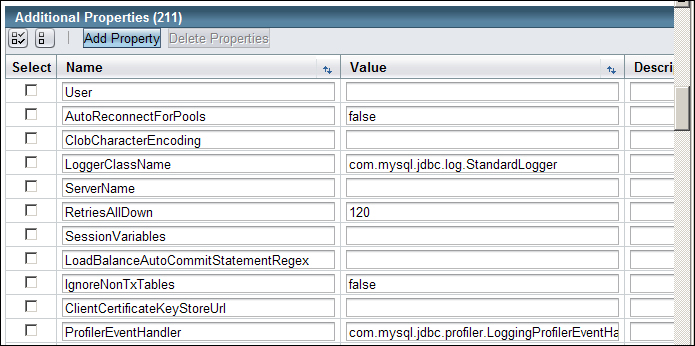
- There are many properties here! Thankfully only a few are required unless you are familiar with MySQL database administration. You may safely delete all the listed properties to keep the configuration simple, and then enter the following properties that correspond to the original
glassfish-resources.xmlfile:
- The basic fields that are required are URL, User, and Password. Saving these settings will return you to the JDBC Connection Pools screen:
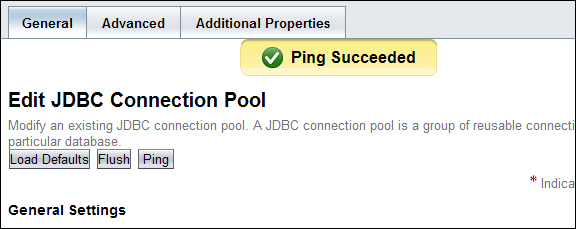
- Click on the 3TPool name to open the settings again and click on the Ping button to test the connection. You should now see the following result:
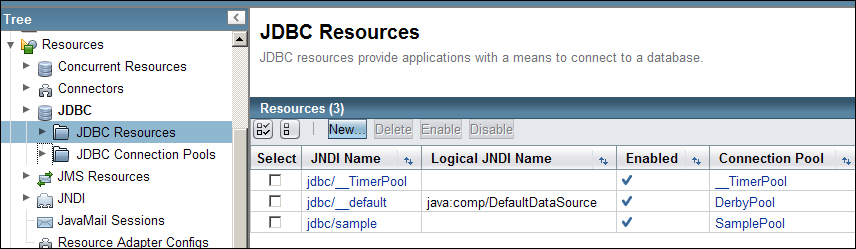
The final step is to create a JDBC Resource. Click on this node to display the configured resources:
Click on the New… button and enter the following details:
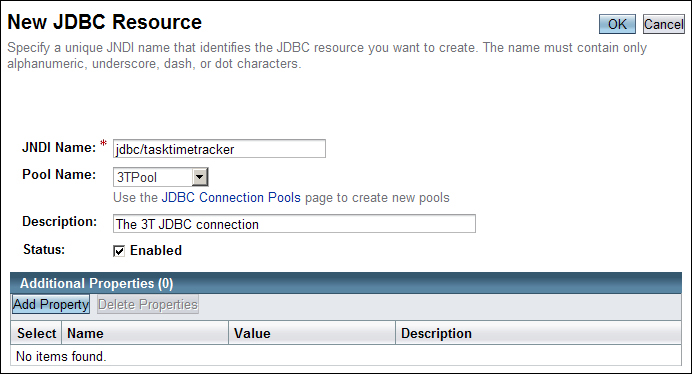
The JNDI Name must be the same as the <jta-data-source> property defined in the persistence.xml file and is hence set to jdbc/tasktimetracker. Click on the OK button to save the resource configuration. The refreshed node should now show the newly created resource.
You have now finished configuring the GlassFish JDBC settings.