
The format of the skeleton generation command is:
sencha -sdk /path/to/sdk generate app MyApp /path/to/MyApp
Running this command will copy all required SDK files to the /path/to/MyApp directory and create a skeleton of the resources ready for development. You must use full paths for both the SDK and MyApp directories.
It is important to remember that the 3T application is a Maven project and that the web content root is the webapp directory located within the Maven directory structure. The project folder that was created in Chapter 1, Preparing Your Development Environment, and the webapp directory (on Windows) can be found at C:projects ask-time-trackersrcmainwebapp.
On Mac, it can be found at /Users/{username}/projects/task-time-tracker/src/main/webapp.
The 3T application skeleton can now be generated by executing the following command (for Windows platforms):
sencha –sdk C:Senchaext-4.2.2 generate app TTT C:projects ask-time-trackersrcmainwebapp
Note that this command must be on a single line. The TTT argument represents the application name and will be used to generate the application namespace. We could have used TaskTimeTracker, but the abbreviated form is easier to write!
Executing the command from the terminal should produce considerable output, ending with some red errors:
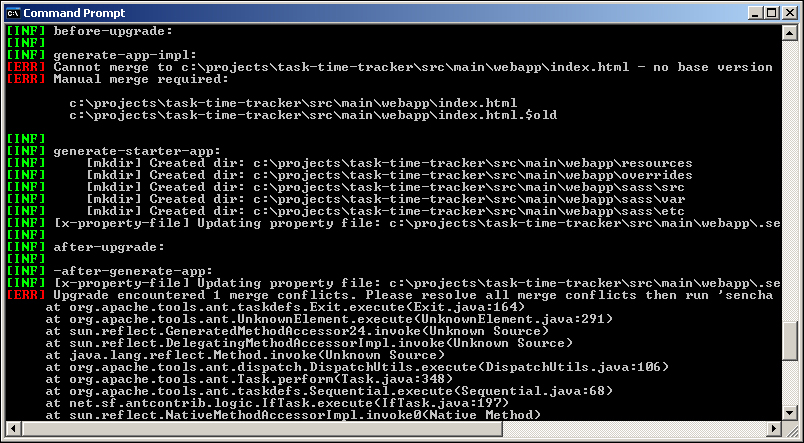
Don't be too concerned with the [ERR] warnings; Sencha Cmd has identified the presence of the index.html file and replaced it with the Sencha Cmd version. The original file was copied to index.html.$old. We don't need the backup file (it was created during the NetBeans project creation process); it can safely be deleted.
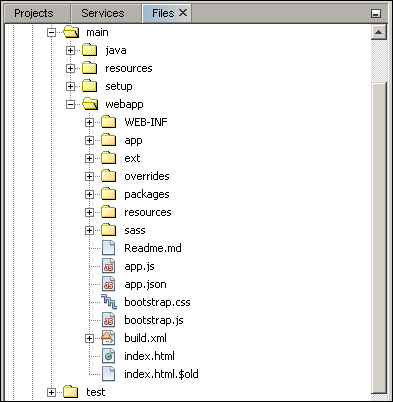
Opening the NetBeans IDE will now display many new files and directories within the webapp directory of the 3T project:
You can now run the project to view the output in the browser:
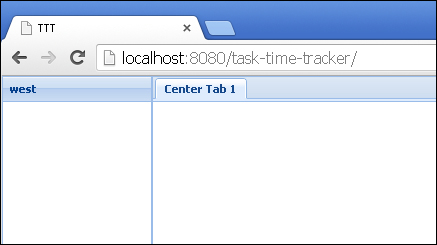
This output is the default Ext JS 4 application content in the index.html page, created by the generate app command when building the project skeleton. Let's now look at the key files that have been generated.
The index.html file consists of the following listings:
<!DOCTYPE HTML>
<html>
<head>
  <meta charset="UTF-8">
  <title>TTT</title>
  <!-- <x-compile> -->
    <!-- <x-bootstrap> -->
      <link rel="stylesheet" href="bootstrap.css">
      <script src="ext/ext-dev.js"></script>
      <script src="bootstrap.js"></script>
    <!-- </x-bootstrap> -->
    <script src="app.js"></script>
  <!-- </x-compile> -->
</head>
<body></body>
</html>
Note the x-compile and x-bootstrap tags within the page content. These are used by the Sencha Cmd Tool and allow the compiler to identify the scripts at the root of your application (the default file is always app.js). The compiler also ignores the bootstrap part of the framework that is used only during development. When generating a production application, all of the required files are pulled in during the build process. This will be covered in detail in Chapter 13, Moving Your Application to Production.
You should note that the ext-dev.js file is the only Ext JS 4 framework resource required. This file is used for dynamic JavaScript class loading during the development phase. The framework will then dynamically retrieve any JavaScript resources required by the application.
The app.js file is the entry point of the application. The contents of the file, including generated comments, looks as follows:
/*
    This file is generated and updated by Sencha Cmd. You can edit this file as needed for your application, but these edits will have to be merged by Sencha Cmd when upgrading.
*/
Ext.application({
  name: 'TTT',
  extend: 'TTT.Application',
  autoCreateViewport: true
});
The Ext.application extends the TTT.Application class, which is defined in the app/Application.js file as follows:
Ext.define('TTT.Application', {
  name: 'TTT',
  extend: 'Ext.app.Application',
  views: [
    // TODO: add views here
  ],
  controllers: [
    // TODO: add controllers here
  ],
  stores: [
    // TODO: add stores here
  ]
});
It is the Application.js file that will contain our 3T application-specific code.
Note
You should note that this is a different setup to that described in earlier Ext JS 4 tutorials where the app.js file contains application-specific properties (views, controllers, stores, and application functions). The approach outlined previously keeps all application-specific code within the app directory.
Our first change to the autogenerated Application.js file is to add the launch function:
Ext.define('TTT.Application', {
    name: 'TTT',
    extend: 'Ext.app.Application',
    views: [
        // TODO: add views here
    ],
    controllers: [
        // TODO: add controllers here
    ],
    stores: [
        // TODO: add stores here
    ],
    launch: function() {
        Ext.create('TTT.view.Viewport'),
    }
});
We can now remove autoCreateViewport:true from the app.js file as the logic for creating the viewport is now in the launch function. The launch function itself will be enhanced in the next chapter to implement the user logon, so there is plenty of code to come! The updated app.js file is as follows:
Ext.application({
    name: 'TTT',
    extend: 'TTT.Application'
});
The bootstrap.js and bootstrap.css files were generated by Sencha Cmd and should not be edited. They are used internally to initialize and configure the development environment.
An Ext JS 4 viewport is a container that resizes itself to use the entire browser window. The Viewport.js definition is as follows:
Ext.define('TTT.view.Viewport', {
    extend: 'Ext.container.Viewport',
    requires:[
        'Ext.layout.container.Fit',
        'TTT.view.Main'
    ],
    layout: {
        type: 'fit'
    },
    items: [{
        xtype: 'app-main'
    }]
});
There is only one view added to the items array; the TTT.view.Main, function, which has an xtype function called app-main:
Ext.define('TTT.view.Main', {
    extend: 'Ext.container.Container',
    requires:[
        'Ext.tab.Panel',
        'Ext.layout.container.Border'
    ],
    xtype: 'app-main',
    layout: {
        type: 'border'
    },
    items: [{
        region: 'west',
        xtype: 'panel',
        title: 'west',
        width: 150
    },{
        region: 'center',
        xtype: 'tabpanel',
        items:[{
            title: 'Center Tab 1'
        }]
    }]
});
The preceding file defines the border layout and textual content of the two regions that are displayed in the browser.
Note
Not confident with Ext JS views, xtypes, viewports, border layouts, or panels? We recommend browsing and reviewing the basic Ext JS 4 component concepts at http://docs.sencha.com/extjs/4.2.2/#!/guide/components.