
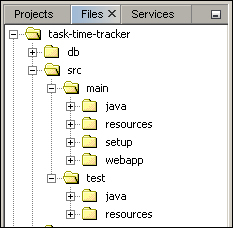
Our strategy for unit testing is to create a set of test cases that can be run in an automated manner at any time during the development lifecycle. "Automated" means that no developer interaction is required; the tests can be run as part of the build process and do not require user input. The entire process is managed seamlessly through the use of Maven, JUnit, and Spring. Maven convention expects a test directory structure under the src directory with testing resources and Java test cases in subdirectories as shown in the following screenshot:
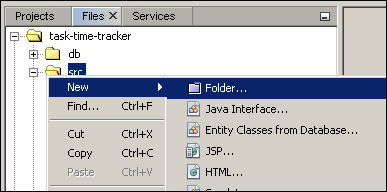
Note how Maven uses the same directory structure for both source and testing layouts. All resources required to execute test cases will be found in the src/test/resources directory. Likewise, all the resources required for deployment will be found in the src/main/resources directory. The "convention over configuration" paradigm once again reduces the number of decisions that the developer needs to make. Maven-based testing will work without the need for any further configuration as long as this directory structure is followed. If you do not already have this directory structure, then you will need to create it manually by right-clicking on the required folder:
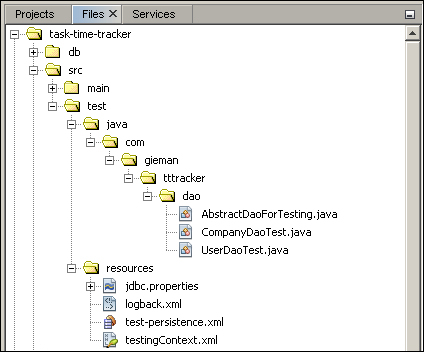
After adding the directory structure, we can create individual files as shown:
We will start by using NetBeans to create the jdbc.properties file.
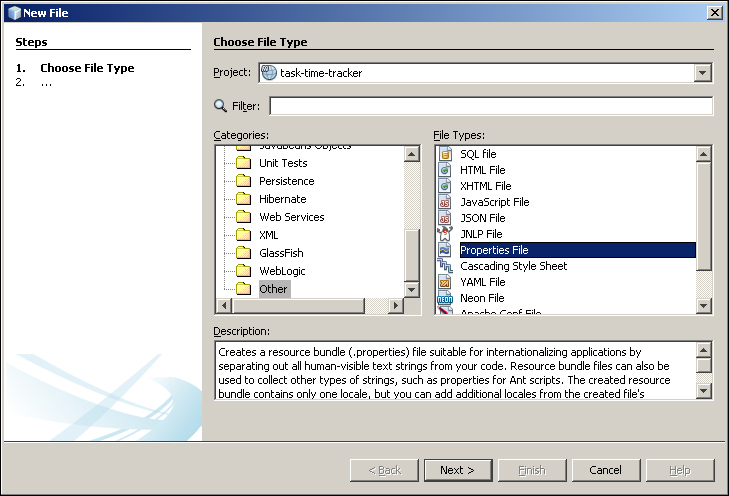
Right-click on the test/resources folder and navigate to New | Other. The New File wizard will open where you can select Other from Categories and Properties File as shown:
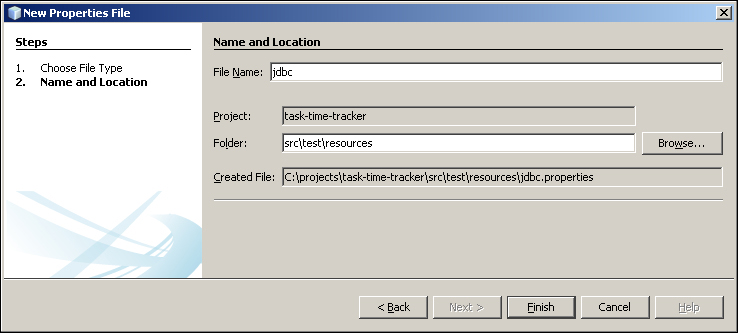
Select Next and type in jdbc as the filename:
Click on the Finish button to create the jdbc.properties file. NetBeans will then open the file in the editor where you can add the following code:
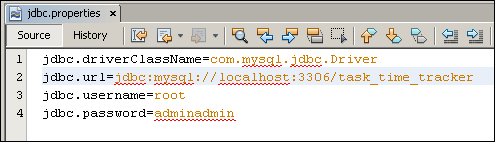
The jdbc.properties file is used to define the database connection details that will be used by Spring to configure our DAO layer for unit testing. Enterprise projects usually have one or more dedicated test databases that are prefilled with appropriate data for all testing scenarios. We will use the database that was generated and populated in Chapter 2, The Task Time Tracker Database.
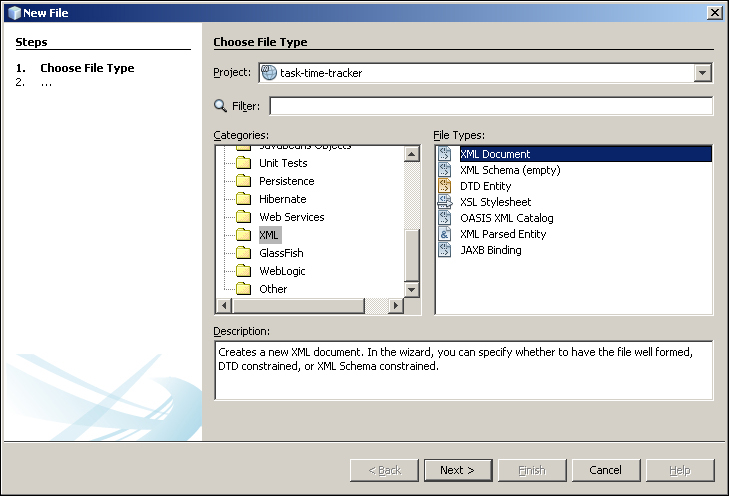
Create this file by using the New File wizard XML category as shown:
After creating the logback.xml file, you can enter the following content:
<?xml version="1.0" encoding="UTF-8"?>
<configuration scan="true" scanPeriod="30 seconds" >
    <contextName>TaskTimeTracker</contextName>
    <appender name="STDOUT" class="ch.qos.logback.core.ConsoleAppender">
        <encoder>
            <pattern>%d{HH:mm:ss.SSS} [%thread] %-5level %logger{5} - %msg%n</pattern>
        </encoder>
    </appender>

    <logger name="com.gieman.tttracker" level="DEBUG" additivity="false">
        <appender-ref ref="STDOUT" />
    </logger>
    <logger name="com.gieman.tttracker.dao" level="DEBUG" additivity="false">
        <appender-ref ref="STDOUT" />
    </logger>
    <logger name="com.gieman.tttracker.domain" level="DEBUG" additivity="false">
        <appender-ref ref="STDOUT" />
    </logger>
    <logger name="com.gieman.tttracker.service" level="DEBUG" additivity="false">
        <appender-ref ref="STDOUT" />
    </logger>
    <logger name="com.gieman.tttracker.web" level="DEBUG" additivity="false">
        <appender-ref ref="STDOUT" />
    </logger>

    <root level="INFO">
        <appender-ref ref="STDOUT" />
    </root>
</configuration>
For those who are familiar with log4j, the syntax of the logback logger definitions is very similar. We have set the root log level to INFO, which will cover all the loggers that are not explicitly defined (note that the default level is DEBUG but this will usually result in extensive logging at the root level). Each individual logger, with the name matching a com.gieman.tttracker package, is set to log level DEBUG. This configuration gives us considerable flexibility and control over package-level logging properties. In production we would normally deploy a WARN level for all loggers to minimize logging. If an issue is encountered, we would then selectively enable logging in different packages to help identify any problems. Unlike log4j, this dynamic reloading of logger properties can be done on the fly thanks to logback's scan="true" scanPeriod="30 seconds" option in the <configuration> node. More information about the logback configuration can be found here: http://logback.qos.ch/manual/configuration.html.
Follow the New File steps outlined in the previous section to create the test-persistence.xml file. Enter the following persistence context definition:
<?xml version="1.0" encoding="UTF-8"?>
<persistence version="2.1" xmlns="http://java.sun.com/xml/ns/persistence" xmlns:xsi="http://www.w3.org/2001/XMLSchema-instance" xsi:schemaLocation="http://java.sun.com/xml/ns/persistence http://java.sun.com/xml/ns/persistence/persistence_2_1.xsd">
  <persistence-unit name="tttPU" transaction-type="RESOURCE_LOCAL">
    <provider>org.eclipse.persistence.jpa.PersistenceProvider</provider>
    <class>com.gieman.tttracker.domain.Company</class>
    <class>com.gieman.tttracker.domain.Project</class>
    <class>com.gieman.tttracker.domain.Task</class>
    <class>com.gieman.tttracker.domain.TaskLog</class>
    <class>com.gieman.tttracker.domain.User</class>
    <exclude-unlisted-classes>true</exclude-unlisted-classes>
    <properties>
      <property name="eclipselink.logging.level" value="WARNING"/>
    </properties>
  </persistence-unit>
</persistence>
This persistence unit definition is slightly different from the one created in Chapter 3, Reverse Engineering the Domain Layer with JPA:
<?xml version="1.0" encoding="UTF-8"?>
<persistence version="2.1" xmlns="http://xmlns.jcp.org/xml/ns/persistence" xmlns:xsi="http://www.w3.org/2001/XMLSchema-instance" xsi:schemaLocation="http://xmlns.jcp.org/xml/ns/persistence http://xmlns.jcp.org/xml/ns/persistence/persistence_2_1.xsd">
  <persistence-unit name="tttPU" transaction-type="JTA">
    <provider>org.eclipse.persistence.jpa.PersistenceProvider</provider>
    <jta-data-source>jdbc/tasktimetracker</jta-data-source>
    <exclude-unlisted-classes>false</exclude-unlisted-classes>
    <properties/>
  </persistence-unit>
</persistence>
Note that the testing persistence-unit transaction type is RESOURCE_LOCAL rather than JTA. Our testing environment uses a local (Spring-managed) transaction manager rather than the one provided by our GlassFish server container (which is JTA). In both cases, the tttPU persistence unit name matches the @PersistenceContext unitName annotation of the EntityManager field in the GenericDaoImpl:
@PersistenceContext(unitName = "tttPU")
protected EntityManager em;
The second difference is the way the classes are discovered. During testing our domain entities are explicitly listed and we exclude any classes that are not defined. This simplifies processing and ensures that only the required entities are loaded for testing without scanning the classpath. This is an important point for Windows users; on some Windows versions, there's a limit to the length of the command-line statement, and therefore, a limit on how long you can make your classpath argument. Using classpath scanning, the loading of domain entities for testing may not work, resulting in strange errors such as:
org.springframework.dao.InvalidDataAccessApiUsageException: Object: com.tttracker.domain.Company[ idCompany=null ] is not a known entity type.; nested exception is java.lang.IllegalArgumentException: Object: com.tttracker.domain.Company[ idCompany=null ] is not a known entity type.Always ensure that your testing persistence XML definitions include all domain classes in your application.