
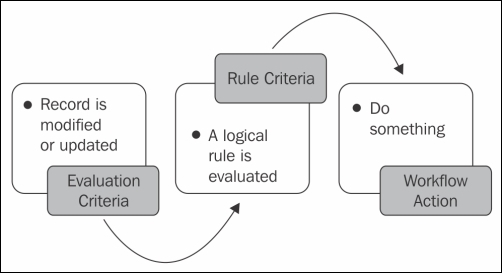
A workflow is a simplified version of Process Builder. They work on a simple statement: if the condition is satisfied, do something. A typical workflow is shown in the following diagram:
Library Management wants to send an e-mail reminder to any member who, seven days after taking out a book, has still not returned it. They have an e-mail template ready to send the reminder.
The following steps will illustrate how to create a workflow:
- Navigate to App Setup | Create | Workflow & Approvals | Workflow Rules.
- Click on New Rule to begin.
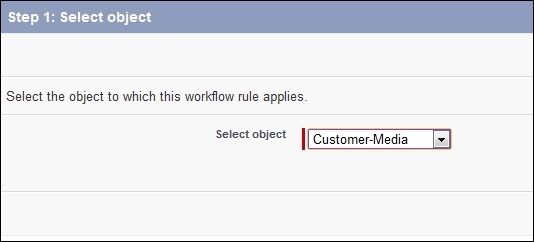
- Select the object on which the workflow will be triggered and click on Next. In this example, we will select the Customer–Media object:
- Give the rule a name: Send an email:

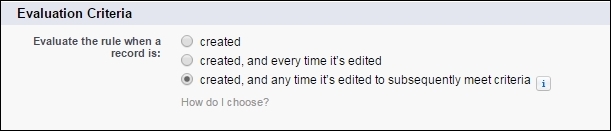
- Select the Evaluation Criteria. The evaluation criteria for a workflow can be any of the following:
- When a record is created or when a record is edited and did not previously meet the rule criteria: This rule triggers during creating and updating the object until the criteria are met. It is not retriggered once the criteria are satisfied.
- Only when a record is created: This ignores updates to existing records.
- Every time a record is created or edited: This option triggers during creating and updating records irrespective of whether it still meets the criteria. The workflow is repeated every time there is change in the value. We cannot add time-dependent actions to the rule if we choose Every time a record is created or edited.
- For the purpose of the example, the evaluation criteria will be when a record is created or when a record is edited and did not previously meet the rule criteria:
Rule Criteria: We can create a formula as the rule criteria or select a rule. Select formula evaluates to true as the Rule criteria and select
AND(NOT( ISBLANK( Issue_Date__c ) ),ISBLANK( Return_date__c ))as the rule criteria. The formula checks for the Issue Date and confirms that the book is not returned yet: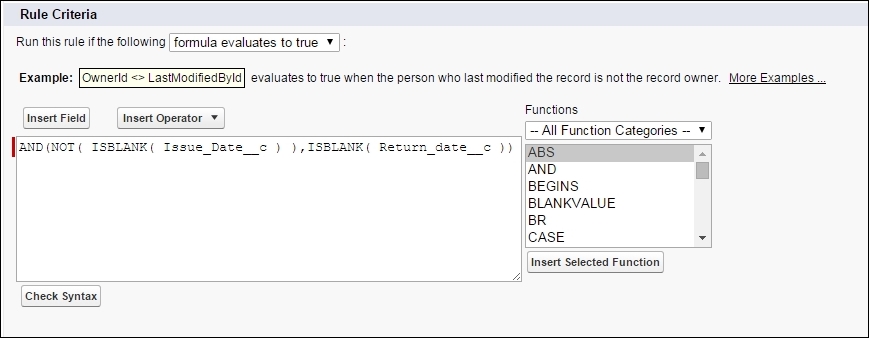
- Click on Save and then Next.
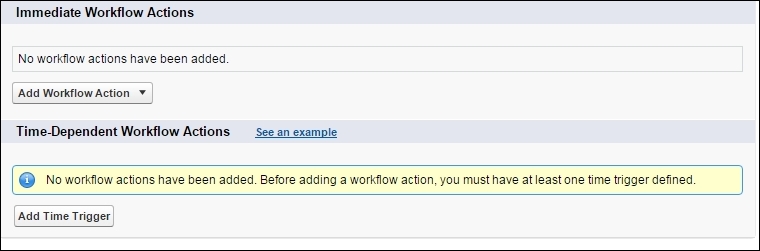
- We can add immediate actions, as shown in the following screenshot:
- Workflow Actions: We can add different actions for the workflow to perform once the workflow rule criteria and the entry criteria are evaluated. We can add the following actions to the workflow:
- Task: A task is created for any user once the workflow is triggered. Tasks are set in the Salesforce calendar and can be directly synchronized with the other calendar application by the user.
- E-mail alert: We can also send an e-mail alert to reach recipients if the criteria are met. For example, if a book reserved by the member has recently checked in, an e-mail alert will be triggered to the customer to collect the book.
- Field update: We can make an automatic field update after a certain criterion is met. For example, if we automatically change the status of the book once it is returned, we can update the field using this action.
- Outbound message: An outbound message is sent to the external server or web service.
- For the exercise, we are going to add a time-trigger to send an e-mail seven days after
Issue_date__c. To add the time-trigger, click on the Add Time Trigger button on the workflow detail page: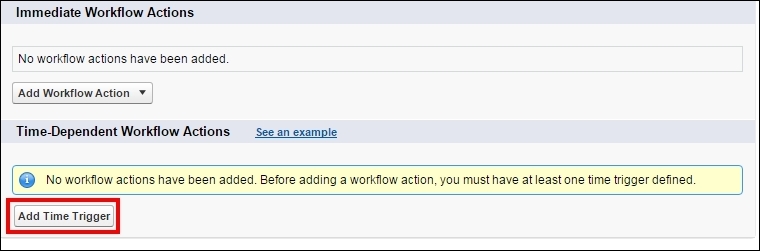
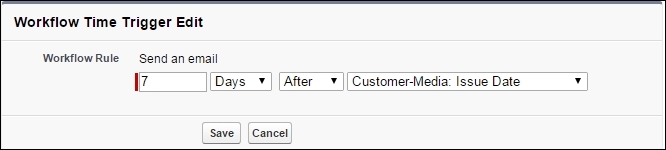
- Select 7 days after Issue date as the time trigger for an e-mail action:
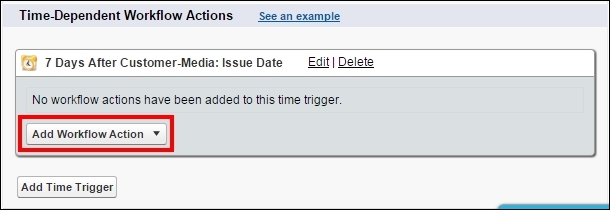
- Now that we have a time trigger, we can add one of the four actions discussed earlier. For example, we will select send an e-mail as an action:
- On selecting E-mail as an action, a new window opens to configure the e-mail action.
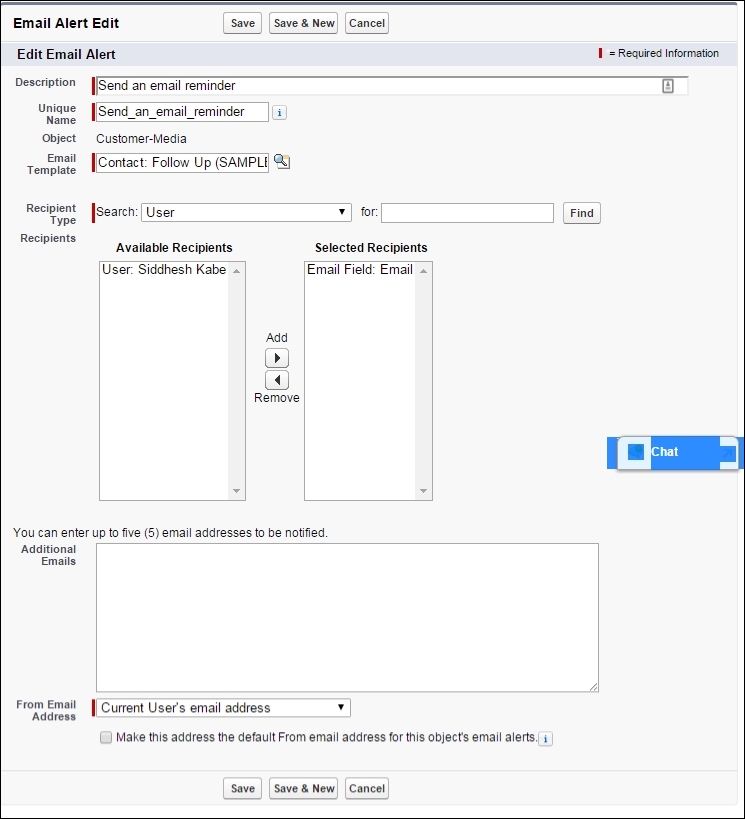
- We can choose any
emailtype field as a Recipient type, and select a template to send an e-mail. Click on OK to return to the workflow. - Click on the Done option to complete the workflow. Once we finish designing the workflow, it has to be activated:

A time-dependent workflow cannot be used if the Evaluation Criteria is set to Every time a record is created or updated.
If the record has an action pending in the queue and the workflow is modified and does not meet the criteria, the pending action is canceled. For example, in the preceding example, if the workflow is fired today with the time-dependent action set for seven days later, and if between seven days, the record is changed and it no longer satisfies the entry criteria, the time-dependent action is canceled.