
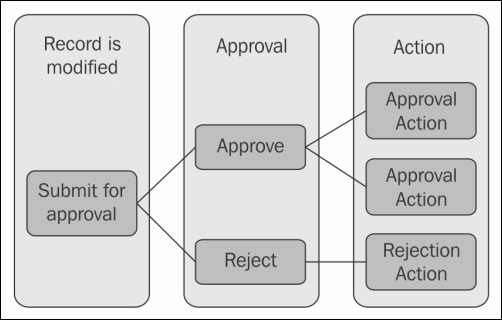
Apart from automating the process workflows, Force.com also provides a system to automate the approval process. The difference between workflows and an approval process is that an approval process requires a manual decision between the flows. A typical approval process flow is as follows:
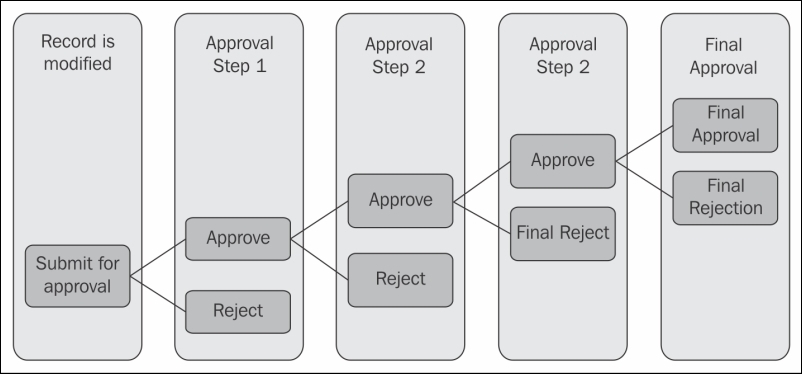
An approval process can be a single step or multiple steps. At every approval stage, we can add a set of actions. The following diagram shows the visualization of a multi-stage approval process:
Let's create a multi-step approval process.
Since time is a subjective term, the library wants the provision to provide a discount on the fine collected. However, the discount should be approved by the head librarian and supervisor. Every librarian is empowered to give a discount of up to 5% for every customer. However, any discount above 5% should be approved by the supervisor and any discount above 50% should be approved by the head librarian.
Note
Before creating the approval process, first check whether all the items required for the approval process are in place. We will define the approval process e-mail template. We need to determine who is submitting an approval to whom. We also need to determine how many approval steps are needed. We will need a new Discount_on_Fine__c field of the Percent (2,0) type on the Customer__c object for this approval process.
The steps to create an Approval Process are as follows:
- Navigate to User Name | Setup | App Setup | Create | Workflow & Approvals | Approval Process.
- Select the Customer__c object for which we need the Approval Process, and click on User Standard Setup Wizard.
- Enter the unique name Customer Discount Approval and process name, and click on Next.
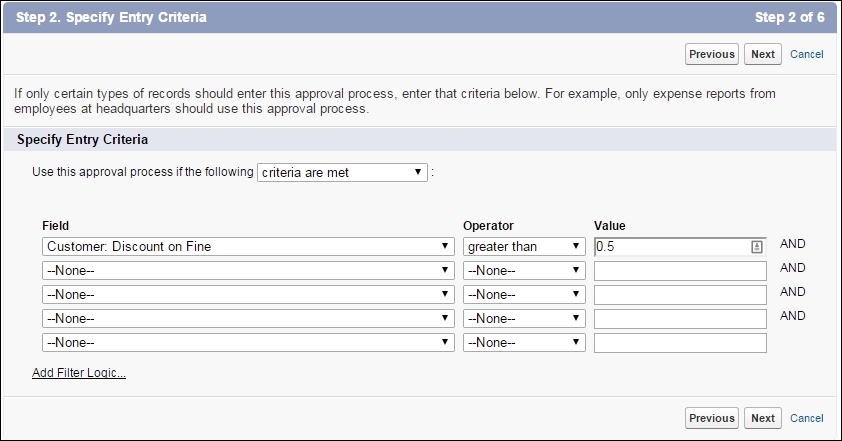
- Specify the entry criteria. The Entry Criteria define which records when submitted for approval should enter this approval process. An object may have multiple approval processes defined; when a record is submitted, each approval process is evaluated in order, and the first one whose entry criteria matches the record uses that approval process. This is exactly how Assignment Rules operate with Leads and Cases. For this example, only those records that have a discount greater than 5% will be entered. Then, click on Next:
- In the next step, we can select the field for Automated Approval Routing. We can assign the approval process dynamically to the manager of the submitter using this option, as shown in the following screenshot:

Tip
If the approver is not the direct reporting manager to the submitter or if the Manager field is empty for the user, this option can be set to blank and the approver can be selected on the basis of the step. This process also applies to the multi-step approval process where every stage has a different approver.
- In the same step, let's select Record Editability Properties. When we submit a record for approval, it is automatically locked for editing and can be edited only when it is approved. Using this option, we can allow the approval user to edit the record along with the system administrator. However, the submitter can never edit a record after submission until it is approved, rejected, or recalled. Select Administrators ONLY ... and click on Next:

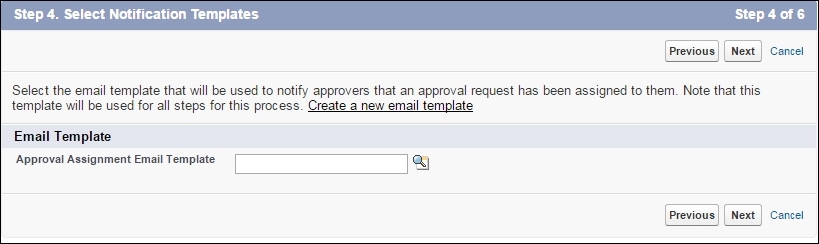
- In this step, we need to select an E-mail Template that can notify the user of the record for approval. As the record moves through the different levels of approval, each approver who can approve the record receives the e-mail. However, for example, if the record does not reach the second approval step, the second approver does not receive this e-mail:
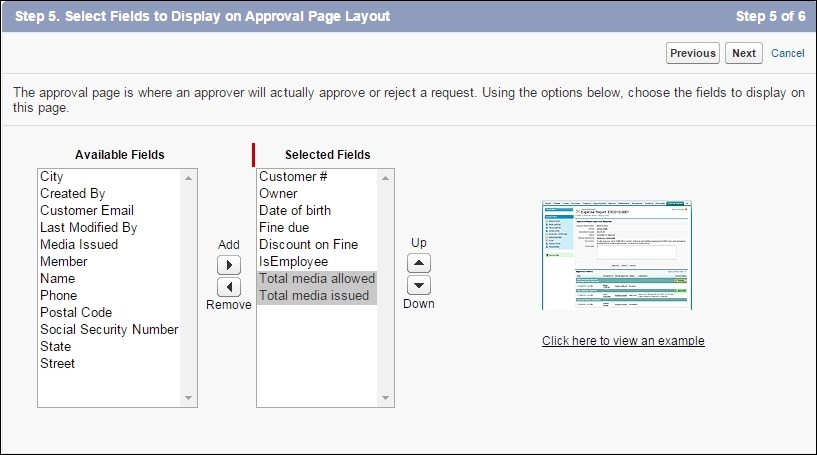
- Select Fields to Display on Approval Page Layout. This is a quick way to view the record page where the approver will land after clicking on the link through the e-mail. This page should contain all the critical decision-making information. Select the important fields, such as Discount on Fine and Fine due, and click on Next:
- Select the initial submitters for the approval process. This option helps us determine which users are authorized to submit a record for approval:

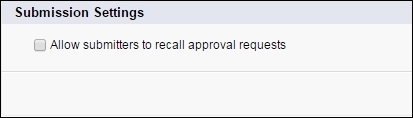
- Also, in Submission Settings, we can select Allow submitters to recall approval requests. This option allows users to change their mind and recall the approval request, and then click on Save:
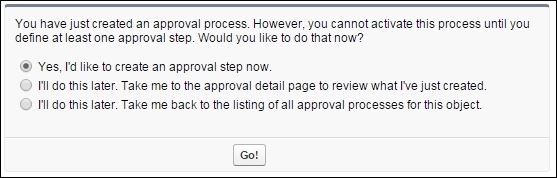
- After clicking on Save, there is a decision box that appears saying that an approval step is to be added immediately. On selecting Yes, the wizard to create approval steps will pop up:
The approval process wizard helps us create an approval process. The next phase in an approval process is the steps where we determine which criteria the approval process should be routed through and to whom. The record filtration in the different steps can be visualized in the following diagram:
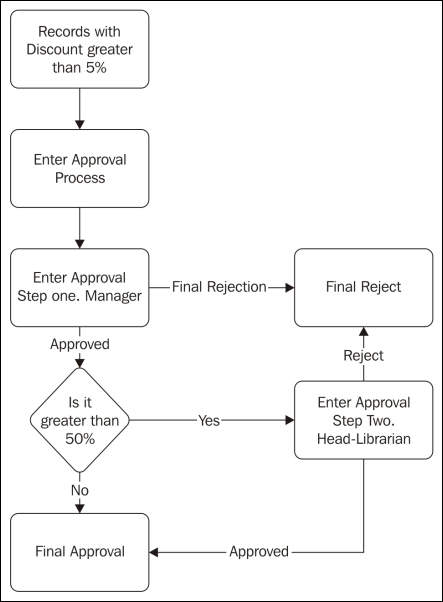
Note that in the Creating a multi-step approval process section, we did select the entry criteria for records to enter if greater than 5%; we will again subfilter them or let all the records enter the approval step, depending on the condition. For example, as shown in the preceding diagram, the main entry criteria could be discounted by more than 40 %.
However, there are two different managers to approve the discount from 40 to 50 % and discounts above 50 %; hence, we add further conditions in the approval steps:
- Go to the Approval Process detail page. If we are continuing from the previous steps, then skip the first two steps and proceed to the third step.
- Click on New Approval Step, which will open a wizard.
- Name the approval process
Discount greater than 5%;and allocate1as a step number, and click on Next: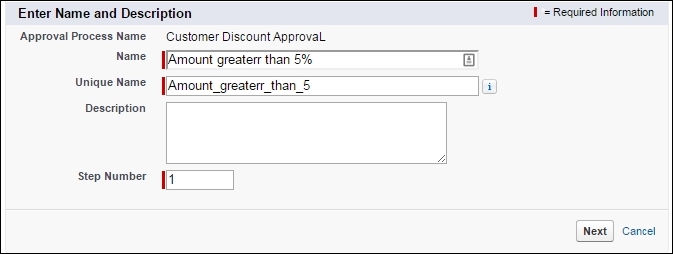
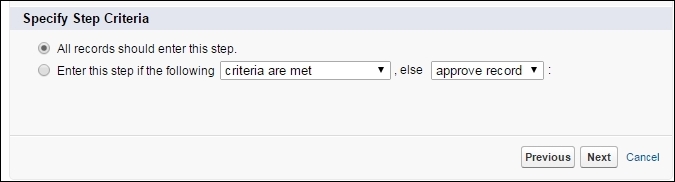
- Specify Step Criteria: If we wish to filter the records for different approval steps or let all the records enter in the step. If we filter the criteria, we need to also mention what to do with the remaining records, that is, auto-approve or reject them. Because for the approval process we have already specified the criteria, all the records that enter this step will be greater than 5%; hence, all the records should enter this step:
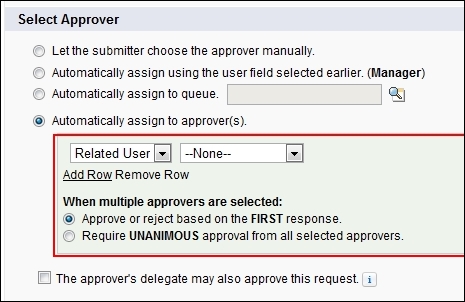
- Select Approver: We have to select the approver for the record in this case. Apart from going to the manager for approval, we can assign the record to a queue of users or we can also let the user choose the approver manually. We will select Manager as the approver:
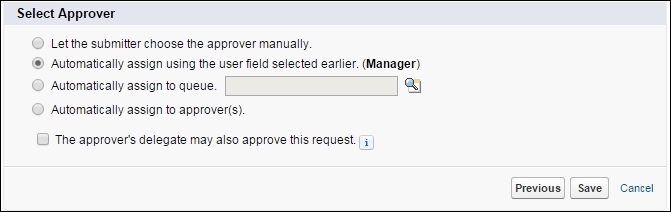
Also, we can directly specify the user or users who can approve the record. If the approval is assigned to multiple users (by selecting Automatically assign to approver(s)) or if we select the checkbox for the delegate to approve the record, the manager's delegate can also approve it. This is called the delegated approval process.
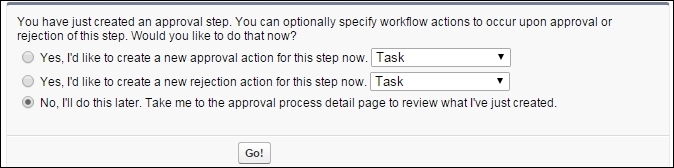
- This step gives us the option of jumping directly to adding the approval or rejection action to the step. The actions are similar to those of workflow actions, and we will come to that in the next section. Go to the Approval Process detail page to see the work that we did.
An approval process uses the same actions as that of a workflow. However, we can add actions at every step in the approval process. If there are five steps, each of them will have two sets of actions each: one for approved actions and the other for rejected actions. Along with that, we can specify Submission actions, Final Approval Actions, and Final Rejection Actions:
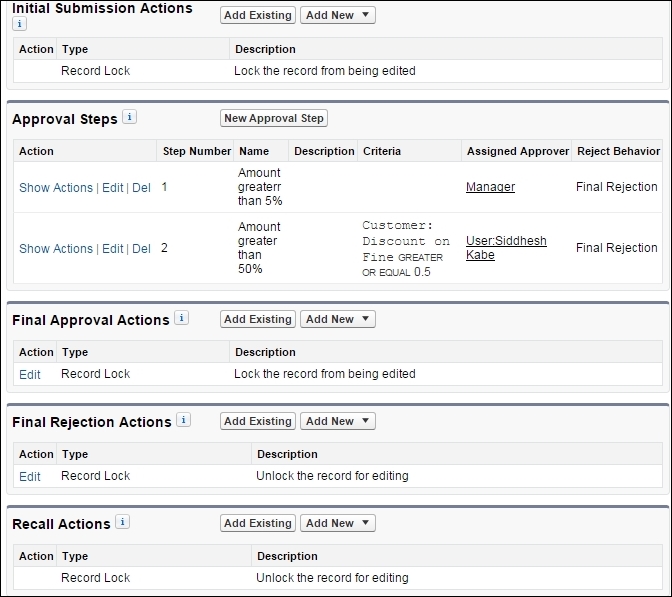
We can specify the default actions that can occur when the record is:
- Submitted: By default, Force.com adds a new type of action to this step, which is a record lock. However, we can modify this action and unlock the record. This happens when a record is submitted for approval; a possible action would be a field update for Status from Open to Under Approval.
- Approved: These actions are executed when the record is approved in a step and is still in the approval process. Possible actions can be updating the status to Approved by XYZ or Under XYZ approval.
- Rejected: These actions are executed when the record is rejected in a step and is still assigned to someone else. Possible actions can include an e-mail alert sent to the submitter stating that it has being rejected.
- Finally approved: The default final approval action is to Lock the record. It is recommended that the record remains locked to prevent the user from editing. These actions are executed at the end of the approval process when the record is finally moved out of it. Possible actions can be updating the Status to Approved and an e-mail alert sent to the submitter confirming about the approval.
- Finally rejected: The default final rejection action is to Unlock the record. These actions are executed when the record is finally rejected with comments from the rejecter.
- Recall action: When a record is recalled, it is automatically unlocked. If the submitter has a change of heart once the record is submitted for approval, he can recall the record. This is possible only if we specify that the submitter can recall the record.
We can specify the action to any of the preceding steps. The actions are similar to workflow actions, and we can also reuse the existing workflow actions in the approval process.
A parallel approval step has many approvers in a single step. The approval process can be assigned to more than one approver; in this case, we have two scenarios:
- All the approvers need to approve the record unanimously
- A single person in the group can approve the record
A common scenario would be if you need to get an approval for an amount of more than 10,000 for a project; it will go to the project manager as well as the finance manager for approval. Both the approvals are required.
To create a parallel approval process, first create an approval process, as mentioned earlier. Then, perform the following steps to create the parallel approval step:
- Go to the Approval Process detail page. If we are continuing from the previous steps, then skip the first two steps and proceed to the third step.
- Click on New Approval Step, which will open a wizard.
- Give the approval process a valid name and a valid step number, and click on Next.
- Specify Step Criteria: If we wish to filter the records for different approval steps, let all the records enter in the step, or if we filter the criteria, then also mention what to do with the remaining records, that is, auto-approve or reject them.
- Select Approver: Select Automatically assign to approver(s) so that we can directly assign the user or the related user.
- Now, we can specify whether we need a unanimous approval from the user or a single approver is enough.