
To connect the Arduino GPS shield with the Arduino Ethernet board, perform the following steps:
- Stack your Arduino GPS shield with the Arduino Ethernet board.
- Move the UART/DLINE switch to the DLINE position. This is a two-way switch that can be used to select the UART or DLINE mode to communicate GPS shield with Arduino.
- UART: This connects the GPS module's serial lines to Arduino hardware serial (D0/RX and D1/TX).
- DLINE: This connects the GPS module's serial lines to the Arduino software serial (D2 and D3). See the solder marks label next to the UART/DLINE switch.
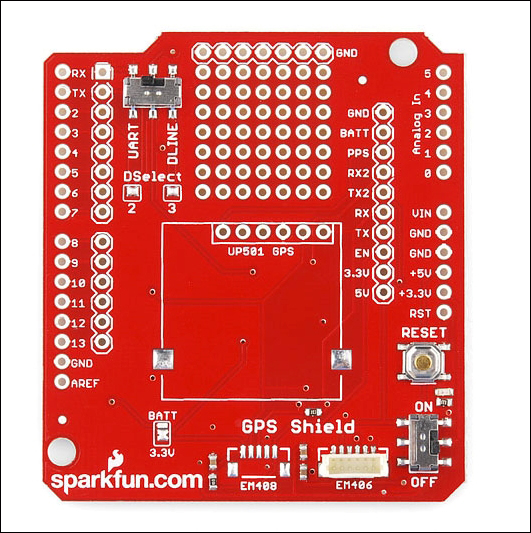
The Arduino GPS shield PCB: Image courtesy of SparkFun Electronics (https://www.sparkfun.com)
- Connect the 9V DC power supply to your Arduino Ethernet board. Then, connect the Arduino Ethernet board to the computer with an FTDI cable a USB to Serial (TTL Level) converter.
- Now, download the TinyGPSPlus library from https://github.com/mikalhart/TinyGPSPlus/archive/master.zip and extract it to your Arduino Installation's libraries folder.
Follow these steps to test the GPS shield:
- Open a new Arduino IDE, then copy and paste the sample code
B04844_06_01.inofrom theChapter 6code folder of this book. (Note that this is the sample code included with the TinyGPSPlus library to display the current location by latitude and longitude with date and time). You can also open this sketch by navigating to File | Examples | TinyGPSPlus | DeviceExample on the menu bar. - Verify and upload the sketch to your Arduino board or Arduino Ethernet board.
- Open the Arduino Serial Monitor by going to Tools | Serial Monitor. The following output will be displayed:
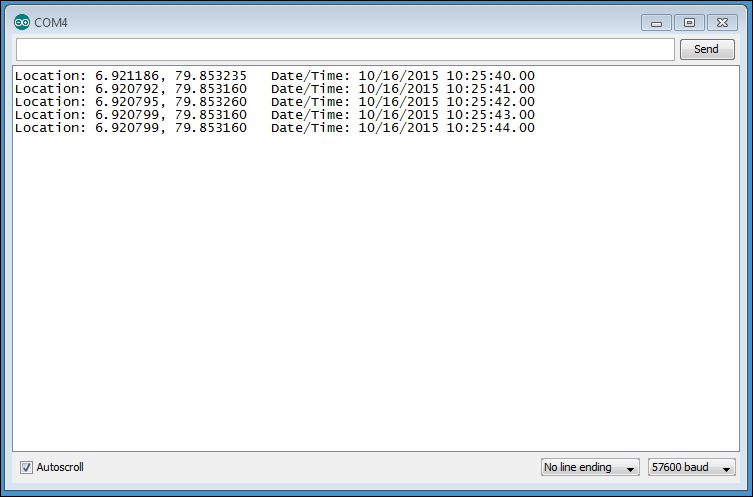
In each entry, the current location is displayed with latitude, longitude, and date/time. Next, you will learn how to use these values to display the location on Google Maps.
Google Maps JavaScript API can be used to display the current location with a marker on Google Maps. We can simply pass the latitude and longitude to the Google JavaScript API library and display the current location as a simple marker.
The following steps will explain you how to display the Arduino GPS shield's current location on Google Maps:
- Open a new Arduino IDE and paste the sample code
B04844_06_02.inofrom theChapter 6code folder. Verify and upload the sketch to your Arduino Ethernet Shield or Arduino Ethernet board. - The code consists a mix of Arduino, HTML, and JavaScript. Let's look at some important points of the code.
- The following JavaScript function creates a new Google map position with latitude and longitude:
var myLatlng = new google.maps.LatLng(-25.363882,131.044922);
The latitude and longitude values should be replaced with the real time returning values of the Arduino GPS shield as follows:
var myLatlng = new google.maps.LatLng(gps.location.lat(),gps.location.lng());
- The following JavaScript function will create a map and display a simple marker on Google Maps based on the location provided by the map options:
var map = new google.maps.Map(document.getElementById('map-canvas'), mapOptions);
- The following JavaScript function creates a new Google map position with latitude and longitude:
- Open your web browser and type the IP address of the Arduino Ethernet Shield and navigate to the site. Read Chapter 1, Internet-Controlled PowerSwitch, for information on how to find the IP address of your Arduino Ethernet Shield. Example:
http://192.168.10.177. - Your web browser will display your GPS shield's current location on the Google Map, as shown in the following screenshot:
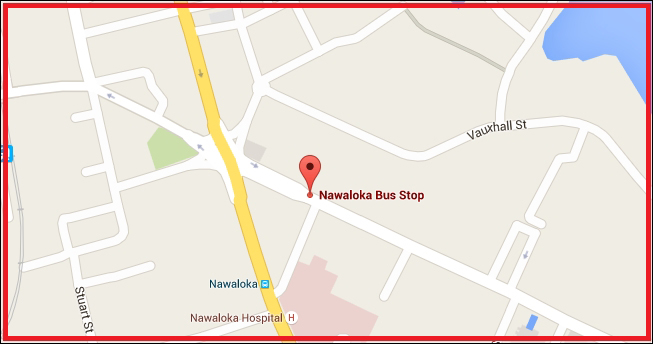
The current location of the Arduino GPS shield is displayed on the Google Map with a marker icon
In the next section, you will learn how to send the current GPS location by SMS to the client using Twilio and Temboo.