NetBeans is another popular IDE. This is backed by Oracle, is equally feature-rich and extensible, and supports multiple languages, such as Eclipse.
As of writing this, NetBeans 8.0.2 is the most recent edition. The screenshots in this book reflect this version.
NetBeans can be downloaded in two different ways (if not downloaded already):
- Oracle provides a download of the latest JDK along with the latest version of NetBeans. This is a good option, especially if you have not installed JDK yet.
- If JDK is already installed, then NetBeans can be downloaded separately from https://netbeans.org/. There are different bundles of NetBeans (similar to Eclipse). You can choose one from Java SE or Java EE, or all of them, based on your preference.
Now that NetBeans is installed, let us create a new Maven project, by performing the following steps:
- Navigate to Tools | Options. Choose Java and click on the Maven tab. You will notice Maven Home showing up as Bundled with (Version: 3.0.5):
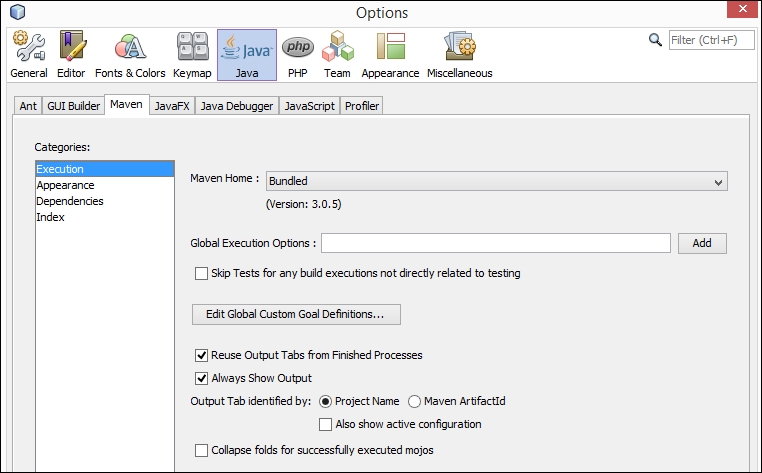
- You can leave it as is or change it to your Maven installation by choosing the dropdown.
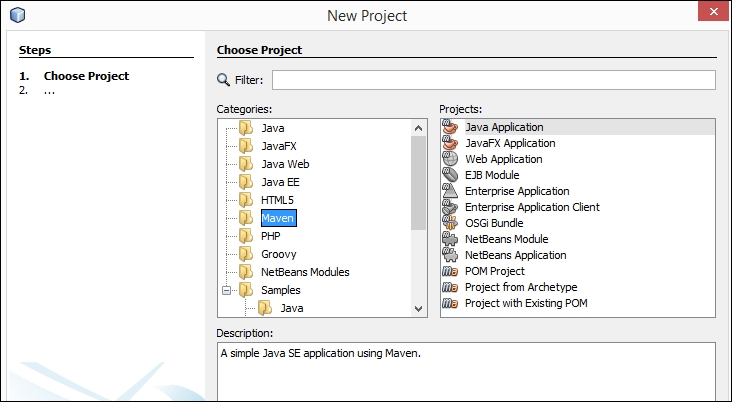
- Now navigate to File | New Project.
- Choose Maven from Categories: and Java Application from Projects:, as shown in the following screenshot:
- Specify the details of the project:
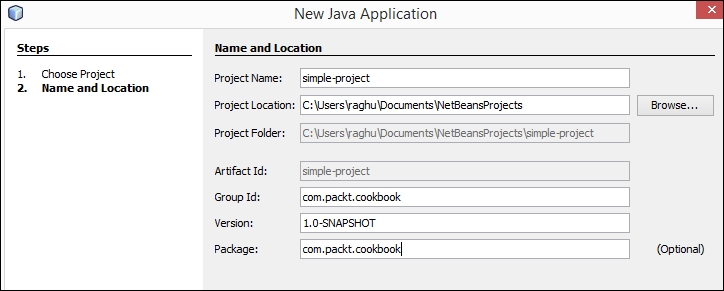
You are done! A new project is now created in NetBeans.
Like Eclipse, NetBeans has built-in support for Maven. Unlike Eclipse, NetBeans did not use the Maven archetype for a quick start. Instead, it created a new project using its template. In this case, you will notice that it did not create the dummy source and test class that the quick archetype creates.