Importing an existing Maven project in IntelliJ IDEA

While we can use IntelliJ IDEA to create a new project, in most cases you will already have an existing project in your filesystem. In the latter scenario, you will want to import this project.

Getting ready

As IntelliJ IDEA needs a Java environment to run, let us first ensure that the Java environment is set up on our system:

  1. Ensure that JDK is installed.
  2. Download IntelliJ IDEA by visiting https://www.jetbrains.com/idea/ and clicking on the Download link.
  3. Ensure the project SDK is set to your Java installation.

How to do it...

To import an existing Maven project in IntelliJ IDEA, perform the following steps:

  1. Start IntelliJ IDEA.
  2. Choose Import Project. Browse for the simple project that we created earlier:
    How to do it...
  3. Make changes if required. The changes can be made as shown in the following screenshot:
    How to do it...
  4. Confirm the project to be imported:
    How to do it...

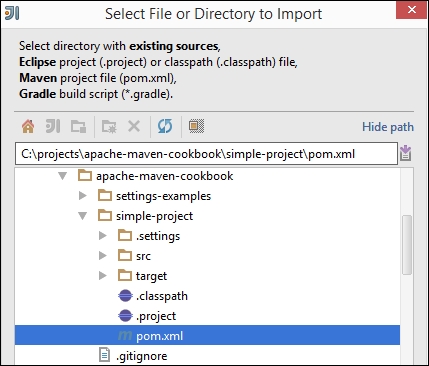
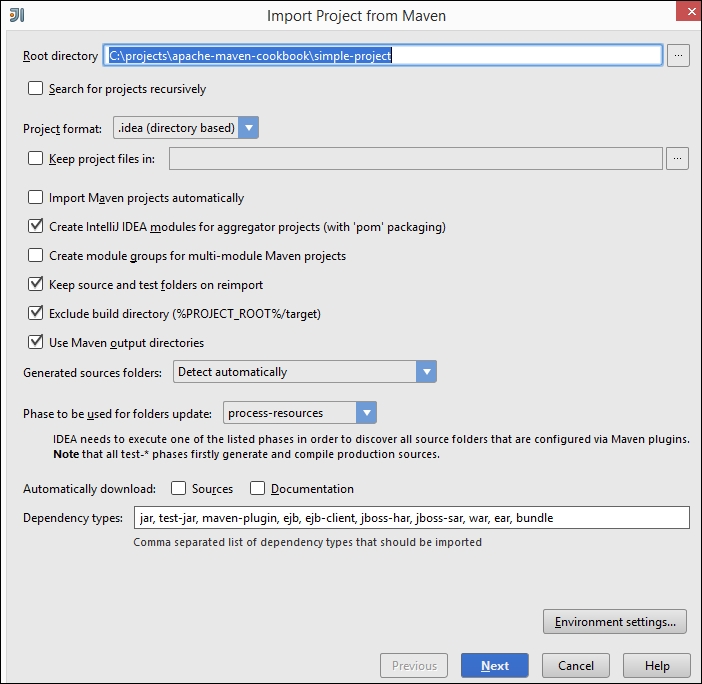
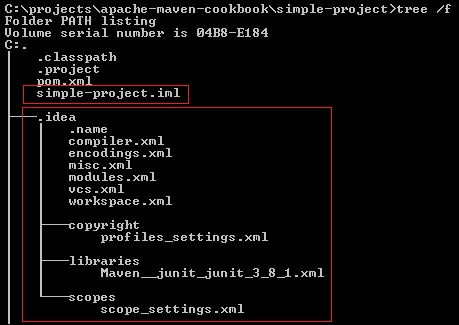
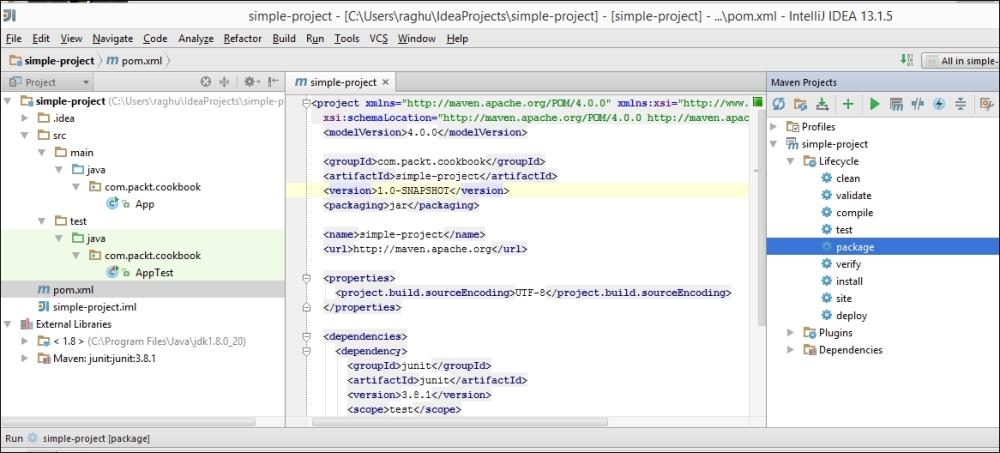
You are done! The existing Maven project is now imported to IntelliJ IDEA.

How it works...

IntelliJ IDEA has first-class support for Maven. It can parse pom files to determine the project structure and dependencies, and lay them out in the IDE.

Once the project is opened in IntelliJ IDEA, the following folders and files get created:

How it works...

There's more...

All Maven-related operations can be conducted from the IDE by opening the Maven Projects tab in IntelliJ IDEA:

There's more...

You can choose Lifecycle and click on the phase to be run. For instance, in the preceding screenshot, we run the package phase of the Lifecycle.

..................Content has been hidden....................

You can't read the all page of ebook, please click here login for view all page.
Reset
3.15.31.22