
One really cool thing about platformer games are their physics-based obstacles. This would mean items such as teeter-totters, items that crumble, items that swing, and so on. Let's start with a basic pile of rocks with a ramp on it. Start by creating a new scene and copying our beginning ground block into it, as done before. Also, let's name this scene Rock Jump; duplicate an additional eight ground-blocks (so there's nine in total), and extend our scene bracket to match the length of the eight ground-blocks. You should have something like the following screenshot:
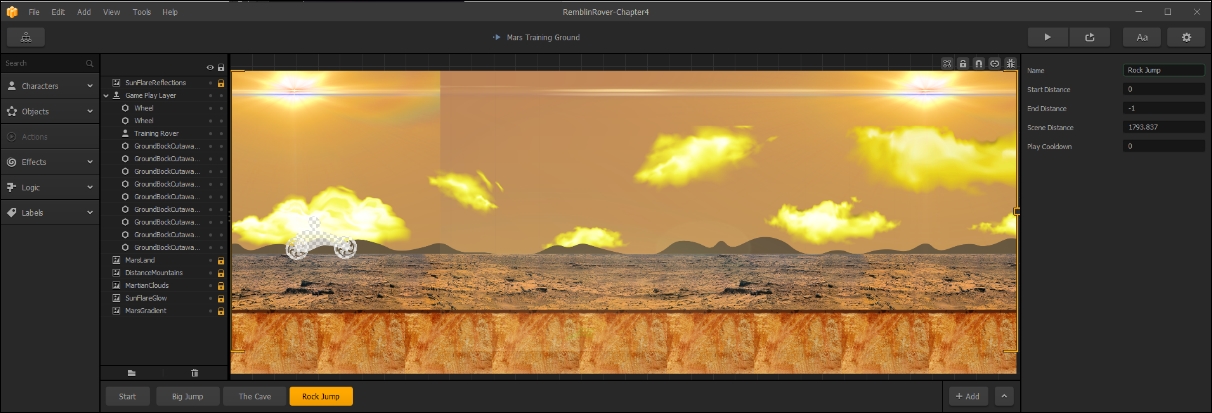
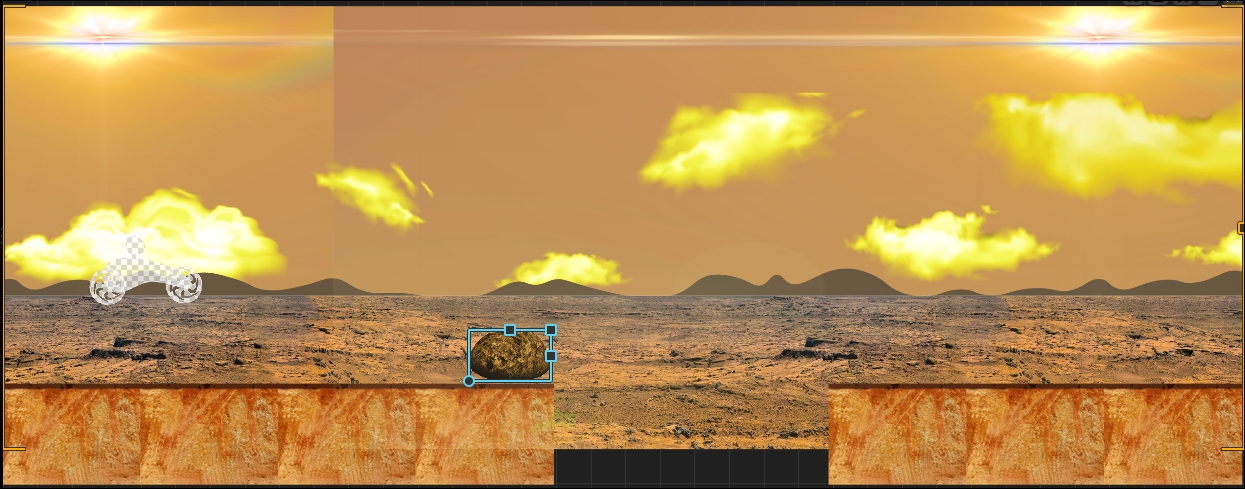
Now, remove the fifth and sixth block from the left to create a two-block gap just right of center. We duplicate the blocks all the way across the scene to make sure we have a level layer (rather than dragging and dropping across a gap). It's just a quicker way of doing things, but if you like, the same could be accomplished by dragging the fifth block over, and then continuing the duplication. Your exact process is your preference. Let's move on...
In the Projects/RamblinRover/Ground folder, you'll find the rock001.png file. Drag that to the stage as an object, and using the scale handle on the top-right of the box around the rock, scale it down so that it's just a bit taller than one of the wheels of the rover.
Then, please position the rock on the ground so that your stage looks like this:
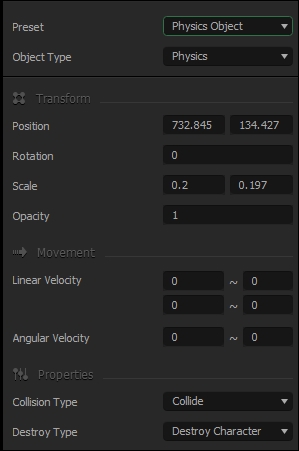
Now, let's make this a physics object. At the top of the Properties window for this object, you'll see a parameter called Preset. Set this to Physics Object. There are several different Presets that do various things to the object settings. All this one really does is change the Object Type parameter to Physics. We just wanted you to be aware of this Preset parameter for now... we'll get deeper into these a bit later. Also, we want this to destroy our character's body if it touches it, so change the Destroy Type to Destroy Character (as we did with the ground-blocks before). The results should look like the following screenshot:
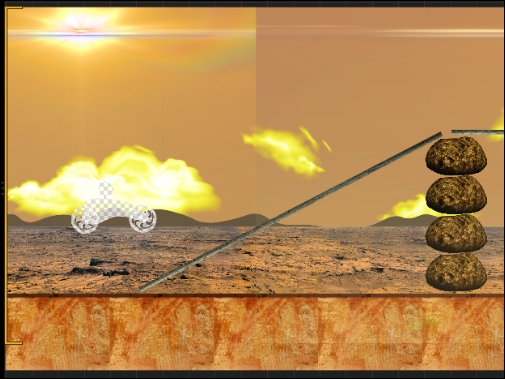
Now, let's make two more duplicates of the rock. We want to create a base for our ramp, and the objective of this is to make the rocks move, or even fall apart as the rover hits the ramp so that the player's strategy is to hit this obstacle as fast as possible. It should look somewhat like the following screenshot:

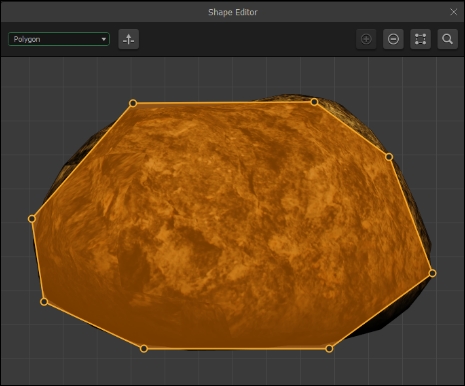
Before we actually add the plank for the ramp, we'll need to set up the rock's collision shape. As we did before for the character, adjust the collision shape for the rock object to match the following screenshot:
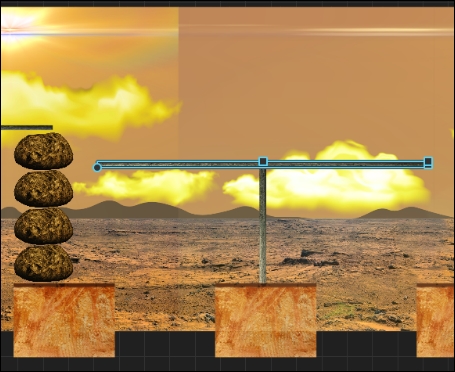
Now, we need an actual ramp. In the same folder as the rock001.png file, a file called steel.png is present. This is a simple metal texture that we can resize however we like. Go ahead and drag that onto our stage as another object. Again, make this a Physics Object, and set it so that it destroys the character on collision.
We can use this metal object to make a nice ramp by just squishing it down vertically, and sizing it a little bit horizontally. Then, if you grab the circle-shaped handle at the bottom-left of the object, you can rotate it. Use these controls, and position the ramp so it looks like this:
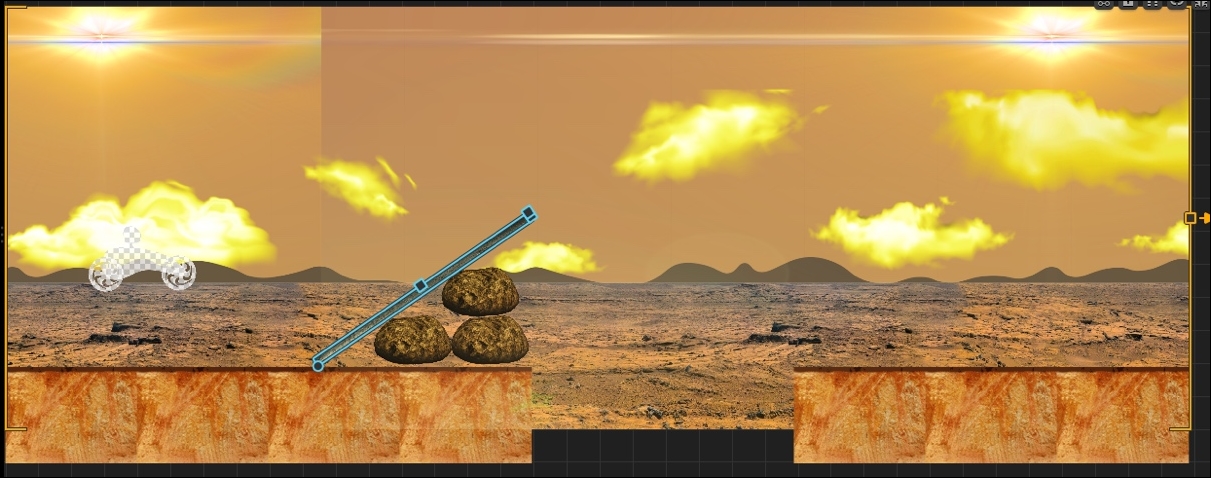
It's okay, for now, if none of these objects are directly touching each other. Remember, gravity will make them all fall upon generation, and they'll sit together (held by the same gravity).
Go ahead and test it out in the preview by soloing this scene and driving it a few times. You'll notice that if you take it at full speed, it holds together just fine, but if you try to slow down, the rover just pushes the ramp and rocks into the ditch... then the player is pretty much out of luck if they want to cross the ravine. Let's try something a bit crazier now...
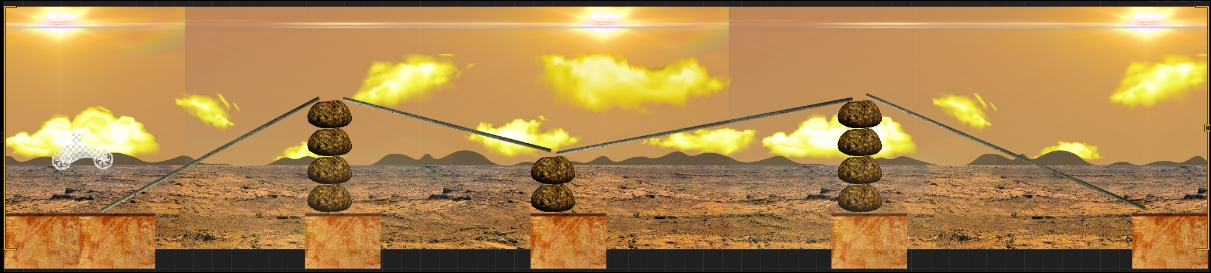
We're going to use the same objects (the rock and steel) that we used in this scene. Go ahead and create a new scene called Crazy Ramp 1. It looks nuts, but based on what you just learned, please try to make this on your own. If you're not able to, we'll explain how to do it starting in the next paragraph. Alright, enough of the prelude...this is our next scene:
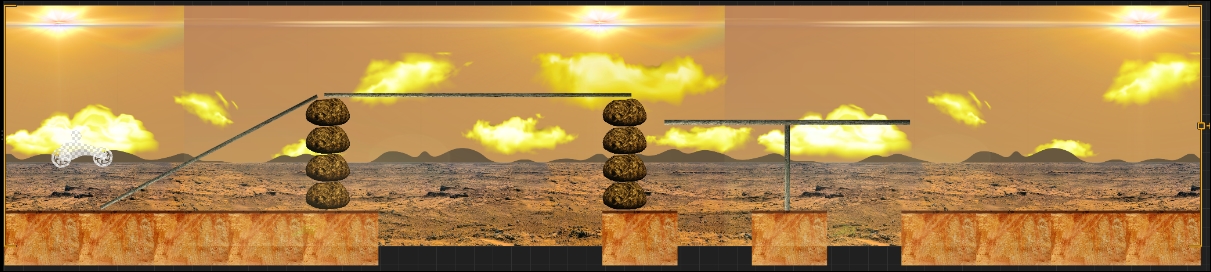
Overwhelmed? Don't worry, let's break it down for you a chunk at a time from left to right. First, let's just skip the ground-blocks...we're pretty sure you get that by now:
The first chunk is the initial ramp (the preceding screenshot). It's pretty much just a taller version of the ramp we made before, rocks (duplicated using the W key) that are all set to be Physics Objects that destroy the character upon collision. Then, the ramp is another steel object squished down and rotated in the same way we adjusted its shape for the last scene. Again, it's a Physics Object that destroys the character upon collision:
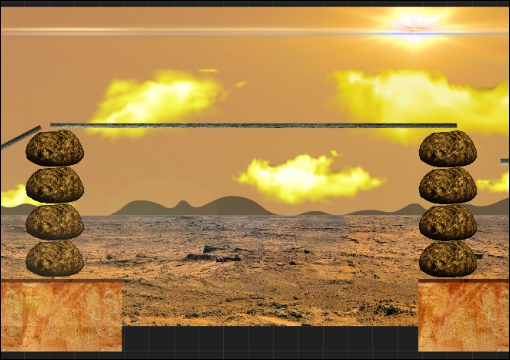
The next section is just a carbon copy of the ramp (pictured above). The only difference is that the rotation of the steel object is set to 0, and it's placed on top of both of the rock pillars.
Finally, it's the T-ramp (in the preceding screenshot). These are both steel objects, and both are Physics Objects that destroy a character upon collision. One is squished horizontally, and the other is vertically scaled down. They are set so that the exact center of the top of the T (which happens to be marked by the vertical-scale handle) is placed in the center of the stem of the T. It will balance the top sheet well, until the rover hits it. Also, when the rover gets to this obstacle, the ramp will increase in pitch as the rover traverses it. Try it out using the Preview function!
Ok, so do you think you're ready to fly without a net to make another Crazy Ramp scene? Good. Make another scene called Crazy Ramp 2, and make it like the following screenshot:
Great job! Now, let's create some basic scenes for the beginning of the level. Remember how we created the original Big Jump and The Cave scenes? Use the same techniques to create these two scenes.
Name this first one Bumps.
And this one we'll call Simple Gap:
Now, let's make sure that the easiest levels are first (just for organizational sake). All you have to do is drag the scenes in the Scene Selection window to their proper positions. When complete, it should look like this:
There we go! So now we have a really good foundation for our first world. Some really simple scenes, and some crazier (at least crazier-looking) scenes. Remember, as it's our first world, it's meant to look cool, but be pretty easy. Now let's make a really fun scene that is one of the coolest things about a motocross game...a loop!