
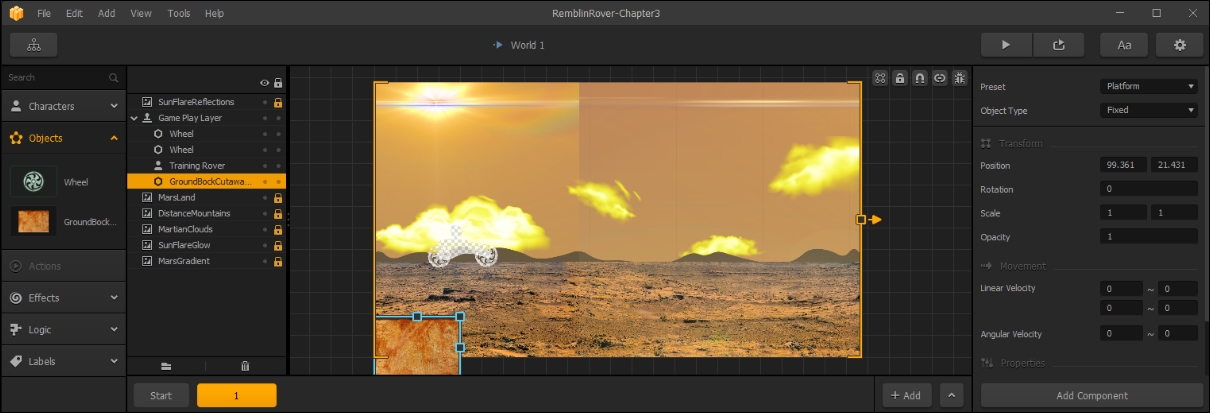
Before we switch to Scene 1, let's highlight the GroundBlockCutaway-Mars object on the far left by clicking on it. Now, load it into your computer's clipboard by copying it (Ctrl + C in Windows or Cmd + C on Mac). Why did we copy this one into memory? Because not only are we now able to copy the object to another scene, but its exact position. Since we're rolling from one scene to the next, we'll want to have the height of the first block of our next scene be the same height as the last block of this scene. And, since all of the blocks are the same height in the Start scene, why not copy the first block? Then its left-to-right position is also set and we won't have to move it.
Now, in the scene selection window (at the bottom of Buildbox), click on the button with a number 1 on it. You'll see an empty scene with our backgrounds in it, and a ghost image of our rover. Paste the GroundBlockCutaway-Mars object onto the stage by using Ctrl + V in Windows, or Cmd + V on Mac. The result should look like this:
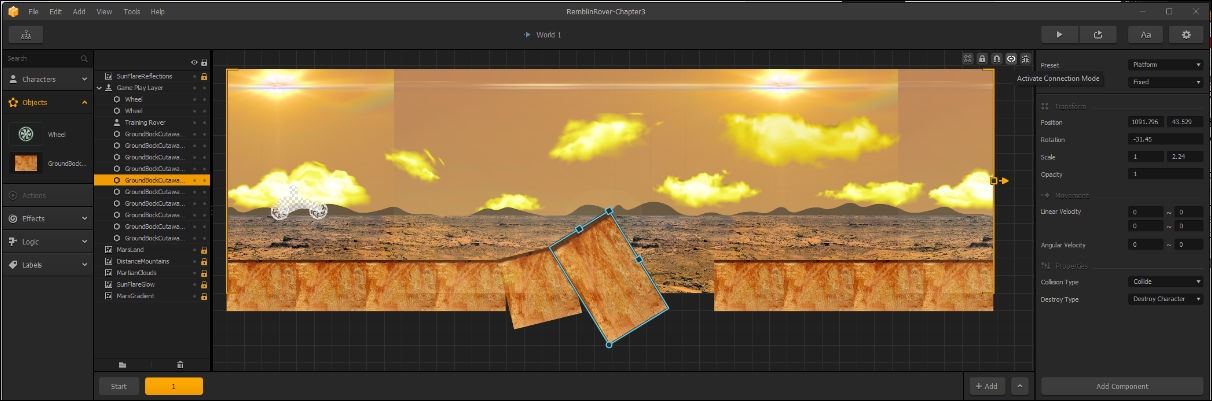
First, let's get a good ground layer to cover a fairly decent sized scene. With the GroundBlockCutaway-Mars selected on the stage, hit the D key on your keyboard 10 times. This will create 10 instances of the ground-block that go well beyond the end of the visible scene. As we did before, grab that bracket-handle (the little square on the right bracket) and extend the scene to the end of the ground-blocks. You'll need to zoom out (using the mouse wheel) to see the whole scene now.
Now, let's create a jump-ramp. Select the fifth block from the left. All of those little squares that line the edge of the selection box are for scaling. The round one in the bottom-left corner is for rotating the block. First, we're going to make the block taller. Drag the vertical-scale handle (the one in the center of the top of the selection square) up until the scale is around 1.4. Now, use that rotational handle (the circle at the bottom-left of the selection square) to rotate the block to somewhere between -13 and -14 degrees. Then, you can position the block so that there are no gaps visually between this block and the previous block, and line up the left corner to the top of the previous block.
Follow the same procedure to make another section of the ramp that's steeper. Select the sixth block from the left, and set the vertical scale to somewhere around 2.25 and the rotation to around -31.5 degrees. Then delete the seventh block by selecting it and hitting the Delete key on your keyboard. This will create a gap to force drivers to keep their momentum up, and not simply drive over the ramp, but to take it at speed and jump the gap. And these are the results:
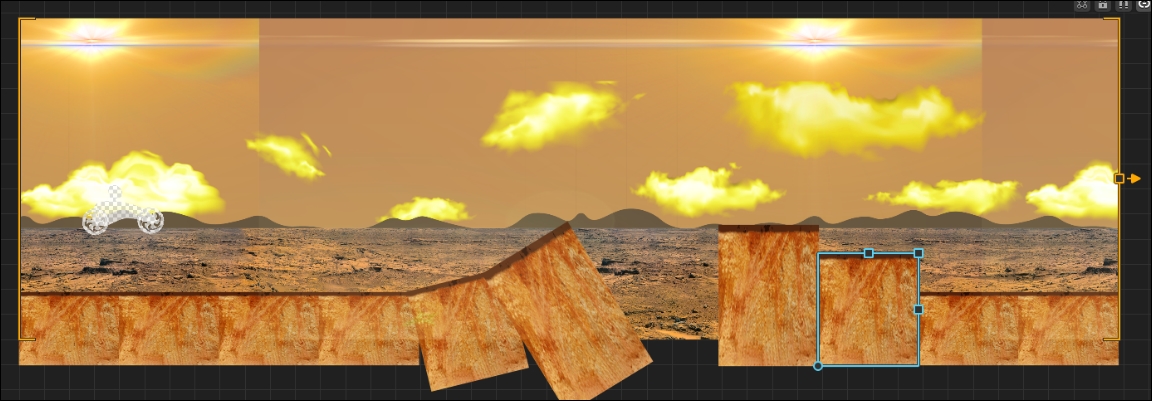
Neat, so we have a jump. But let's take it a step further. The bonus to an endless game is that by combining the different obstacles, the way they approach each one will vary by the previous obstacle's exit. So, let's ensure that this obstacle isn't a gimme if they're going too slow. Let's raise the exit blocks a bit.
Let's begin with the fourth block from the right. Vertically scale it to around 1.9, and move it up so that the top is about even with the top of the ramp. Then, on the third block from the right, let's scale that to around 1.5 and move it up to split the difference in height between the fourth and second from the right to create stair steps. The results should look like this:
I know, you're probably itching to test all of this out. Well, let's get the controls together so that the game is playable, and then we can!