The actual implementing of advertising in Buildbox is a relatively simple proposition. It's a three-step process:
- Sign up with a provider.
- Link to your account in Buildbox.
- Enable ads in UI properties.
Ok... so each of those steps has several sub-steps. But in reality, everything about this is pretty easy. If you can order goods on the Internet... you can do this. Let's get started.
First off, you're going to need to choose providers (or a provider) for ad services. Each platform has its own requirements on what it allows through Buildbox to provide ads for. The following chart shows the providers on the various platforms:
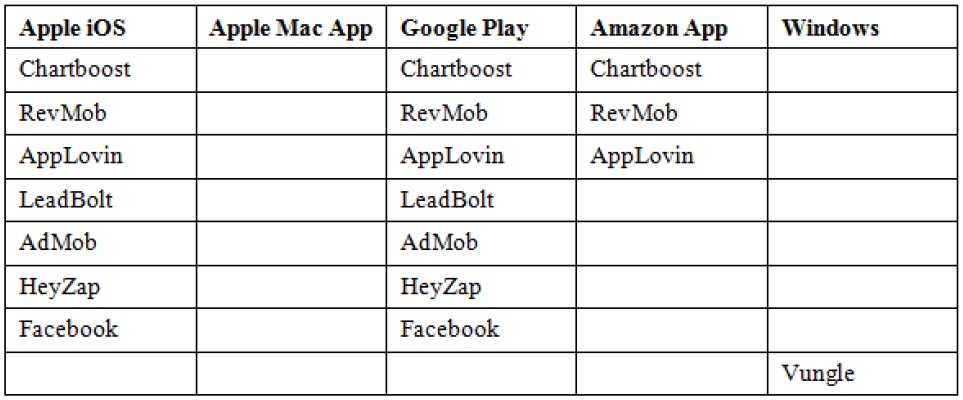
You don't need to use every provider for placing ads. This just gives you better options for what you may or may not want to use. We're going to use RevMob for Ramblin' Rover (as it's one of the most compatible, and therefore requires minimal work), as well as Vungle (because it's the only one that works for the Windows Store). Don't worry though. Almost every service works the same way, and it's pretty much as simple as signing up on Facebook.
Let's start with RevMob (http://www.revmobileadnetwork.com). Once you sign up for an account and log in, you'll see this bar at the bottom of your web browser:
The middle three buttons are the ones we're concerned with (iOS, Android (Google), and Amazon Apps). If you click the Add Amazon App button, you're brought to the following interface:
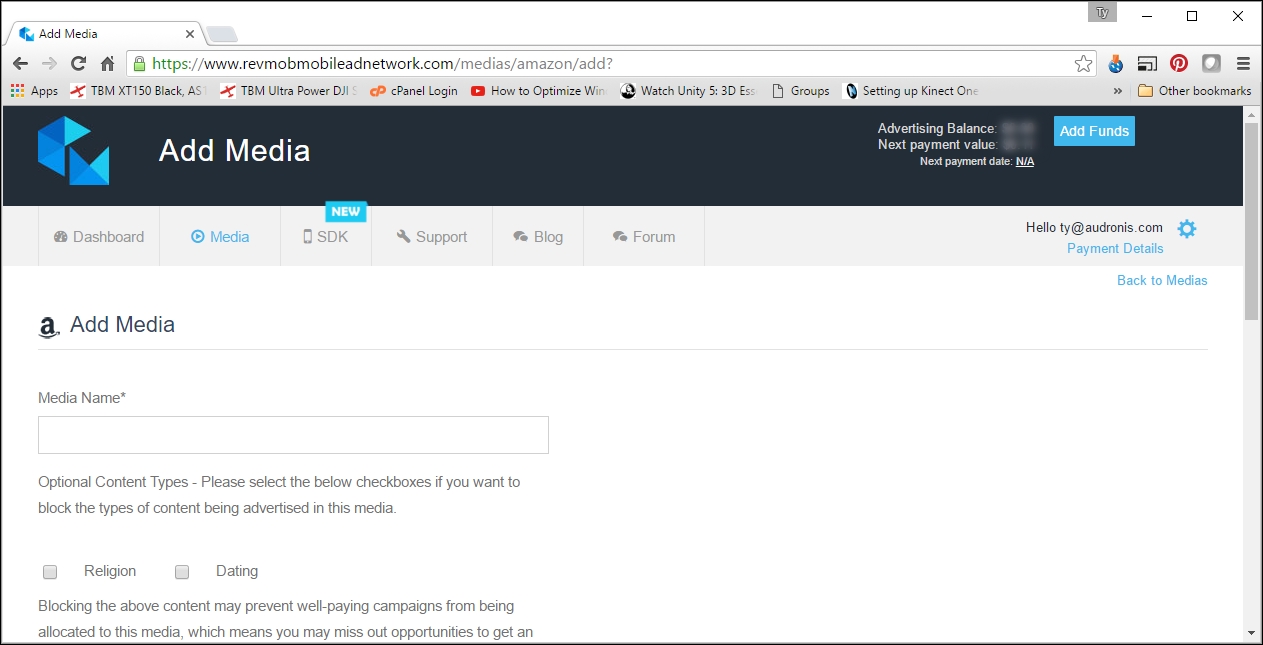
Just enter Ramblin Rover in the Media Name field and submit. You'll then be confronted with this message:
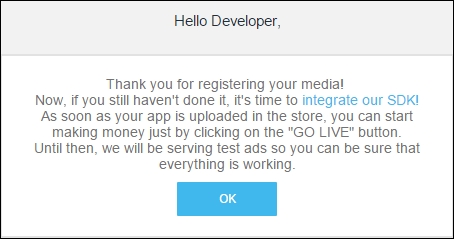
Don't worry about the Software Developer Kit (SDK) part of the message. One of the beauties of Buildbox is that they've already integrated the SDK for all their supported ad providers!
Go ahead and do the same thing for iPhone and Android (as known as. Google Play). Your screen (when complete) should look like the following screenshot. There are a couple of exceptions. We set two of the statuses to Live to show you what it looks like, and we named our apps by the store name to show you that we've added all three. Yours should all be in Testing mode, and all should be titled Ramblin Rover.
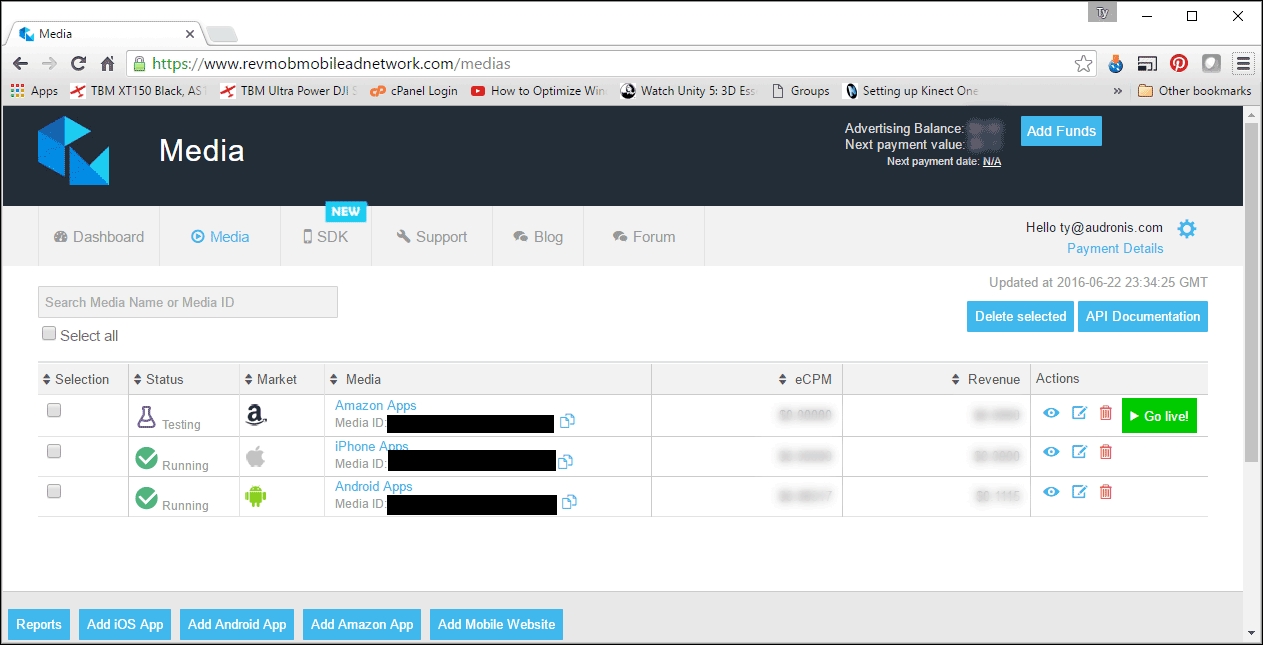
The Media IDs for your various distribution channels (redacted with black bars - these are private, and you should guard your Media IDs) will be important in a moment. Leave this browser window open, and open your Ramblin' Rover project in Buildbox.
Open the Project Settings window (the gear icon in the upper-right of Buildbox), and select the Advertisements tab at the top. You should see this:
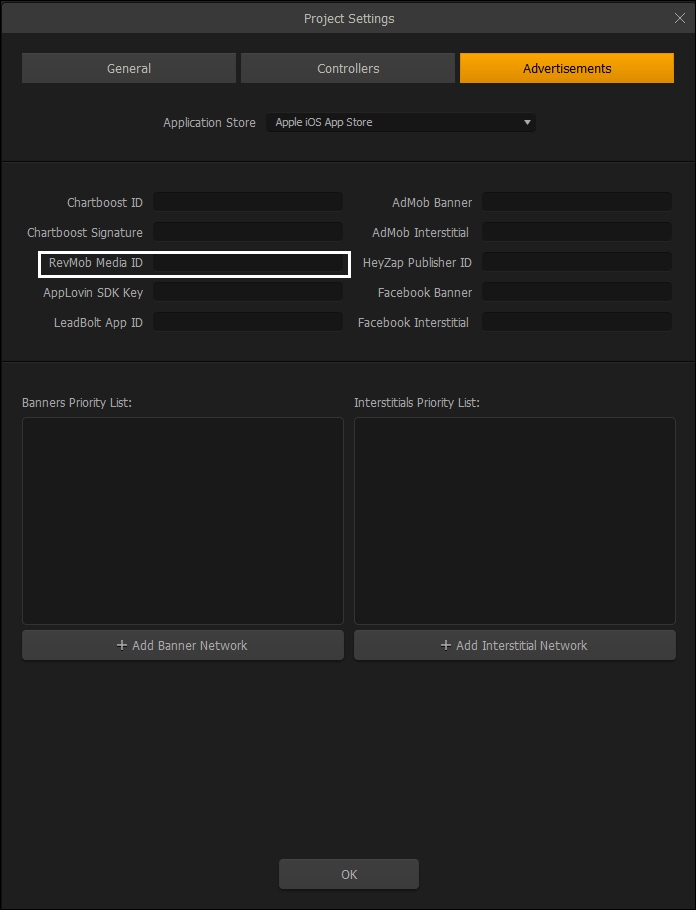
We've highlighted where we put the RevMob Media ID that we setup. Just select each (the Apple iOS, Google Play, and Amazon App Stores) from the Application Store drop-down menu, and copy the appropriate Media IDs into these RevMob ID fields (the field is unique for each dropdown).
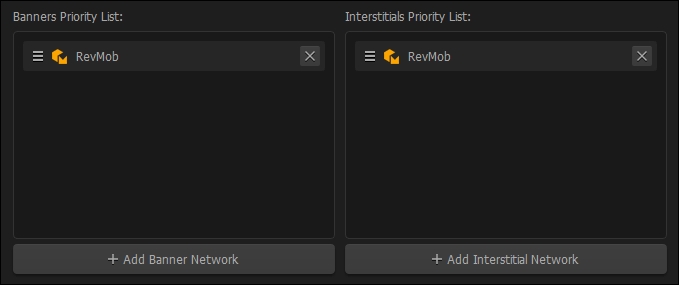
Great! Now our ads are linked... but they can't be displayed yet. We now need to set a priority for both banners and interstitials. Select the + Add Banner Network, and add RevMob to both banners and interstitials (for each of our three stores). It should look like this:
Note
Before we move on though... go ahead and sign up on Vungle (http://www.vungle.com) and do the same with our Windows Store. It should be noted that you should leave the Priority Lists blank for Windows Store.
After talking to Buildbox Support... Vungle is the only service offered for Windows Store. So, the priority lists have been turned off. By the time you read this, they may have eliminated these Priority Lists from the Windows Store interface (due to the confusion), but just in case they're still there for you... we thought we should say something.
OK... so now we have the capability of displaying ads. But now we need to tell Buildbox where to put them. Close the Project Settings window, and let's do this.
Banner ads in Buildbox are still image ads that are clickable links that appear on the lower-section of the screen (in broadcast TV... it's called a lower-third - the same area a newscast may put someone's name). So you have to be careful on what UIs you put these types of ads on. You don't want to block off buttons (or even worse... crucial game fields).
Interstitial ads are ads that are placed full-screen for a short time (or have a close button at the top-right). They pop up between UIs, and can be still images, or full-motion video.
With both of these types of ads, we need to be careful. We actually want to annoy our players... but only ever so slightly. This way, they're motivated to buy the ad-free version, but not so irritated that they give us a negative review, or stop playing.
Another good strategy is to have ads pop up only intermittently. For instance, a screen where a player is used to hitting start over several times... they may accidentally click on an ad (generating revenue). On the game over screen. So a game-over screen should have an interstitial pop up... but only every five-or-so times. Granted... this sounds a bit sneaky, but this is an actual strategy that game companies use to help with profits. Remember... if you want to be a professional, you need to take into account your bottom line.
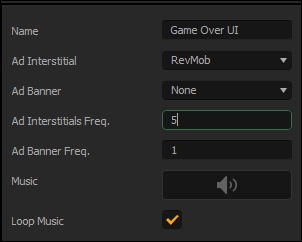
Let's start by selecting our main Game Over UI. You'll notice in the properties window that there are four ad-related fields (Ad Interstitial, Ad Banner, Ad Interstitials Freq., and Ad Banner Freq.). This is where you set what ad provider to use, and how often it pops up.
The frequency number is based on how many times the UI appears before an ad pops up. So, if we set the Ad Interstitial Freq. to 5 and Ad Interstitial to RevMob; a RevMob video will pop up one out of every five game over screens. Go ahead and do that now. It should look like the following:
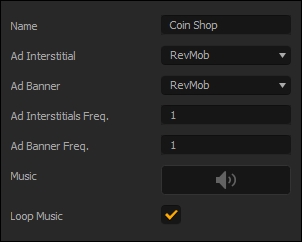
And yes... it really is that easy. Now just do the same thing with the rest of your Game Over UIs. You may be wondering right now, wait a minute... what about Vungle? We'll get to that later. For now, let's add a banner (as well as an interstitial) to the store page. Why not? Let's give them a reminder of why they should pay to remove all ads. Go ahead and add RevMob to both the Ad Interstitial and Ad Banner fields for our Coin Shop. Also, leave the frequencies at 1. This will make an interstitial and a banner appear every time this screen comes up. It should look like this:
Now just do the same to the Rover Selection UI, and there you have it... our ads are complete! Once you have ad providers, implementing them in Buildbox is extremely easy. No code snippets, no SDKs... just plug in the account codes, and tell Buildbox where and how often you want ads. Now, let's get to that coin shop.