
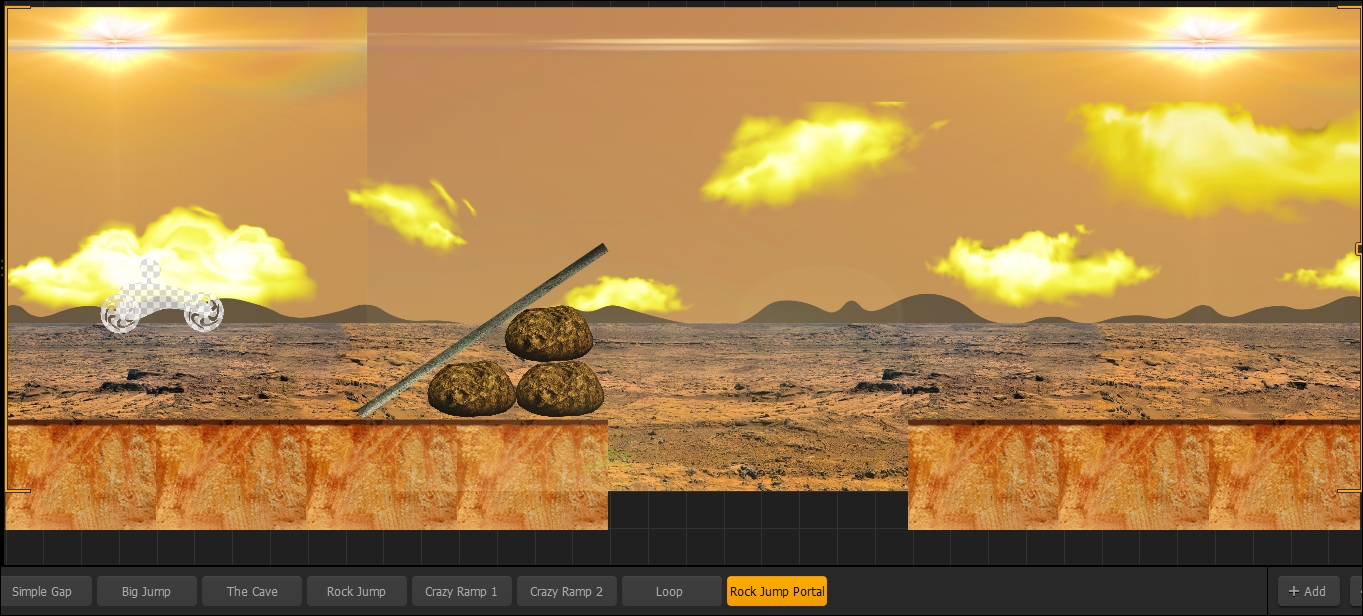
Before we get to the level itself, we'll have to create a way to get there! We'll need a scene that pops up every so often in our game, but isn't readily-identifiable as the portal to our secret level. Let's start by duplicating an existing scene. If you select the Rock Jump scene, and use the D key on your keyboard, you'll create an exact copy of the whole scene. Finally, rename it Rock Jump Portal. Then, move the scene down (in the scene selection window) to the end of the list. It should look like the following screenshot:
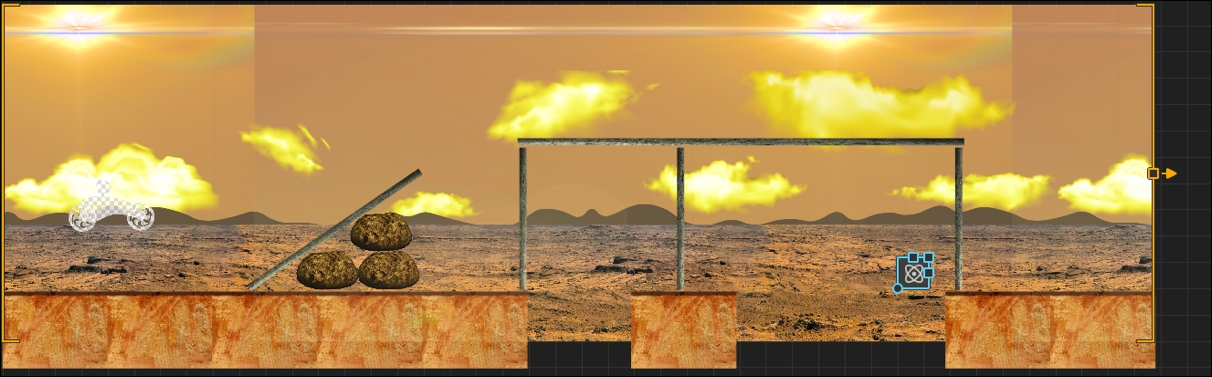
Great! So upon entering the scene, the player will believe they are just entering another rock jump scene. But let's do something more interesting here. Make the scene look like the following screenshot (using the same techniques as before):
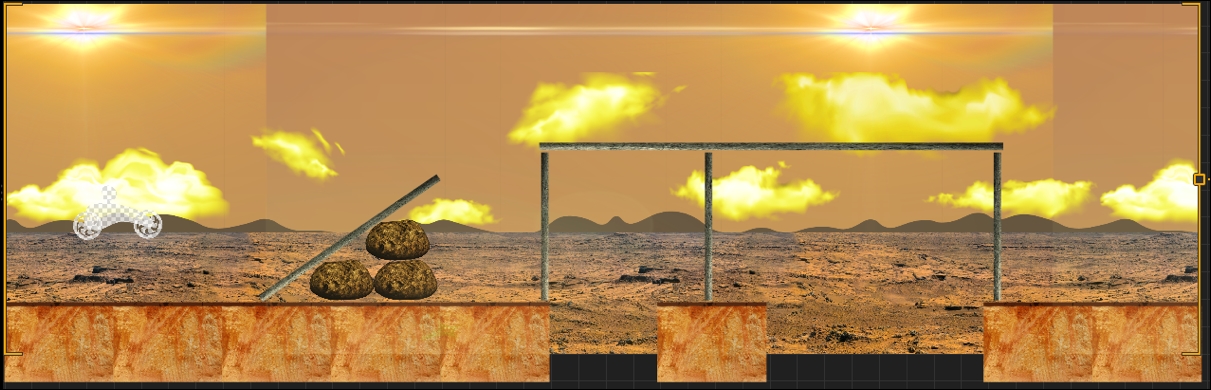
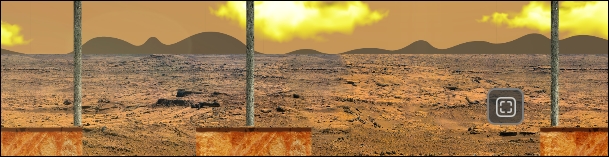
So, here's what this obstacle is all about: it's supposed to look like a simple platform held up by narrow sticks for the player drive across the top of. But if a player hits it just right, and reverses their thrust upon landing on top...they can make it fall over and bridge the gaps (just like the following screenshot):

So, this is where we'll put our portal to a secret level. We'll need to use a Logic Asset to do this. Every type of Logic Asset has a different use:
- Transform: This is pretty much exactly how it sounds. Characters, objects, and enemies will be transformed (position, scale, or motion vector) when touching this. We'll use this inside our secret world.
- Portal: This is a way to teleport a character from one place to another. You can even use multiple portals to create clones. This can't be used with a motocross game (as only the character is teleported, not the wheels), so we'll use this much later in other examples.
- Gatekeeper: will only let a certain number of objects pass by it. It applies to all types of objects. So, say you clone your character, then want only one character on the screen. A gatekeeper could be used to only let one character by, and delete the rest.
- Path: A path object is just that...a path that an object will move along at a certain speed. It can be used for characters, enemies, and other objects. We'll use this one later.
- Menu Jump: A menu jump takes the player to a new screen or world when the character comes in contact with it. When you place a Menu Jump asset, a new output is placed on the world node in the Game Mind Map.
The player will need both observation and skill to get to the location we set up in the previous picture, so let's place our Menu Jump there. Now, grab a MenuJump asset from the Logic section of our Asset
Library and place it as shown in the following screenshot:
Let's name this logic asset Secret World. You may remember from our demo game that it had such an item. This logic asset will take the player off the game screen to either a UI, or a different world. It does not show to the player in any visible way, so we're now going to have to place something else to let the player know that something is there.
Much like Logic Assets, each type of effect asset has a different result:
- Light: This is a point of light with a rudimentary lens flare that can also create an illusion of volumetric lighting (Buildbox calls them shadows, but a 3D artist would cringe at this name).
- Trail: This is an effect that can follow any object or character. It can be used to create an illusion of speed. It's basically a graphic that is deformed to match the motion of a character (for instance, jumping down the screen will make large arcs that follow the character).
- Flag: The flag effect is a graphic that appears to wave in a breeze as a basic flag would. We'll use this in just a bit.
- Particle: This is a generator. Particles can be used to imitate fairy dust, fire, smoke, or even sparks.
- Mirror: This is a great effect if you're on a wet surface. It creates a mirror image of everything around it. Be careful, though...it can be very resource intensive and run poorly on older mobile devices.
Go ahead and drag a Particle effect asset near the MenuJump we put on the screen earlier (don't place it on top of it yet). Name it Secret Indicator, and while in the Properties window, let's click on the Edit button for the Emitters parameter. You'll be confronted with the following interface:
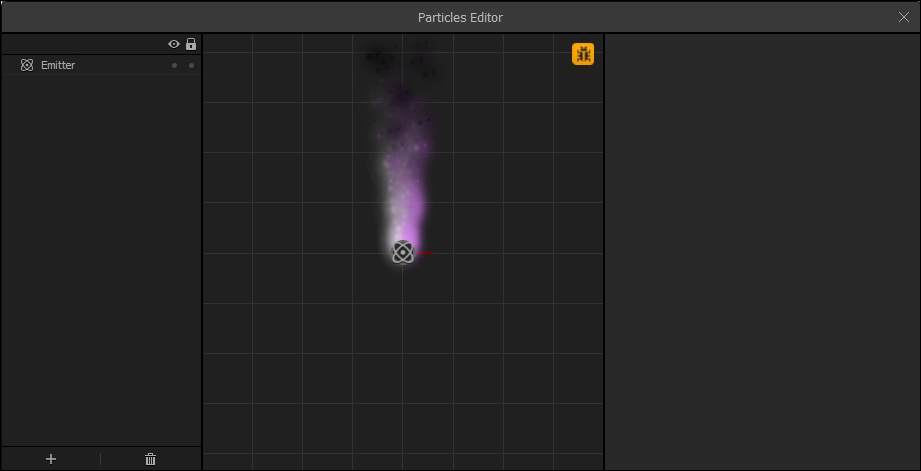
You should see an animated preview of some peculiar purplish smoke. Not exactly what we'll be going for. In this interface, we can add multiple emitters, and edit the emitters we currently use. We'll get deeper into this later for another world. But first, let's just change the parameters for our current emitter. Select it on the left side of the window by clicking Emitter. A whole lot of parameters will pop up. Let's check them out one by one:

- Position: This is the position relative to the center of the emitter object on the stage. When setting up multiple emitters on one object, you may want them staggered. The top parameter is X, and the bottom is Y. The value next to each and separated with a ~ symbol is plus or minus (so you can randomize things within that space).
- Rotation: This allows the emitter to be rotated by degrees.
- Scale: Gives us the ability to make some emitters larger than others.
- Texture: Texture is the image (or sprite) that each particle will be made of.
- Total particles: The total number of particles allowed to be on screen at any given time.
- Emission rate: How many particles per second are created.
- Start size: How big each particle will be when created (again, the ~ symbol gives you the ability to randomize within constraints).
- End size: How big each particle will be at the end of its life.
- Start spin: The amount of rotation each particle will have when created.
- End spin: The amount of rotation each particle will have upon deletion.
- Gravity: How much each particle will be attracted in any given direction (very useful for things such as water and sparks).
- Radial acceleration: How much each particle will speed up (with a positive number) or slow down (with a negative number) as it gets further away from the emitter.
- Speed: How fast each particle initially moves when generated.
- Angle: The angle of each particle's movement.
- Life: How long each particle will last (in seconds).
- Color: The tint of the texture of each particle over its life.
- Color variation: How much each particle will vary its color over its life.
- Position type: How each particle is positioned.
Match your emitter settings to the preceding screenshot. As you change each setting, see how it affects the outcome. For instance, notice that changing the angle to 0 ~ 360 emits particles at a 0 angle, but randomizes them across the entire 360 degree area around the emitter.
When finished, close the emitter editor, and position the emitter directly over the menu jump we placed earlier to match the following screenshot:
We'll come back here later. But for now, let's create...
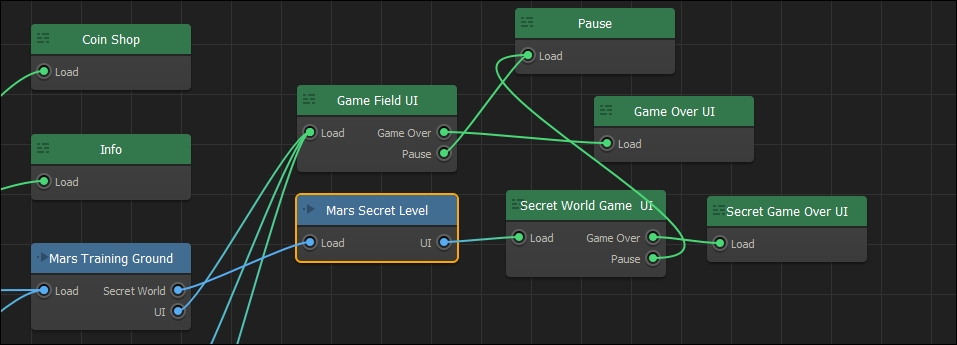
Back at the Game Mind Map, right-click in the blank area, and create a new world. Name this new world Mars Secret World and duplicate the parameters from the Mars Training Ground's properties. After all, we're still on Mars, so we want the same physics. Now, duplicate (using the WASD keys) the Game Field UI node, and the Game Over UI node. Name these, and connect them as shown in the following screenshot:
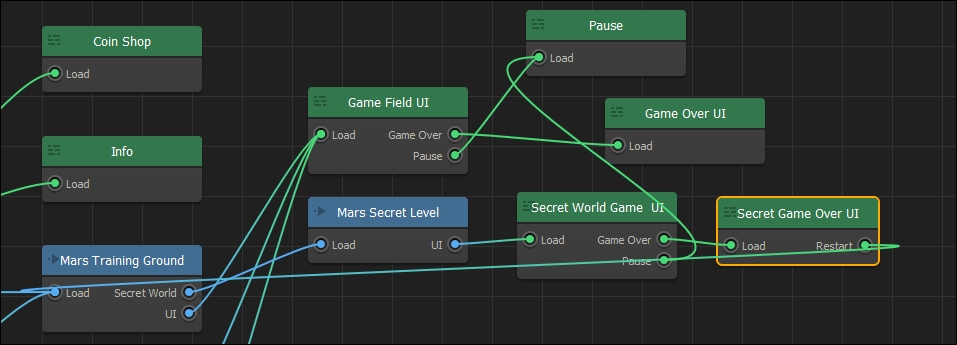
The reason we duplicated our UIs (rather than using the originals) is that when the character is destroyed, we don't want the level to start over. We'd like the player to go back to Mars. So, let's set that up really quickly. We'll get deeper into UIs later, but for now, double-click on the Secret Game Over UI.
Now, just select the Restart button, and set the Function parameter to Default. This will give us an output on this node back at the Game Mind Map. Go back to the Game Mind Map and connect it up as shown in the following screenshot:
Awesome! So our basic structure is down for our secret world. Now, let's actually make our world...
Open up the Mars Secret Level and bring in the InnerCave.png from Projects/RamblinRover/Backgrounds as a background. We don't need to worry about parallax on this level because we're underground. Now, set up the character as we outlined before (using scale and connections) so that it looks like the following screenshot. If you have trouble, go back to the section in Chapter 3, Your First Game — Ramblin' Rover, Part 1, where we talk about connections and how they work to review. Don't forget to bring in the character objects from the Asset Library (so you don't duplicate resources). Also, remember to set the boundaries for the character complete with death at the bottom, and restriction on the top:
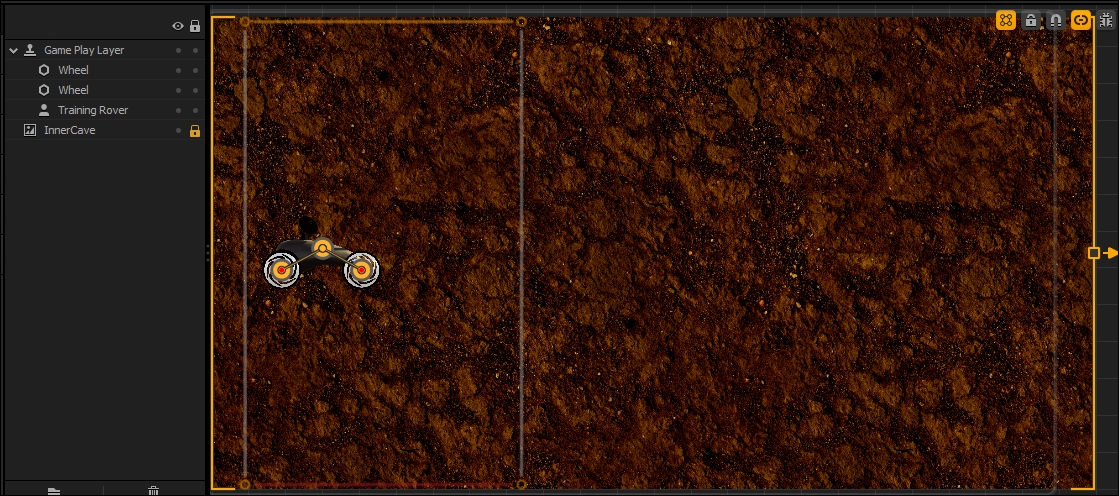
There's one more thing we need to do (which we haven't covered before) to make a motocross character work properly. And that's to set the properties of the connections. If you click on the connection lines themselves, you'll want to set the properties to a Speed of 50, a Torque of 200, and enable the ButtonActivated parameter by ticking the checkbox for it. These are the settings that actually let the wheels spin when you use controls. Without these, the character will just land and sit on the ground, no matter what you do with the controls.
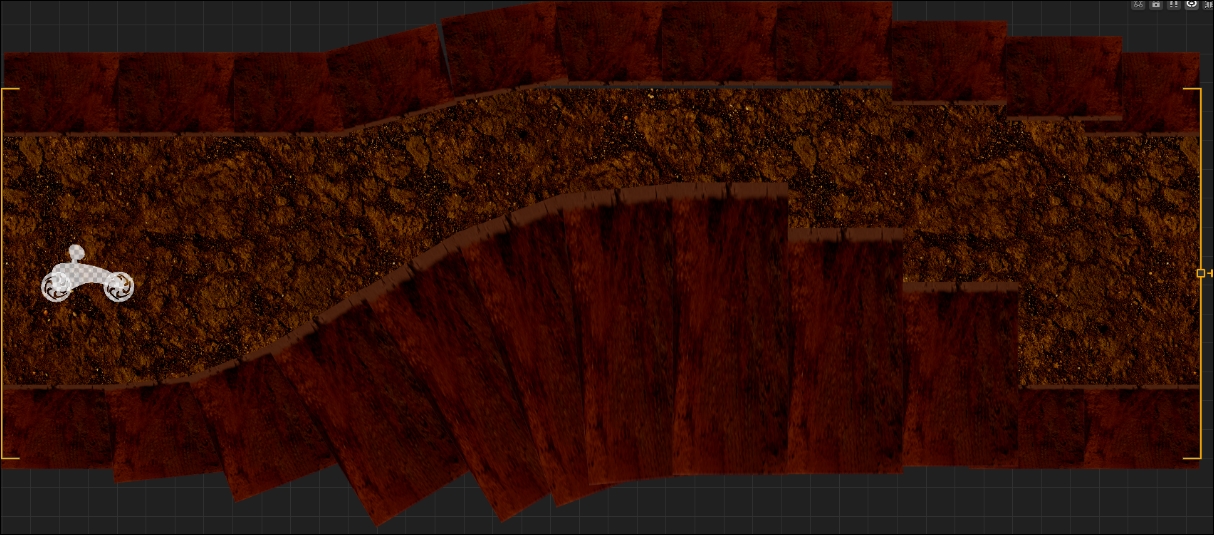
We want this level to be pretty hard. It will ultimately be a long string of nothing but rewards...and a ton of them. So, we want to make it more difficult to traverse with lots of traps. For that reason, we'll have ceilings, and narrow gaps to traverse. So, make a total of four scenes that look like this using the CaveBlock-Mars asset we already have in the library:

Hump-Stairs. This scene is so that if they come in too fast, they'll hit the ceiling. But if they come in too slow, they'll tumble down the stairs and crash:
Cave Jump 001. Here, we'll take advantage of the player's need for speed, and give them the opportunity to perform a flip:

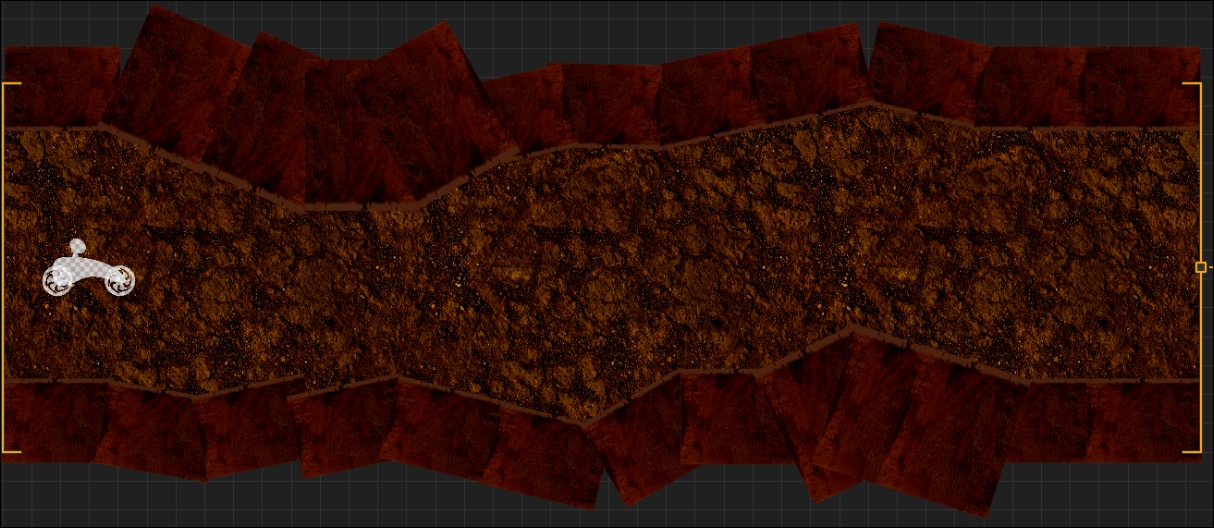
Crazy Bumps is a level designed to set the player off balance and struggle to maintain control of the rover:
Great! So now we have our base for our first four scenes. We'll build some more, but let's place some lights to make this more interesting...
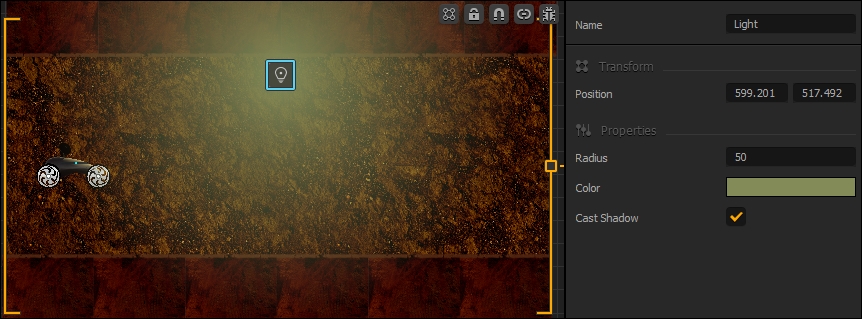
From the Effects section of the Asset Library, bring in a Light. Set the Color of the light to a very desaturated yellow (meaning a pale yellow) with a brightness of about 50% in the color requestor. Place the light as shown in the following screenshot on the Start scene with the settings indicated in the screenshot:
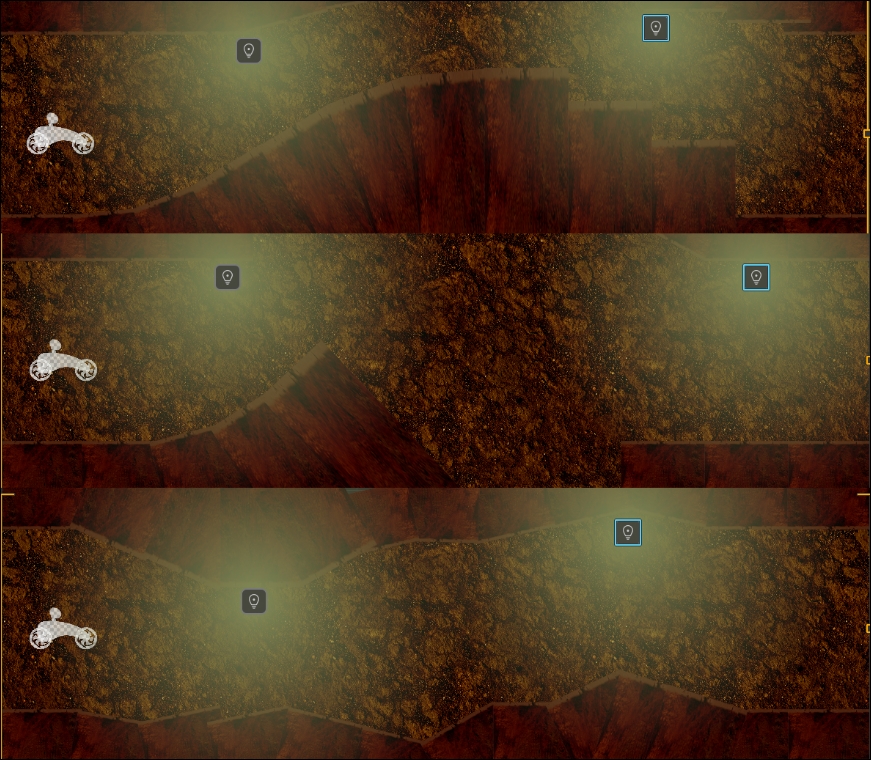
Before we test this, copy this light and paste it as shown in our other three scenes:
Awesome! Give it a try now. Remember, you can jump straight to this world by setting the output from the Start node to the Load of the MarsSecretLevel node in the Game Mind Map.
Let's create two more scenes. These will have tougher dynamic obstacles...
In this first scene, we'll make a platform that moves quickly up and down. This motion will create a bumper to knock the rover up and over another obstacle. Create a new scene and call it Bumper 001. Let's just make the first chunk of this scene for now. Set up objects as shown in the following screenshot (the squares with a rotating arrow in the middle are Transform Logic assets):
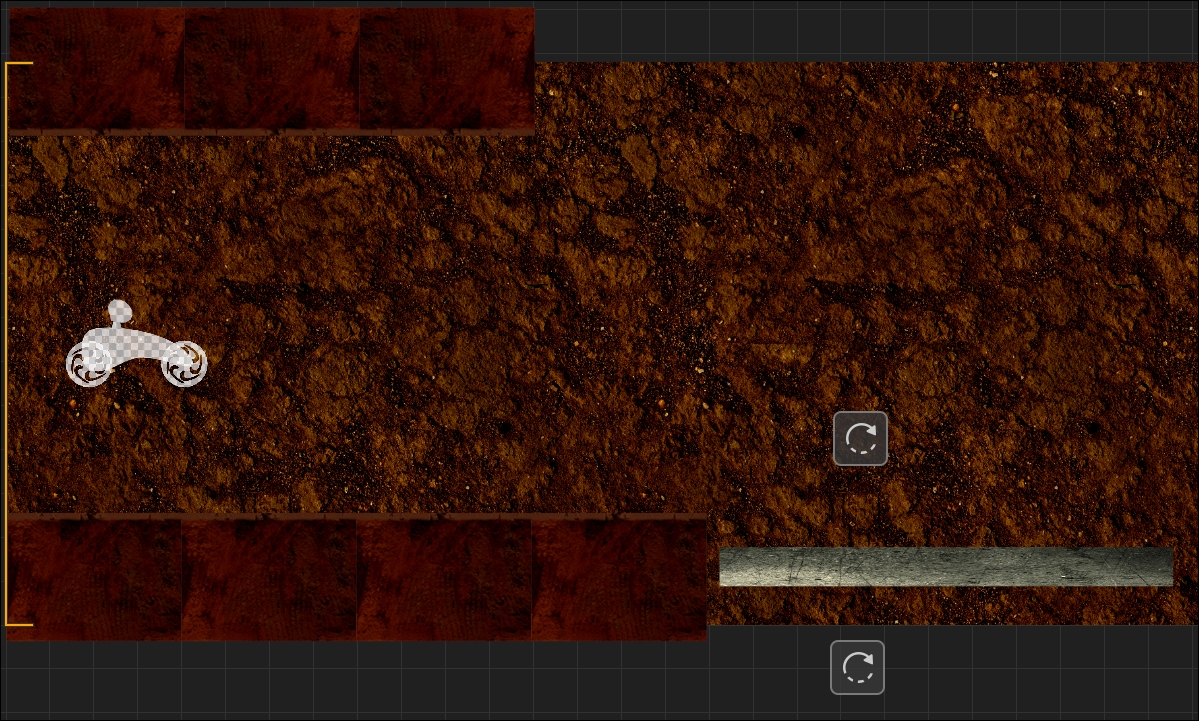
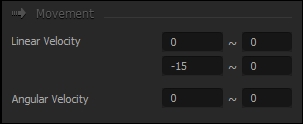
You're about to learn how transform objects work. Let's start by giving some default motion to our Steel object. Select the Steel platform and change its vertical Linear Velocity to -15. This will start its motion downward. The settings should match the following screenshot:
Now select the Transform object beneath the Steel platform. In the Properties window for this object, we can set up the object it affects, and just how it affects it. Please set the settings as indicated in the following screenshot (and then we'll tell you what it all means):
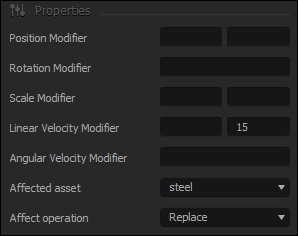
So, as we know a Transform object is one that transforms what touches it in some way. However, it will only affect one object, and that is the object that must activate it. So, in the Affected asset parameter, we select steel. You may notice that this drop-down menu only lists one instance of each type of object. This is because it will affect any instance of that type of object that touches it.
We can also set the Affect operation to Add to existing values, Multiply the existing value by something, or simply Replace the value with a new one. So, we selected Replace. Finally, all we want to change is the vertical Linear Velocity Modifier, so we set the new value to 15. Set up the other Transform object in the same way, except set this Linear Velocity Modifier to -15.
What this will all do is when the items are generated, the steel platform will move down. Upon touching the lower Transform object, it will move up...then down again when it touches the upper Transform object. It will do this infinitely. So, when your rover rolls over it just right, the rover will be shot up and over the next obstacle, which looks like this:
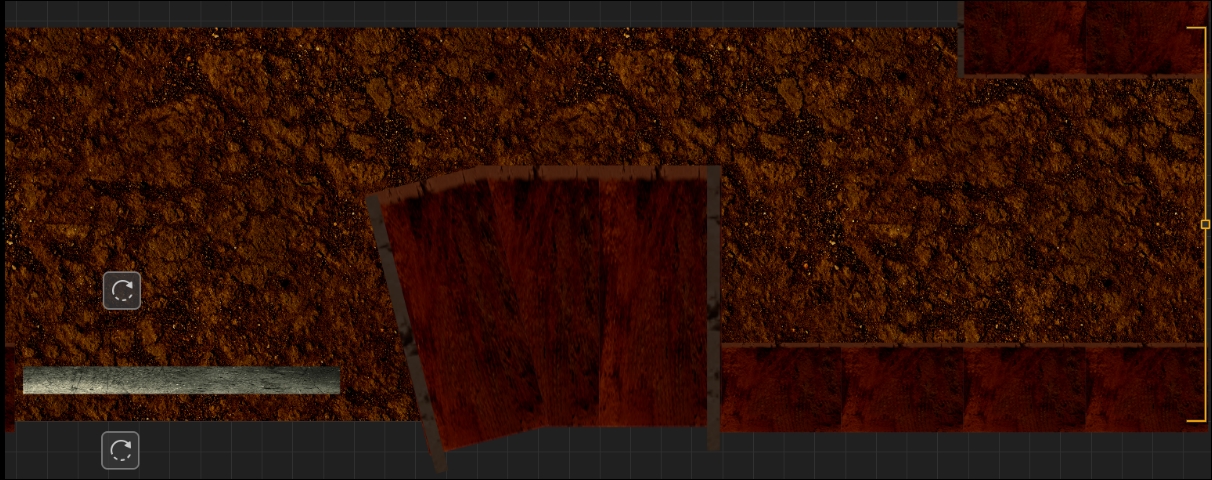
Notice that we also placed some RawGroundBlock-Mars objects along the sides of some of the blocks to create collision zones (because our underground block only has collision on the top part of its shape). Test and adjust this so that it's nearly impossible, but if you time it just right, you will go over the obstacle at full throttle.
Now, use all of these principles to create a new scene called Crusher 001 like this:
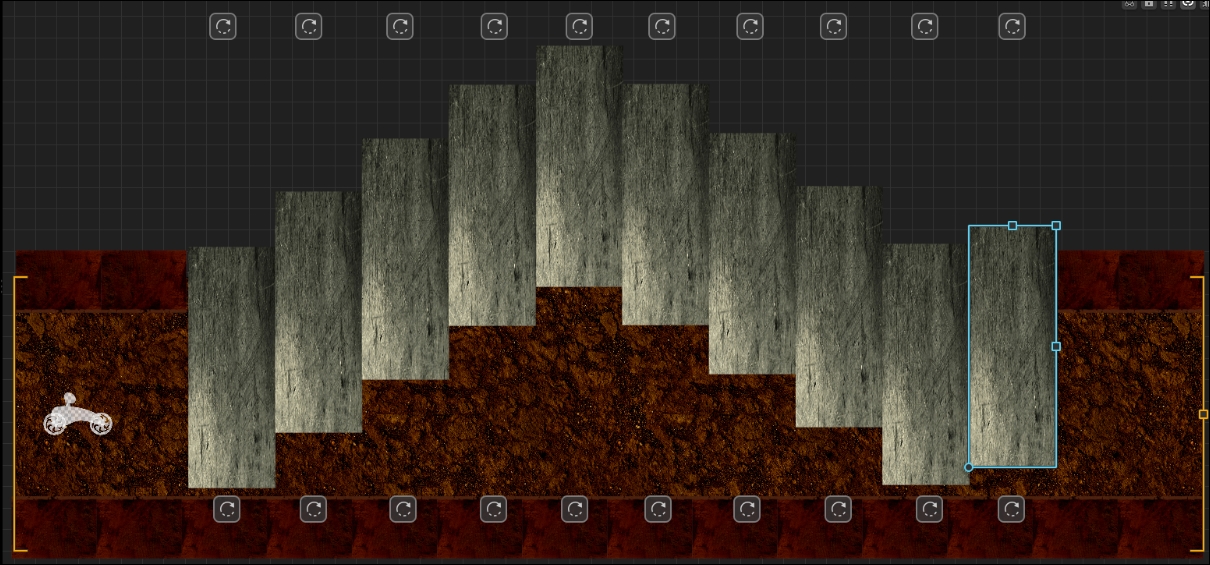
The first five steel blocks and the very last one will begin with a vertical Linear Velocity of -10. The other four blocks will begin with a vertical Linear Velocity of 10. All of the Transform objects will Multiply the vertical velocity value by -1. Using Multiply instead of a static value gives the same result, but since we have so many blocks to worry about we can now edit speed (if we desire) just by changing the blocks, and not every single Transform object. What we've ended up with here is a cascading series of crushing pillars that force you to move at full throttle through here and to time it just right.
Now, go back and add lights, as we did before, to these scenes. It's time to add some rewards and death-bait.