
- Scratch 2.0 Game Development HOTSHOT
- Table of Contents
- Scratch 2.0 Game Development HOTSHOT
- Credits
- About the Authors
- About the Reviewers
- www.PacktPub.com
- Preface
- 1. Blowing Things Up!
- 2. Beating Back the Horde
- 3. Start Your Engines
- 4. Space Age
- 5. Shoot 'Em Up
- 6. Building a Worthy Boss
- 7. Creating a Level Editor
- 8. Dungeon Crawl
- 9. Hunger Run
- 10. Sprites with Characters
- A. The New Scratch Interface
- Index
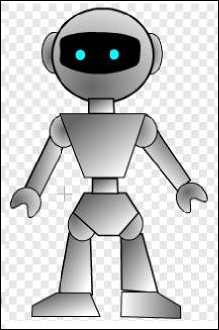
Though we've created the robot frame and colored it, we are not done yet. To make the robot look more natural and three-dimensional, we will adjust the position, including the layer position, of several shapes.
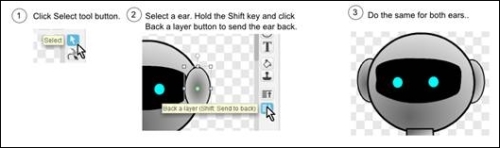
To adjust the head, perform the following steps:
- Click on the Select tool.
- Select a ear. Press the Shift key and click on the Back a layer button to send the ear back.
- Do the same for both ears, as shown in the following screenshot:
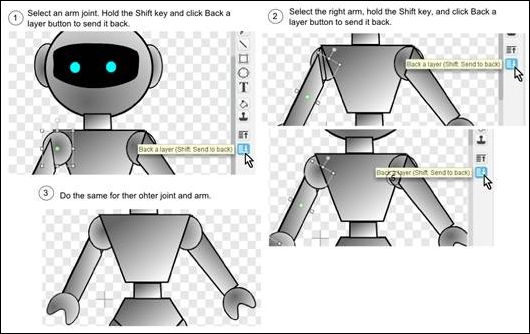
Next, we will adjust the shapes on the upper body:
- Select an arm joint, press the Shift key and click on the Back a layer button to send the arm joint back.
- Select the right arm, press the Shift key, and click on the Back a layer button to send the right arm back.
- Do the same for the other joint and arm, as shown in the following screenshot:
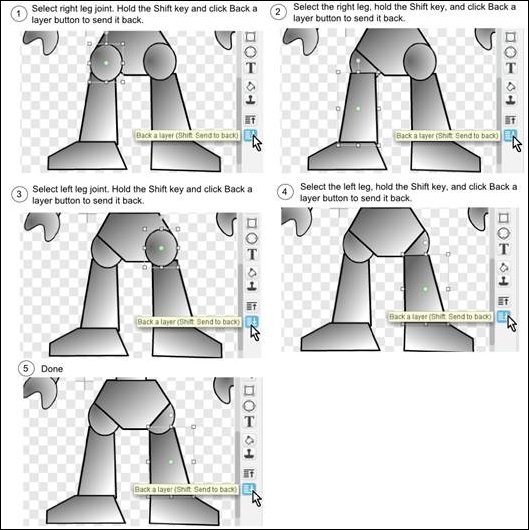
To adjust the legs, we also first select the joint, send it to the back, then select the leg and send it to the back. The details are included in the following screenshot:
-
No Comment
..................Content has been hidden....................
You can't read the all page of ebook, please click here login for view all page.