The Spaceship sprite can move and fire ammo at the enemies. To do so, we need to create codes to do the following:
- Start
- Move
- Shoot
- Response
- End

Now we are ready to equip the Spaceship with scripts, so it can be controlled.
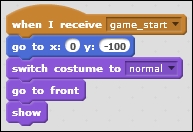
To create the script that executes upon game initialization, perform the following steps:
- Start with a when I receive <game_start> message block.
- Move to the bottom center of the stage and enter
0and100in the go to x: () y: () block. - Switch the costume to normal using the switch costume to <> block.
- Enable go to front and show.
The following screenshot shows the final script:
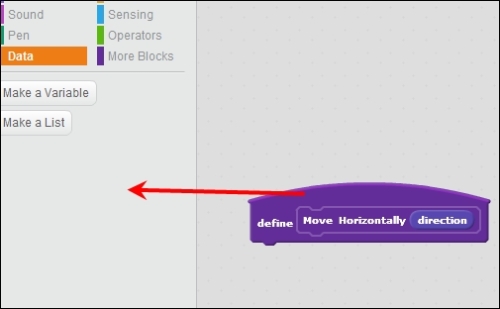
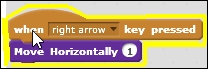
For movement, we will create two more blocks using More Blocks, one for the horizontal movement and another for the vertical movement. The More Blocks feature lets the users group the commonly used codes in custom blocks, making the code shorter and easier to read. In terms of computer programming languages, More Blocks are like methods or functions. Each More Block can have zero or several input parameters. Similar to the variables in a mathematical function, input parameters are plugged into More Blocks to produce the desired result. For example, one can have a More Block named Jump that will jump num_jump times, num_jump being the input parameter. At runtime, if num_jump holds a concrete value such as 3, then the Jump block would jump three times. For horizontal movement, we are going to create a More Block named Move Horizontally, which when executed, would move the Spaceship horizontally, as shown in the following screenshot:
To create code for horizontal movement, perform the following steps:
- Select the More Blocks tab and click on the Make a Block button.
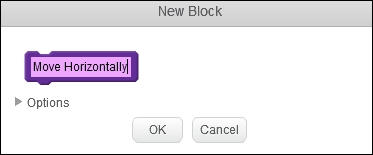
- On the New Block dialog box, click inside the empty More Block and type
Move Horizontally. Expand the Options tab and click on the Add number input: button.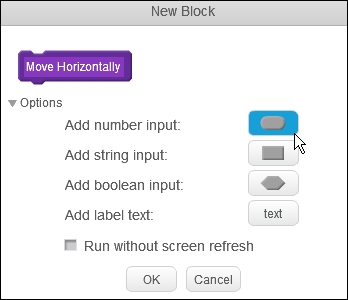
- Then, enter the value of
directionfor the boolean input parameter. The boolean datatype has only two possible values:0(false) or1(true).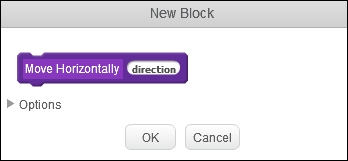
You should see the new More Block as shown in the following screenshot:
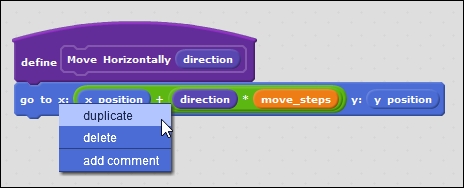
- From the Operators tab, drag out the <?>* <?> block and drag the direction block to make the <x position> + (<direction> * <move_steps>) block visible.
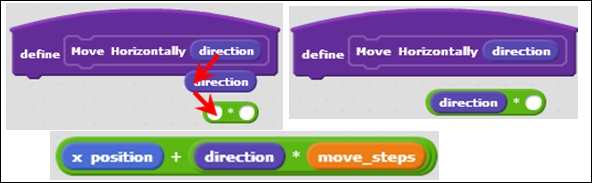
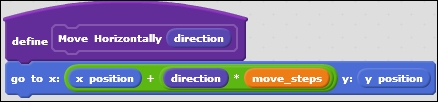
- Build the go to x: ( <x position> + ( <direction> * <move_steps> ) ) y: <y position> block.

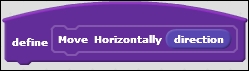
- Add this script to define the direction using the define Move Horizontally <direction> block.
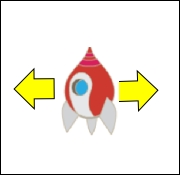
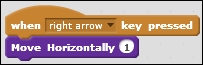
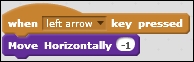
Let's add scripts to move the Spaceship when a user hits the right or left arrow key as follows:
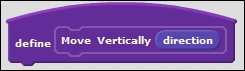
To write the code for the vertical movement, we will also create a custom block.
The steps to write the code for vertical movement are as follows:
- Create a custom block named Move Vertically.
- Right-click on the body of the Move Horizontally block and select duplicate.
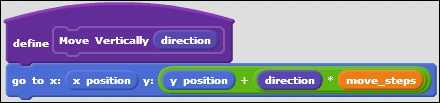
- Update the copy so that it is go to x: () y: (); the slots are filled as shown in the following screenshot:

- Then, attach the go to x: () y () block under the Move Vertically definition block. The resulting custom block should look like the following screenshot:
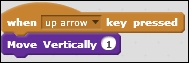
- Start with when <up arrow> key pressed. Move to the right via Move Vertically () with the value
1.
- Start with when <down arrow> key pressed. Move to the right via Move Vertically () with value
-1.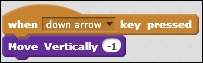
The Spaceship should shoot ammo when the Space bar is pressed. To do so, when the Space bar is pressed, a clone of the Spaceship Ammo would be created to fly straight up until it hits the edge or an enemy sprite.
The steps to build the shooting code are as follows:
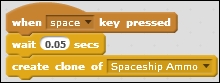
- Start with the when <space> key pressed block.
- To prevent the game from hanging up when the user hits the Space bar too many times, we will add a timeout between each round of firing. Let's wait for
0.05seconds by using the wait () secs block. - Now add the code to fire the ammo by using create clone of <Spaceship Ammo>. Note that we still cannot shoot the Spaceship Ammo. This is not possible until we add the scripts to the Spaceship Ammo sprite later in the project.
The finished script should look like the following screenshot:
For the sake of game responsiveness, the Spaceship sprite does not continue to check whether it has collided with the enemy sprites or their ammo. Instead, the checking is done by the enemy sprites and their ammo. When notified, the Spaceship reacts to the collision by simply changing its costume.
The steps to build the script are as follows:
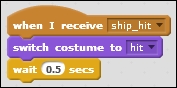
- Start with the when I receive <ship_collided> block.
- Then, use the switch costume to <hit> block.
- Wait for
0.5seconds for the user to see the Spaceship explode (using the wait () secs block).
The following screenshot shows the final script:
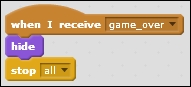
The Spaceship sprite terminates when it receives the game_over message.
The steps to write the code are as follows:
- Start with the when I received <game_over> block.
- Then, add the hide block.
- Finally, add the stop all block.
The finished script should look like the following screenshot:
Now, try testing the Spaceship sprite by moving it horizontally using the left and right arrow keys. Then, test the vertical movement using the up and down arrow keys. Additionally, you can test each script block by double-clicking on it. When a script block is being run or executed, its outline would turn faint yellow.
In this section, we introduce More Blocks. I hope you found creating a custom block fairly easy. However, deleting a custom block is not as intuitive. There is no "delete this custom block" available when right-clicking on the block definition. To remove a custom block, first remove all the references to it. Then, drag the definition block to the tool area in order to delete it.