Space Age has four levels; for each level, a special enemy sprite is responsible for the attack and they are as follows:
- Level one: Rock
- Level two: Monster
- Level three: Robot
- Level four: Mother Ship
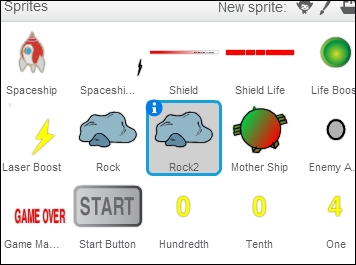
In the starter project, there are only two enemy sprites: Rock and Mother Ship. Both the Rock and Mother Ship have complete scripts and are ready to participate in the game. We will copy Rock to create Monster and Robot, and then tweak their local variables to increase the difficulty.
The Rock sprite attacks by crashing and firing ammo. When created as a clone, it continues to fall down at a random speed and randomly fires rounds. The speed of falling as well as the frequency of firing the ammo are configured through min_speed, max_speed, and shoot_random_wait.
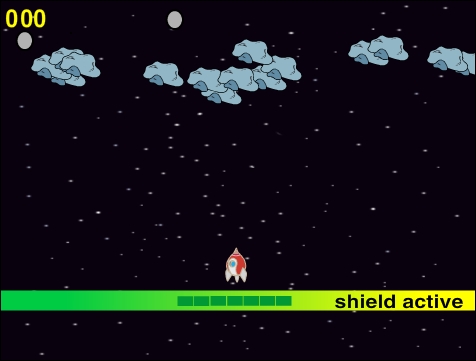
Before duplicating Rock to create new sprites, first test the Rock sprite by playing the game. Click on the green flag, and hit the Start button to start playing. If all is well, you should see the Level One information page scrolling by and the Rock clones shown as a drove. Hold the ammo, because we have yet to add scripts to the Spaceship Ammo sprite.
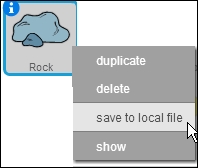
- Right-click on Rock and select duplicate to create Rock2.
- To change the name from Rock2 to Monster, click on the round i icon, and change the name to
Monster.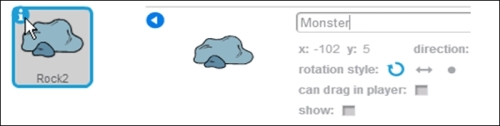
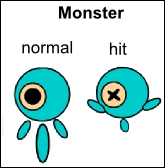
- Next, go to the Costumes tab, and delete the existing costumes. Click on Upload costume from file, and navigate to
<chap4_images_dir>costumesenemiesmonster, selectnormal.svgandhit.svg, and click on OK. - Verify whether the Monster sprite has both the normal and hit costumes as shown in the following diagram:
Now, let's create the Robot sprite:
- Right-click on Rock and select duplicate to create Rock2.
- To change the name from Rock2 to Robot, click on the round i icon, and change the name to
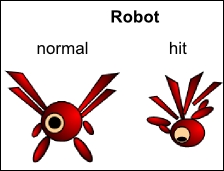
Robot. - Create the Robot sprite costumes by navigating to
<chap4_images_dir>costumesenemies
obot
and then importnormal_robot.svgandhit_robot.svg. - Verify whether the Robot sprite has both the normal and hit costumes as shown in the following diagram:
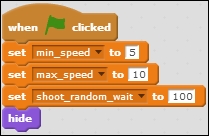
Let's make Monster and Robot faster and shoot out more ammo. To do so, we will change the min_speed, max_speed, and shoot_random_wait variables. Navigate to Monster's Scripts tab and change its scripts as follows:
- Add the when <green flag> clicked script.
- Use set <min_speed> to () and change its value from
4to5. - Use set <max_speed> to () and change its value from
8to10. - Use set <shoot_random_wait> to () and change its value from
1000to100(wait less, shoot more often).
The final script will look like the following screenshot:
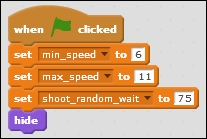
Repeat the same steps for Robot, but make it harder:
- Find the when <green flag> clicked script.
- Use set <min_speed> to () and change its value from
4to6. - Use set <max_speed> to () and change its value from
8to10. - Use set <shoot_random_wait> to () and change its value from
1000to75(wait less, shoot more often).
The final script will look like the following screenshot: