
The most important part of this game is the player character. This is the direct representation of the player in the game. The player can control the character and move it around. The player has to protect the character from harm to win the game.
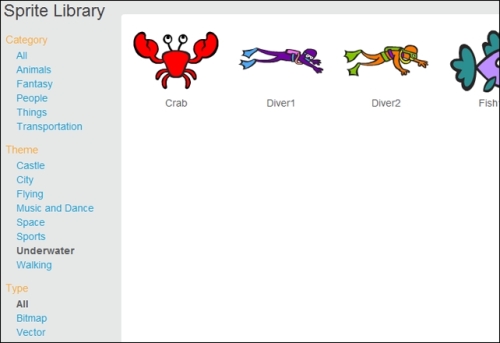
We will look for an interesting sprite in the Scratch library to use as the player character. The diver looks like an interesting choice since he is lying horizontally and facing right.

A perfect start for a side-scrolling game! The diver can be found in the People or Underwater category. There are two diver sprites. I choose the orange one, because it stands out better against a blue, watery background.
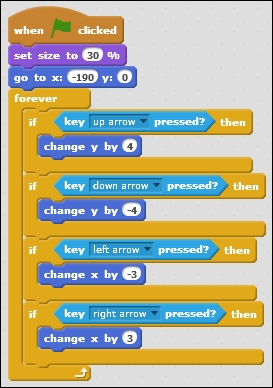
After adding the diver sprite to the stage, we can start scripting the player controls. This is a fairly straightforward process, as follows:
- Start with a when <green flag> clicked block.
- Scale the sprite down with a set size to ()% block; enter the value
30. - Then, reposition it to the left of the screen using the go to x: () y: () block; enter the value
-190and0respectively. - Add a forever loop.
- Inside the loop, we will place the keyboard controls. There will be four similar condition checks. One for each of the arrow keys.
- Combine an if () then block with when <up arrow> key pressed?.
- Inside the if () statement, place a change y by () block; enter the value
4. - Copy the construction thrice.
- Add them all together, then place them inside the forever loop.
- Change the arrow buttons checked in the copied if () statements to account for all the four possible directions.
- Change the direction that the character will face to the corresponding direction when the appropriate button is pressed. Replace the change y by () blocks with the change x by () blocks where appropriate.
- Change the values in the change x by () and change y by () blocks as shown in the following screenshot:
Click on the script or on the <green flag> icon to test whether the script works correctly. With these simple steps, we created a controllable player character. If your character moves in the wrong direction, check again if you changed the script appropriately. The left and down direction should have negative values. Mixing this up can give odd results.
Why didn't we choose to use the much simpler movement script as shown in the following screenshot?
.jpg)
The reason is that the easy way doesn't have quite the same result, and that is because most keyboards have a peculiar way of operating. When you first press a key, the keyboard gives one impulse to the computer, then pauses for a little while. Only if you keep the key pressed, the keyboard will start giving impulses repetitively.
This pause is included to prevent you from accidentally typing a stream of letters when typing. Very useful for text editing but not so much when creating a game where you want responsive controls that react immediately to your input.
With our loop and if key pressed combination, we take control of this procedure that checks whether a button has been pressed and can make sure that the game will respond right away when a button is pressed, without pausing to wait for the next impulse coming from the keyboard.