You can use macros to automate many of the tasks you perform in Excel. For example, if you frequently format your data in a particular way, you can use Excel's macro recorder to record the steps you use to format your data. You can then play back the recorded steps whenever you want to apply your format. Most of the commands you can execute in Excel, you can also record and play back.
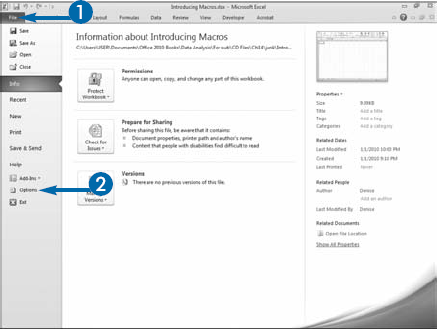
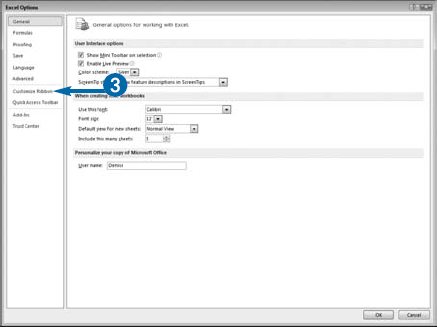
The commands you use to create and execute macros are located on the Developer tab. By default, the Developer tab does not display in Excel. To display it, you must choose Developer in the Customize the Ribbon pane in the Excel Options dialog box.
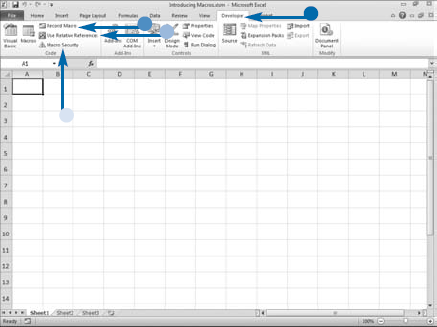
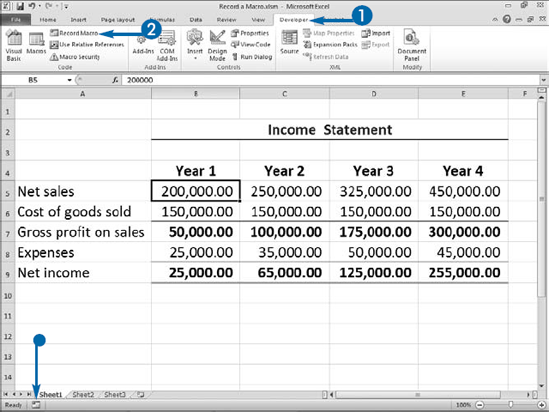
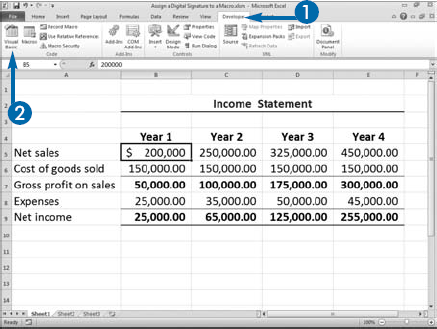
You begin recording macros by clicking Record Macro on the Developer tab or by clicking the Record Macro button on the status bar. Both options open the Record Macro dialog box. For detailed instructions on how to use the Record Macro dialog box, see the section "Record a Macro."
When you record a macro, you can record it using an absolute reference or a relative reference. If you record using an absolute reference, when Excel plays back your macro, it plays back the exact cells you clicked when you recorded the macro. If you record using a relative reference, Excel plays back the relative location of the cells you used when you recorded your macro. Click Use Relative References on the Developer tab to record using a relative reference. To learn more about absolute and relative references, see the section "Record a Macro."
When you save a workbook that has macros, you must save it as a macro-enabled workbook. Excel gives macro-enabled workbooks an .xlsm extension.

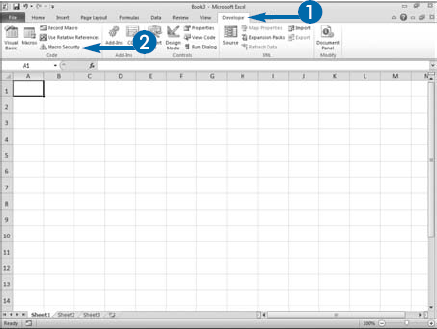
Because of increasing problems with computer viruses, specifically macro viruses, the default Excel macro security setting disables all macros when you open a workbook and enables you to decide on a case-by-case basis whether you want to enable them. This is true whether you created the macros or someone else created them. You can change the Excel macro security setting by selecting one of four options.
The Disable all macros without notification option disables all macros. This option does not provide you with any security alerts to let you know macros exist.
The Disable all macros with notification option is the default setting. It notifies you if macros are present so you can enable them on a case-by-case basis.
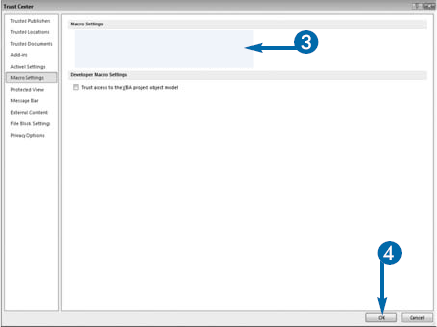
The Disable all macros except digitally signed macros option disables all macros except those digitally signed by a trusted publisher. If the publisher has digitally signed the macro but you have not opted to trust the publisher, you can enable the macro or trust the publisher. See the Extra section in the section "Assign a Digital Signature to a Macro" to learn how to trust a publisher.
The Enable all macros (not recommended; potentially dangerous code can run) option enables you to run all macros. Because potentially dangerous code can run, Microsoft does not recommend this option. Changes you make to macro security in Excel do not change the macro security in other Office programs.
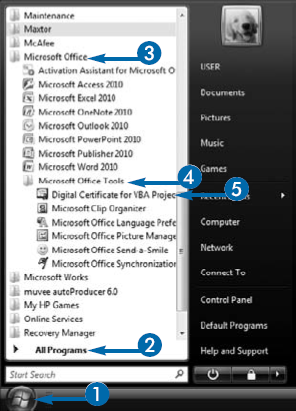
Macro creators use digital signatures to verify the safety of the macros they create. You can create a digital signature by using the Microsoft SelfCert.exe tool or you can obtain a digital certificate from a commercial certification authority. For more information on the Microsoft SelfCert.exe tool, see the next section, "Create a Digital Signature."
Set Macro Security

Note: See the section "Introducing Macros" to learn how to display the Developer tab.


Excel changes your macro security setting.
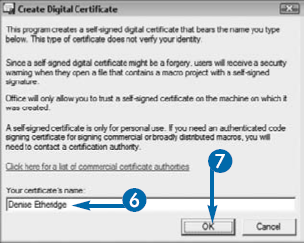
If you create a workbook that contains macros, you should consider using a digital signature. A digital signature provides assurance that no one has altered the macros. You can create a personal digital signature by using the Microsoft SelfCert.exe tool. Digital signatures created with the SelfCert.exe tool only work on the computer on which the digital signature was created.
If you plan to distribute your workbook to others, you should consider acquiring a commercial digital signature file. When you use a commercial digital signature, the digital ID attaches to the macro and remains with it; if anyone alters the macro, Excel notifies the user that macro should not be trusted. The most common provider of commercial digital certification is VeriSign, Inc.
A macro enables you to automate common tasks. You can use a macro to record any series of commands you can execute in Excel. For example, if you frequently apply a certain format to your worksheet, you can record the steps for creating the format and then play them back each time you want to apply the format.
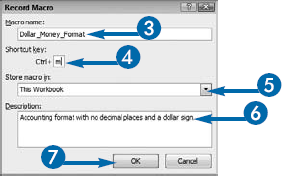
Clicking the Macro Recorder button opens the Record Macro dialog box in which you can name your macro, assign your macro to a shortcut key, and tell Excel where you want to store your macro. You can name your macro anything you want; however, the name must start with a letter; only contain letters, numbers, and underscores; and not contain any spaces. You can assign any upper- or lowercase letter to act as the shortcut key.
In the Record Macro dialog box, the Store Macro In field tells Excel where to store your macro. You can choose to store your macro in the Personal Macro Workbook, a New Workbook, or This Workbook. Use the Personal Macro Workbook option if you want to make your macro available to all Excel files. After you have stored at least one macro in the Personal Macro Workbook, the workbook opens whenever you open an Excel file. Use the New Workbook option if you have specialized macros that you want to use with multiple files. If you store your macro in a New Workbook, you can use the macros whenever that workbook is open. Use the This Workbook option if you want your macro to be in the workbook in which you are currently working.
Record a Macro
Note: See the section "Introducing Macros" to learn how to display the Developer tab.
Alternatively, click the Record Macro button (

The Record Macro dialog box appears.
Press Shift as you type to assign an uppercase key.


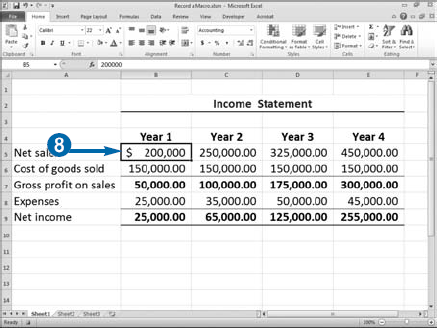
Note: This example changes the number format using the following steps. Click the Home tab. Click the Number Group launcher. Click Accounting. Set Decimal Place to 0. Select $ as Symbol. Click OK.

Alternatively, click the Stop Recording button (


Excel stops recording your macro.
Your macro is ready for you to use.

A digital signature provides assurance that a workbook file that contains macros is valid and no one has altered the macros. There are two types of digital signatures: personal digital signatures and commercial digital signatures. You can create a personal digital signature by using the Microsoft SelfCert.exe tool, or you can purchase a digital signature. Refer to the section "Create a Digital Signature" to learn how to create digital signatures. After you create a digital signature, you must attach it to your workbook. Attaching a digital signature is similar to sealing an envelope. If an envelope arrives sealed, you have some level of assurance that no one has tampered with its contents.
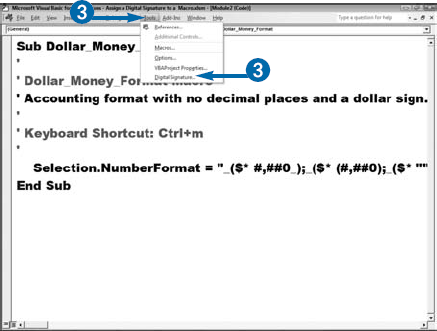
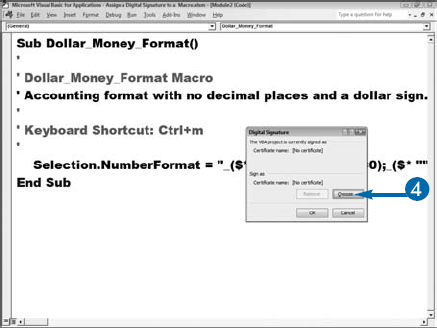
Use the Digital Signature dialog box to attach a digital signature. Visual Basic Editor (VBE) is a separate Excel module that you can use to edit your macros. Access the Digital Signature dialog box by opening the VBE. The Digital Signature dialog box lists valid certificates. You can use the Digital Signature dialog box to view certificates and to select the one you want to use.
Unless you have on your computer a valid digital signature certificate for the signature used to sign a macro, Excel removes the digital signature when you modify a macro and you must reattach it. If you are not sure if a workbook has a digital signature, you can check the signature by reviewing the Digital Signature dialog box. If a workbook has a digital signature, the name of the signature appears in the Certificate Name field. If you click the Remove button in the Digital Signature dialog box, Excel removes the digital signature.
Assign a Digital Signature to a Macro
Note: See the section "Introducing Macros" to learn how to display the Developer tab.
Visual Basic Editor appears.
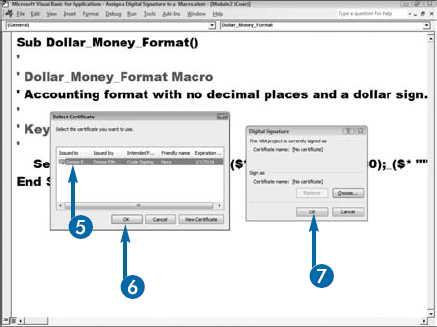
The Select Certificate dialog box appears.
Note: See the section "Create a Digital Signature" to learn how to create a digital signature.
Excel attaches the digital signature to your workbook.
Note: To return to Excel, press Alt+Q.
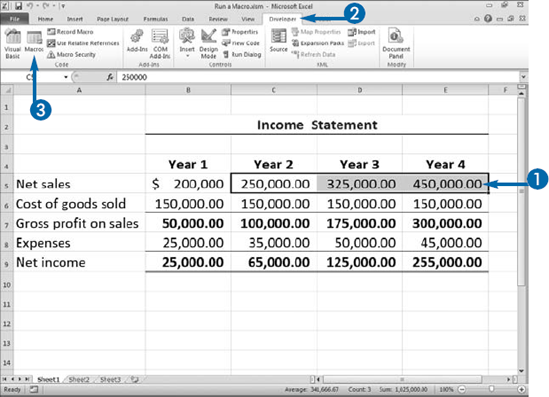
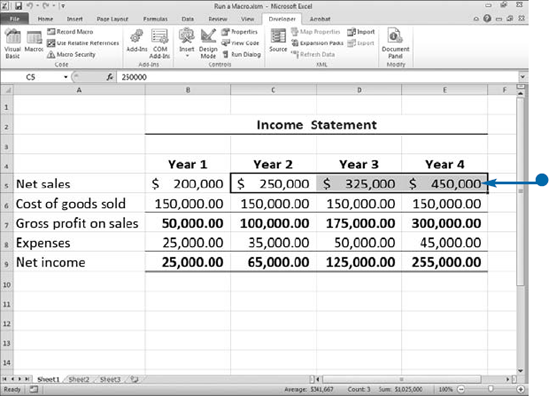
Macros enable you to quickly perform tasks that would normally take multiple steps. When you run a macro, Excel replays the steps you recorded when you created the macro. You can run any macro located in any workbook as long as the workbook in which the macro is located is open. To run a macro, you can press the shortcut key you assigned when you created the macro or you can select the macro from the Macro dialog box.
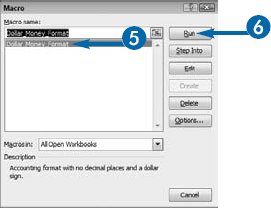
When you create a macro, you can choose to store it in one of three locations: the current workbook, a new workbook, or the Personal Macro Workbook. By default, the Macro dialog box lists all the macros in open workbooks. If a macro is stored in the Personal Macro Workbook, the macro opens in a hidden file each time you open a file. By default, the files in the Personal Macro Workbook always appear in the Macro dialog box.
You can use the Macros in field to limit the number of macros listed in the Macro dialog box. To see the macros in any open workbook, including the Personal Macro Workbook, select the All Open Workbooks from the macros in drop-down list. To see the macros from a specific workbook, select the name of the workbook from the Macros in drop-down list. To see global macros stored in the Personal Macro Workbook, select the Personal.xlsb from the Macros in drop-down list.
To run macros from another workbook, the macros must be from a signed source or you must enable the macros. You can set the security setting for macros. See the section "Set Macro Security" to learn more about macro security.

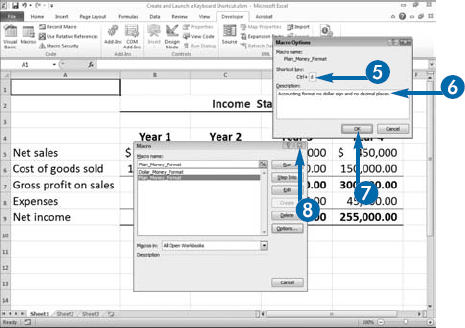
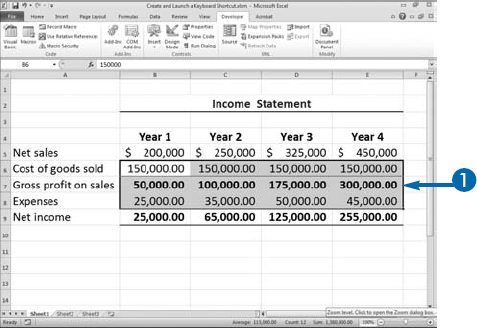
A keyboard shortcut is a combination of keys you press to execute a command. You can use a keyboard shortcut to launch an Excel macro command. You can assign an upper- or lowercase key to a macro when you create it or assign one later by using the Macro Options dialog box. You execute a macro keyboard shortcut by pressing the Ctrl key along with that upper- or lowercase key. Refer to the task "Record a Macro" to learn how to create a macro.
Keyboard shortcuts are case sensitive. For example, Excel interprets a lowercase m and an uppercase M as two different keys. To execute a macro you have assigned to a lowercase letter, press Ctrl plus the letter; for example, Ctrl+m. To execute a macro you have assigned to an uppercase letter, press the Ctrl key and the Shift key plus the letter; for example, Ctrl+Shift+M.
If you give the same keyboard shortcut to macros in two different workbooks, you may execute the wrong macro if you use the shortcut while you have both workbooks open. Excel cannot discern from which workbook you want the macro. You can use the Macro Options dialog box to reassign one of the conflicting macros to a new key.
You should also be careful not to assign the macro to a keyboard shortcut that Excel uses. If you do, Excel will execute your macro instead of the command it created. For example, by default, Ctrl+o opens the Open dialog box. If you assign o to a macro, your macro will override Excel's assignment.


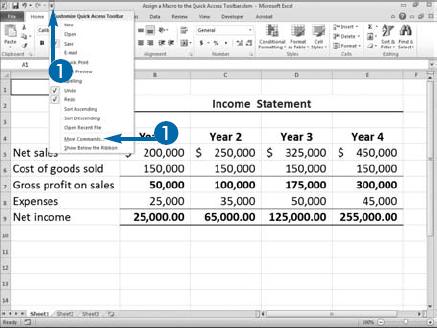
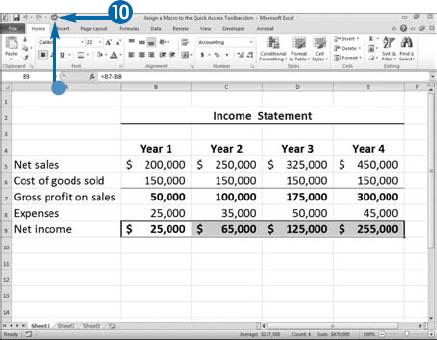
You can assign a macro to the Excel Quick Access Toolbar. You can execute macros assigned to the Quick Access Toolbar using a shortcut key or the Macro dialog box; however, using the Quick Access Toolbar means you can access the macros by simply clicking the appropriate button.
When you add a button to the Quick Access Toolbar, you can specify whether it should appear on the toolbar of all Excel workbooks or only on the Quick Access Toolbar in the workbook you specify. By default, the button will appear in all workbooks. If you have placed your macro in the Personal Macro Workbook, you will probably want your macro button to appear in all workbooks because the macro will be available to all workbooks. If your macro will only be available to a single workbook, your macro button should only appear on the Quick Access Toolbar for that workbook.
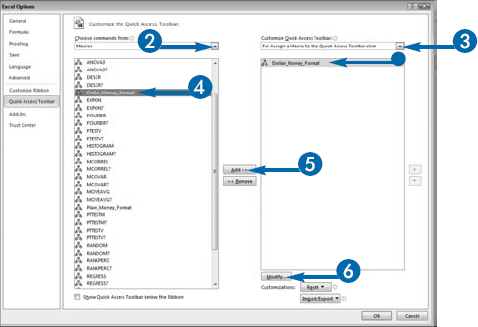
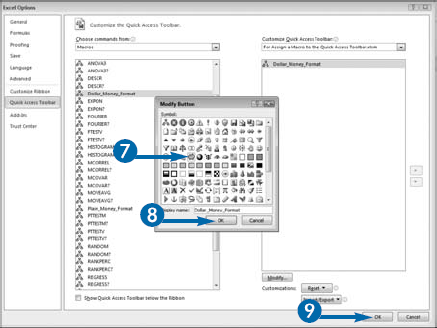
You use the Customize the Quick Access Toolbar page of the Excel Options dialog box to add a macro button to the Quick Access Toolbar. You can use the Modify button to specify the button you want to use to represent your macro. You can specify where on the Quick Access Toolbar your button appears and whether the Quick Access Toolbar appears above or below the Ribbon. You can click the Reset button to return the Quick Access Toolbar to its default state.
Deleting a macro does not remove the macro button from the Quick Access Toolbar. When you press the button for a deleted macro, you receive an error message. Use the Remove button on the Customize the Quick Access Toolbar page of the Excel Options dialog box to remove a macro button.
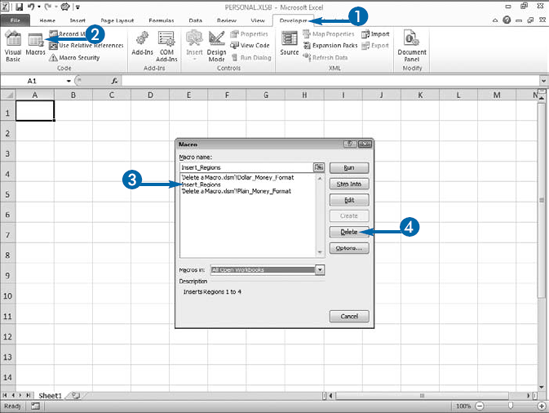
You can delete macros you no longer need by clicking the Delete button in the Macro dialog box. Because the Macro dialog box only displays macros in open workbooks, the workbook that contains the macro must be open before you can delete the macro.
The Personal Macro Workbook stores macros you want to make available to all workbooks. Excel creates the Personal Macro Workbook when you choose to store your first macro in it. After Excel creates the Personal Macro Workbook, the workbook opens as a hidden file every time you open Excel. To learn more about storing macros in the Personal Macro Workbook, see the section "Record a Macro."
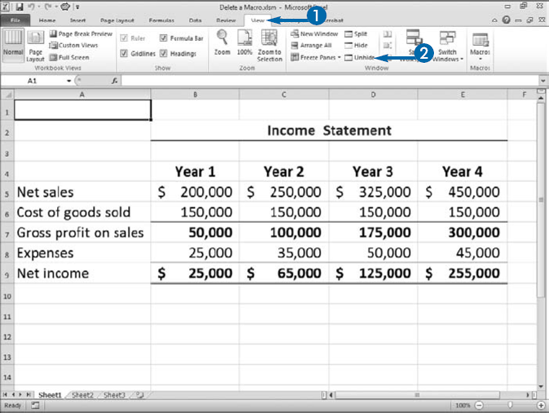
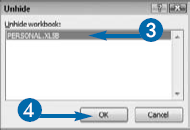
If your macro is in a hidden workbook such as the Personal Macro Workbook, you must unhide the workbook before you can delete the macro. If you try to delete a macro from the Personal Macro Workbook prior to un hiding it, Excel displays the following message: "Cannot edit a macro on a hidden workbook, Unhide the workbook using the Unhide command." You unhide the Personal Macro Workbook and other hidden workbooks by executing the Unhide command on the View tab.
If you unhide the Personal Macro Workbook, make sure you hide it again using the Hide command on the View tab after you delete the macros. Hiding the workbook prevents you from making inadvertent changes to it.
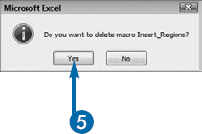
You cannot undo the deletion process. If you delete a macro by mistake, you can close the workbook without saving. Of course, if you close without saving, you will lose all the work you have done since saving. Your only other alternative is to re-create the macro.