
IN THIS CHAPTER
While Adobe Illustrator excels at creating vector-based graphics and Photoshop remains an industry standard in raster or bitmap graphic editing, Adobe Fireworks nicely bridges the two.
Fireworks's real strength, however, is in working with graphics created specifically for the Web. While both Illustrator and Photoshop now contain tools for dealing with the specific demands of Web graphics, neither program was created for that purpose. Fireworks, however, was designed from the very beginning for Web graphics. Its mix of both vector and raster tools along with its superior Web optimization tools make it an ideal choice for creating images for your Web site.
With the release of Fireworks CS3, Adobe added features to the program to also make it a good tool for doing rapid prototyping of Web sites. Today, many professional Web designers begin the process of creating sites in Fireworks, which allows designers to create initial design comps to present to their clients.
Unfortunately, Fireworks does not, at this point, work seamlessly with Catalyst. In some ways the two products fill the same niche: Catalyst provides a means by which designers can create initial prototypes of Flex projects, whereas Fireworks provides the same tool for HTML-based sites.
That said, many designers still prefer Fireworks over Illustrator and Photoshop as their primary graphics tool. Adobe is not ignoring Fireworks in the Catalyst workflow, but a true round-trip workflow does not exist between Fireworks and Catalyst as it does with Illustrator.
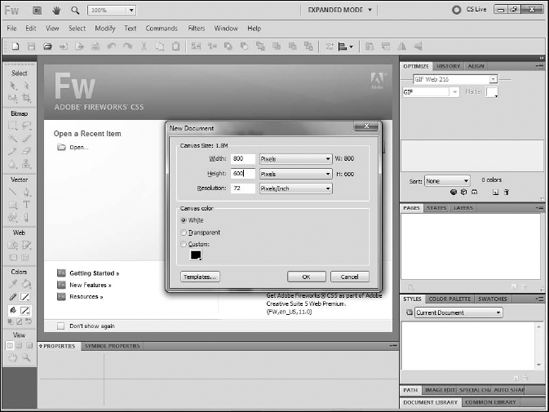
As with other tools in the Creative Suite, Fireworks displays a Start screen on launch (see Figure 7.1). From here you will find a Create New category with a single option: Fireworks Document (PNG).

Clicking the option to create a new Fireworks PNG file displays the New Document dialog box (see Figure 7.2). From this dialog box, you can select the size, resolution, and canvas or background color.
Note
Fireworks's default file format is PNG. Most Web designers are already familiar with the PNG format due to its increasing popularity as a Web graphics format. PNG files often replace GIF and in some cases JPG files. However, Fireworks uses a specially modified version of the format that supports layers and other data needed by Fireworks. Therefore, a Fireworks PNG file cannot be placed directly on a Web page without first being converted to a traditional PNG.
As with other programs in the Creative Suite, Fireworks contains a set of tools and panels that allow you to interact with the application.
The Tools panel (see Figure 7.3), which by default displays on the left side of the screen, contains the main tools in the program. As with Illustrator and Photoshop, Fireworks groups its tools although it also displays headings for each group.
Like other graphics programs, Fireworks occasionally nests tools together requiring you to press and hold your mouse on one tool to display a menu of additional, related tools.
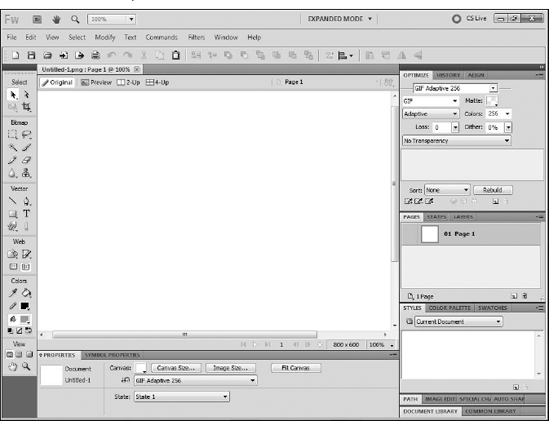
Table 7.1 lists all of the tools in Fireworks. Every tool can be selected by pressing an assigned key on the keyboard, as shown in the table. Those tools with multiple assigned keys can be selected with either key. Nested tools will often share the same key and can be selected by pressing the key repeatedly until the desired tool is chosen.
Table 7.1. Fireworks Tools
The panels in Fireworks provide an easy way to access common program interface components (see Figure 7.4). Panels are grouped around the right and bottom edges of the screen but are fully customizable and can be opened, moved, ungrouped, regrouped, and closed as desired.
A set of panels is known as a workspace. Fireworks ships with three workspaces. Unlike Illustrator or Photoshop, these workspaces merely show or collapse the panel groups along the right edge of the screen. If you prefer, you can create your own workspaces with your desired panel arrangements.
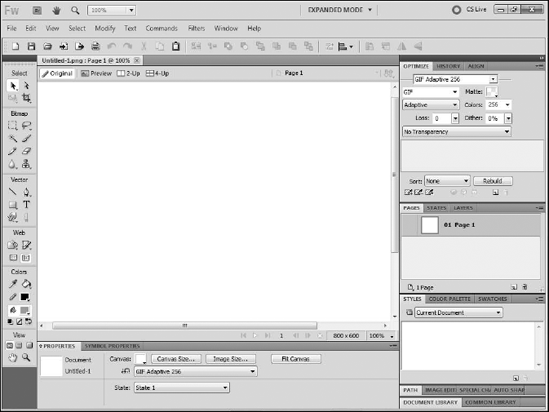
Table 7.2 outlines the panels available in Fireworks and provides a brief description of the purpose of each panel. You can open all panels via the Windows menu, and most panels can also be opened directly with a keyboard shortcut, as noted in the table.
Table 7.2. The Fireworks Panels in the Default Workspace
Table 7.3 describes each of the panels that are not visible in the default workspace. Panels are listed in the order in which they appear in the Windows menu.
Table 7.3. Other Fireworks Panels
Fireworks provides a variety of tools and panels that enable you to work with color. The Color Palette and Swatches panels are the most commonly used. The Tools panel also provides a pair of color pickers, one each for the fill and stroke of shapes, as does the Properties panel when a shape is selected on the canvas.
Note
As with Illustrator and Photoshop, you can work in a variety of color modes in Fireworks. Keep in mind that Catalyst is a program devoted entirely to creating projects that will display on a computer screen. You will need to use RGB in your Fireworks projects that are destined for Catalyst.
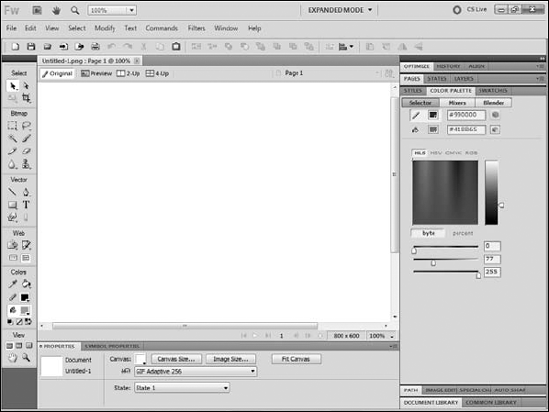
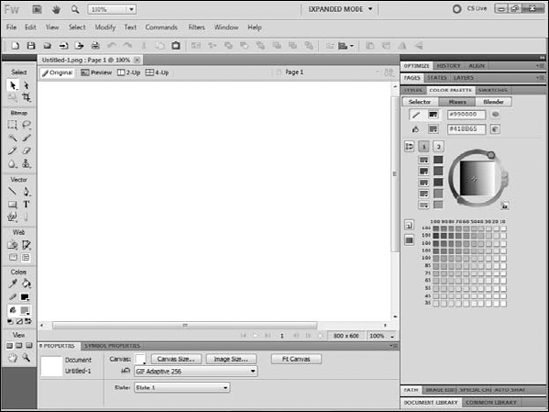
The primary panel for working with color in Fireworks is, appropriately, the Color Palette. The panel provides three methods of defining colors: Selector, Mixer, and Blender. You can switch among these modes using the buttons at the top of the panel.
All three modes have options at the top to determine whether your color will apply to the fill or stroke, as well as text boxes where you can type a hexadecimal color value.
Selector mode (see Figure 7.5) presents a fairly traditional set of tools from which you can define a color. A square displays the entire gamut of colors available in the selected color model, with a slider to the right to set the tint of the selected value.
Sliders are also available that you can drag to choose the desired amount of each color.
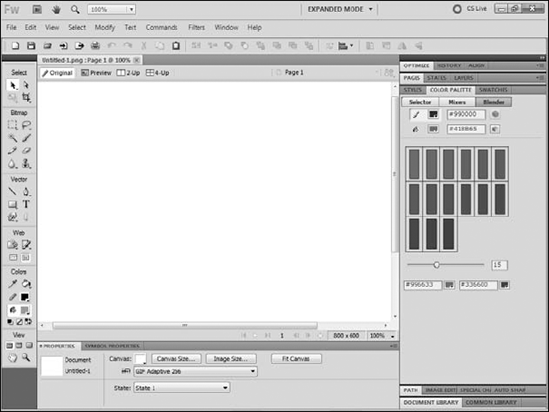
The Mixer mode of the panel (see Figure 7.6) allows you to define five colors so that you can create and work with a consistent but limited color scheme in your document.
It contains a color wheel to help visualize related colors as well as a table of variations of the currently selected color. You can use the panel to export your schemes for use in other documents.
The panel's Blender mode (see Figure 7.7) primarily allows you to define two colors and then have the program calculate a set of gradations between those colors.
This panel can be helpful in setting up gradients or in using the gradations for color combinations in your document.
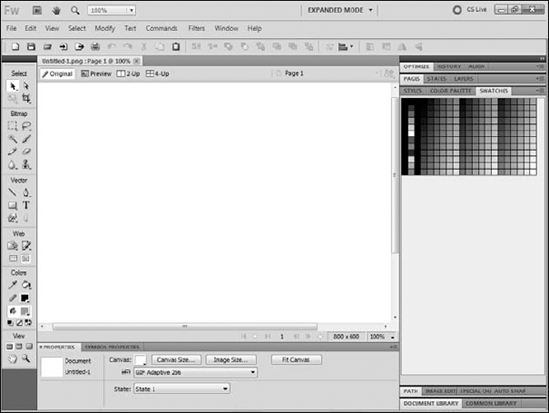
After you mix your colors, you can save them for reuse in the Swatches panel, shown in Figure 7.8. You must designate a color as either the fill or stroke color and then click in a blank area of the panel to add that color as a swatch. Swatches can be deleted by pressing Ctrl (
Tip
The default set of swatches in Fireworks is the so-called Web safe palette. In the early days of the Web, many users had computers that could display a maximum of 256 colors. The palette was developed as a compromise between the colors that could display on Windows-based computers and those that would display on Macs. Today, there is no technical reason to limit yourself to the palette; Fireworks merely uses it as a convenient set of colors to display in the panel.
In late 2006, Adobe released the first public beta of a new Web-based application known as Kuler. Built with Flex, the application allows users to create color themes with a variety of tools. After a free registration process, you can save themes and share them with others.
Fireworks — along with Illustrator, Photoshop and several other Adobe products — includes a Kuler panel. In Fireworks, you can open the Kuler panel by choosing Window
You can add text to your Fireworks document with the Text tool. The Properties panel (see Figure 7.9) displays options for formatting text whenever the Text tool is selected including character attributes such as font, font style, font size, font color, and paragraph attributes such as alignment and line spacing.

You can add type to a document by simply clicking on the canvas and typing. You can edit text that has been added by either clicking on the text box with the Text tool or double-clicking it with the Pointer tool.
You can change attributes of the text, such as the font face, for an entire block of text by selecting it with the Pointer tool and making the necessary adjustments on the Properties panel.
Fireworks contains a unique set of tools that allows it to work as well with bitmap or raster graphics as it does with vectors. While you can use the tools to create either type of image, you can also directly import bitmap graphics for manipulation (see Figure 7.10).
You can import bitmaps into an existing Fireworks image by following these steps:
Choose File

Select the image to import
Click Open. Your cursor will appear as an angle bracket and represents the top-left corner of the image.
Click the canvas at the point at which you want to place the image to finish the import process.
You can also open bitmap images directly in Fireworks. The program supports opening most common graphics file formats. Standard formats such as GIF and JPEG will open as a single flat image. Photoshop images will open with all layers intact.
Fireworks includes a set of filters to perform common manipulations on bitmap images. Filters are available either from the Filters menu on the main menu bar or from the Filters pop-up menu on the Properties inspector. You must have an image onto which filters can be applied, and the image must be selected to add a filter.
Filters Menu, Properties Panel: Destructive, Nondestructive
Although both the Filters menu and the Properties panel offer the same set of filters, results vary depending on how you insert them. Filters chosen from the menu are destructive; they can only be removed by selecting Edit
In contrast, the Properties panel applies Live Filters that at any point can be edited, deleted, and rearranged if more than one filter is applied.
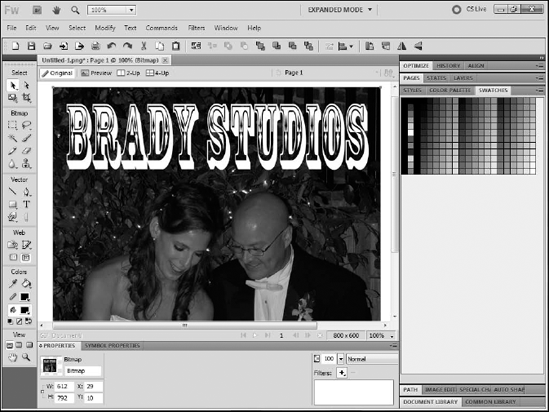
Table 7.4 describes the filters available in Fireworks.
Table 7.4. Fireworks Filters
Filter | Description | Submenu |
|---|---|---|
Auto Levels | Adjusts highlights, shadows, and midtones based on predefined settings | Adjust Color |
Brightness/Contrast | Provides sliders to manually increase or decrease the brightness or contrast in the image | Adjust Color |
Color Fill | Fills the color with a solid color; a dialog box appears to allow you to set the color, blend mode, and opacity of the fill | Adjust Color |
Curves | Displays a dialog box allowing for adjustment of the lightness curves in the image, which allows you to lighten or darken the image | Adjust Color |
Displays a dialog box with sliders to adjust the hue, or overall color of the image, saturation, or amount of color, and lightness of the image | Adjust Color | |
Invert | Reverses the colors in the image, creating a film negative effect | Adjust Color |
Levels | Displays a dialog box that allows you to adjust the highlights, shadows and midtones on the image via its histogram | Adjust Color |
Inner Bevel | Adds borders around the image to create a beveled appearance, where the image will appear to be depressed below the page | Bevel and Emboss |
Inset Emboss | Applies borders to two sides of the image to give the appearance that is has been embossed | Bevel and Emboss |
Outer Bevel | Applies the opposite effect as Inner Bevel, where the image will appear to be raised above the page | Bevel and Emboss |
Raised Emboss | Applies the opposite effect of Inset Emboss | Bevel and Emboss |
Blur | Slightly blurs the image | Blur |
Blur More | Applies a more pronounced blur to the image | Blur |
Gaussian Blur | Displays a dialog box with a slider allowing you to adjust the level of a smooth, uniform blur | Blur |
Motion Blur | Displays a dialog box allowing you to set the angle and distance of a single-direction blur | Blur |
Radial Blur | Displays a dialog with settings for the amount and quality of a blur emanating from the center of the image and radiating from there | Blur |
Zoom Blur | Displays a dialog box with settings for the amount and quality of a blur emanating from the center of the image and moving straight out | Blur |
Add Noise | Adds color noise to the image | Noise |
Convert to Alpha | Converts the image to a transparency based on its alpha properties | Other |
Find Edges | Creates a relief-like effect | Other |
Drop Shadow | Adds a shadow to the outside of image; the shadow's settings are configurable | Shadow and Glow |
Glow | Adds a configurable color glow around the outside of the image | Shadow and Glow |
Adds a configurable shadow effect to the inner edge of the image | Shadow and Glow | |
Solid Shadow | Displays a dialog box with settings to configure a reflection of the image | Shadow and Glow |
Sharpen | Sharpens the edges of the image | Sharpen |
Sharpen More | Applies a more dramatic sharpening | Sharpen |
Unsharp Mask | Displays a dialog box with settings to configure the level of sharpening to be applied | Sharpen |
Photoshop Live Effects | Opens a dialog box identical to the Layer Effects dialog box in Photoshop, allowing you to apply any effect available in Photoshop to a Fireworks image | None |
Note
See Fireworks CS5 Bible for more detailed information on filters.
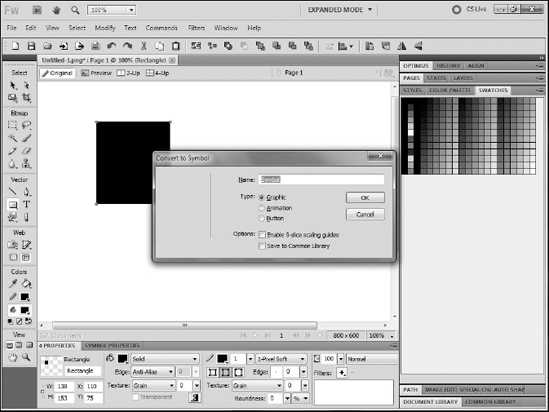
Fireworks provides the ability for objects drawn or imported on the canvas to be saved as symbols. Symbols are reusable objects; once something is saved as a symbol, you can drag it from the Document Library panel onto the canvas at any point.
You can convert an object to a symbol by choosing Modify
Fireworks supports three symbol types:
Graphic. Creates a static image that can be reused in the document
Animation. Allows you to create an animated image by determining the number of states, movement, direction and other attributes
Button. Automatically creates an HTML hotspot to which a behavior or URL can be attached.
Note
See Fireworks CS5 Bible for more information on animation and button symbols. As neither applies to Catalyst projects, details on them are beyond the scope of this book.
Once an object is converted to a symbol it's available in the Document Library. By default, the Library is in the bottom-right corner of the screen. If the library is not visible, you can opt to display it by choosing Window
Instances of symbols retain a link back to the original. Therefore, if you edit a symbol, all instances are updated. You can edit symbols either by double-clicking the icon to the left of the symbol name in the Library or by right-clicking an instance and choosing Symbol
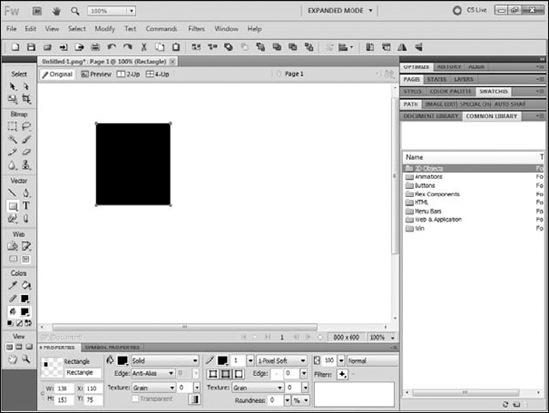
Adobe primarily markets Fireworks as a rapid prototyping tool. Adobe's intent is to position it not as a competitor to Photoshop or Illustrator as a graphics tool, but rather as a logical piece in a Web development workflow.
Fireworks is a tool that designers can use to quickly create comps of sites to present to clients for approval prior to beginning the actual design. With this in mind, Fireworks ships with a set of common interface components for HTML, Flex, and other application frameworks.
All of these prototyping objects are contained in the Common Library (see Figure 7.12). Symbols created within documents are stored in a Document Library that is unique to that document; symbols in the Common Library are available to every document in Fireworks.
Note
If you want to use a custom symbol in more than one document, simply select the check box in the Convert to Symbol dialog box to save the symbol to the Common Library rather than the Document Library.
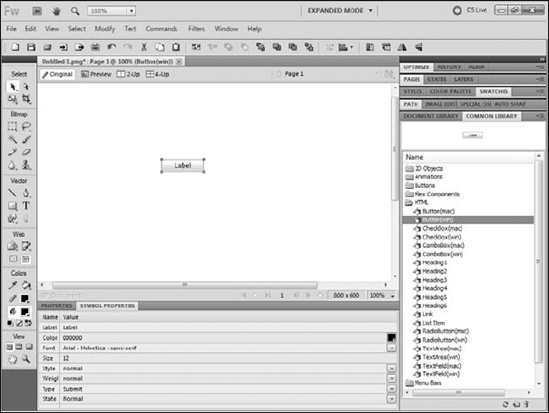
When creating Catalyst projects, you may want to use the Flex Components objects to add representations of components that will eventually be used in the project.
Of particular use is the ComboBox component. ComboBoxes, or drop-down lists, are very common elements in many Web applications. Unfortunately, Catalyst CS5 does not include the ability to convert artwork to a ComboBox. Therefore, if you want to use a ComboBox in your application you may want to add the ComboBox symbol to a Fireworks document and import that into your Catalyst project.
You will not get the actual functionality of a ComboBox — the symbol is nothing more than a graphical representation of a ComboBox — however, you will have an effective placeholder in your design comp that your Flex developer can later replace with an actual ComboBox in Flash Builder.
Most of the components in the Common Library can be configured with the Symbol Properties panel. For example, the ComboBox component simply says Text. However, if you plan to use this in a Catalyst project you will likely want to change that text to better represent the purpose of the ComboBox in the project.
You can open the Symbol Properties panel by choosing Window
You cannot import Fireworks documents directly into Catalyst. However, you can still use them as the basis for Catalyst projects, and you can import Fireworks images into Catalyst via the FXG format.
FXG is an XML-based format for describing Flash-based graphics. Its primary goal was to allow for other tools in the Adobe Creative Suite, such as Photoshop or even InDesign, to have a round-trip editing workflow with Flash.
Exporting your image is as easy as following these steps:
Choose File
In the Export dialog box, select FXG and images from the Export drop-down list.
Type a name for the file.
Click Save (see Figure 7.14).

This chapter introduced the third primary graphic design tool in the Adobe Creative Suite: Fireworks. In it you have learned how to:
Create a new Fireworks document
Use the tools and panels in Fireworks
Work with color
Add and format text
Import and work with bitmaps
Save artwork as symbols
Export graphics as FXG to use in Catalyst