View the project's code
Import the project into Flash Builder
Run the project from Flash Builder
View help on the code
View the project in design mode
Connect a project to live data
Flash Catalyst is not designed to create complete projects. At some point, almost all projects will need to be exported to Flash Builder where a Flex developer can finish creating the interactive aspects of the application and add server-side connections for live data. Fortunately, the process of moving your project from Flash Catalyst to Flash Builder is fairly easy.
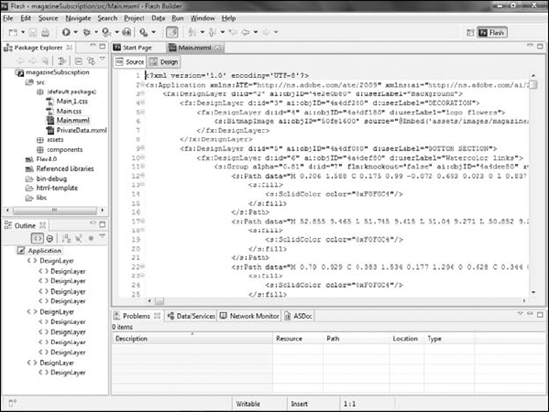
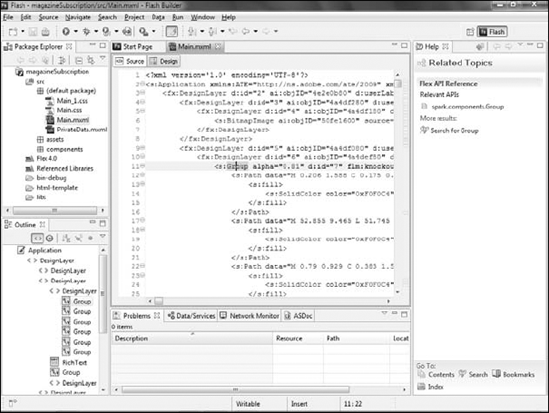
Flash Catalyst is designed for designers, not programmers. Everything that you do in Catalyst results in MXML and ActionScript code being generated, but all of the coding is happening in the background. Catalyst allows you to view the code that it creates for your project, but the view is read-only; you cannot edit the code directly in any way from within Catalyst. Any and all code editing must happen in Flash Builder.
To view the code from your project choose Window
Note
The only time you should see errors in the Problems panel is when you have components with required parts that have not been defined.
The Code workspace (see Figure 15.2) will initially only display the code for the main application file. It will not display the code for the components you have defined, as they are separate files.
If you expand the project's main folder in the Project Navigator by clicking the small arrow to the left of the folder, and then expand the src folder, you will see the main application file. That same folder should also contain a components folder, which in turn contains the files for each of the components in your project. You can double-click any of these files to view their code.
In general, MXML is used to create the visual aspects of the project while ActionScript handles the programming logic. Thus, most of what you create in Catalyst will be MXML. There may be small blocks of ActionScript in your code, such as that needed for action sequences, and video and SWF control; therefore, if your project contains any of these things you will see ActionScript code in your project.
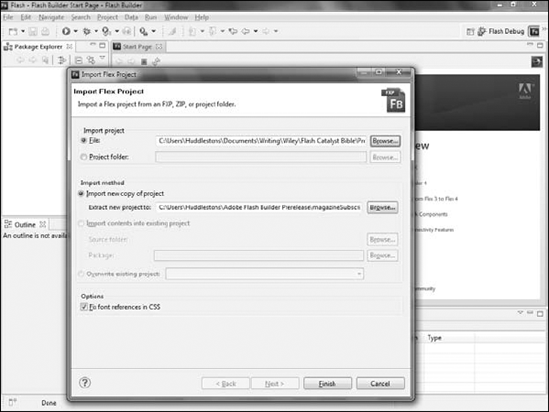
You do not need to do anything special to export your project from Catalyst before using it in Flash Builder. Catalyst saves projects as an FXP file. The FXP format is in fact a zipped file that contains the project's assets. All of the files and folders you see displayed in the Project Navigator panel in Catalyst are contained within the FXP. The only thing you need to do to prepare a file for export is save it in Catalyst.
Importing a project in Flash Builder is likewise a simple process. You simply choose File
The Package Explorer view in Flash Builder displays the folder structure of the project. The basic structure will match what you saw in Catalyst, but Flash Builder will have added references to the Flex 4 and Referenced Libraries folders from which it can draw additional assets you may need as you work on the project.
Also, the src folder will display its contents as packages, so whereas in Catalyst the main application file is directly in the folder, it now resides in the (default package). The components and assets are also shown with package icons, but their functionality is the same as folders.
Note
See Chapter 14 for a discussion of packages.
After you import the project into Flash Builder you can run it just as you would any other Flex project. Choose Run
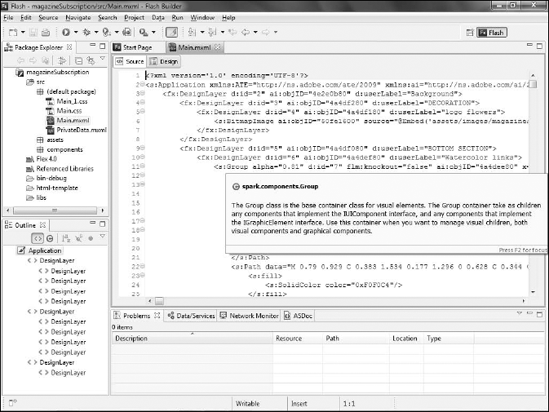
The code required to render a Catalyst project in MXML can be daunting, whether you are new to the Flex framework or new to Flex 4's graphical capabilities. Fortunately, Flash Builder provides context-sensitive help that allows you to quickly view detailed information about any code in the page.
For most tags a simple description can be displayed by simply moving your mouse over the element (see Figure 15.6). A tooltip will appear describing the component. The same help is available for attributes of tags, function calls, and most other language elements.
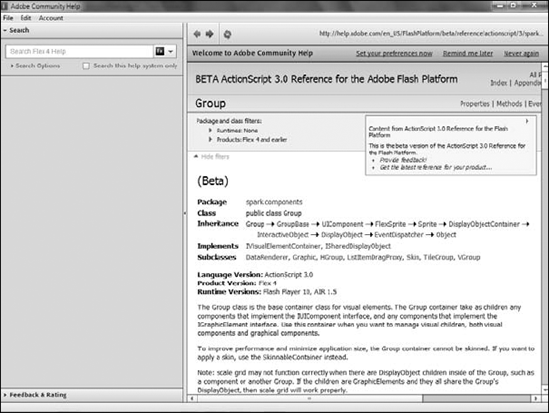
Additional information is provided in the Help view, which can be opened by choosing Help
The Dynamic Help view links to the Adobe help files for a selected item. Clicking a link opens help in a new window directly within Flash Builder's internal Web browser (see Figure 15.8).
Flash Builder features a design mode that allows you to see what the project will look like when it runs in Flash Player. The design mode is, in some ways, similar to the view you have of the project in Catalyst. However, whereas Catalyst features an editable design view and a read-only code view, Flash Builder's design mode allows you to edit the project.
To switch between the code or source view and design view in Flash Builder, click the button in the top-left corner of the document window (see Figure 15.9).
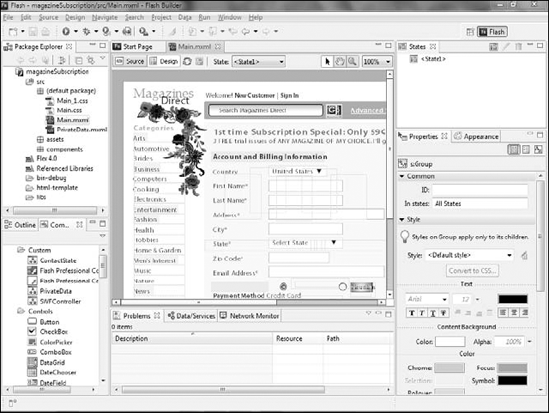
The design mode in Flash Builder features a stage area that displays the project with a set of views surrounding it for editing. Just as in Source mode, the top-left view is the Package Explorer, while the Outline view remains in the bottom-left corner.
Likewise, the Problems, Data/Services, Network Monitor, and ASDocs views will remain visible along the bottom edge of the screen. However, a set of new views, all particularly useful for working on the project in Design mode, will now also be open. Table 15.1 briefly describes each of these views.
Table 15.1. The Default Views in Flash Builder's Design Mode
View | Default Location | Description |
|---|---|---|
Components | Bottom left, grouped with Outline | The Components view provides drag-and-drop access to the components in the Flex framework. They are grouped into three folders: Custom, which contains any components created by you or your Flex developer; Controls, which contains the common user interface components such as buttons and text inputs; and Navigators, which contains the components in the framework designed specifically for navigational use. |
States | Top right | Displays the states in the project. The selected state will be displayed in the design window. |
Properties | Bottom right, grouped with Appearance | Displays the common properties of the component currently selected on the stage. |
Appearance | Bottom right, grouped with Properties | This panel contains tools that allow you to modify the overall look and feel of the application. |
Flash Catalyst allows you to create areas of your application that can be used to display dynamic data. It cannot, however, actually assist you in bringing that data into the project, a step that must instead be completed in Flash Builder.
Flex applications run entirely at the client. In other words, they are applications that run locally in your user's browser and not on a server. Therefore, they cannot connect directly to back-end resources such as databases any more than an HTML-based Web front end can. Instead, just as in HTML-based applications, your Flex application will need to connect to a program on the server that can in turn access back-end databases or other resources.
You can write this server-side script in almost any Web programming language, such as Adobe ColdFusion, PHP, or Microsoft ASP.NET. You can also access scripts written in Java. Regardless of the language, the script will need to be written as a Web service in order for your Flex application to have access to it.
A detailed description of writing such a script is well beyond the scope of this book. If you want to connect to your own data source, you will need to consult a reference on the language of your choosing.
Note
Strictly speaking, Flex applications can connect directly to server-side Java and ColdFusion resources, even if they are not Web services, via the Adobe LiveCycle DS or Breeze DS servers. Discussion of these alternatives is beyond the scope of this book; David Gassner's Flex 4 Bible goes into detail on these methods.
Note
So that you can experiment with server-side data, several files are available on the book's Web site (www.wiley.com/go/flashcatalystbible) to allow you to work through this process. Detailed setup instructions for these files are included on the site.
Once the server-side script has been written and properly deployed on the server, Flash Builder mostly automates the task of connecting your application to the script and consuming the data returned from it. The Data/Services view, which by default appears along the bottom of the screen, allows you to launch a set of wizards to get started using server-side data (see Figure 15.10).
To begin using server-side date, follow these steps:
Click the Connect to Data/Service link on the panel. This launches the first step of the wizard. A default installation of Flash Builder includes wizards for six types of services:
Blaze DS. An Adobe application server for the Flex framework.
ColdFusion. Adobe's server-side scripting environment.
HTTPService. Allows you to connect directly to files on the server that return properly formatted date, most often using XML.
LCDS. Short for LiveCycle Data Services, this is another Adobe application server for Flex.
PHP. An open-source alternative to ColdFusion.
WebService. Lets you connect to other resources such as those created using ASP.NET.
Select the type of service you want to use. Flash Builder now needs to modify your project to work with the server. When you import a project from Catalyst, Flash Builder creates a generic project.
Once the project is created, you need to configure the project to use the server-side resources. A dialog box warning you that this change is necessary appears when you select the service.
Click Yes on the dialog box. The Server Settings dialog box opens.
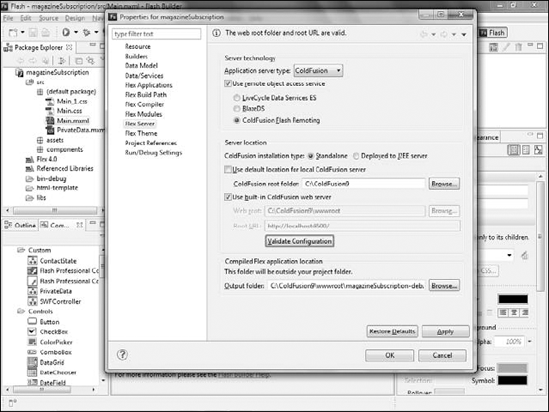
Complete this dialog box by selecting the appropriate application server type and specifying the path to the server (see Figure 15.11). The wizard will resume with the New Flex Service dialog box.
Note
See the Flash Builder help files or the Flex 4 Bible for detailed instructions on configuring the server-side settings. The figures in this chapter display the settings necessary to connect to a ColdFusion script.
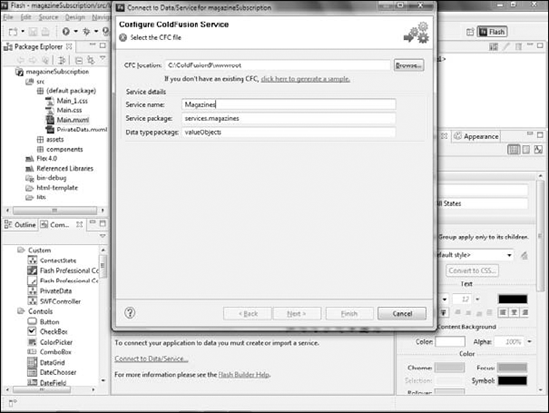
If you are using ColdFusion, you can have Flash Builder generate a ColdFusion Component (CFC) to provide you with basic functionality. Alternatively, you can select Import CFC to use a prebuilt ColdFusion component for your project. Flash Builder will introspect the imported CFC file and return a list of the functions, or methods, available from the CFC (see Figure 15.12).
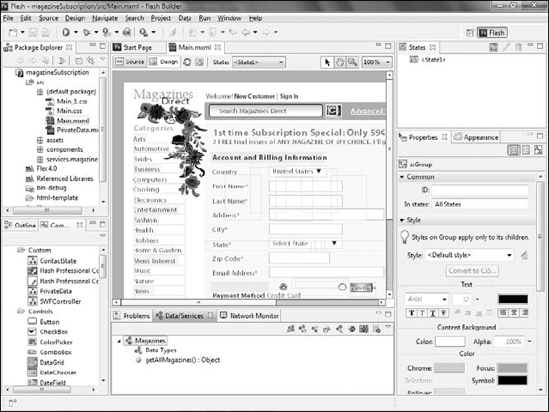
Use one of more of the methods on the returned list to retrieve the data for your project.
Select the method you want to use (see Figure 15.13).
Click Finish. Flash Builder generates a number of ActionScript files to implement the necessary functionality to receive the data from the server so that it can be used by Flex.
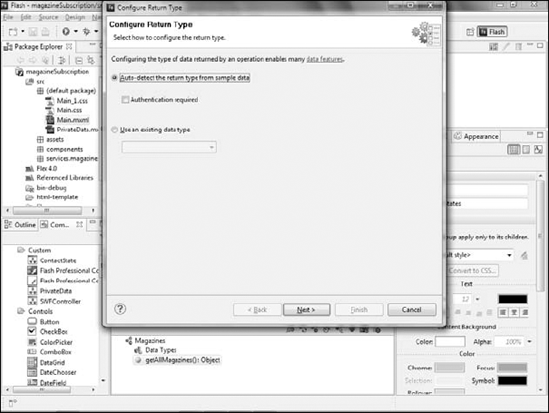
Configure the type of data that will be returned. You can accomplish this by either of the following methods:
Clicking the Configure Return Type button on the panel.
Right-clicking (

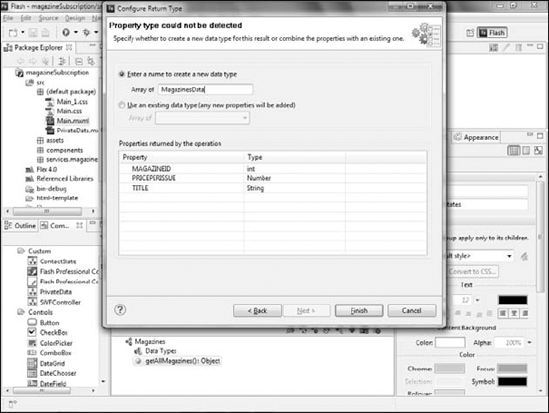
Either way, the Configure Return Type dialog box appears (see Figure 15.15). Most of the time, you will want to create your own custom data type with a name that represents the kind of information being returned.
Tip
A data type lets a computer program know how it should interpret information and places restrictions on how that information is used. Common data types include strings, which represent text and other nonnumeric characters; numbers; and Boolean or true and false values. Data types in ActionScript are defined through the use of classes. This makes it possible for developers to define their own data types through the creation of custom classes. When you select the option in the Configure Return Type dialog box to use a custom data type Flash Builder writes the code needed to define this type as a new class.
Once the return type has been defined, determine which method of the service will be called and provide any necessary arguments to it (see Figure 15.16).
Note
Arguments are pieces of data that need to be passed to a service. For example, a Web service that displays the local weather would need an argument informing it of the user's location, such as a ZIP code.
Tip
You need to specify the data type of the argument, which must match the type expected by the service. You need to look at the service's documentation or contact its developer to determine what this type should be.
The final step of the wizard displays after Flash Builder invokes the service's method. It displays the information being returned and the data type of each piece.
Review the information displayed after the Flash Builder invokes the service's method to ensure that it is correct.

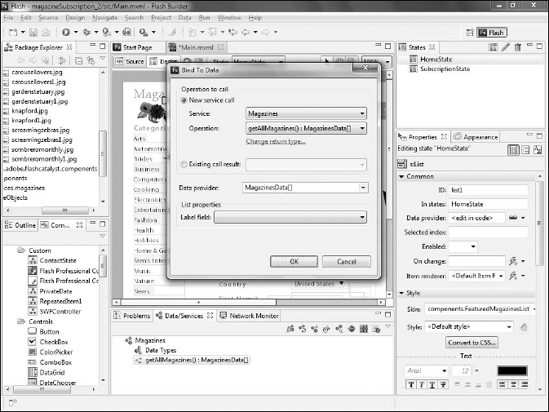
Now that the service has been configured, you can use a process known as data binding to associate the data with a control in your project. This process can be completed in Design mode and requires no code be written by you. Follow these steps to bind data:
Select the control to which you wish to bind the data.
Click the Bind control to data button in the Data/Services view. Alternately, you can drag the icon that represents the data from the view onto the control or right-click (
When you designed the control in Catalyst, you likely added placeholder data to show what the control might look like. Flash Builder will detect that the control already contains data.
Confirm that you want to replace this dummy data with the live data coming from the service. The Bind to Data dialog box appears (see Figure 15.17).
Determine the service being called and the type of data to be used (see Figure 15.18).
Note
See Chapter 12 for details on adding design-time or placeholder data in Catalyst.
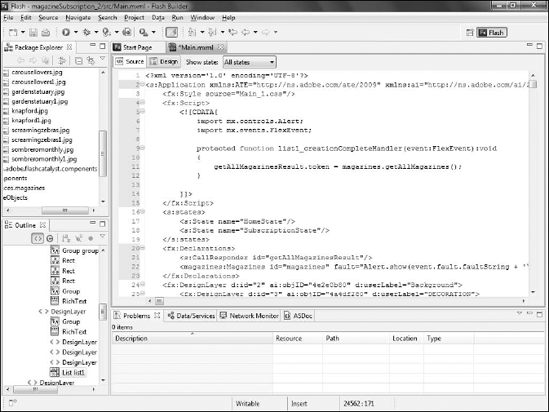
Click OK on the Bind to Data dialog box. Flash Builder switches to Source view and displays an event handler function that it has created. This function is invoked by the application as soon as it finishes building the list control that will display the data and is responsible for populating the control with the data. You need not make any modifications to this code (see Figure 15.19).
Click File