
IN THIS CHAPTER
Although you can create application comps in either Illustrator or Photoshop, it's likely that many designers will find Illustrator's drawing capabilities better suited to the task of creating the comp. Photoshop's strength, on the other hand, has never been in creating images but rather in modifying existing raster graphics.
Therefore, assets for your application, particularly photographic assets, will likely require a certain amount of work in Photoshop before they are ready to be brought into Catalyst.
It is possible to create images completely from scratch in Photoshop. There are, in fact, artists who create photo-realistic imagery entirely in the program. Most of the time, however, you will be opening pre-existing images, whether pulled from your company's image library, downloaded from a stock photo site, or taken by you on your digital camera.
Warning
Images are subject to copyright protection. Do not download an image off any Web site you do not own with the intent of using it in your application unless that site specifically states that such use is acceptable. If you have any doubt at all about whether or not you can use an image, it may be best to err on the side of caution and assume you cannot. Copyright laws vary from country to country and can be very complex, so when in doubt, seek competent legal counsel.
Tip
There are many extremely good royalty-free stock photo sites on the Web. A good list of many of the more popular sites can be found at www.smashingmagazine.com/2009/08/16/free-and-commercial-stock-photography-sites/.
Photoshop supports opening images in almost all of the most popular file formats, but images you download from stock photography sites will almost certainly be either JPEG or PNG images. Your company's image library may have them as TIFF or BMP files. This is only a small list of the formats supported by the program. Except for images saved in proprietary, application-specific formats, if you have an image on your computer, you can almost certainly open it in Photoshop.
You have a few options for opening images. You can click File
Tip
The double-click shortcut to open files works over most of the screen in Windows. On a Mac, or on Windows if you have other files open, you can double-click in the darker gray area below the panels on the right or below the Tools panel on the left.
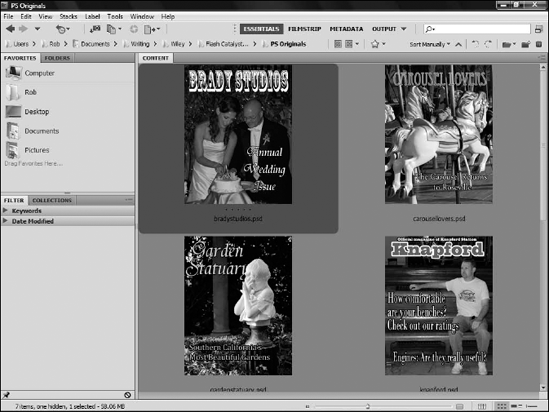
You can also open files from Adobe Bridge (see Figure 6.1). Bridge is a stand-alone application installed with any of the Creative Suite applications. You can access Bridge directly from the Start menu in Windows or the Dock on a Mac or by clicking File
Bridge allows you to organize and sort files with more freedom than is provided in either Windows Explorer or the Mac Finder. Bridge also allows you to rate images on a five-point scale and add keywords and other metadata, and then either search for files or filter file lists by the rating or keywords.
As long as your operating system's preferences are set to open the file type in Photoshop, double-clicking any image in Bridge opens it in Photoshop. Should you have a different program associated with the file, you can right-click (
You can have multiple files open at the same time in Photoshop, and each one is represented by a tab along the top of the screen. You can switch to viewing another file by clicking its tab, or rearrange the order of the files by dragging the tabs. You can also drag a tab into the middle of the screen to detach it so that it floats in its own window.
To open multiple files at once, follow these steps:
In Bridge, you can follow much the same procedure:
Ctrl+click (

Either double-click any one of the files, or right-click (
Select Open With

When you open an image in Photoshop, the program automatically opens the file at a level of magnification that allows you to see the entire image, which rarely is 100 percent. The Zoom tool allows you to increase or decrease the magnification to see more or less detail on the image.
Note
As with the chapter on Illustrator, this chapter on Photoshop does not attempt to cover every aspect of the program, or even every tool on the Tools panel. Instead, this chapter focuses on those tools, panels, and features most likely to be of use to the Catalyst designer. See Photoshop CS5 Bible, by Lisa DaNae Dayley and Brad Dayley, for a more thorough handling of the subject.
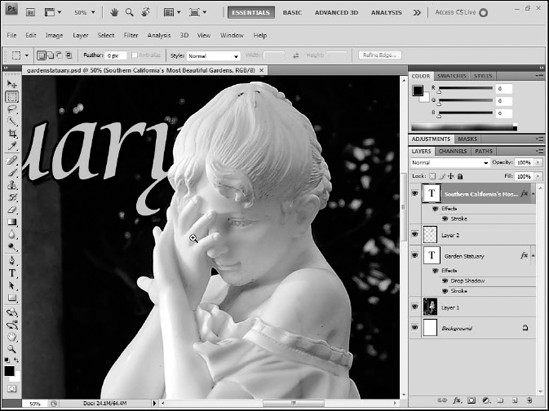
You can select the Zoom tool by clicking the magnifying glass toward the bottom of the Tools panel on the left edge of the screen (see Figure 6.2). Each time you click the image, you zoom in. When you need to zoom back out, press and hold the Alt (Option) key and click.
When you are busy using another tool, you can temporarily use various Zoom functions by checking out the shortcuts listed in Table 6.1.
You can quickly zoom in on a specific region of a page by using the Zoom tool to create a marquee selection. Click and drag the mouse with the Zoom tool to draw the marquee; when you release the mouse, Photoshop zooms you in so that the pixels within the marquee fill the screen.
Note
Remember that Photoshop is primarily a raster-based editor, and all photographic images will be raster. Raster images are resolution-dependent, so how far you can zoom in and still maintain detail depends on the resolution of the image.
Once you have zoomed in on the image, you need to navigate to see other areas of the picture. You can of course use the scrollbars, but you can generally move more easily using the Hand tool. Once the tool is selected, click and drag to move to other areas of the image.
You may also use the Navigator panel, which you can open by clicking Window
Tip
While using other tools, you can temporarily access the Hand tool by pressing and holding Shift and then clicking and dragging as normal.
Very often, you will want to work on a portion of an image and be sure to not affect other areas. For example, if a photograph had an overexposed background and a properly exposed foreground, you would want to darken the background without changing the foreground. To do this, you need to select the pixels in the background. When a region of pixels is selected, Photoshop's tools affect only the selection.
Selecting geometric areas of an image is fairly easy with the Rectangle and Elliptical Marquee tools. Both share the same spot on the Tools panel, so you need to press and hold your mouse on one to select the other, just as you did in Illustrator.
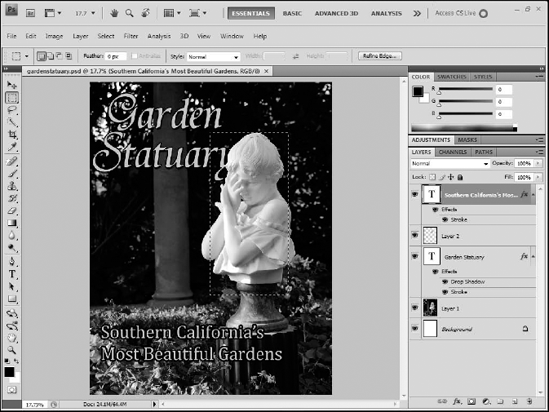
With the tool active, click and drag on the image to create a selection marquee. You can press and hold Shift while you drag to create a perfect square or perfect circle (see Figure 6.3).
Tip
You can press and hold the Spacebar while you drag when using any selection tool to move the selection to a different location as you draw it. You can press and hold Alt (Option) while you drag with the Rectangle or Elliptical Marquee tools to draw the selection from the center, rather than the edge as is the default.
When you need a freeform selection marquee, use the Lasso tool. Simply click and drag on the document. If you return to your original point before releasing the mouse, Photoshop creates a marquee selection in the shape you drew (see Figure 6.4).
If you release the mouse before returning to your original point, Photoshop draws a straight line between your release point and your starting point to complete the marquee.
The Lasso tool is not generally a good tool to use when you need precise selections. Unless you have either a graphics tablet or a very steady hand, you will likely have difficultly drawing the marquee with the Lasso tool.
Therefore, it is best used when you need only a rough selection outline. Other selection tools, such as the Quick Select tool and the Magic Wand, give you better precision.
Grouped with the Lasso tool are the Polygon and Magnetic Lasso tools. The Polygon Lasso allows you to draw a selection marquee in a shape with any number of straight sides.
Simply click on the image anywhere that you want to place a corner, and Photoshop draws a straight line for the marquee between that corner and the previous one. Click back on your starting point to complete the marquee and create the selection (see Figure 6.5).
The Magnetic Lasso allows you to follow lines in the image. If you have a portion of an image with high contrast and distinct outlines, such as the side of a dark building against a light sky, the Magnetic Lasso allows you to create a selection that follows that edge.
To use the Magnetic Lasso tool, follow these steps:
Click a starting point on the edge and then drag along that edge. You do not need to hold down the mouse button, but you will find that the tool is more precise if you drag very slowly.
If the tool does not follow the edge, click to create points to lock in the side. Keep in mind that the tool relies on high contrast, so it is unlikely to work on an image with indistinct edges.

The Smart Selection tool allows you to very quickly create selections in areas with high contrast and distinct edges (see Figure 6.6).
To use the tool, simply click and drag within the area you want to select. As long as the area you are selecting has sufficient contrast with its background, the tool allows you to drag through the region and create the selection you want.
The circle you see while selecting is the brush size, which you can adjust before you begin selecting by using the left and right square bracket keys.
The Magic Wand tool selects areas based on similar colors. Simply click on a pixel in your image, and all contiguous pixels with the same or similar colors are selected. The Tool Options panel at the top of the screen includes a Threshold setting to determine how similar or dissimilar a color can be in order to get selected. High threshold numbers allow for a wider range of colors to get selected than lower thresholds.
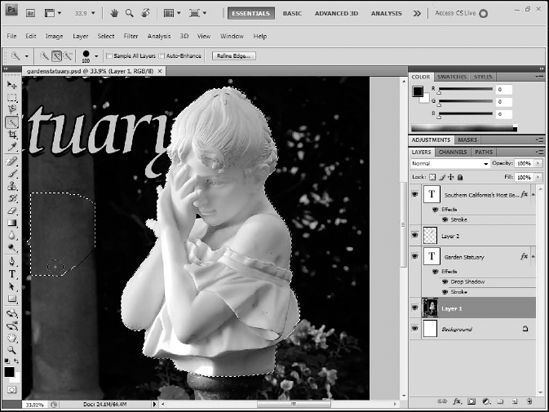
You will encounter many occasions when one of the selection tools works for a portion of your image, but not other sections. Fortunately, Photoshop allows you to add to or subtract from selections, and even combine selection tools.

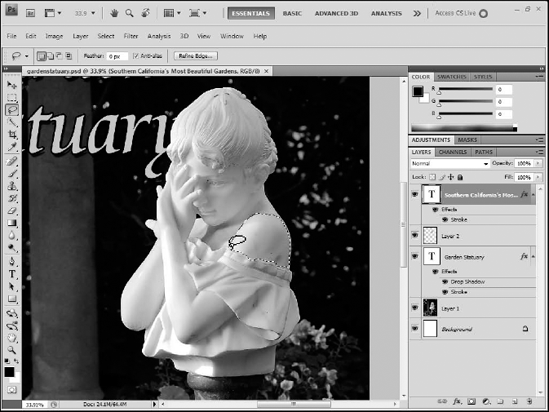
With any selection tool, you can press and hold Shift to add to your current selection (see Figure 6.7) or press and hold Alt (Option) to subtract from it.
You can do this with any tool, including a tool other than the one with which you made the initial selection. For example, if you wanted to select a single flower in an image, you might start with the Magic Wand, assuming that the flower was mostly a single color. Then, you could press and hold Shift and use the Smart Selection tool to add smaller petals or other details to the selection.
Conversely, if you began with the Smart Selection tool and ended up having a selection that included some areas that you did not want, you could press and hold Alt (Option) and drag over those extra areas to remove them from the selection.
You cannot do anything to any part of an image that is not selected. Therefore, once you are done manipulating a selected region, you need to deselect to continue working on other parts of the image. You can deselect by either clicking in an unselected area with a selection tool, or by clicking Select
You may end up needing to spend a considerable amount of time creating a selection in Photoshop; you would not want to lose that selection by an inadvertent mouse-click.
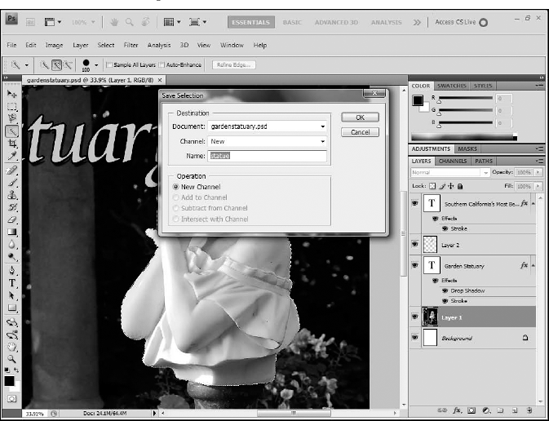
There may also be times when you need to create a selection and manipulate a part of an image, and then later in your work return to that same selection. To help in both of these cases, Photoshop allows you to save selections. With an active selection, simply click Select
The Save Selection dialog box allows you to name your selection and save it as a channel (see Figure 6.8). You can reload selections by following these steps:
Click Select
Choose the appropriate channel.
Click OK.
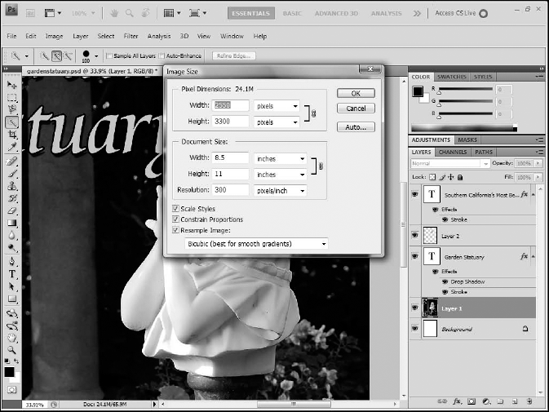
Photoshop allows you to resize and crop images. As rasters, images in Photoshop cannot be resized without affecting either their file size or their quality, and most often both. You can resize images by clicking Image
The dialog box shows the size of the image using two different but related methods (see Figure 6.9). The top section shows the pixel dimensions, and the bottom displays the document size, usually in inches.
Photoshop calculates this document size by multiplying the resolution of the image by the pixel dimensions. If you change the pixel dimensions, the document size changes while leaving the resolution alone. Conversely, changing the resolution changes the pixel dimensions according to the current document size.
Tip
The ideal resolution for images that you plan to display on Web pages is 72 pixels per inch. This ensures good quality images on most computer monitors while maximizing file savings. However, you generally want to work on images that are at least double the final resolution to give you a high-enough quality to do the edits you need. Therefore, you should try to work on images that are at least 150 pixels per inch, and plan to drop them to 72 when you are done editing.
You can almost always scale images down, making them smaller, without noticeable quality loss. The same is not true when scaling up because Photoshop needs to resample the image, filling data into what become new pixels in the image.
The bottom of the Image Size dialog box allows you to set the method that Photoshop uses for this resampling. For most images, the default method, Bicubic, works well, so you will rarely need to change it.
In addition to resizing images, Photoshop allows you to crop (see Figure 6.10). Cropping an image involves removing areas of the image you no longer want. You may choose to crop an image simply to make it smaller, but usually it is a more artistic decision. By cropping unwanted areas from the image, you can change the focus of an image.
Photoshop relies heavily on layers for organizing complex images, although its layers function slightly differently from Illustrator's. In Illustrator, every shape you draw is placed on its own sublayer. Photoshop does not have sublayers; when you add multiple objects to the same layer in Photoshop, they simply overlap one another on that layer.
Because Photoshop does not automatically create sublayers as you work, you do need to be much more conscious about layers. Whenever you need to have a new portion of your work on a new layer, you need to be sure to create the new layer first. Two objects on the same layer merge into one another, so in order to maintain editability, you need to do almost everything on new layers.
Just as in Illustrator, Photoshop's Layers panel displays the layers in the image. The order in which the layers appear is their stacking order, bottom up. You can change this by simply dragging layers up or down as needed. The eye icon to the left of the layer thumbnail allows you to show or hide the layer.
You can create new layers in Photoshop by clicking the New Layer button in the bottom of the Layers panel. You should get in the habit early on of giving your layers meaningful names, which you can do by double-clicking the layer's current name.
Note
A checkerboard pattern on a layer's thumbnail represents transparent pixels on that layer.
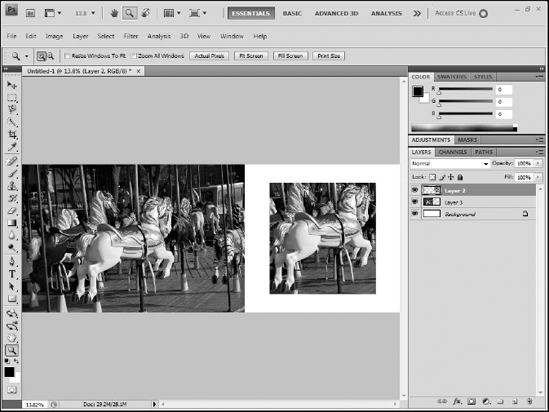
Once you have an area of your image selected, you may want to copy that selection to a new layer. This allows you to further isolate the selection while working on it. With any range of pixel selection, you can click Layer
Most of the time, it is better to copy pixels to the new layer, instead of choosing the Layer via Cut option. Copying the pixels gives you the new layer while preserving the original. If you later change your mind and decide you no longer need the new layer, you can delete it and return to your unaltered image.
You can delete layers at any time. Select the layer and click the small trashcan icon in the lower right corner of the Layers panel, or drag the layer onto the trashcan.
When you select a layer in the Layers panel, you are making that layer available for editing. Actions you perform apply to that layer. When you use a selection tool, it selects only the pixels on the currently active layer. However, selecting a layer does not automatically select any pixels on that layer. If you want to select all of the nontransparent pixels on a layer, you can Ctrl+click (
Each layer has an opacity setting that allows you to make it semi and completely transparent. The property appears in the top right corner of the Layer panel. You can adjust the opacity by typing a percentage value in the text box, clicking the arrow and dragging the slider, or scrubbing the value by dragging left or right directly on the Opacity label.
You can blend the colors on layers with those below it by changing the layer's blend mode. Photoshop supports a long list of blend modes. The most commonly used blend modes are:
Multiply
Screen
Overlay
Multiply blends the darkest pixels of the layer being blended with the dark pixels of the layers below it, resulting in a darker overall appearance.
Screen is the opposite of Multiply: The lightest pixels of the layer are blending with the light pixels below.
Overlay is somewhat in the middle, blending the midtones of the layers. There is no right or wrong when blending layers, and only experimentation reveals the blend mode that results in the effect you are trying to achieve.
Note
Many of Photoshop's blend modes exist in Catalyst. See Chapter 4 for an overview of the Catalyst blend modes.
Note
See Photoshop CS5 Bible, by Lisa DaNae Dayley and Brad Dayley, for a more detailed description of layer blend modes in Photoshop.
One of the more common uses of Photoshop is retouching images. Images may need minor fixes such as removing blemishes on a model, correcting color, or major work such as fixing water stains on old prints.
Many pictures, particularly those made with digital cameras, need to have their color corrected. Digital cameras contain a sensor that sets the white balance on the photo, which varies depending on the light source at the time the picture was taken. Some cameras are very good about automatically adjusting the white balance, but even the best sometimes get it wrong.
There may also be times when you simply want to change the white balance, and thus the overall coloring of the photo, for artistic reasons.
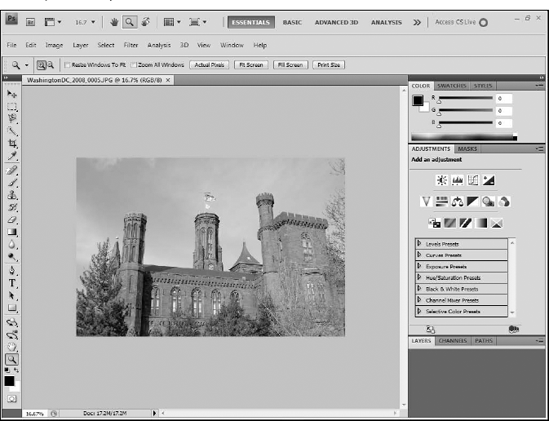
Several different techniques exist for correcting white balance in images in Photoshop, but one of the easiest is to use a Color Balance adjustment layer. Many easy-to-use adjustment presets exist in the Adjustments panel (see Figure 6.11). You can open the Adjustments layer by clicking Window
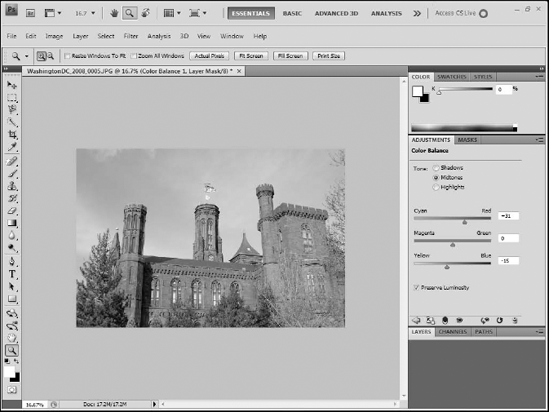
The Color Balance is the icon that resembles a set of scales in the second row. Clicking the icon adds an adjustment layer to your image and presents you with three color sliders. The first adjusts the color between cyan and red, the second between magenta and green, and the third between yellow and blue. You can adjust your image's white balance by simply moving these sliders left or right until you get the desired effect (see Figure 6.12).
Note
When you use the Adjustments panel, Photoshop applies your changes through an adjustment layer. This is a special layer that allows you to perform nondestructive adjustments. Because all of the changes are made on a separate layer, you are not altering the actual image so you can always continue to fine-tune the adjustment by simply clicking on the layer. You can remove it altogether by deleting the layer.
Once you have made the desired adjustments, you can click the arrow in the bottom left corner of the panel to return to the main Adjustments menu. You can add as many adjustments as you want, but be aware that each is added on a new adjustment layer above the last so the adjustments are cumulative.
Another common issue with many photos is that they are either too bright or too dark. As with color balance, these problems can be fixed with an adjustment layer.
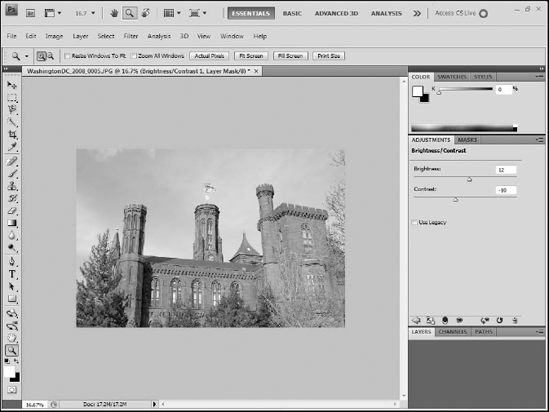
Several techniques exist to adjust the overall brightness of an image, but the easiest one to understand is Brightness/Contrast. This is the first of the icons on the Adjustments panel and simply presents two sliders (see Figure 6.13). The Brightness slider increases or decreases the level of the highlights in the image, whereas the Contrast slider does the same for the shadows.
Photoshop contains several useful tools to alter the image itself. The Spot Healing Brush tool, Healing Brush tool, Patch tool, and Red Eye Removal tool are all grouped together.
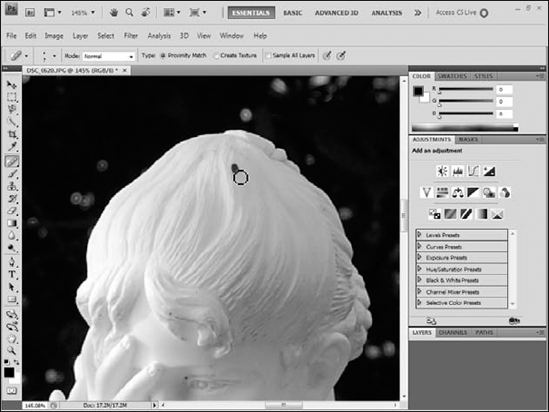
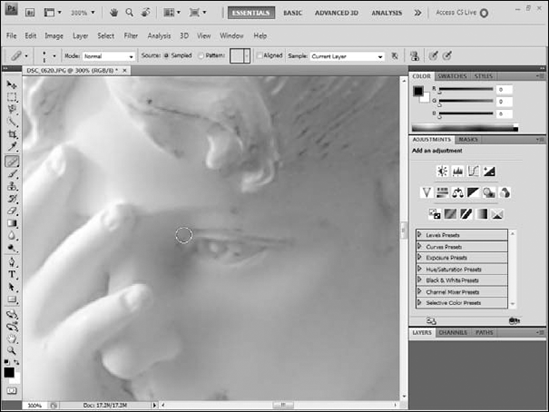
The Spot Healing Brush tool allows you to paint over problem areas of your image (see Figure 6.14). It takes the painted pixels and blends them with those in the immediate vicinity. You can often correct small blemishes such as spots on a camera lens very quickly with this tool.
Tip
When using the Spot Healing Brush use short, small strokes. If you attempt to paint over too large an area at once, you get undesirable results.
You can accomplish more precise work with the Healing Brush tool (see Figure 6.15). This tool creates the same basic effect as the Spot Healing Brush, but the Healing Brush allows you to define the spot from which the blending pixels are drawn.
To use this tool, follow these steps:
Define a source point from which to draw the pixels to be blended by Alt+clicking (Option+clicking) a spot on the image. You generally want this to be a point fairly close to the area to be repaired.
Click and drag over the area to be repaired. Photoshop takes the pixels from the source point and blends them with the pixels over which you drag.
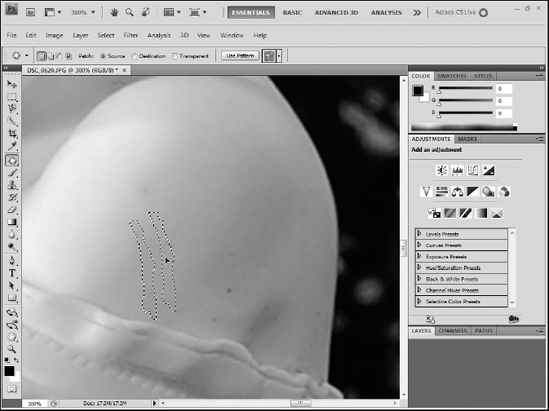
The Patch tool functions much as the Healing Brush tool does by allowing you to blend pixels from one area of the image with those from another (see Figure 6.16). However, with the Patch tool, you define the area to be fixed first and then drag it to the area with the pixels to be blended.
To use the Patch tool, follow these steps:
Click and drag to draw a marquee around the area that you want to fix.
Position the cursor within the selected region, and click and drag it over the area with the good pixels. Photoshop blends these pixels with those in the original region.
Tip
The Spot Healing Brush, Healing Brush, Patch, and Red Eye Removal tools must be used directly on the layer that contains the pixels to be fixed. Therefore, you should duplicate the layer that contains the image before you work. By doing so, you preserve the original image and follow the idea of doing only nondestructive editing. You can duplicate a layer by selecting it in the Layers panel, then clicking Layer
The Red-Eye Removal tool is a somewhat unique tool in that it serves only one purpose, albeit an important one. Red-eye is a major issue on many photographs of people, particularly children. The tool makes it very easy to remove the red-eye. Simply click and drag to create a selection around the red part of the eye and Photoshop takes care of the rest.
Photoshop contains a set of vector-based drawing tools that allow you to create shapes and paths. While the program contains several tools for drawing vectors, the primary one is the Pen tool. You can draw paths using the Pen tool, relying on exactly the same techniques used in Illustrator (see Figure 6.17).
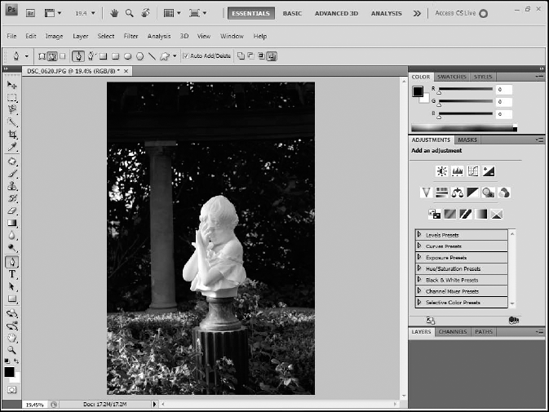
Figure 6.17. The Tools Options bar for the Pen tool, showing the three possible modes. These same options are available when using any vector tool.
Note
See Chapter 5 for details on drawing paths with the Pen tool.
Whenever you draw vectors in Photoshop, you need to set the mode for your drawing. You can create shape layers, paths, or fill pixels.
Shape layers are special layers filled with a solid color that have a mask overlay in the shape you draw (see Figure 6.18). Shape layers appear as your desired shape on the document, but you can see the fill layer and mask in the Layers panel.
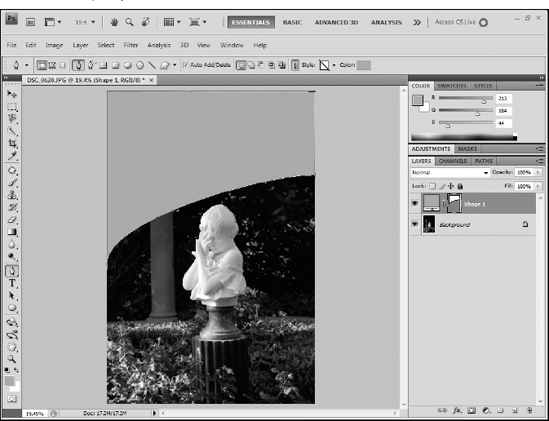
Figure 6.18. A shape layer. The shape appears as a solid shape on the document, but the fill layer and mask can be seen on the Layers panel.
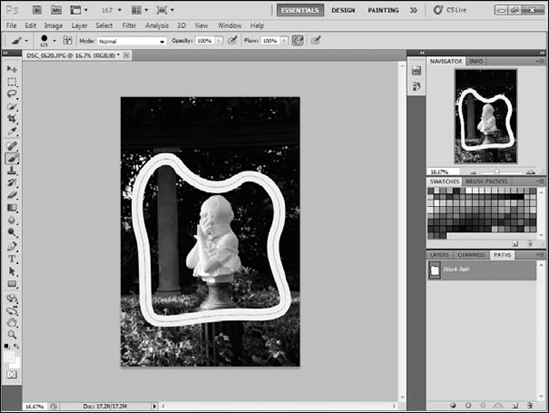
If you select the Path option you can create paths, but they do not relate to pixels on the image. Paths drawn using this mode can be accessed via the Paths panel. The panel provides a set of buttons along the bottom that allow you to stroke or fill the path, both of which rasterize the path into pixels on the document, or convert the path into a selection (see Figure 6.19).
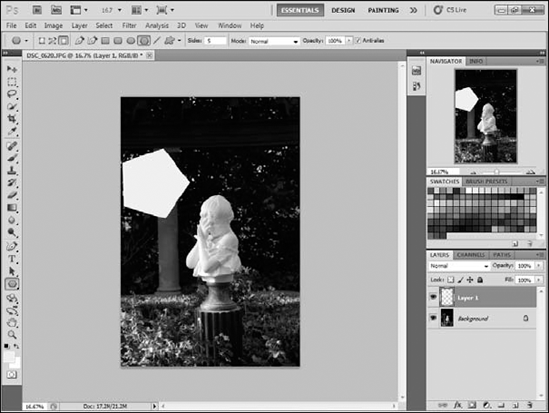
The final mode, Fill Pixels, simply allows you to use the control offered by the vector tools to create rasterized pixel-based drawings (see Figure 6.20).

Note
The Fill Pixels option is not usable with the Pen tool. You can only use it with the shape tools.
In addition to the Pen tool, you can also draw vectors using the shape tools (see Figure 6.21). Photoshop includes a set of vector tools very similar to Illustrator; Rectangle, Rounded Rectangle, Ellipse, Polygon, and Line.
Photoshop also includes a Custom Shape tool. When selected, the Tools Options bar provides a Shape menu that allows you to choose from a set of included shapes.
Note
Just as with Illustrator, you can press and hold Shift when drawing with the Rectangle or Rounded Rectangle tools to draw perfect squares, or when drawing with the Ellipse to draw perfect circles. However, you cannot use the arrow keys to increase or decrease the radius of the corners when drawing Rounded Rectangles as in Illustrator, nor can you use those keys to change the number of sides of a polygon. Those options are instead located on the Tools Options bar.
Photoshop's layer styles allow you to add many special effects to your layers. Shape layers and layers with selections copied and pasted onto new layers can have effects applied to them.
Note
The default layer in any image opened in Photoshop is the Background layer. This is a special, protected layer. You can make selections on it and paint directly on it, but you cannot apply layer effects to it or move it up in the layer stacking order. You can convert it to a normal layer by double-clicking its name, which displays the Layer Properties dialog box. Simply type a new name and click OK.
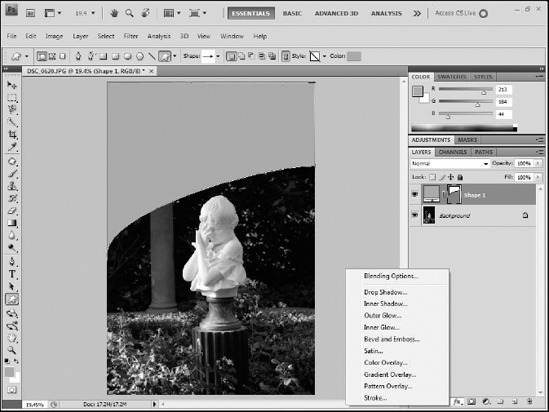
You can add layer styles by selecting a layer and clicking the Add a layer style button in the bottom right corner of the Layers panel, then selecting the style to add (see Figure 6.22). This, in turn, displays the Layer Style dialog box, where you can modify the properties of the selected style or add additional styles.
Tip
In the Layer Style dialog box, clicking the checkbox next to a style name adds that style to the current layer but does not display the style's properties. Clicking the style name both adds it to the layer and displays its properties.
Layer styles that have been applied to a layer are listed below the layer name in the Layers panel. Each has its own eye icon, allowing you to hide or show the layer as needed. At any point, you can change the style's properties by double-clicking its name in the panel.
Should you apply a layer style to a layer and then decide that you want it applied to a different layer, you can simply drag the style to the new layer. To copy a layer style, press and hold Alt (Option) while you drag the style to a different layer.
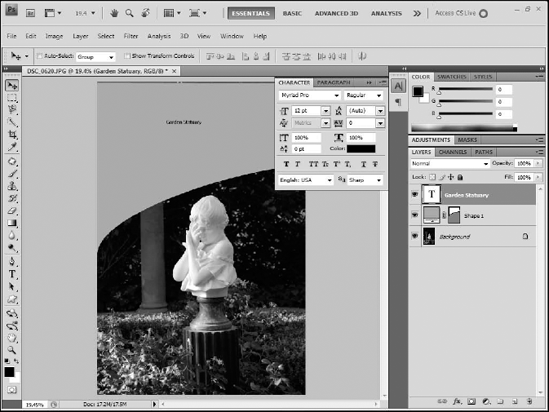
The Text tool in Photoshop provides many powerful ways to add text to your image. When you select the Text tool the Tools Options bar changes to display basic text properties such as font, text styles, font size, alignment, and color. Many more options are available on the Character and Paragraph panels (see Figure 6.23).
All text is placed on its own layer. You can move it up or down in the Layers panel to change its position in the stacking order, turn it on or off by clicking its Show/Hide Layer icon, and apply layer styles to it.
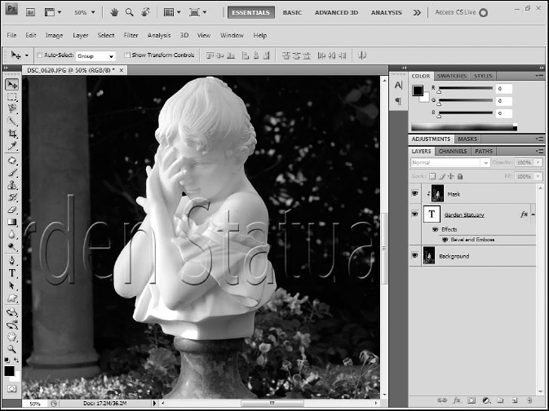
A common effect seen in many Photoshop images is text that appears to be embossed on top of an image (see Figure 6.24). You can achieve this effect through a combination of layer effects and masking.
To create this effect, perform the following steps:
Duplicate the background layer by clicking Layer
Click the Text tool.
Type the text.
Set the font, size, and other properties of the text. This effect works best on fonts with simple, straight lines.
With the text layer selected, click Add a layer style
Adjust the Bevel and Emboss settings as desired.
Move the text layer between the two image layers.
Select the top image layer.
Click Layer
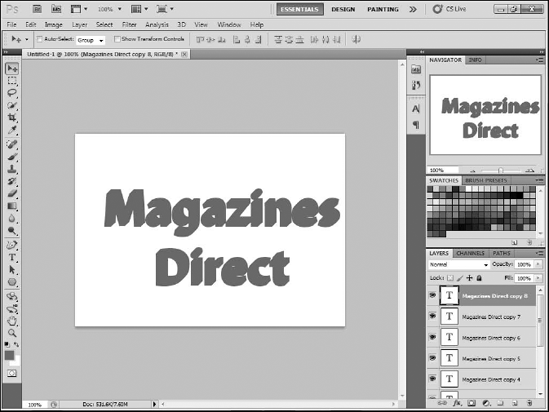
While Photoshop contains tools to work with 3D images, none are really appropriate for creating 3D text. Fortunately, you can create this effect fairly easily through a simple process of duplicating and moving layers. Figure 6.25 shows the completed 3D text effect.
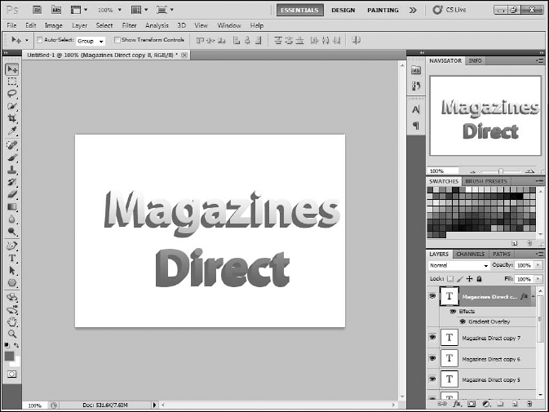
To create this effect, perform the following steps:
Create a new text layer by clicking the Text tool and typing the word or phrase you wish to use.
Set the font, color and size to any settings you wish. This effect works best with large type.
Click the Move tool.
On the Layers panel, be sure that your text layer is selected.
Click Ctrl-J (Cmd-J) to duplicate the layer.
On your keyboard, press the Up arrow once.
Press the Right arrow once. This moves the new layer one pixel up and to the right.
Duplicate the new layer by pressing Ctrl-J (Cmd-J). Move the layer up and to the right by one pixel by pressing the appropriate arrow keys.
Repeat step 8 as many times as desired until the text has the depth that you wish (see Figure 6.26.)
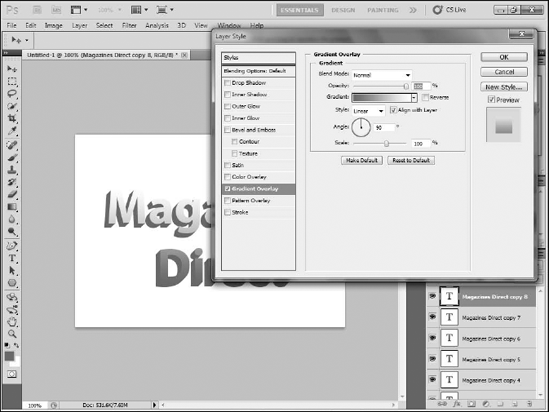
If you wish, make the text more visually interesting by applying a gradient fill to the top layer by ensuring that it is selected, then clicking the Layer Effects button at the bottom of the Layers panel and selecting Gradient Fill.
Select a gradient where either the beginning or ending color matches the color of the text you were using.
Click OK. (See Figure 6.27.)
This chapter provided an overview of Adobe Photoshop, which you will likely use to modify photos and other raster-based assets for your Catalyst projects.
You learned how to:
Open images in Photoshop
View images by zooming in and out on them and moving them around on the screen
Use Photoshop's selection tools
Size and crop images
Work with layers to organize your images
Retouch images and fix image problems
Use Photoshop's vector tools to add shapes and paths
Create effects using layer styles
Work with text