One of the most important decisions you have to make about a print job is how many colors to print. You need to know how many colors you can work with before you start creating images and laying out text and graphics.
This decision is based on which type of color inks you plan to use: process, spot, or both.
The number of colors on a printing press refers to how many inks are applied to the paper. It might be a full-color job, but it’s printed (as you learned in Chapter 9) with four inks. Each ink counts as a color. As a general rule, the more colors in the document, the more it costs to print.
One-color printing is the cheapest type of printing you can get. There is only one printing plate, which uses only one ink. Most people use black ink for one-color jobs, but you can also have the print shop use a spot color instead of black. If you do use a color instead of black, the print shop may charge you a small wash-up fee to clean off the special color ink after they are finished printing your job.
Don’t change your electronic files from black to a special color for one-color printing! Just tell the print shop that the black text and graphics (the black “plate”) should actually be printed using your chosen color, and they will put a different color ink on the press.
If you use a desktop color printer to output the document in color—perhaps to show a client what it looks like in color—all the color prints onto one page and it doesn’t really matter how many colors you have chosen in the file. But if you plan to take the document somewhere else for final output, make sure the color has been defined as a spot color. If not, the color will separate into the separate CMYK components when you send it to the service bureau or print shop for final output.
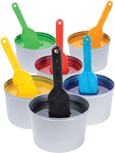
Two-color printing is more expensive than one-color. Most two-color printing uses black plus a second color, which might be a spot color or one of the process inks. However, you can use any combination of two inks—you can print black and process cyan, black and spot green, spot green and spot purple, process magenta and spot yellow, or any other combination of two inks. (Remember, the paper color doesn’t count—you get that color free.)

Once you have chosen to work with two colors, you should consider how those two colors might combine. For instance, a tint of a spot green could be combined with a tint of a spot purple to create the look of a third color, brown (see Chapter 10 for descriptions of tinted colors).
Before you decide to mix tints of spot colors, talk to the print shop that will be printing the job. They have the best idea as to what tints of which colors mix well together, and they probably have sample books that show you what to expect when certain inks hit certain papers.
You rarely hear of projects printed with three colors; this is because of the way colors are printed. If you have a one-color job, the shop will typically use a printing press with one ink roller and one plate. A two-color job uses a press with two rollers and two sets of plates. But there is no three-color press—the next size up is a four-color press with four rollers and four plates for four inks. Choosing a four-color press is significantly more expensive than choosing a two-color press, but if you have a project that needs three colors, it’s most likely going to print on a four-color press. As long as you’re paying for the use of the four-color press, you might as well add the extra color. So printing almost always jumps from two to four colors.
A four-color press using process inks (CMYK; see Chapter 9) is the most common printing solution for magazines, direct mail brochures, catalogs, greeting cards, color postcards, and so on. It’s rather easy to identify four-color process printing—as soon as you see a photograph printed in color, you know the job was printed in at least four colors.

Because most four-color printing uses process inks, it’s often called four-color process printing. Cyan, magenta, yellow, and black inks combine to create all the other colors. However, that doesn’t mean that all four-color printing is process—you can use any combination of colors on a four-color press. For example, you might choose to combine black and three spot colors. The options on a four-color press give you more flexibility in creating specific colors or special effects with metallic colors. The packages for many bars of soap or toothpastes are printed with four spot colors. That’s how they get the special metallic colors. But if you see a photograph on the box, then those are process colors.
Six-color printing, as you probably suspect, is even more expensive than four-color. Most six-color printing is used for packaging where the four process colors are combined with two more spot colors. (In case you were wondering, five-color printing is the same as three-color printing in that as long as you’re on a six-color press, you might as well get your money’s worth and use all six colors.) With six-color printing, a package can show a full-color photo and also use a special color that matches the company’s logo. Cereal boxes are an excellent example of six-color printing—they use the four process colors to print the mouth-watering bowl of cereal with fruit and milk, and they also use two spot colors to print the logo or the name of the company in its own special colors.
Some very expensive brochures, such as those for new cars, are also printed in six colors. This lets the designer display the car in a full-color photo, as well as add text or graphics in silver or gold. For some brochures the sixth color is not a color, but a varnish applied over an image to make that image stand out more. (For more on spot colors, see Chapter 10.)
Another type of six-color printing is called high-fidelity printing (often referred to as hifi printing). Hifi printing is a result of the fact that the four process inks don’t always capture the complete range of colors in photographs. So instead of limiting the printing of photographs to just four colors, hifi printing adds two more colors to the mix. With six inks, there is a wider range of colors possible in photographs. Hifi printing is said to have a wider gamut of colors.
One brand of hifi printing, Hexachrome®, is from the Pantone company. Hexachrome adds orange and green inks to the mix of process colors. These two inks help make flesh tones and the vast variety of greens in the world look closer to their original colors. Some software packages, such as InDesign and QuarkXPress, allow you to define colors using the Hexachrome system. If you want to use hificolors, make sure your print shop can recreate them, and ask about how you should prepare any scanned images.
When you print in color, you want to make sure that the correct number of separations are created for the press (see Chapter 9 for an explanation of separations). You definitely don’t want to have more separations come out of the printer than the number of colors you had planned to use. For instance, if you planned and budgeted for a two-color job, you had better make sure your file only prints two separations. If it doesn’t, fixing the problem at the service bureau or print shop will cost time and money you may not have expected to spend.
When I first started working with computer graphics, the only way to avoid problems was to make what was called paper separations: Before we sent the file to the service bureau, we opened the print dialog box and choose “Make Separations” and then counted the number of pieces of paper that came out of the printer. There would be a piece of paper for each plate; four for process color printing, two for a two-color job; one for a one-color job. Of course, all of the separations would print only in the black toner.
These days it is much easier (and saves tons of trees) to just use the electronic separation features that are built into programs such as Adobe Acrobat and InDesign. Instead of counting sheets of paper, you can just turn on and off the indicators for each of the plates to keep an eye on how the page will separate. (I love doing this to see how the process colors combine.)
In InDesign, you open the Separations Preview panel and turn on the setting for Separations. Each of the process colors will be listed as well as any spot colors that may be in the document. You then click the eyeball controls to view each of the color plates.

The Separations Preview panel in InDesign shows the color plates on a page. Here the top image shows the four process colors plus a fifth spot color. The bottom image shows just the black plate.
In Acrobat, you choose the Output Preview command from the Print Production area. You use the check boxes to control the display of the various color plates. The panel also lets you change the display of black and the paper colors. With these electronic separations, you should be able to avoid any unexpected separations when your job goes to press.

The Output Preview panel in Acrobat shows the color plates as well as additional prepress information. Here the black and cyan plates are shown.
You shouldn’t be in a rush to finish these projects. They are an unending journey of examining all printed material to see how the colors are printed.
Find examples of one-color printing that don’t use black. Look for any photographs in those examples. Do they look good or not? If not, why not?
Find examples of two-color printing. How many use black as the primary color and a spot color as the second?
Look at the colors on a soda can. Is there any white on the can? What color is the can itself? Given that the can itself is not white, how did the white area get on the can? Can you find other examples where white is added as a spot color?
Examine the colors printed on a cereal box. Open up the flaps of the box (take the cereal out first) and look for squares of colors. If the cereal box was printed with just four colors, there will be just four squares. If the box was printed with six colors, there will be six squares—four process colors and two spot colors.

An example of the color bars found on the sides of a package. Notice the extra colors of green and dark blue.