Before you begin to create your printed project—before you type a headline, sketch an illustration, or take a photo, before you even turn on your computer—you have to know your final goal.
In this chapter we’ll discuss the questions you need to ask before you start your project, and how to understand the answers.
When you start a printed project, there are three important questions to ask before you start working:
The kind of project tells you the physical properties of the piece, such as general size, approximate number of pages, number of colors, etc. Is it a book? A brochure? An annual report? A single-page flyer? How are the pages held together? The physical properties will determine many factors in the production and printing of your work.
How much money you can spend lets you know your budget for the project. You won’t be able to hire a famous photographer or print in full color if it’s a low-budget project (of course, what’s “low-budget” for one person may seem like a fortune to another). Whether the budget is high or low, you need to know your financial limitations so you can plan on how much to spend. (This also helps when grocery shopping or buying a car.)
The due date, or deadline, tells you when the project needs to be finished. The deadline can be in a year, a month, a week, or we-need-it-immediately! Some dates are flexible; some are very fixed. “We need it in the third quarter” is a flexible date; “We need it to hand out at the 3 p.m. meeting” is a fixed date. Once you know the final deadline, you can plan the due dates for other parts of the project so everything will be ready on time. For instance, if you do hire that famous photographer to take pictures for your piece, you will need to tell her when she has to send you the photos so you can incorporate them into the project; her deadline is earlier than your final deadline.
The following shows a sample schedule for creating a single-page ad for a client.
Item | WK 1 | WK 2 | WK 3 | WK 4 |
|---|---|---|---|---|
Client meeting to discuss the ad. Client brings previous ads and promotion material. | X | |||
Client provides copy for ad. | X | |||
Designer starts comps for two versions of the ad. (Note: If necessary, three versions may be presented to the client.) | X | |||
Send client PDF files of comps. Telephone call to discuss recommendation and approved comp. | X | |||
If necessary make revisions of comps and resend comp for final approval. | X | |||
Schedule photo shoot. | X | |||
First layout with placeholder art is sent to client for proofing. | X | |||
Photo shoot. | X | |||
Choose photo and start retouching. | X | |||
Add photos to layout and send PDF to client. | X | |||
Receive PDF comments from client and make corrections. | X | |||
Send final corrected PDF to client for approval. | X | |||
Send finished PDF to publication. | X |
If you are working for someone else, don’t be afraid to ask questions. You don’t look like a novice when you ask—you actually look pretty smart.
In addition to the three main questions above, you also need to ask—and answer—the following questions before you start on a project. Some of the answers you’ll get from your client; some you’ll have to figure out for yourself; some will come from other people, such as the manager of a print shop or the art director of a publication.
Most people tell you the type of project you’re going to work on when they give you the assignment. They say things like, “We need an advertisement to run in the paper announcing a sale.” Or, “Would you design a menu for my new café?” If you’re doing the work for yourself, you’ll say something like, “I should create a flyer to hand out at the mall so people will know I’m open for business.” In those cases you know immediately the type of job you’re working on.
Sometimes people are a little vague as to what type of project they need. They might say, “I need something to publicize my bed-and-breakfast.” Or you might say to yourself, “I sure would like to let people know we’re going out of business next week.” In those cases you and your client need to take a long time to talk and decide what type of job it is. You won’t be able to make any further decisions until you’ve got this one answered.
There are a variety of ways to reproduce your work, from your office inkjet printer, a copy shop, or a small print shop, to a large, commercial press. The process you choose depends on your project. Because it’s good to understand the advantages and disadvantages of each level of printing and exactly when to choose each one, we elaborate on this topic in Chapters 2 and 3. You should also understand process color (Chapter 9) and spot color printing (Chapter 10) before you make a firm decision on how to proceed with a big job.
This question may seem straightforward, but it can actually be a little tricky. Go get your morning newspaper and measure the size of a page. It’s probably around 12 inches wide by 22 inches tall. (At least that’s the size of The New York Times, which is the paper I have delivered each morning. The Daily News is a smaller paper.)

Now unfold the paper and measure it again. This second measurement is the actual size of the piece of paper. For The Times, this measurement is 24 by 22 inches. The first measurement was the size of the page.
If you are designing a brochure or a flyer that will be folded, then you need to know the size of the paper before folding. Then you can figure out the size of the individual pages after folding. This is a common mistake: We often confuse the page of text or graphics with the size of the paper it will be printed on.
Once you’ve decided what kind of job it is and what the paper size is, you need to know how many pieces of paper are necessary for the project. If you plan to reproduce the project on a laser printer or photocopier, you can print on both sides of the paper. For example, a report that has 20 letter-size pages (meaning 8 ½ × 11 inches) uses only 10 pieces of folded 11-×-17-inch paper (two letter-size pages fit on one sheet of 11-×-17-inch paper). And then only five sheets of paper if you print on both sides of the paper. However, if you’re having your job professionally printed, you need to talk to the print shop about the final number of printed pieces of paper.
If you’re planning to create a multi-page document that will be produced on a printing press, such as a brochure, newsletter, annual report, or book, you need to check with the print shop about the total number of pages you think you’ll have. Because projects like books and lengthy newsletters are printed in units called signatures (defined below), you may end up with extra, blank pages at the end of your piece if you don’t plan carefully.
Books and newsletters that are printed at a professional printing establishment that uses big paper presses are not printed on individual sheets of paper that are the same size as those in the final product. These multi-page documents are printed on large sheets or rolls of paper with eight pages on one side and eight on the other side. This is called a “16-page signature” because when that one printed piece of paper is folded and trimmed, the result is 16 pages of the book held together at its folded edge. The folded set of pages is called the signature.

You have to think in signature units. If your signature unit is 16, then the number of pages in your project can be 16, 32, 48, 64, 80 and so on—any multiple of 16. If your signature is 8, the number of pages can be 8, 16, 24, 32, 40, 48, and so on.
So what happens if your final project is only 67 pages? With a 16-page signature unit, your options are either 64 pages—not enough pages—or 80 pages in which case you’ll have 13 blank pages at the end of the book which is considered unacceptable by most publishers.
There are several ways to fix this: You can add 13 pages of copy and illustrations to fill up the blank pages. You can cut 3 pages of copy so the book fits into 64 pages. Or, if you are working for a large publishing house, you can ask the printer to switch to an 8-page signature and then add copy for only 5 extra pages (the next 8-page signature after 67 is 72). This is what Peachpit Press routinely does for many of my books.
You need to find out the signature unit before you do much work on a project destined for a printing press. You’d hate to discover that you have five blank pages at the end of a lengthy report, especially if you had told the client that the letter from the company president had to be cut because there wasn’t room for it.
When you read a magazine or brochure, you read from page 1 to page 2 to page 3 and so on. This is also how a page layout program such as InDesign or QuarkXPress displays the pages. This display is called reader’s spreads.
However, printed materials are not always printed in the same order that you read. Your print shop may tell you that the pages for a job need to be arranged in a certain order. Let’s say you create an 8-page brochure, and each individual page is 8 ½-×-11 inches. The print shop will print two pages, side by side, on one 11-×-17-inch piece of paper. Then they print two different newsletter pages on the other side of the paper.

The printer’s spread for an 8-page brochure positions page 8 next to page 1.
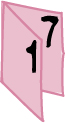
When this piece of pape is folded, the pages form the outside of the brochure.

On the other side of the same piece of paper, the printer’s spread positions page 2 next to page 7.

Additional pages are inserted and bound to create the finished brochure.
Figure . When pages are imposed, the order of the pages depends on the number of pages in each signature. Here the pages for an 8-page signature are assembled together.
To make sure these pages are in the correct order when the job is finished and folded, the print shop will arrange the pages in a special order called a printer’s spread. For instance, in a typical 8-page brochure, page 1 is printed to the right of page 8, on one wide piece of paper. On the other side of that piece of paper, page 2 is printed next to page 7. Page 3 is printed next to page 6, and on its other side, the printer’s spread is pages 4 and 5. When the brochure is bound together, the pages read in proper order. (If you want to see printer’s spreads, take apart the pages of a catalog. You’ll see how the pages are arranged next to each other. Or create the spread above with numbered pieces of paper.) The final position of the pages, set up in printer’s spreads, is called imposition. (For more information on imposition, see Chapter 16.)
Look at your own newspaper: As you discovered, folding the paper changes the size of the individual pages. Each time you add a fold, you add more pages to the job.
Let’s say you’ve decided to create a folded brochure to fit in a business envelope. It’s a good idea to take a piece of paper and fold it up the way you want the finished project to look. (You can just scribble where you want the headline, the images, and the body copy to appear.)
If someone else will be printing the job, such as your local print shop, take this “mock-up” to make sure it can be printed as such. Some types of folds are tricky and can’t be done by machine—they have to be folded by hand, which can be very costly. You don’t want that cost to surprise you. You might have to rearrange your folding, depending on what the print shop suggests.

If your job requires creating lots of folded brochures and letters, you should invest in a copy of A Field Guide to Folding by Trish Witkowski. This 200-page paperback contains everything you need to know about folding paper, including what types of paper work best with which types of folded products.
The answer to “How many copies?” is pretty simple to figure out—it is how many finished pieces of the project you will have. The number of finished pieces is sometimes called the print run. The print run will often determine what kind of printing process you should choose.
For instance, if you only need 500 finished copies of a full-color page, it might cost $1,000 to have it printed at a commercial print shop, which means that each copy costs about $2 to produce. However, 500 copies can be printed on a color photocopier, which might cost only 40¢ a page, for a total cost of $200. You do the math! The copy shop wins on this one!
But let’s say you need 10,000 copies of this same page. The copy shop might be able to bring down the cost per page to 30¢ each, for a total cost of $3,000, but at the commercial print shop those 10,000 copies may cost only $1,000 total. That’s because once a job starts to run on a commercial printing press, there is very little difference between printing 500 copies or 10,000. So the more copies you print, the less each individual unit (each copy of the finished project) will cost. Suddenly the commercial print shop becomes a much better deal.
For the most part, copy shops are most economical for print runs under 500 pieces, and it is more affordable to use commercial print shops for anything over 10,000. So what about print runs in between? It depends on the job. Ask your local print shop what their estimate is. See Chapter 3 for more details on estimating these costs.
The question of color can be tricky. It’s not about how many colors are on the page, but how many inks are needed to create those colors. For instance, look at the pages in a magazine such as Time or Newsweek. A single page might have red, blue, green, yellow, orange, purple, brown, black, and pink elements on the page. That doesn’t mean the magazines were printed using all those colors. They were printed using only four colored inks (cyan, magenta, yellow, and black) that are mixed on the page to create many other colors. This is called process printing and is covered in Chapter 9.
However there are times when you might want to add just a single color such as gold or bright orange in addition to the black ink. This is called spot color printing and is covered in Chapter 10.

When you are deciding how many colors for a job, you are really deciding on how many inks. The more inks, the higher the cost.
The color of the paper doesn’t count as a color! If you print your job using black ink on pink paper, it still counts as only one color because the print shop is only using one ink (black) on the press. The paper itself provides the other color.
A graphic is anything that isn’t text. This doesn’t include the little fancy rules between sections of a document or the little dingbat illustrations that are part of a font. For instance, the typeface I’m typing in right now includes these cute little dingbat glyphs: ![]() ,
, ![]() ,
, ![]() ,
, ![]() ,
, ![]() , and
, and ![]() .
.
I don’t consider these graphics because they are part of the typeface. I can insert them in my design simply by typing on the keyboard. I call that inserting a character, not a graphic.
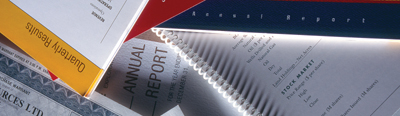
An actual graphic can be a photograph, such as a picture of the corporate headquarters; or a drawing, such as a map showing the best route to the party; or a separate software file, such as a bar graph from a spreadsheet. You won’t find these in a typeface.
A graphic can appear on a small section of the page or it can be a texture that covers the entire page.

A photograph may be scanned into the computer or transferred from a digital camera.

An illustration may be created using an illustration program such as Adobe Illustrator or page layout program like Adobe InDesign.
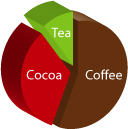
A graph or pie chart may be created in a spreadsheet or illustration program.
Figure . Examples of the types of graphics you might use in a project.
Once you realize your project will have graphics, you may need to reconsider some of the other questions in this chapter. For instance, if you are going to show photographs of the food served in a restaurant, you may not want to print those photos using only black ink—you may want to use color inks to make sure the food looks as delicious as possible.
You may also decide that the green ink you want to use really isn’t appropriate if you have to include a photograph of the company president—black or brown might be a better choice.
Different types of graphics may also require different printing processes. You’ve probably noticed that a photograph looks much better when printed professionally compared to one reproduced on a desktop printer or photocopier. A simple line drawing, however, can be reproduced rather well using an ordinary desktop printer.
If you are printing your job using an ordinary desktop laser printer or going to a small copy shop, many of your paper questions will be easy to answer because only certain types of papers can be used in those printers or copiers. Those papers may be bought at your local stationery store or office supply shop, or you can order them from specialty paper catalogs. As soon as you choose to use a professional print shop to reproduce your job, there are other things to consider about the paper, some of which you may need to discuss with the print shop.
Most paper is white. However, there are hundreds of different shades of white. Some whites are very warm, almost yellow; others are cool, almost blue or gray. Your print shop should be able to give you samples of different paper colors.
If you are using a desktop printer or photocopier, you can also choose between these different variations of white. Many companies use a plain, duller white paper for their ordinary print jobs because it tends to be less expensive, and then choose a brighter, more expensive white paper for special output.
Of course, you can also get paper in colors. Most copy shops and commercial presses have a wide variety of colors to choose from that will give more impact to flyers, invitations, and garage sale notices. However, keep in mind that most photographs don’t look so good on colored papers—our eyes just aren’t used to seeing the “whites” of a photograph as blue or pink.
Most professional printing starts with plain, white paper. Sometimes the entire paper is covered with ink so that it looks like the paper itself is a certain color. One way to determine the original color of the paper is to see if there is any white on the page or anywhere in a photograph. If there is white, then, almost certainly, that was the original color of the paper.
However, there are times when you will be printing onto a suface (technically called a substrate) that is not white. For instance, my favorite snacks come in little bags that have color printed on a silver substrate. Any white that is on the bag is actually a separate color ink that needs to be specified as a special color added to the document.
Papers are coated or uncoated, which refers to how smooth the surface of the paper feels. The degree of smoothness is created during the paper-making process.
Uncoated papers are rougher and tend to be porous (they soak up more ink). The paper used for newspapers and cheap catalogs is uncoated.
Coated papers are smooth and range from a rather dull coating to very glossy. They might be coated on only one side or on both. On coated papers, photographs and illustrations look sharp and crisp because the ink doesn’t absorb into the paper.
Don’t confuse coated paper with varnished or laminated paper. Varnishing or lamination is actually part of the printing process, where extra coatings of clear shellac or plastic are applied to add even more gloss to a paper. Go look at the boxes for most bars of soap. That surface is usually varnished to keep moisture from the product inside.
A paper’s finish is the texture or smoothness of the paper. An antique finish is a rough texture. Eggshell or vellum finishes are smoother. There are also specialty finishes made to simulate the look of fabrics, such as tweed or linen. Keep in mind that if you use a paper with a textured finish, your text might not look as clean or the illustrations may look a little rough because the ink has to bend up and down around the nooks and crannies of the finish.
Paper is graded according to its weight—which is usually expressed in terms of how much 500 sheets of the paper in its standard size weighs.
The typical bond paper for a laser printer or copy machine is listed as 24-pound; lighter bond paper is 20-pound.
Book paper is either coated or uncoated and can weigh between 30 and 110 pounds. Despite the name, book paper can be used for books, magazines, posters, flyers, or any job that doesn’t need exceptional quality.
Text paper is the term used to describe a high-quality coated or uncoated paper used for better-quality printing. Annual reports, magazine inserts, and premium movie and theatre programs use text. Common weights of text papers are 70- or 80-pound.
Cover stock is a heavier-weight paper that usually matches the colors of certain book papers. Cover stock can be used for book covers, business cards, postcards, or presentation covers. Typical cover weights are 60, 65, 80, or 100.
As a general rule, the heavier the paper the more it costs. If you are going to mail your printed piece, take into consideration the weight of the paper because it might affect the postage you have to pay.
There are a few other features to consider when looking at paper.
Strength is how well the paper holds up under stress. Paper bags and envelopes need a high degree of strength.
Thickness is how thick the paper is. Thick papers don’t have to weigh a lot. Some books are printed on very thick but lightweight paper, which makes the book look like it has more pages.
Brightness is how light reflects off the paper. Some papers contain fluorescents so they appear brighter. This makes the paper sparkle more, but can affect the color of printed images.
Opacity refers to how much the text or images printed on the other side of the page show through. If you are creating a book with lots of text and illustrations, make sure the opacity is not too low or your readers will be distracted by the images and text from the other side of the paper.
You may also want to consider using a recycled paper that comes from at least 30% of used papers.
If you’ve got a printed project with more than one piece of paper, then you need to determine the binding for the job. Binding simply refers to the technique that holds the pages together.
If you are printing the project on a desktop printer or copier, you will most likely want to use one of the typical office bindings. Some of these bindings can be applied in your own office; others may need to be done by a local copy shop.
Three-ring binding uses three punched holes in the paper and a three-ring binder. The primary advantage of three-ring binding is that you can add or delete pages easily. Unfortunately, three-ring binding tends to remind people of their school days and screams amateur output.
Plastic comb binding uses a plastic insert with teeth that fit into rectangular holes in the paper. There are inexpensive kits that punch the holes in the paper as well as hold the teeth open. This makes it easier than manually trying to add or delete pages. There is usually a limit of 2 inches to the thickness of a plastic comb. Anything thicker tends to fall apart too easily.
Spiral binding uses a metal or plastic spiral that coils through many small holes on the side of the paper. Unlike the plastic comb, once you have bound the pages with the spiral, it is almost impossible to add more pages. (It’s not too difficult to tear out pages, but you do have to delete the little strips of paper that collect inside the spiral.)
Wir-O binding is similar to spiral binding, but instead of a single spiral, two wire teeth fit into rectangular holes in the paper. Wir-O is sturdier than spiral binding but also makes it difficult to add pages to the document.
Velo binding uses two plastic strips on either side of the document. The strips are held together with plastic pins and bound together with heat. Velo-bound documents cannot be unbound without destroying the strips and pins.
Fastback binding uses a cloth or paper strip wrapped around the spine of the pages and then glued in position. Fastback is the most professional-appearing binding in an office environment, but the pages can fall out if the booklet is used a lot.
Saddle-stitch binding uses two or more staples inserted right at the fold of the paper. The pages of the document need to be printed on both sides of the paper in the correct position for final binding. This type of imposition is best handled by a professional copy shop or office document center.
A print shop will ask what type of binding you want. They may also suggest one type over another depending on the number of pages you will need to hold together. Below are descriptions of the types of bindings typically used by professional print shops. (Some of these bindings are similar to the office bindings described in the previous section.) Some print shops do their own binding and finishing; many send the printed job to a separate company that binds and finishes it.
Spiral binding uses a metal or plastic spiral that coils through holes at the side of the paper.
Wir-O binding is similar to spiral binding, but is sturdier.
Saddle-stitch binding uses two or more staples inserted in the fold to hold both the cover and the pages.
Side-stitch binding combines all the signatures and the cover and stitches them together with staples on the outside of the book cover.
Perfect binding gathers all the signatures together. The spine is then ground to create a flat edge, and a paper cover is glued around the spine. Most magazines are bound this way.
Case binding sews the individual signatures together and glues them to a gauze strip, then affixes end papers with glue and attaches them onto hard covers. This is the most common form of binding for hardcover books.
Sewn-and-glued binding sews the signatures together and then glues them to a cover as in perfect binding. (This book has been bound using sewn-and-glued binding.)
Lay-flat binding gathers all the signatures together and grinds the spine as in perfect binding. The cover is then glued to the book at each side of the spine, which allows the pages of the book to lay flat when opened. However, pages tend to fly out of this type of binding if the spine of the book is opened too far.
Copy the following table. Then fill out each of the categories before you start any project. I’ve left some space for you to add your own items. You can also go to: http://www.peachpit.com/designintoprint and download an interactive PDF file of these pages. You can use this file to organize your project before you start work.
BRIEF DESCRIPTION OF THE PROJECT | |
What are the deadlines? | |
When is the first draft due to the client? | |
When is the second draft due to the client? | |
When is the final project due at the print shop or publication? | |
When is the job due for binding? | |
PROJECT BUDGET | |
Budget for printing | |
Budget for photography or illustrations | |
Budget for other expenses | |
JOB DETAILS | |
Paper size | |
Page size | |
Number of pages | |
Number of colors | |
Number of folds | |
Signature units | |
Graphics | |
Number of final copies | |
Paper description | |
Paper coating | |
Paper finish | |
Paper weight (important for postage costs) | |
Special paper considerations | |
BINDING | |
Type of binding | |
Print information | |
Laser or copier printing | |
Type of printer/copier | |
INFORMATION ABOUT COPY SHOP OR PRINT SHOP | |
Name | |
Address | |
Phone | |
Contact person | |
Email or Web site information | |
PUBLICATION | |
Name of publication | |
Ad to be shipped to | |
Issue date | |
Ad size | |
Deadline at publication | |
Deadline extension | |
Publication sales rep | |
Production contact | |
Email or Web site information | |
Job notes | |
OTHER | |