
Forensic Duplication
During an incident, a significant amount of data is gathered, preserved, cataloged, and analyzed. One of the most comprehensive sources of information is a forensic image of an affected or suspect computer system. Although malicious activity may not be captured by event logging or fly-by network sensors, or simply may be too “common” in other data sources to analyze, oftentimes evidence of its presence lies in plain sight on the hard drives in your organization. In this chapter, we cover processes, formats, and tools that are used by the forensic community to properly duplicate data. You may find that case law allows a lower standard than what we present here. By design, a court may find that the best available duplication acceptable and render it admissible. As an IR team, however, you must endeavor to generate the best duplicate possible—one that leaves your team, and any others that may ask or demand access to it, with the ability to answer any question. With this in mind, there are two types of duplications: a simple duplication and a “forensic” one. A simple duplication consists of making a copy of specific data. The data may consist of a single file, a group of files, a partition on a hard drive, an entire hard drive, or other elements of data storage devices and the information stored on them. A forensic duplication is an accurate copy of data that is created with the goal of being admissible as evidence in legal proceedings. Furthermore, we define forensic duplication as an image of every accessible bit from the source medium.
We encourage you to consider all data you collect as evidence that may contribute to a legal process. To that end, you should perform duplications with methods that are generally accepted in the forensic community. In this chapter we discuss some of the considerations related to creating simple and forensic duplicates, and we walk through some the most common methods in use.
What tools should you choose for performing a forensic duplication? Building on the legal standards in place to regulate the admissibility of expert testimony, we believe that a forensic duplication tool must prove itself in the following areas. An important note to keep in mind during this chapter is that we use the term “tool” to describe any imaging solution. This solution may be software or hardware.
• The tool must have the ability to image or account for every bit of accessible data on the storage medium.
• The tool must create a forensic duplicate of the original storage medium.
• The tool must handle read errors in a robust and graceful manner. If the imaging operation fails after repeated attempts, the error is noted and the process continues. A placeholder may be put in the output file with the same dimensions as the portion of the input with errors. The contents of this placeholder must be detailed in the tool’s documentation.
• The tool or the process must not make any changes to the original storage medium.
• The tool must generate results that are repeatable and verifiable by a third party.
• The tool must generate logs that detail the actions requested and any errors encountered.
In the first point made in the list, we note that a tool (hardware or software) must be able to duplicate or account for every accessible bit on the storage (or source) medium. This is somewhat of a loose requirement because every bit is not accessible. A hard drive or SSD is a storage system in itself, and presents addressable sectors to the host computer depending on a number of factors. Some of the configurations are accessible, such as drive configuration overlays and the Host Protected Area (HPA). Others are not, such as reassignment of sectors for SSD load-leveling or error detection. We’ll cover HPA access issues in this chapter.
Note that what you don’t see here are requirements that you use a commercial forensic imaging tool. We have encountered less-scrupulous salespeople who suggest that their solution is superior based on nontechnical factors, such as the number of times it has been accepted in trial. As long as your process is generally accepted by the community and is performed properly, the sole possible advantage may be usability.
The use of reliable tools is very important during the imaging process. The NIST Information Technology Laboratory runs the Computer Forensics Tools Verification project, where it maintains testing specifications and results for duplication tools, software write blockers, hardware write blockers, and deleted file recovery tools, among others. If a process that your organization uses is not presented on the site, the test plan and supporting data is available so you can perform your own testing.
GO GET IT ON THE WEB
NIST Computer Forensic Tool Testing (CFTT) www.nist.gov/itl/ssd/cs/cftt/cftt-project-overview.cfm
FORENSIC IMAGE FORMATS
Most IR teams will create and process three primary types of forensic images: complete disk, partition, and logical. Each has its purpose, and your team should understand when to use one rather than another. Most importantly, your team needs to understand the implications of that choice. Although the complete disk image is the most preferable format because it is the most comprehensive and captures the contents of the storage medium in a static state, technology, business priorities, availability, and expediency may demand a different process. In this section, we discuss the options available to your team. Figure 8-1 is used to illustrate the scope of each.
The process for obtaining a “complete disk image” is intended to duplicate every addressable allocation unit on the storage medium. This includes Host Protected Areas (HPAs) and Drive Configuration Overlays (DCOs). Although some difficulties may exist in practice (such as HPA, modified drive firmware, damaged sectors, and remapped sectors), the theory remains that the resultant image captures every allocation unit at that moment in time. When the process cannot complete, as we stated earlier, it must fail in a predictable manner.
If we were to take an ideal situation—a hard drive with no bad sectors, no Host Protected Area, and one that correctly reported its true number of sectors—what would a complete disk image contain? Figure 8-1 depicts an ordinary hard drive—one that you may expect to find in a system purchased from an OEM source, such as Dell or HP. It contains a boot sector, three partitions, and a bit of unallocated space at the end of the drive. When you obtain a complete disk image, the output file contains every allocation unit, or sector, accessible to the imaging software. Being the most thorough of the three options, the process will allow an examiner to review data contained in drive management blocks, OEM recovery partitions, any user-generated partition, and unallocated sectors that may have held data at one time. In addition, if you need to perform recovery of data partially overwritten by a format operation, you stand the best chance of doing so by starting with the entire disk.

We will discuss the issue of imaging RAID devices at the end of this chapter. When things begin to get dull and monotonous, there is nothing like processing a RAID in an inconsistent state to brighten your workweek.
A couple of years ago, we participated in an internal investigation of an employee who was thought to have gained unauthorized access to financial statements prior to an SEC filing. The subject’s primary system (an Apple MacBook Pro) was duplicated and the complete disk image was provided for analysis. The investigators had information from server logs that showed that a specific browser version, identifiable by a user agent string, was used to access the restricted data.
The subject knew that he was going to be investigated and attempted to cover his tracks by downgrading his entire system to end up with a browser version that predated the one identified by the investigators. He had also researched common forensic analysis techniques and understood the problems he would have with date and time stamps on the file system. Examination revealed that the subject attempted to deceive the investigators by taking the following steps:
1. He modified the system log files to remove evidence of computer use during the incident.
2. He resized the primary partition to make room for a second.
3. He changed the time and date of the computer.
4. He installed an older version of the operating system on the second partition.
5. He migrated user data.
6. He migrated the modified log files.
7. He removed access to the first, original partition to ensure it would not boot or be automounted.
8. He restored the time and date of the computer.
9. He restarted and began to use the new, but apparently older, partition to accumulate recent activity.
Despite his attempts, the amount of artifacts left behind during this process were numerous; however, most were on the original partition. He had done a good enough job on the recently installed partition that if the investigators had only obtained a partition image of the active partition, they would have been able to conclude simply that there were numerous anomalies on the drive. The folders on the original Desktop named “to edit” and “completed,” containing the “before” and “after” versions of the log files, would not have been found because a complete disk image was required to perform a recovery of the original.
Host Protected Areas and Drive Configuration Overlays are methods used to alter the apparent capacity of a drive. One of the original justifications for the HPA and DCO functions was to enable drive manufacturers and integrators to alter the number of accessible sectors on a hard drive. This led to the possibility that a knowledgeable party could hide data on hard drives by changing the apparent size of the drive. There are anecdotal stories about subjects using this for nefarious purposes; however, it is exceedingly rare. Nonetheless, one should be aware of the possibility.
Additional information on the HPA and DCO functions and their successors can be found in the documents published by the T13 Technical Committee. |
Partition Image
Most forensic imaging tools allow you specify an individual partition, or volume, as the source for an image. A partition image is a subset of a complete disk image and contains all of the allocation units from an individual partition on a drive. This includes the unallocated space and file slack present within that partition. A partition image still affords you the opportunity to perform low-level analysis and attempt to undelete files and examine slack space from that partition. Even if you image each partition on a drive, remember that there are other parts of a disk that contain data. Reserved areas at the beginning or end of the drive, space in between partitions, and any unpartitioned space will not be captured.
Because a partition image does not capture all the data on a drive, it is taken only under special circumstances. There may be situations, such as limited scope of authority and an excessively large disk, that prevent you from taking a complete disk image. At the same time, you may not know the exact files you need, or you may also want the opportunity to examine unallocated space, so you cannot just copy files. In those cases, imaging one or more partitions may be the ideal choice.
Logical Image
A logical image is less of an “image” and more of a simple copy, and it’s the type of duplication we referred to previously as a “simple duplication.” Although logical copies are typically the last resort and make most examiners cringe when they hear one is inbound, there are solid reasons why they are the duplication of choice. Common justifications we have used are:
• Specific files are required pursuant to a legal request. There are occasions when only specific files are required for a response. Obtaining a complete disk image may not be possible due to legal restrictions.
• A specific user’s files from a NAS or SAN device are of interest to the investigation. In some situations, recovery of deleted or lost items from NAS or SAN devices is a near impossibility due to object reuse or access to the low-level disk structures, so a complete forensic duplication is unnecessary.
• A duplication of data from a business-critical NAS or SAN is required. Your organization may not permit the IR team to take a disk unit offline to perform duplication, and you may not be able to perform a live image.
A logical image is typically the most appropriate choice in edge cases. When one occurs, ensure that you document the justification for later reference.
What tools or processes should be used for creating logical images? As when you’re collecting full duplications, there remains a need to document file metadata as well as integrity hashes. Both FTK Imager and EnCase have the ability to create evidence containers for logical files. They will document the files’ metadata and allow you to manage the integrity of the evidence properly.
What happens when you are handed data that doesn’t comply with standards that your IR team has set? This is a frequent occurrence in our position—systems administrators providing USB memory sticks full of logs, VM server admins handing over all of the files associated with a virtual machine (VMX, VMDK, and VMSS files, for example), or network admins dropping 12GB of network captures on your desk. In these situations, document as much as you can and track the data as you would a forensic image your team collected.
Image Integrity
When a forensic image is created, cryptographic checksums are generated for two reasons. First, when the image is taken from a drive that is offline (static) and preserved, the hash is used to verify and demonstrate that the forensic image is a true and accurate representation of the original. Second, the hash is used to detect if the data was modified since the point of time at which the image was created. When you’re working with static images, the hashes serve both purposes. If, however, the image was created from a live system or created to contain a logical file copy, or if the original was not retained for a legitimate reason, the hash is simply used to ensure that the integrity has been maintained throughout the life of the image.
When an image is taken of a drive with bad sectors, each iteration through the original media may result in the calculation of a different hash value, depending on how the drive’s firmware interprets the information on the magnetic media. In these situations, good documentation of the error conditions is important. When damaged drives are imaged, the hashes serve the second purpose mentioned above—that the integrity of the data in the image has been maintained. |
How that hash (or series of hashes) is stored depends on the file format used to store the forensic image. Several forensic imaging formats were designed to include a means to verify the integrity of the image. Two common formats that use this method are the Advanced Forensic Framework format (AFF) and the Expert Witness format (EWF). The AFF format, generated by AccessData’s FTK and ASR Data’s SMART, splits the source into one or more AFF segments and then saves them to an AFF image file. The AFF format stores MD5 or SHA1 checksums for each AFF segment, as well as a checksum for the entire image. The AFF format is extensible, so you can optionally store any metadata, including additional checksums, within the image file. Guidance Software’s EnCase creates E01 files (based on Andrew Rosen’s Expert Witness file format) that contain checksums for every 64 sectors and an MD5 hash for the entire raw disk image. In both situations, the hashes used for verification are accessible to the examiner from within the application used to create the image. These hashes should be recorded in any documentation generated by your team.
When the file format does not provide for a means to store the integrity hashes, the examiner (or the person responsible for obtaining the image) must record them. When imaging to a raw image format, some tools make this process easy. AccessData’s FTK Imager will output a text file alongside the output files that contains information on the case, the source medium, the time and date, and the hashes. DCFLdd can generate the hash from the source medium as the image is generated, optionally saving that information to a text file for you.
In either case, you must ensure that the hashes become a part of the chain of custody, reports, and other documentation.
In the previous editions of the book, we referred to two types of forensic images. The first, a forensic image, applied to any whole-disk or partition duplication that was a 1:1 representation of the bytes on the original medium. If one were to generate a hash of the forensic image and the original medium, they would be identical. The second, a qualified forensic image, applied to any whole-disk or partition image that had additional data embedded within it. The file formats generated by FTK and EnCase are qualified forensic images because they embed a header and checksum data throughout the image file. |
What Output Format Should I Use?
This question comes up in nearly every investigation where we work with our client to gather forensic images. The answer depends on a few factors. Generally, we suggest that people generate EWF-formatted output files when imaging a Microsoft environment. This format is generated by FTK Imager and EnCase Imager, but is accessible to a number of examination processes, including any open source project (via the libewf library). If the source is a Unix system, RAID disk members, or anything that is out of the ordinary, we request true forensic images, such as those created by DC3dd and FTK Imager. If any sort of advanced processing becomes necessary, the image needs to be a 1:1 representation of the original, and conversion burns valuable time.
As mentioned previously, the three types of images are complete disk, partition, and logical. A responder generally creates one of these types in either a traditional imaging process or a live image process. In this section we discuss traditional imaging techniques and tools that can assist you. Traditional imaging is performed on static drives (that is, hard drives that are not part of an active, running system). The system has been turned off and booted to a forensic imaging environment, or the disks have been plugged into an imager or examination workstation for duplication. Whether the drive is in a powered-down RAID disk pack or a single drive found buried by the side of the road, the powered-off state is the starting point for traditional duplication.
Hardware Write Blockers
The best way to ensure that the source media is not modified in any way is to use specialized hardware that prohibits write commands from reaching the drive controller. A set of these write blockers should be in every IR team’s kit.
The write blockers are typically protocol bridges that contain modified firmware or an ASIC designed to intercept a subset of the protocol’s commands. In Figure 8-2, four versions are shown. With these in your kit, you can reliably duplicate SATA, PATA, SCSI, SAS, and USB devices. The write blocking hardware shown in the figure is from Tableau.

GO GET IT ON THE WEB
Tableau Forensic Products home page www.tableau.com
A more portable version that allows one to image SATA and PATA drives over USB, Firewire, and eSATA is made by WiebeTech. A number of our consultants carry these units in the field because they are well constructed, fit nicely in small cases, and allow one to rapidly duplicate drives over eSATA. The WiebeTech Forensic UltraDock v4 is shown connected to a subject’s drive in Figure 8-3.

GO GET IT ON THE WEB
WiebeTech home page wiebetech.com
The two examples of hardware write blockers we just presented are the current market leaders. Both companies are very active in the community and perform extensive validation tests to ensure that the write protection scheme is robust and reliable. As we noted earlier, however, refer to the NIST CFTT site for current information on hardware write blockers.
Image Creation Tools
The most common method to create a forensic duplicate is via software. The three main tools we use are DC3dd, AccessData’s FTK Imager, and Guidance Software’s EnCase. Each has its pros and cons that make it more or less suitable for a given situation. You should become familiar with a number of tools, in case one does not work as expected in a given circumstance. In the sections that follow, we step through the use of each of the three tools.
During any duplication process, you need to think about five things as you start:
• Is my source media write protected?
• Will my examination environment attempt to perform any actions automatically, if I’m in a situation where a hardware write-protection device isn’t feasible?
• Do I have sufficient space for the output files?
• How do I address the source media?
• What command-line options are required to get the expected output?
Each section will start from the same initial conditions. You have a suspect hard drive that you need to image. It is connected to a forensic examination workstation, through a write blocker, and you have a volume ready to receive the forensic image file. As discussed previously, this is known as “imaging a static drive.”
When you’re creating an image of a static drive, or accessing any type of evidence, don’t forget to always use a hardware write blocker to protect against accidental modification. Do not think that your operating system is “better” and won’t make changes to the evidence unless you instruct it to; many “read-only” mount operations will, in fact, modify the evidence by updating partitioning structures, replaying journals, or repairing minor inconsistencies. Always play it safe. |
dd, DCFLdd, and DC3dd
The dd command is present on nearly every Unix system. According to Unix manual pages, the dd command can “convert and copy a file.” Because most Unix-based systems present hard drives and other hardware as files, the dd command can be used to perform a forensic duplication. However, the dd command has a few features missing when it comes to performing forensic duplications. Two major shortcomings, when used for our purposes, are that it has no built-in capability to generate and record a cryptographic checksum, and it does not provide user feedback—unless there is a catastrophic failure. Although the standard dd command can be used to create an image, it’s not preferred if a newer dd-based tool, such as DCFLdd or DC3dd, is available.
DCFLdd and DC3dd are purpose-built applications derived from the original dd source code. The U.S. Department of Defense Computer Forensics Laboratory (DCFL) and Defense Cyber Crime Center (DC3) are the creators of these tools. The modified code is currently kept in projects on the Sourceforge website. Features were added that make them more ideal than the normal dd command to use as a forensic duplication tools. As of this writing, DC3dd is the newer of the two tools, and has more recent updates and features.
GO GET IT ON THE WEB
dcfldd Sourceforge home page sourceforge.net/projects/dcfldd
dc3dd Sourceforge home page sourceforge.net/projects/dc3dd
Let’s go through performing a forensic duplication using the DC3dd tool. We’ll walk through the most common use case—creating a static image of a drive that is attached to the examination workstation through a physical write blocker.
You will need to be able to run DC3dd, so you have two options: use a boot disk that has DC3dd preinstalled, or copy the precompiled DC3dd binary onto your Linux examination workstation. Naturally, the easiest option is to find a boot disk that has DC3dd preinstalled. A number of solutions are available, such as BackTrack and the Ultimate Boot CD.
If you choose to use your examination workstation, as opposed to a CD boot environment, most Linux distributions have the binary package for DC3dd accessible via a package manager. For example, in Ubuntu, use apt-get to install the package named “dc3dd.” If your distribution does not include DC3dd as a known package, or you are in Microsoft Windows, you will have to download and compile DC3dd yourself.
Let’s run through disk duplication with DC3dd. The command line will be the same on any Unix or POSIX-compatible platform, with the exception of the device paths. The process shown in the following sections was performed on a forensic workstation running Ubuntu 12.04.
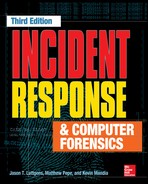
As we noted earlier, our examples show evidence connected through a read-only bridge, and we use/mnt/storage as our output location. We have already mounted a sufficiently large volume there, ready to receive the image. Determining the source, or evidence drive, after it is plugged in can be tricky to newcomers. Under Linux, the easiest way is to examine the output of the dmesg command. If you recently connected the device you wish to image, information will appear at the bottom of the dmesg output. An example is shown in Figure 8-4.
In this case, the kernel detected a USB flash disk, 1GB in size, and assigned it the device “sdb.” Under Linux, all disk devices are addressable under the/dev directory, and the full file name for this physical media is/dev/sdb. Now we will run the DC3dd command, and specify this device file as the input, as well as an output location, a hash algorithm, and a hash log file. Note that if you need more information about the options available, you can run ./dc3dd –help.
Device Automounting
Most desktop Linux distributions and Apple OS X will attempt to automount any removable media that is attached to the system. If you are not performing duplication through a read-only bridge, you’ll need to disable the daemon responsible for the automount function. There are many references online for this process on each distribution of Linux and on most recent versions of OS X. The process generally entails terminating or disabling a daemon that monitors for hardware changes. In current versions of OS X, the daemon is called “diskarbitrationd.”
In this example, we wrote the image to/mnt/sdb.dd as one single file. Optionally, we could split the image into multiple files by using the ofs= and ofsz= options. For example, ofs=/mnt/sdb.0000 ofsz=500M will create files of a maximum of 500MB in size, that are sequentially numbered starting with “sdb.0000,” and increasing by one for each segment. A log of the session was stored in/mnt/sdb.log, as specified by the hlog= option, and the hash was computed as an MD5 checksum, as specified by the hash= option.
By default, DC3dd will probe the size of the device, and it provides a percent complete as part of its status output. While it’s running, DC3dd also updates the volume of data it has read as well as the elapsed time. An example of DC3dd running is shown in Figure 8-5.
Once DC3dd returns to the command prompt successfully, the image is complete. You can finish documentation with the calculated hash values and then secure the evidence.

AccessData FTK Imager
FTK Imager from AccessData is a freely available and comprehensive imaging tool. There are currently versions available for Microsoft Windows, Linux (Debian and Fedora), and Mac OS 10.5 through 10.8. The Windows version is GUI based and comes in two major releases—a “Lite” version and a full install. The primary difference is that the “Lite” version is portable, meaning it will run in a stand-alone mode, directly from a portable USB drive. FTK imager can be run from the command line for all supported operating systems.
FTK Imager can create output images in four formats: Raw (dd), EnCase (E01/EFW), SMART, and AFF. The imager also supports splitting files into chunks, which is useful if there are file system or backup system restrictions. There are a number of other useful features, such as the ability to view images or live media, extract files, convert images, mount images as a drive letter, and many other functions that are documented in the user guide.
GO GET IT ON THE WEB
AccessData www.accessdata.com
Guidance Software EnCase
Guidance Software provides three tools to create forensic images. You can create an image directly in Microsoft Windows with the EnCase Forensic product, with the two command-line utilities winen.exe or winacq.exe, or with one of the Linux-based Guidance Software boot disks that run LinEN (a Linux-based image creation tool). You must own a copy of EnCase to gain access to these tools. The imaging tools allow you to select desired levels of compression and output segment size. The output format of the image is the EnCase “E01” format.
GO GET IT ON THE WEB
Guidance Software EnCase product information www.guidancesoftware.com/forensic
LIVE SYSTEM DUPLICATION
A live system duplication is defined as the creation of an image of media in a system that is actively running. This situation is not preferred, but is sometimes the only option. For example, the system may be an extremely business-critical system that cannot be taken down except during very short maintenance windows. In other situations, you may be faced with encrypted drives that would not be accessible after the system was shut down. Performing a live image will make minor modifications to the system, but you will be able to get an image. Be sure to document exactly what you did, including the tool you used, the procedure you followed, what services may be running, and the exact dates and times. You will want that information in case someone “challenges” the fact that you modified the system. Such challenges are more easily refuted if you have the proper documentation.
Performing a live system duplication has much greater risk than performing a static image. There is no hardware write blocker preventing you from destroying evidence. You are also performing the duplication on a live production system. Keep in mind, there’s always a chance you could severely impact performance, or even crash the system. |
Another potential downside to live imaging is that the source media is a moving target. As you are creating the duplicate, changes to the contents of the media are occurring. Also, the operating system may have certain data cached in memory that has not yet been committed to the media. So, in some rare cases, the duplicate you create may be partially or wholly unusable because of inconsistencies in the data that the duplication process read from the disk.
Special care must be taken when creating a live image. Because there is no write protection in place, you can mistakenly write the image back to the source drive—destroying evidence in the process. You also must take care in what type of software you use and how you use it. You should not copy or install anything to the source drive—use tools that can run directly from external media or network shares. Also, you should try to use software that is “lightweight” to minimize the impact to the source system. We frequently use the FTK Imager Lite version to perform live images. The process is nearly the same as for a static image, with two main differences:
• Run the imaging software directly from portable media or a network share. Also, minimize making modifications to the running system, such as copying or installing software.
• Select sources that correspond to the hard drives that are part of the running system. Be sure to review the full list of sources, and image each drive that is part of the running system, as appropriate.
Duplication of Apple Hardware
Apple hardware tends to have a higher degree of component integration than what you may find in other hardware. Their MacBook Air line was the first widely sold laptop to use mSATA flash drives in 2010, and older versions’ drives used a ZIF ribbon connector. Both can be troublesome for most IR and forensic groups. Since the first PowerBooks in 1999, Apple has supported an operational mode called Target Disk Mode. After a system reset, this puts the system into a configuration that resembles an overpriced external hard drive. Once the system is in Target Disk Mode, you can plug it into a FireWire (or ThunderBolt) port on another computer and access the drives. At this point, you can treat the suspect system as you would any other bridge (note that it provides read and write access) for duplication. At publication, only one company, Tableau LLC, sold a FireWire read-only bridge.
Sometimes you will come across a situation where the evidence that is part of an investigation resides on a very large RAID, SAN, NAS, or other massive central storage system. In many of these cases it’s infeasible to make a complete duplicate of the entire original source due to the sheer volume of data or the complexity of the storage configuration. In some cases, creating a full duplication may be possible, but may not be desirable. We’ll go over some of the common considerations you should think about when making a decision on how to preserve evidence in these situations.
To begin, you must determine where the relevant data resides, and formulate an appropriate plan to create a logical copy of only the relevant data. If your organization primarily uses certain forensic tools, such as EnCase or FTK, each normally has a feature to copy and store logical copies of files into proprietary “containers.” The copy process and the resultant containers preserve the original metadata about each source file and include a cryptographic checksum so the data can be validated in the future.
If the data storage system is small or moderate size, you may have the time and resources to complete a full duplicate. Be aware, however, that some storage systems use proprietary methods to store data and manage the media. Because of this, you may not be able to reassemble the duplicates back into a usable state. If you know the specific data that is relevant, it might be a better to use a method that you know will provide good results (for example, performing a live image on the mounted volume or creating logical file copies). If you are not sure what data is relevant, or if you have possession of the storage system and expect to maintain access to it, you may want to consider creating full physical-level images of the media and attempt to create a working reassembly. Naturally, this will take the storage unit offline for an extended period of time.
Duplication of Virtual Machines
In the 10 years since the last edition of this book, enterprise computing has changed radically. The list of technology that has remained the same is probably an easier list to manage. Many server rooms and data centers are completely virtualized, providing an IR team with another option. Instead of a traditional collection process, an administrator can simply provide your team with a copy of the files that comprise a virtual machine. If the VM is paused, you can also get an image of its memory at no cost. When we receive a system in this format, we document the source, cryptographic hash, and the rest of the details as in any other situation. It’s a very efficient means to capture a forensic image of a server.
To Image the RAID or Image the Disks … That Is the Question
A common RAID imaging scenario is that you have access to the full RAID enclosure and are left to decide whether to image each individual drive or attempt to image the volume as presented by the RAID controller. In most cases, we have decided to allow the system to boot to trusted media (a custom Linux image, for example) and image the volumes presented by the RAID controller. Naturally, one would enter the RAID BIOS and verify the configuration to ensure that all of the data stored on the physical volumes is accounted for. This makes analysis a bit easier, because RAID reconstruction is not always a straightforward process.
SO WHAT?
In this chapter we discussed the most common methods used to generate forensic duplications of data. A number of commercial software applications and open source tools exist that have a proven record for reliably duplicating hard drives, memory sticks, and other removable media. Over time, technology will change, and with it come new ways to connect, protect, and duplicate data during an investigation. When new tools or methodologies are developed, it is important to consider whether a new tool has been tested and used by others in the field before putting a new solution into service.
During the pre-incident preparation phase, identify the types of storage you may encounter in your organization. Ensure that you own the tools necessary to perform duplications and practice on nonessential hardware. Many shops that specialize in forensic computing hardware are quite efficient and will ship the day you call. Operating in an emergency situation is, however, a bad time to get familiar with new hardware. Have it ready, keep it maintained, and you’ll be ready for nearly anything.
QUESTIONS
1. A new hard drive duplication and imaging product called “Cyber Imager Pro” is released on the market. Your boss wants you to evaluate the product for use in your organization to perform forensic duplications. Describe what you would do to evaluate the product and determine whether or not it is acceptable.
2. If you have connected evidence hard drives to a system for imaging, do you need to use a write blocker if you are going to boot to a Linux-based forensic CD? Explain why or why not.
3. You are tasked with establishing the standard hard drive imaging tool and procedure for your organization. What considerations and steps will you take to create the standard?
4. You are attempting to image a hard drive, but the process seems to randomly fail part of the way through. The imaging software reports that it is unable to read from the source drive. How would you approach troubleshooting the issue?
..................Content has been hidden....................
You can't read the all page of ebook, please click here login for view all page.