
Buttons are an easy way of adding interactivity to a course. Storyline comes with rectangular and oval buttons pre-configured with 6 states (normal, hover, down, visited, and disabled). You can customize these states and add your own.
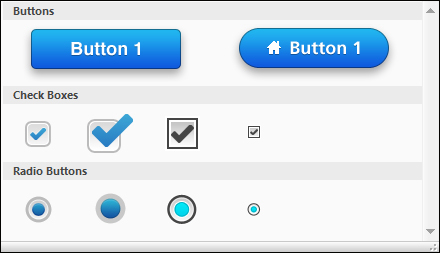
Buttons can be formatted using quick styles that are part of the current theme found under the Format tab. They can be resized and moved just as you would for other objects.
Storyline provides a library of over 100 icons that can be added to any button, either with or without text. The color of the icon can be set from the Format tab and the size of the icon can be adjusted by changing the font size under the Home tab.

Perform the following steps to insert a button:
- Select the Insert tab and then choose Button.
- Pick a button style.
- Click-and-drag on the slide to position and size the button.
Perform the following steps to format a button:
- Select the button.
- Begin typing, if you wish to add text.
- Select the Format tab and choose from any of the formatting options.
- Add an icon to the button by selecting an icon style and color.
In this exercise, you will continue to work with the file, Exercise 3 – Workplace Compliance, to add interactivity, external content, and animated effects.
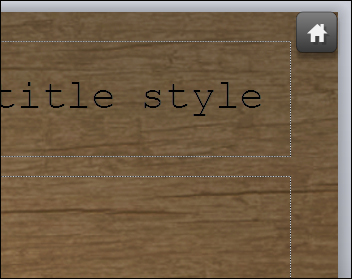
- View the Master Slide and select Master Slide Layout 2.
- Insert a small button in the upper-right corner of the slide. Include a house icon on this button and change the color to grey.
- In the Triggers panel, click on the Add a trigger link on the new button and configure the action so that it jumps to the slide 1.2 Menu when clicked.
- Return to Normal View and navigate to 1.1 Home. Add a new rectangle button placed over the top of the words Compliance Matters! on the slide.
- Rename the button in the timeline from Button 1 to start.
- Format the new button so that it has a green fill, the word Start on it, and a right arrow icon to the left of the word Start.
- Change the Hover state of the start button to a grey fill.
- In the Triggers panel, change the trigger for the Start button so that it jumps to the next slide (1.2 Menu) when the user clicks on it.
- Slide the Start button to the 3.5 second mark in the timeline. This will force the button to display only after the Compliance Matters! tagline appears.
- Expand the Sub-title group in the timeline and add a fade out animation to compliance matters and a fade in and fade out animation to compliance box.
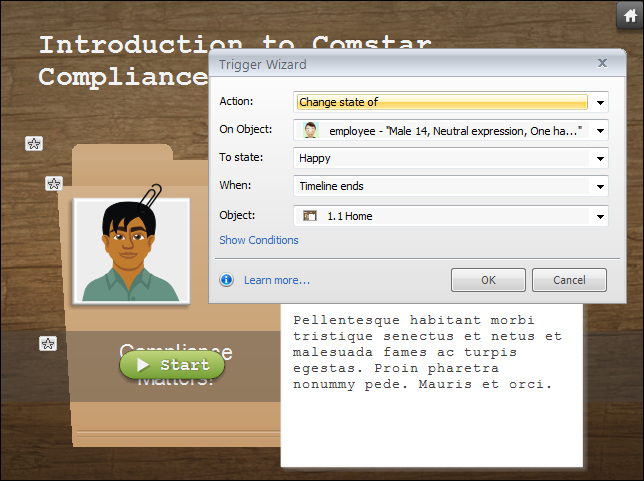
- Expand the employee group in the timeline, click on the employee object, click on the States panel, and add a new state called Happy from the pre-built states.
- Add a slide trigger that manipulates the employee image when the slide ends. Do this by selecting the employee object (not the employee group, rather the single employee object within the employee group), click on Add new trigger in the Triggers panel and set the trigger to change the state of the employee object to Happy when the timeline of slide 1.1 Home ends.
- Save the file.
- Navigate to 1.4 Privacy. Be sure that you are in Normal View.
- You'll now link the Google search result image that you captured in an earlier lesson so that it links to a live website. To do this, open your browser, go to Google, and search for the definition of corporate privacy. When the search results appear, select the URL from the browser address bar and press Ctrl + C to copy it.
- Back on the 1.4 Privacy slide, select the Google image and choose Format | Hyperlink. In the Action drop down, select Jump to URL/File and then press Ctrl + V to paste the URL into the File field.
- Select the Browser options icon to the right of the File field (it's a globe) and set it so that there are no browser controls and the size of the pop-up window is custom at 800 px x 600 px. Click on OK to save those changes.
- You may need to move the Google image or resize it so that it doesn't overlap the Home button you earlier added to the Master Slide.
- Preview this slide and save the file. You will notice that the web link is not active during preview and the earlier zoom placed on the Google image is not that necessary. Let's remove it by closing out of Preview, selecting the Google image, and choosing Format | Zoom.
- Save the file.
