
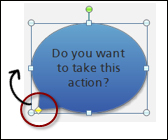
Character conversations are often used to mimic real-life interactions. Most frequently you will see character conversations in scenarios or as a method to test learner understanding of a particular concept. The following example shows how a character can prompt the learner to make a choice and another character respond to that choice.

The Captions feature provides additional shapes that are designed to be used as captions, pop ups, or alerts, and also as visual instructions or conversations in speech bubbles.
Captions can be placed, sized, and formatted the same way you would format a regular shape or image in Storyline.

Adding a human voice to the conversation can be an effective method of making a connection with the learner. You can record narration directly within Storyline or use an external software application to do this and then import the audio clip into Storyline.
Storyline supports a variety of audio formats including .aac, .aiff, .aif, .m4a, .ogg, .wmv, .wav, and .mp3. When you record narration, .mp3 files are generated with an audio bitrate of 192 kbps (kilobits per second). The quality of the audio clips in a story can be adjusted prior to publishing.
When you record or import narration, it will appear in the Timeline wherever the Playhead is currently positioned. You can position the Playhead to the appropriate place in the Timeline before recording, or after dragging the resulting audio clip left or right in the Timeline.
Tip
You will likely rely on some kind of script to read narration from. Often the narration script is provided to learners in the form of slide notes that provide a written transcript of spoken narration. This transcript is not true Closed Captions that follow along as narration plays; rather, the entire script is presented at once. Placing the script in the Notes panel of a slide makes the script available to the learner with the exception of when a slide is viewed in a lightbox; in this case, the Notes feature is not accessible. When recording, you can use the slide notes to read scripted narration.
You can record narration using the Insert tab and then selecting Sound. You will see the Record Microphone window appear with various controls to record and edit your narration.

To record a narration, follow these steps:
- Select the Insert tab and click on the Sound button.
- Select Record Mic.
- Click on the Record button and speak into your microphone.
- Click on the Stop button when you have finished recording.
- You may want to click on the Play button to listen to the recording, click on Record if you wish to re-record the narration or on Delete to remove the entire audio clip from the slide.
- Click on the Save button to save the recording.
You can also import existing narration from the same menu, using the following steps:
- Select the Insert tab and click on the Sound button.
- Select Sound from File and find the file you want to import.
- Click on the Open button to import the file.
Tip
When you import slides from PowerPoint, Articulate Quizmaker, or other Storyline projects, all audio files associated with the external content will be available for editing. The exception is Articulate Engage where the audio is imported but cannot be edited within Storyline as it is part of a Flash-based interaction. Note also that because Engage interactions are Flash, they cannot be played back on mobile devices.
Storyline provides a built-in audio editor that allows you to perform basic editing tasks on a recorded or imported audio clip.
From the editor, you will see a waveform of your narration and from here you can playback the clip, adjust volume, delete portions, and insert a silent track (this is handy when you need to space out the narration or create a pause).

Here are the steps for editing audio:
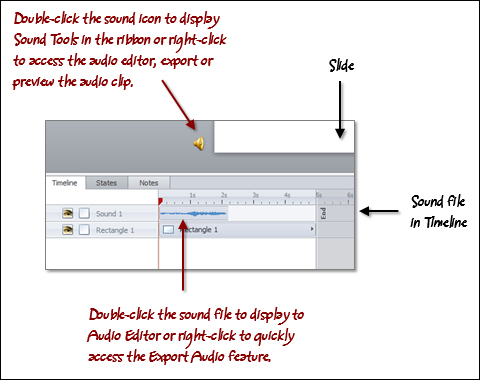
- Double-click on the audio clip in the Timeline to open the Audio Editor.
- If editing or playing back just a portion of the clip, select it first by clicking on it and dragging it on the waveform to highlight a portion of the clip.
- Perform the required editing tasks including re-recording, if needed.
- You can cut- or copy-and-paste audio by selecting the section to cut or copy, clicking on the Cut (Ctrl + X) or Copy (Ctrl + C) buttons from the ribbon and then selecting where you want to paste the audio in the waveform and pressing Ctrl + V to paste.
You'll likely want to synchronize slide objects to your narration, particularly when a slide plays back automatically without learner interaction. You can use cue points in Storyline to make objects appear at the right moment.
Cue points can be inserted in the Timeline by listening to the narration and inserting a cue point where you want a slide object to appear. Once you've added your cue points, you can then align individual slide objects to them. You cannot align a group of objects to a cue point without first expanding the group and then individually aligning the objects within the group.
You can manually insert a cue point by right-clicking on the Timeline and choosing Insert Cue Point at Playhead. You can insert as many cue points as you need, each will appear in the Timeline and are sequentially numbered.

Here's how to do this:
- Click on the Play button in the lower-right corner of the Timeline to begin slide playback (animation and audio).
- Press C on the keyboard when you want to insert a cue point. If you wish to manually adjust it further, click-and-drag the cue point marker to the left or right in the Timeline.
- Once done, right-click on an object in the Timeline and choose Align to Cue Point. Then, select the cue point number to align the object to that cue point.
- If you no longer need a cue point, right-click on the cue point in the Timeline and choose Delete Cue Point.
Continuing with Exercise 4 – Workplace Compliance, you will now create an audio narration to add a human touch to the start of this course and for the help character.
- For this exercise, you will use the audio recording capabilities in Storyline to record the welcome information. Navigate to the Menu slide and select the Notes panel.
- Type the following narration script in the Notes panel:
Hello and welcome to this course. There are three topics to cover: Business Conduct, Privacy, and Security. You can explore these topics in any order you wish.
- Let's record it. Select Insert | Sound | Record Mic….
- Click on the Narration Script icon to display the script.
- When ready, click on the Record icon (it displays a red circle) to begin. There will be a 3-second countdown before recording starts. Record the script as shown.
- When done, click on the Record icon again (it now displays a square) to stop the recording.
- Click on the Play button to listen to the recording.
- If everything sounds good, click on the Save button, otherwise you can replay, rerecord, or edit the audio first.
- A Sound icon appears off the lower-left corner of the slide confirming the sound was recorded and is now part of the slide. Switch to the Timeline to see the waveform representation of the sound. This displays at the top of the Timeline and is called Sound 1.
- Let's time the three post-it notes so that they appear on screen as the narrator speaks of each. Follow these steps:
- Click on the Play button in the lower-left corner of the Timeline. The audio will begin playing.
- Press the C button on the keyboard when you hear "Business Conduct".
- Repeat this for "Privacy" and "Security".
- Right-click on the Business Conduct object in the Timeline, choose Align to Cue Point and select Cue Point 1.
- Repeat for the other post-it notes aligning to Cue Point 2 and Cue Point 3.
- Press Ctrl + F12 to preview this slide. Close Preview and make any adjustments necessary to ensure each post-it appears at the proper time. You can do this by dragging the cue point markers right or left and re-aligning the objects to them.

- Let's add a voice to our help character. Select the question mark button, click on the States panel and select Edit States.
- Click on the Hover state.
- Not sure what each topic is about? Here's a quick explanation:
- Select Insert | Sound | Record Mic… and record the following narration:
- Play and edit the recording if needed. Save when done. You will notice a Sound icon appearing next to the question mark button. This audio, as part of a state, will play automatically when the state is activated.
- Click on Done Editing States.
- Preview the slide and save the file when finished.
